
Off Road High Caster Standard UCAs By JBA: Step By Step Install & Review For the 5th Gen 4Runner
Suspension is crucial for any vehicle – it helps your tires stay planted and your car maintain control and composure.
Whether you are on a paved road or navigating through an overgrown trail, the suspension is extremely important.
When people first think of suspension systems, they think of shocks, coils, and lift kits.
While the most notable components of a suspension system are the shocks and coils, there are some other components that can make all the difference. One such component is upper control arms (UCAs).
UCAs are one component that helps keep your wheel be aligned properly and give you the right angles for good handling.
What do UCAs control?
Well, it can be a limiting factor in articulation, it has a very important role in caster, and it can aid in giving you a smoother ride.
Why Did I Want Aftermarket UCAs?

For my particular setup, I wanted to get aftermarket UCAs for better caster angles, improved articulation (travel), and simply a beefier setup that could take a beating.
I know many people reading this article might not know what caster means, as I didn’t know for the longest time. Caster is simply the angle of the steering axis….or the angle from the upper ball joint to the lower ball joint.
Positive caster is when this angle is pointed towards the rear of a vehicle, the negative caster is when the angle is towards the front of a vehicle, and neutral caster is straight up and down.
In general, the positive caster is what you want, and the closer you can get to 4 degrees positive caster the better. What does this do though?
Positive caster is going to give you better steering control.
Your vehicle will maintain a straight course, the steering will not be affected as much by imperfections, you will have an easier return to straight, and essentially more caster will make your car want to go straight. This is very important at higher speeds and will allow you to stay on a much truer course.
Due to the nature of caster alignment, you will also gain more negative camber alignment (essentially the top of your tire will point slightly inward more).
This gives you better handling while turning and going around corners.
Next, I wanted UCAs that gave me the potential for more articulation. Although I don’t have a suspension setup that will give me any more travel, I will need aftermarket UCAs to gain additional travel in the future if I upgrade my suspension further than what I have.
Last, I like to “over-engineer” a little bit…nothing extreme, I just want a solid vehicle. A good pair of UCAs will make your vehicle stronger and capable of handling rougher terrain.
While there are several UCA options on the market for the 5th Gen 4Runner, one, in particular, caught my eye—JBA UCAs.
The JBA High Caster Standard UCAs

When I was researching UCAs for my 4Runner I kept coming across ball joints, pivot joints, squeaking bushings, and a lot of information that overall was pushing me away from installing a set of UCAs.
Companies such as Camburg, Icon, and Total Chaos were the “go-to” companies…but then I stumbled upon JBA and their product had a few notable things that caught my eye.
The first thing that caught my eye was the price. JBA UCAs are very competitively priced.
Some companies such as ICON produce UCAs that cost over $1,000! While I am sure they are a good product, $1,000 is quite a bit. You can find the current cost of the JBA High Caster Standard UCAs here.
JBA UCAs also have an easily replaceable ball joint—probably the easiest to replace out of all the major UCA manufacturers. While you don’t buy anything with the intention of replacing it, you do have to consider maintenance.
Eventually, you will need to replace the ball joint and the JBA UCAs are about as easy as it gets to replace.
Next, the ball joints have 90 degrees of motion!
This is just ridiculous and speaks to the engineering that went into this product. You won’t have to worry about your UCA limiting articulation as these ball joints have some of the best articulation I’ve seen.
The bushings and ball joints all have grease fittings so you can easily put some quality lithium based grease in for maintenance (I prefer Mobile 1 grease). This helps with any potential squeaking, plus the actual bushings are made of a synthetic elastomer so they will last longer and also be less likely to make some unwanted noise, unlike other UCAs.
Other notable discussion points are 5/32” wall 1” diameter tubing and a red powder coat finish which are much stronger than the factory UCA construction.
On paper, these UCAs seemed to be a perfect match for nearly any 4Runner on the market. I wanted to give them a try so I went ahead and installed a pair of JBA Standard High Caster UCAs.
The Packaging

I don’t buy any products based on the packaging that it comes in, but sometimes the way a product is packaged is a reflection of how the product is made.
Upon receiving the UCAs I was immediately impressed with the packaging.
These UCAs came packaged, unlike anything I’ve ever seen. Molded foam around the UCAs, a signed letter from the president of JBA Off-Road, and a DVD from the president of JBA sharing his faith – pretty impressive.
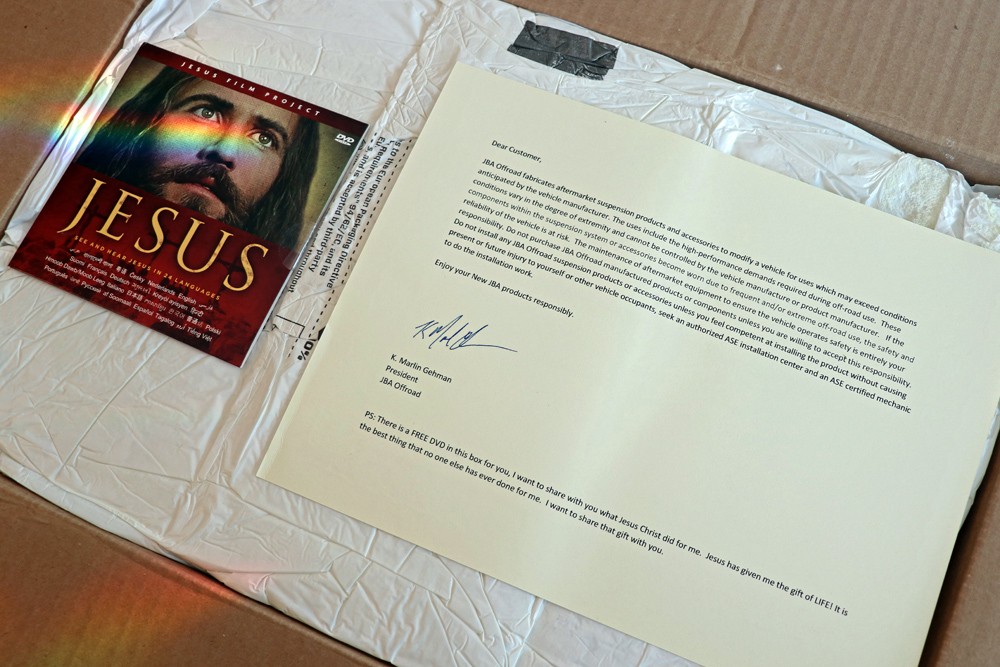
It is always nice to see a company that takes pride in every process, including shipping. It would be hard to find a better packaged UCA in my opinion.
Off Road JBA High Caster Standard UCAs Install
- Jack Up Vehicle & Remove Front Tire & Mudguards
- Remove Nut From Factory UCA
- Separate Ball Joint & Steering Knuckle
- Remove Factory ABS Hose On Factory UCA
- Remove Nut/Washer From UCA Bolt
- Remove Factory UCA & Install JBA UCA
- Position Large Washer on UCA Long Bolt
- Put Ball Joint Stud Through Steering Knuckle
- Tighten Ball Joints & Re-attach ABS Brackets
- Grease Bushings & Ball Joint
- Re-attach Mudguard Flaps
- Replace Your Tire & Lower Jack
Overall, installing these UCAs wasn’t too bad, but you should expect anywhere from 2-4 hours depending on your experience and skill level. It helps to have a helper during the install process, but you could install these by yourself.
JBA gives really good instructions on how to install their product, so I will follow their lead and give you the rundown based off of their instructions.
Step 1. Jack Up Vehicle & Remove Front Tire & Mudguards

Jack up your vehicle and remove your front tire. Make sure to place jack stands under your frame as well.
After you remove the front tire, then remove the rubber mudguards from the wheel well.
There are special tools to remove the clips that hold the guards in, or you can simply use a flat head screwdriver. If you go the screwdriver route, expect to bend or break a couple of clips (but they are cheap and can easily be replaced).
I ended up breaking a few and purchasing some replacements from AutoZone for a few dollars. I’d recommend replacing all of these clips, as the AutoZone ones are much tighter and secure than the factory clips.
Depending on how much space you want/need, you don’t have to remove all of the clips and mudguard entirely…just a few to gain good access to the UCA bolt.
Step 2. Remove Nut From Factory UCA

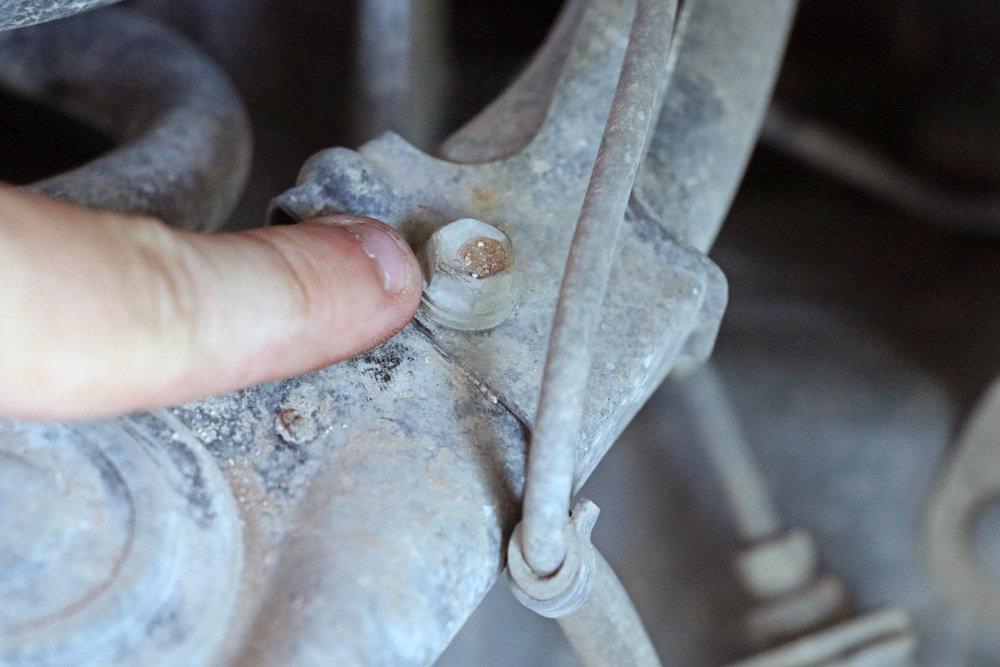
Remove the nut from the factory UCA ball joint stud using a 7/8” socket.
In order to do this, you need to remove the small cotter pin first, then you can place a socket over the nut.
Step 3. Separate Ball Joint & Steering Knuckle

After removing the nut from the ball joint stud, separate the ball joint from the steering knuckle.
This is a little tricky. You will want to place a jack under your brake rotor to help support the steering knuckle as well as use some zip ties or bungee cords to secure the steering knuckle from falling towards you.
I used some zip ties and bungee cord to secure the steering knuckle to my shock and it worked quite well.

In order to separate the ball joint stud from the steering knuckle, you will probably have to use force. I used a hammer and struck the top of the steering knuckle while an assistant used a pry bar to nudge the separation of the ball joint from the steering knuckle.
Take your time and it will eventually come loose.
Step 4. Remove Factory ABS Hose On Factory UCA
Remove the factory ABS hose from the top of the factory UCA with a 10mm socket. There is one small bolt holding the ABS bracket.
Then, push this hose to the side, but be careful not to stretch the hose.
Step 5. Remove Nut/Washer From UCA Bolt

Remove the nut/washer from the long bolt that goes through the UCA.
I had to unbolt the bracket to a line near this bolt, but other than this the removal process was rather straight forward. You will need a standard 19mm socket for one end and a deep 19mm socket for the other end.
After completely loosening the UCA bolt, you will have to slide it out.
You may have to move some hoses out of the way, so open up the hood and have an assistant help you out.
I found that slightly jiggling the UCA while pushing the bolt out worked well. You might need your assistant to help/guide the bolt out of the holes.
Step 6. Remove Factory UCA & Install JBA UCA

Remove the factory UCA and get ready to install your new JBA UCAs!
After removing your factory UCA be careful to make sure that the steering knuckle is stable and secure. It is quite heavy and awkward, and if it should fall it could injure you and also stretch/break some ABS lines.
Next, Grease UCA Bushings & Place UCA Into Position
Place a thin film of Mobile 1 grease on the UCA bushings and then place the UCA by the holes for the long bolt to slide through.
There are 4 washers you need to install.
The thick ones go on the outside and the thin ones go on the inside. It might take a little force to get these washers in place…take your time.
Step 7. Position Large Washer on UCA Long Bolt

Once you have all the inside washers in place, place the large washer on the long bolt and start sliding it into place.
Once you have it all the way through then place the other large washer on the outside and then the UCA bolt nut. Torque this nut to 85 ft-lbs.
Step 8. Put Ball Joint Stud Through Steering Knuckle

Put ball joint stud through the steering knuckle.
Make sure you place the washer between the rubber boot and above the steering knuckle. Install the nut finger tight and then torque to 45 ft-lbs.
Step 9. Tighten Ball Joints & Re-attach ABS Bracket

Double-check to make sure the ball joint bolts are tight. They should be torqued to 20 ft-lbs.
Then, re-attach any brackets you unbolted, including the ABS bracket and tighten the bolts to hold these brackets in place.
You will probably have to bend the ABS bracket a little to fit on these UCAs, but it is very easy to do with some pliers.
Step 10. Grease Bushings & Ball Joint

Using the grease ports, grease the bushings with 1-2 pumps of grease and the ball joint with 3-4 pumps of grease (or until you see the boot start to swell).
I used Mobile 1 grease and highly recommend it for this application.
Step 11. Re-attach Mudguard Flaps

Re-attach your mudguard flaps with clips.
Once again, I broke a few clips, but you can find these clips (or similar ones) at a local auto parts store for at an inexpensive price.
Step 12. Replace Your Tires & Lower Jack
Put your tire back on and lower your vehicle off the jack/jack stands. Make sure to torque your lug nuts properly.
Repeat this process for the other side and then get an alignment after you have completed the install.
The Alignment Process
As I previously mentioned, one reason people install UCAs is to gain additional caster. When you go to get your alignment, make sure to tell the technician that you want your caster to be set as close to 4 degrees as possible.
With my factory UCAs, I had a maximum caster of 2.9 degrees. After installing the JBA UCAs I am right around 4.2 degrees! This is awesome! How does it handle now?
Overall Impression & Performance

Driving on the highway has been improved as I now have a more stable ride and my 4Runner likes to stay straight just a tad bit more. This is really nice, as 4Runners are known to roam the road a bit so any improvement in tracking is a plus.
Off road the UCAs handle great. They don’t make any noise, give me all the articulation that my shocks are capable of, and they simply look great!
Future Modifications

Although I have a really nice suspension setup with Bilstein 6112s and 5160s, I would like more travel one day.
This said, if I ever upgrade my suspension further I will need aftermarket UCAs.
Luckily, I now have them installed and I am ready for whatever suspension I want to install.
Conclusion & Final Thoughts

If you are looking at gaining more caster, articulation, beefier suspension, or bigger shocks, aftermarket UCAs are a must.
These JBA UCAs I installed are unbelievable…and at an affordable price, unlike some UCAs.
I highly recommend these UCAs, as they offer an easily replaceable ball joint, multiple grease fittings for better longevity and no noise, and they give you more caster and articulation.
The JBA customer service is unmatched as well. I can send an email and within an hour I get a response – pretty impressive!
I will definitely keep these UCAs on for the long haul and plan on using them for the many off road adventures ahead of me.
Hello All,
I just received the JBA’s High Caster for my ’21 4Runner Off Road with stock wheels with 1.25in spacers, 285 Falken AT3W, Eibach Pro-Truck Stage 2 suspension and I have a body mount chop and trimming done already. I will update once I have them installed.
Hello All,
I installed these UCAs and unfortunately have experienced alot of rubbing on body mount and fender liner.
I did the bmc and still experience rubbing when turning and hitting bumps.
2015 Trail with KDSS
285 70 17R
3 inch all around with bilstein 5100 and stock coils and spacers
Will try and correct rubbing with HD OME 3 inch coils for front and rear.
Will update.
I have the same set and just ordered the UCA’s. I know you have already answered this but have experienced any rubbing after you’ve been driving it for a while?
Desperate for answers. I am planning on getting these UCA but concerned about the UCA rubbing the tire with the trd pro sema wheels (17×7) on 285/70/17 tires at 2.5 inch lift. I have searched everywhere but cant find answers. Are you running the same parts and have no issues with the UCA rubbing the tires? Thanks
You probably got your answers by now, but for future readers that come to a similar question here is the answer
https://support.jbaoffroad.com/faq/what_wheel_n_tire_combo_works_with_jba-7.0.hc.ez
UCA rubbing depends on the size of tire and the size of the wheel (width , and offset / backspace).
I essentially have the same setup as you (2.5 front lift, TRD Sema Wheels, and JBA UCAs). I am running Cooper Discoverer AT3 XLTs in 285/70R17 and do not have any rubbing on the UCAs. I did have rubbing on body mount and fender liner though.
So, I’d like to get the HD High Caster set but I don’t see any mention of it having the Cerakote ball joints, as are now on the STD set.
Anyone have a definite answer on that? I really want to get rid of my bump steer, it’s bad enough now and I’m about to lift it…
Not sure if yours has these but after researching how to grease my jbas I found this information on their website. This makes it a lot easier than other things I have read about loosening the long uca boot to grease. Just pump grease until it extrudes from the side of the bushing and the washer.
https://jbaoffroad.com/jba-ez-lube-bushings
Are you running wheel spacers with the UCA? Any rubbing on the tire with factory wheels?
Ben, I am not running wheel spacers, just the TRD Sema wheels (which provide a bit more offset than factory wheels). I currently have 285’s installed without any rubbing issues.
How close are you to UCA’s? I’m fixing to install JBA’S on Pro wheels with 285/70/17 P rated Falken Wildpeaks. Worried about tire rubbing UCA’s. Thanks
Jason, Did you end up installing the JBA’s and running 285s on TRD Pro wheels and manage to not run spacers to avoid rubbing the JBA UCA’s? Clint seems to be running his 285s with JBA UCA’s on TRD Pro wheels with no rubbing anywhere. Thanks
I haven’t yet because I got some new FN wheels. I’ll have it all together in a few weeks and check back in. Thanks
Is the Caster adjustment the key to avoid rubbing?? I’m planning on installing 285s and want to avoid body chop mod.
Jessie, unfortunately “good caster” will hurt you as far as rubbing on the body mount goes. If you don’t have aftermarket wheels or UCAs you might have a chance of not rubbing on the body mount. If you do install 285s, I’d anticipate the need for a body mount chop and some fender liner trimming.
I thought more caster would push the wheel away from body mount? Confused! I want 285’s and I thought these UCA’s would help with rubbing possibilities. Help
Very nice write up.
5th gen 4 Runners are a bit notorious for a ‘nose dive’ on breaking. Do the JBA UCL help at all in this area?
You mentioned a increase in camber. Do you have a number for your increased camber?
Ben, they definitely have a little nose dive straight from the factory. I didn’t notice any improvement with these UCAs; however, I did notice a big improvement when I installed my Bilstein 6112 and 5160 suspension (which I already had on prior to installing the UCAs). After getting an alignment, my camber settings went from 0.0 to -0.4. This is still within the recommended parameters.
Nice write up! I have these ready to install, great timing.
Question: I have read you should wait to torque down the long pivot bolt until it is under load. Thoughts?
Thanks! Yes, if possible, it is ideal to torque the long pivot bolt while your vehicle is at its natural ride height.
Very nicely written! Cheers 🍻
Thanks CJ!