
Goose Gear Cargo Plate System Installation: Step by Step Install of the Cargo Plate System on the 5th Gen 4Runner
The factory 4Runner tie-down points work well…
However, when you begin to add items such as a fridge, storage boxes, or other off-road accessories, those stagnate points really begin to reveal their limitations.
When traveling off-road or long distances, a secure load is a safe load.
With all of your gear properly lashed down, it’ll limit how much it all bounces and shifts around on those off-road trails.
It will also help to prevent each object from becoming projectile during a rollover or a crash.
The Goose Gear plate system offers a variety of 37 different mounting locations, allowing for a multitude of ways to secure your gear.
Whether it’s their Goose Gear modules, your own built drawers, fridge, cooler, or even to add multiple lashing points, this plate’s got you covered.
Find it online:
- 5th Gen Plate System (Tiny Rig Company – Authorized Goose Gear Reseller): Check Price
4Runner Plate System & Tools To Install

NOTE: The plate utilizes the factory mounting locations, so no cutting or drilling is required. All plate models require the removal of the rear carpet, underlayment foam, and some plastic trim pieces. The 3rd-row deletes version requires some minor trimming of the two side infill panels near the rear of the vehicle.
Goose Gear Cargo Plate System Installation
Tools You Will For Installation:
- Preferred Tools
- 10mm Socket Wrench
- Panel Tool Kit
- 4mm Hex Key
- Sound Deadener (optional)
- Metal Roller (optional)
- Install Time: 1.5 Hours
- Tip: A Video Tutorial Can Be Found Here
Step 1. Remove the Forward Cargo Anchors

Remove the forward carpet covered trim piece behind the second row.
STEP 1A. Remove the Cargo Area Carpet

Begin by removing the cargo area rear trim cover with a panel tool.
Uncover the 10mm bolts holding down every four tie-downs in the rear cargo area, and then remove.
STEP 2. Remove the Supporting Anchor Brackets

Remove the (4) 10mm bolts that previously held down the (2) brackets for the second-row cargo hooks.
STEP 3. Remove Carpet

Disengage the (x4) white front clips holding in the carpet.
You can do this by either pulling forward on the carpet or using a panel tool to disengage the clips. Lastly, remove the carpet and the underlying foam insulation.
STEP 3A. Sound Deaden the Rear (Optional)

With the removal of the foam insulation, I chose to apply sound deadening material in lieu of its place.
The material will help lessen road noise and help insulate the rear floor. The rear floor of the cargo area took (x2) pieces of deadening material.
Prep the surface by vacuuming out the area, then wiping that area clean with a damp rag; ensure that the area is dry before applying the material.
To apply, measure and cut before uncovering the adhesive backing.
Then slowly peel the paper of the back while rolling out with a metal rolling tool.
TIP: I marked the locations of the rubber grommets on the deadening material in case I needed access to them later.
STEP 3B. Reinstall the Carpet (Optional)

This plate is made to be installed without the carpet; however, as shown in the video, I also opted to reinstall the carpet to the rear.
It does lift the plate slightly… However, everything will fit.
STEP 4. Install Rear Platform Brackets
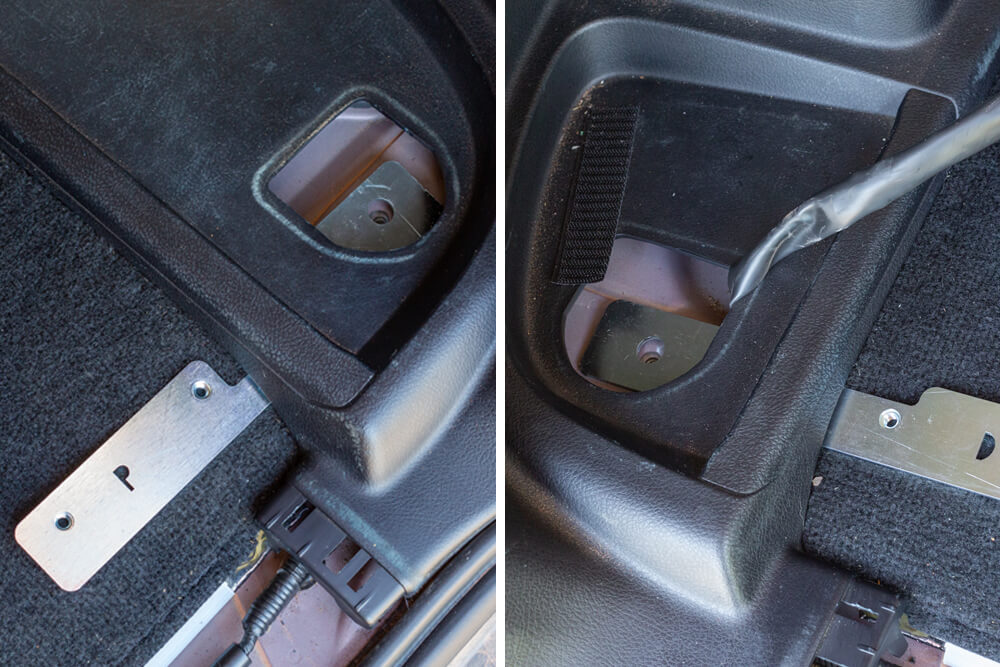
The brackets are labeled with a “D” for Driver side and a “P” for Passenger side.
With the notches facing to the forward of the vehicle slide the driver side bracket underneath the cargo trim to the anchor point.
In the same fashion of the driver’s side bracket, the passenger side will take a little more finesse, working around the inner plastic trim.
STEP 5. Reinstall Stock Tie Downs

Loosely reinstall the rear tie downs and clip in the rear trim cover.
NOTE: With an OEM Audio+ subwoofer, reuse the 10mm bolt from the removal of that anchor and a washer of your choice to secure the driver’s side bracket.
STEP 6. Install Cargo Plate

Before installing the hardware to secure your plate, run a small layer of anti-seize around each thread of each bolt.
Begin to thread all (8) supplied bolts through the plate loosely securing it in the rear, with the (x4) longer bolts attaching towards the front of the plate and the (x4) shorter bolts in the rear.
TIP: To ensure everything lines up correctly, do not fully tighten any bolts until all (x8) bolts are threaded in.
FINAL STEP

Once all bolts are in, begin by fully tightening down the rear cargo 10mm anchor bolts, and then working around the plate to fully tighten down all the bolts.
INITIAL IMPRESSIONS

Upon inspection, the coating has a high quality feel to it, not too abrasive, yet, still smooth with a durable feel.
The dimensions fit perfectly and all the bolt holes lined up, even without being able to see to guide the long forward anchor bolts into place.
What impressed me the most was the number of holes I could use to secure my gear, or add lashing points to. The dimensions fit perfectly, and the support footings underneath are well-constructed.
FINAL THOUGHTS

I have always had my eyes on the Goose Gear plate for the 4Runner, but it was hard for me to justify getting one.
After adding a Dometic fridge to my cargo area on this last camping trip, I struggled to find a proper way to secure it in conjunction with my residual camping gear.
Having the versatility to change up my mounting points will allow me to run more efficient tie downs, especially with the loss of one to my OEM Audio+ Subwoofer.
The opportunities are endless; I like the fact that I can choose to run anchor points, bolt anything down, or even run it empty with my Weather Tech liner on top.
With the Goose Gear plate, I have the opportunity to run my cargo liner in the winter, catching snow and holding wet gear—and, for camping season, installing all my lashing points to hold down my gear.
Overall, I am very happy with the installation of my rear plate and very excited to better explore its benefits as it can adapt to my needs over time.
Would the plate itself reduce noise (without the added sound deadening mentioned in the article above)? Already have the sound deadening and wondering if adding the plate will help.
Can you put the tie downs from the rear seats on the goose gear
On the bottom of the plate, closet towards the 2nd row seats. Does it have legs to compensate the elevation to level out the baseplate. Exactly where those brackets were
removed from?
Do you know what the plate is made of?
Goose Gear uses Baltic Birch on most all of their products to my knowledge.
Off topic, what sound deadener did you use? 80 mil? I’m wondering how thick you used and if you had any issue getting carpet back in.
I used some 80 mil from Amazon. Carpet went in fine, it was a little snug tieing into the rear cargo anchors. But with some patience, everything fit fine.
Do you think the foam would still fit under carpet with the sound deadener in place?
The foam will not sit underneath the plate. The Cargo Plate is designed to be used without the foam.