
5th Gen 4Runner Rear Camera Relocation: Step by Step Install on How to Relocate the Rear Back-Up Camera
Do you have a custom rear bumper or a swing out of some type? Does your spare tire cover your back-up camera? Relocation
If you answered yes to either one of these, odds are you need to relocate your back-up camera.
After installing a custom rear bumper, or even something like the RIGd UltraSwing, your back-up camera is essentially useless.
So, what do you do? …Relocate it!
Preferred Tools for Project:
- Drill
- One Drill Bit ½”
- One Drill Bit 1/16”
- Wire Stripper
- Glue Gun
- Lock Tight Glue (Gorilla Glue)
- Picking Tool or Panel Remover
- 10mm Socket
- 10mm Open Socket Wrench
- Chisel (smaller than ½” Drill Bit)
- 22-28 Gauge Wire at Least 6 Feet (I used the one from my lightbar)
- 2-3mm Heat Shrink Tubing
- A Heat Gun or Lighter
- Electrical Tape
- OE color matched Paint (depends What Color Your Rigs)
- Painters Tape & Newspaper
- Sheet Cutter
- The Old License Plate or Aluminum Plate
- Self-Tapping Screw
5th Gen 4Runner Rear Camera Relocation
- Open Rear Hatch Door & Remove Grommet & Bolts
- Close Hatch & Remove Spoiler
- Unplug Wire For Brake Lights
- Open Hatch & Take Out Handle
- Remove Door Panel & Remove Bracket
- Remove Plastic Cover & Find (x6) Bolts
- Remove Bolts & Loosen with Socket Wrench
- Unplug Camera Power Line
- Cut Wires in Half
- Fish Wire Through Grommet Along Brake Light Wires
- Tuck Wires Using Metal Spacing
- Connect the Wires
- Secure Old Camera Hole using Glue Gun
- Drill Hole For Camera Bracket
- Create a Custom Bracket (Optional)
- Position & Secure Camera Angle
- Replace Panels, Bolts & Plastic Cover
1. Open Rear Hatch Door & Remove Grommets & Bolts
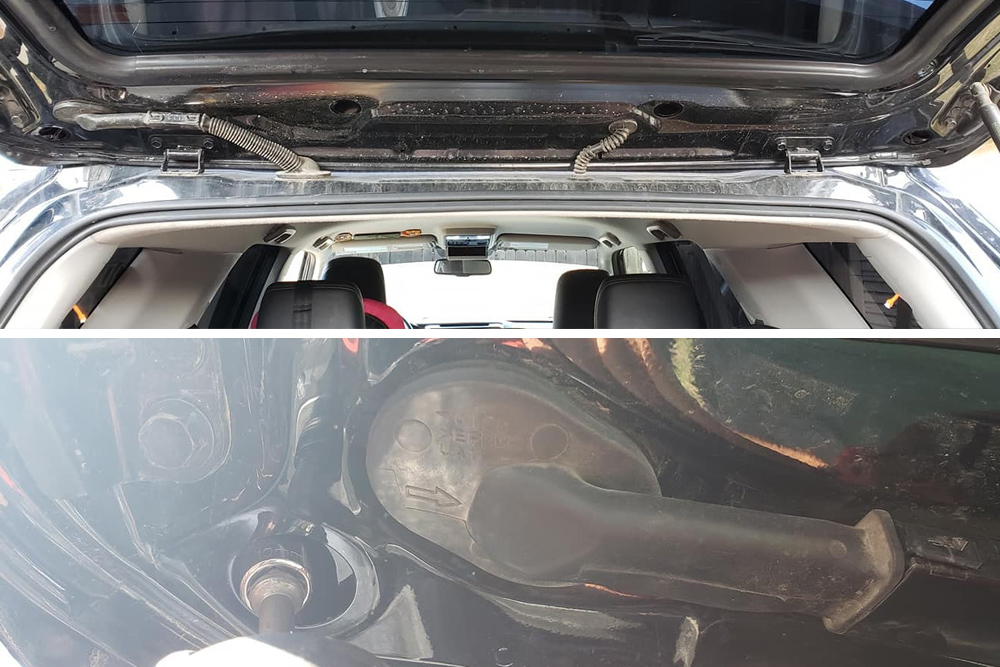
Open the rear hatch door and look for the four grommets on the top. Remove the grommets and unbolt the four bolts.
2. Close the hatch & Remove Spoiler

Remove the spoiler using picking tool, plastic pry tool or a plastic panel removal tool.
3. Unplug Wire For Brake Lights

Unplug the wire brake light. Then, set the spoiler to the side for now.
4. Open the Hatch & Take Out Handle

5. Remove Door Panel & Remove Bracket

Remove the door panel using the panel remover and the light. Then, remove this (silver metal thing) using a drill and 10mm open socket wrench.
6. Remove Plastic Cover & Find (x6) Bolts
Remove the plastic cover. But, do not remove it all the way through.
Slightly remove the plastic cover to find and take out the 6 bolts, as shown in the picture above.
7. Remove Bolts & Loosen with Socket Wrench

Once you find the 6 bolts after removing the plastic cover, remove them with a 10mm socket wrench, in the next step.
While your hatch is open, turn to face it completely. From here, look up and on your left, use the 10mm open socket wrench to remove the bolts.
8. Unplug Camera Power Line

Once bolts are removed, unplug the camera power line. Then, close the hatch, and then slowly remove the 4RUNNER sign.
Lastly, unscrew the camera housing and grab the camera.
9. Cut Wires in Half

At this point, you will need your extra wire (22-28 gauge, at least 6 feet).
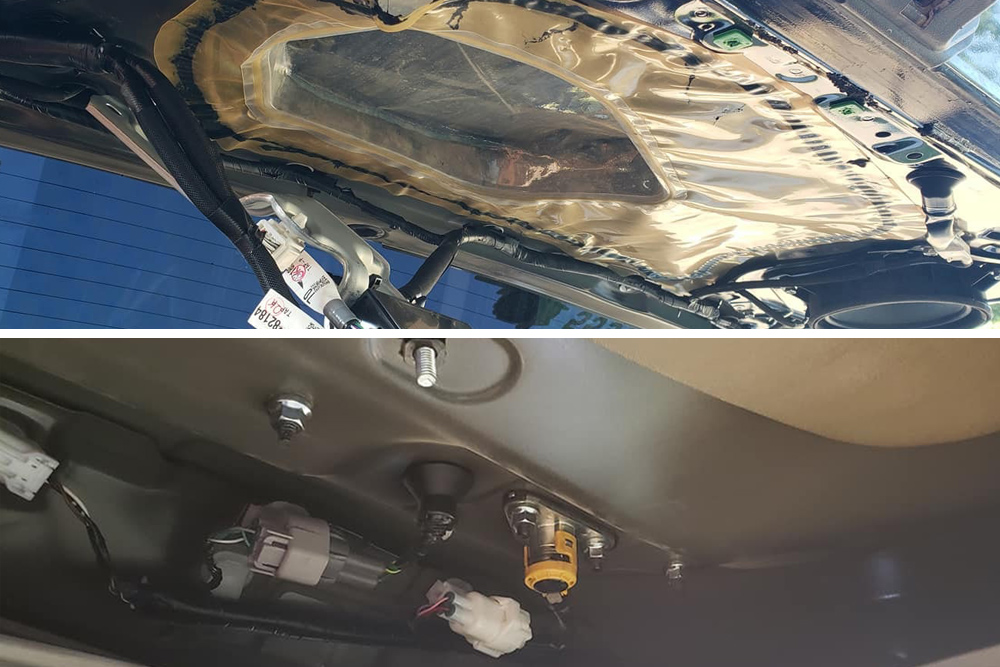
10. Fish Wire Through Grommet Alongside Brake Light Wires

Next, fish the wire from the left pillar all the way up until it comes out of the wire grommet (facing left, while the hatch is open).
Use that wire grommet to route your wire and place it with the brake light wire (leave it for now).
Make sure that the wires do not interfere with the rear window. You can do this by hiding the wires within the metal spacing, as shown in the next step.
11. Tuck Wires Using Metal Spacing

It’s important to ensure that the wires do not interfere with the rear window.
You can move these wires out of the way by tucking them in using the metal spacing shown in the picture above.
12. Connect the Wires
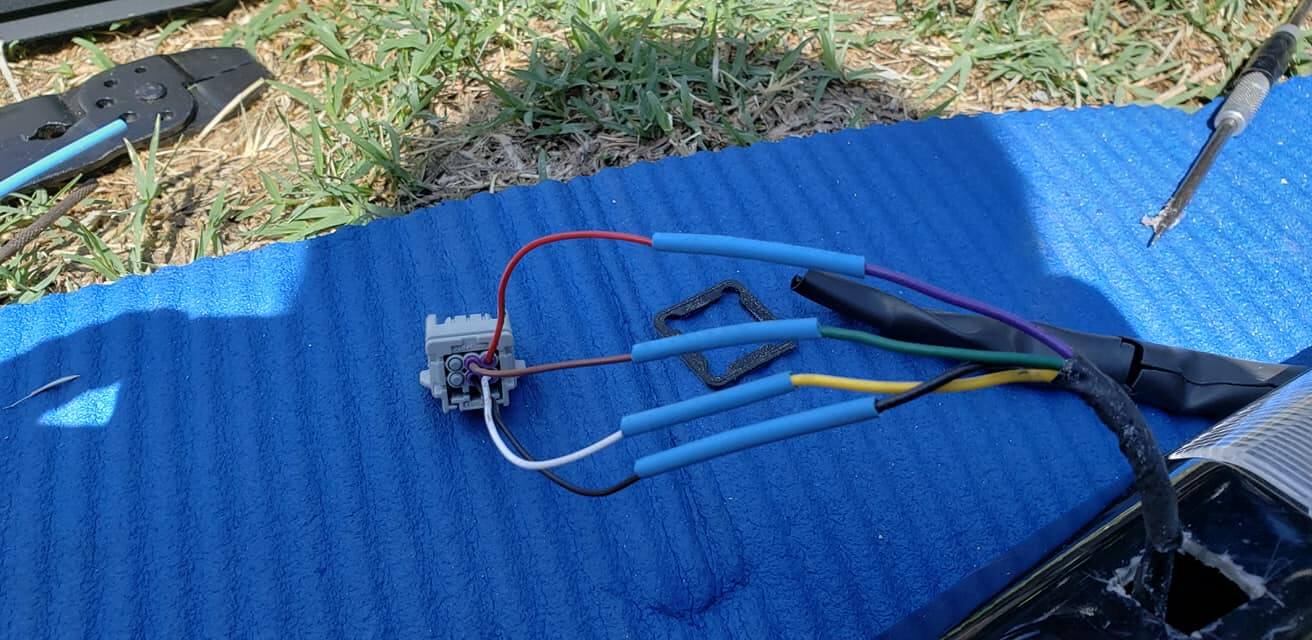
Start connecting the wires. One from to power source and the other one to the camera. Use 2-3mm heat shrink tubing.
Note: If you are using different colors for your extended wires, make sure that the colors on the other side are coordinated.
13. Secure Old Camera Hole using Glue Gun
Secure the hole from the old camera bracket using a hot glue gun.
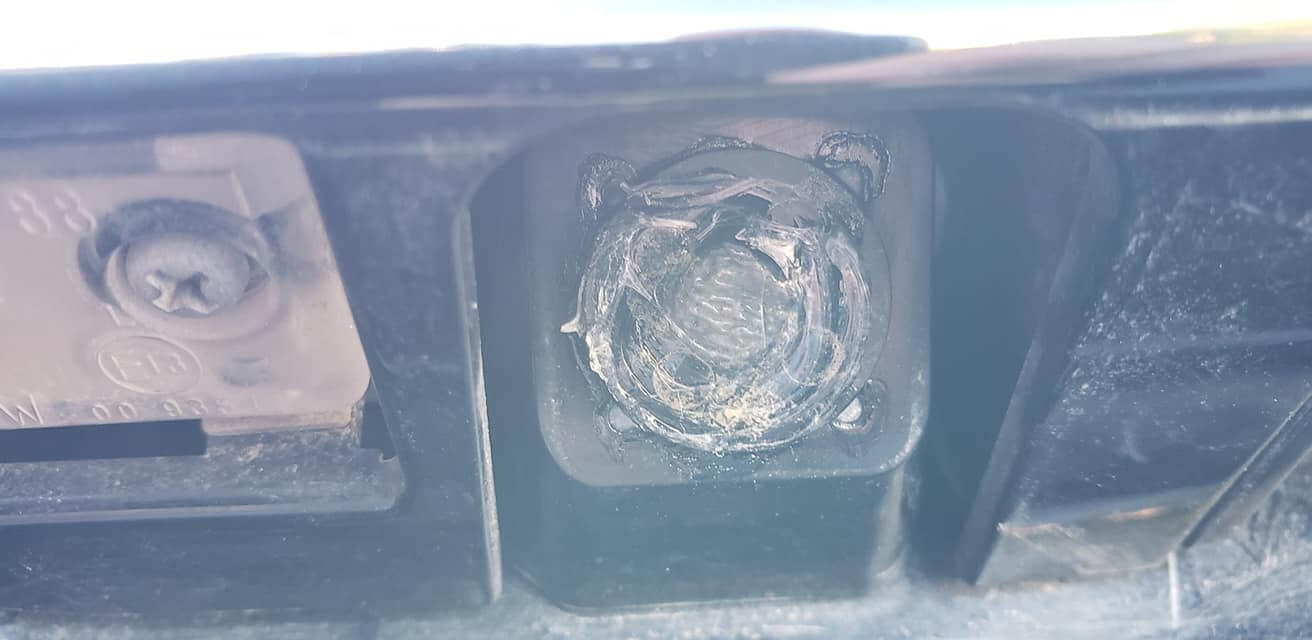
14. Drill Hole For Camera Bracket

Now it’s time to drill.
Use ½-drill bit and drill on your desired location. Use a chisel to make the square and to fit your camera and the connector.
15. Create a Custom Bracket (Optional)

I made a custom bracket to mount my camera.
To do this, I used my old license plate and cut a small piece, bent it to have it tilted.
Note: You can ask someone to hold the camera so you can test the angle.
16. Position & Secure the Camera Angle

Note: Make sure that your runner is not running when you put it on the reverse. Chock the wheels and apply the foot brake.
Once you are satisfied with the camera angle or position, then you can secure it by using a self-tapping screw.
Wait until the glue dries up and put painters tape on the side and the camera itself, and then spray paint to cover the aluminum.
Spray paint may vary depending on your rig’s color.
Final Step: Once everything is working, then start putting the panels, bolts and plastic cover back.
Disclaimer: Blue line from the camera will not be stock accurate. You need to measure the blue line and mark your own marker for the accuracy or desired distance when backing up.
Relocation of the Rear Camera on the 5th Gen 4Runner

Personally, I do not use the line. I use the camera just to see what is behind me.
And, always, check your surroundings before backing up.
I’m curious if anyone can steer me to a ‘plug-and-play” backup camera that is better quality (especially the night resolution) than my OEM camera on my 2018 Off-Road Premium? I can’t track down specs on it to compare to any new ones. BTW, I know this is about relocating the camera, which I don’t want to do — I just would like better image quality…
Janky AF.
Ha ha – kinda true – but with a little polish and fit this is a great guide. I need to do this.
Where’s the photo of the screen showing what the new location looks like when reversing? Ive been thinking about doing a mod like this. Great work on the write up!
I have it on my IG account @Khristian Nazario
Well done my friend. Thanks for the great write up to help the community out
Thank you and I hope it helps.
Now THIS is why I follow this blog here.
Well done sir!
Thank you, musch appreciated and please continue to support Trail4R.com.
I’ve been thinking about doing a similar relocation so I can see around my Thule bike rack that’s either loaded with bikes or folded vertically. I wanted to mount the camera high near the rear wiper blade so I could also look back over the bikes. But I keep thinking there must be a way to mount a new camera without having to dismantle the whole rear door paneling by accessing the wires as they pass from the main body to the rear door. Do you think this would be possible, or is this just wishful thinking?
You can do that as well, but personally I like to hide my wires. Also, if the wire are exposed you have the risk of the wire getting cut or something.