
5th Gen 4Runner OEM Hood Protector: Complete Step By Step Install & In-depth Review
A hood protector is a great way to prevent rock chips and make your 4Runner stand out from the crowd.
Here we will install the Toyota OEM hood protector step-by-step. We’ll also go over pre-install prep work and cover other hood protection options.
Unboxing

The Toyota OEM hood protectors are generally purchased as a dealership install.
But, honestly, this is a pretty easy install, so if you are even a little bit handy, this is one you should be able to do yourself in under 30 minutes and save yourself some money.
The hood protector came in a huge cardboard box and is well protected with bubble wrap and a film over the plastic to prevent scratches.
Many dealerships are now selling accessories such as this one online, so you should not have much trouble finding one.
OE Hood Protector
- OEM Hood Protector on Amazon: Check Price
Other Options
- AVS
- Bugflector II: Check Price
- Aeroskin (low profile): Check Price
- Aeroskin Lightshield (w/ LED): Check Price
THE HARDWARE

A pack of hardware will be placed in a bag taped to the hood protector. It is very unlikely that it will come with any installation instructions, as this is normally just installed at the dealer, not by the end user, but we will cover all you need to know here for the install.
HARDWARE ITEMS:
- 8 White Plugs
- 8 3 M Mylar Rectangles
- 4 Interior Brackets
- 4 External Brackets
- 8 Pointed Tip Screws
- 8 Flat Tip Screws
- 8 Plastic Washers
ENGINEERED TO ATTACH ROCK PROTECTOR

Toyota set us up pretty good to add the rock protector.
Similar to all the pre-threaded holes in the frame to add rock sliders, Toyota provides eight square holes under the front of the hood to mount the rock protector.
Four holes across the front, and then two on each side for a total of eight.
TIME TO WASH

First things first, take a rag and wash the top of the hood and underneath the hood a few inches in from the front of the hood.
This is important, as you will be laying down Mylar strips and you need the surface clean and dry.
Also, wash and dry any rock chips.
A LITTLE TOUCH-UP

This is a great time to touch up the rock chips.
That way you know it won’t be rusting for years under the hood protector without you noticing. Might as well start off with a clean slate.
I had already filled most of the mine earlier this spring, but still had a couple of new small ones to hit.
THE PAINT

I purchased genuine Toyota touch up paint. It does not cost much more and might as well get the good stuff.
It matched great and was easy to apply to fill in those chips.
I think my color is good for blending, so that helped too. Remember, touch up paint won’t make it look like new, but will not show from a normal distance and will keep the rust at bay.
It’s like a little Band-Aid for your truck.
Better to hit them right away before they start to rust so you don’t have to sand out the rust first.
Common Colors on Amazon for Late Model 5th Gen 4Runners:
- Magnetic Grey (1G3): Check Price
- Blizzard Pearl (070): Check Price
- Super White (040): Check Price
- Midnight Black Metallic (218): Check Price
- Classic Silver Metallic (1F7): Check Price
- Nautical Blue (8S6): Check Price
- Barcelona Red (3R3): Check Price
APPLY 3M MYLAR TAPE
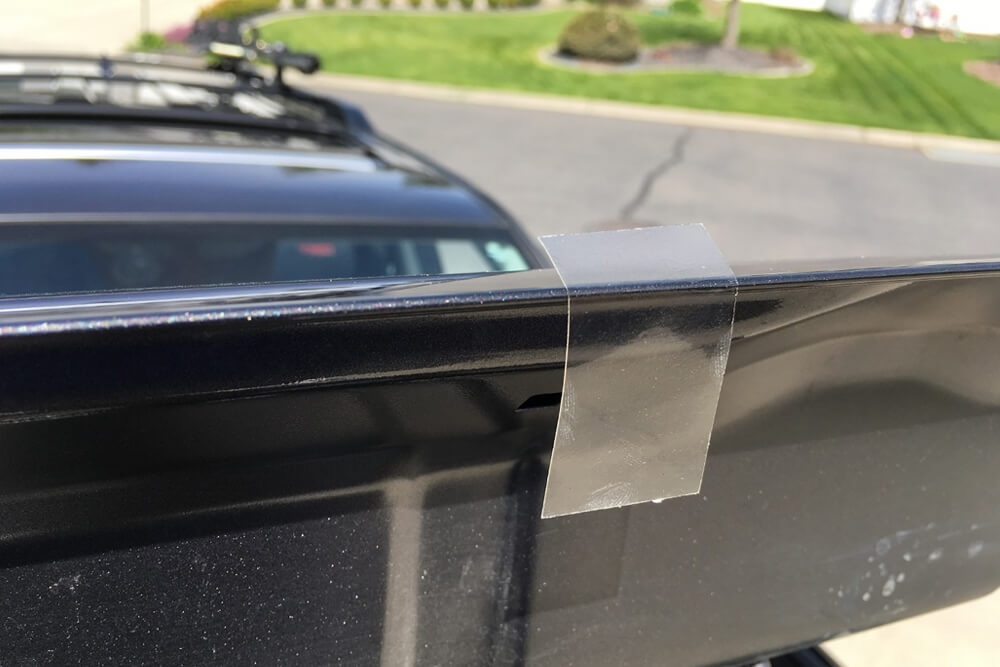
On your clean/dry surface apply the supplied Mylar rectangles lined up with the eight square holes under the hood.
Wrap about a half inch over the top of the hood.
You want to protect the top of the hood from the brackets rubbing, but there is no use wrapping too much Mylar over the top, as it can be seen from certain angles once you are all done.
So, the majority of the Mylar will wrap under the hood.
You can place the bracket in the hole for a second to get a better read on exactly where to place the Mylar.
Try to avoid fingerprints on the sticky side of the Mylar, especially the part that shows on the top of the hood. Repeat process seven more times.
PLUGS AND MYLAR

Above picture, you can view the Mylar laid down and see where the square white plugs will go to hold the brackets in place.
INSTALL BRACKETS
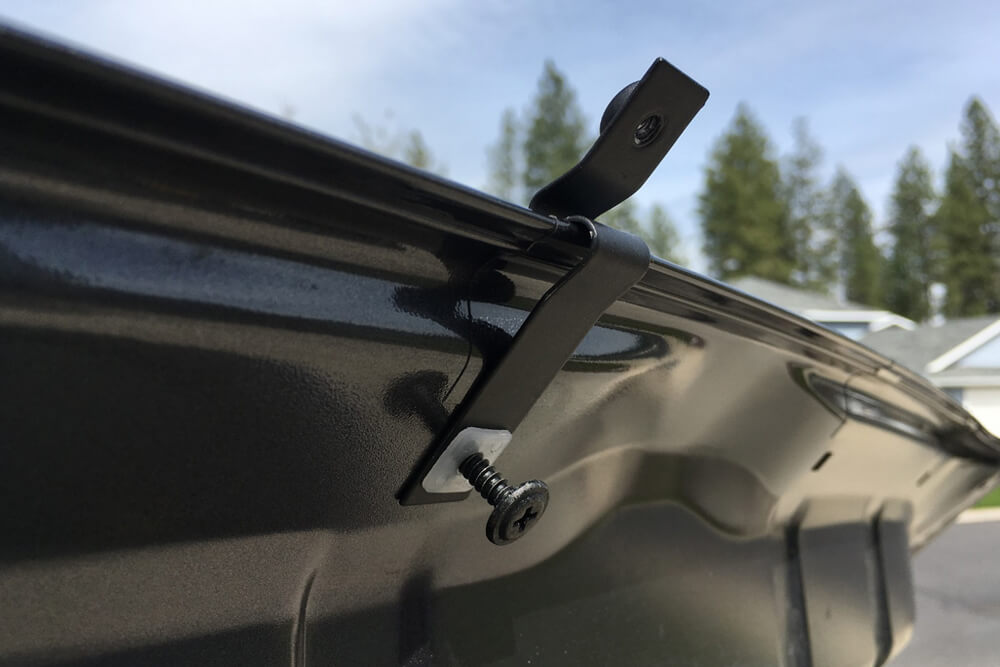
Okay, time to install all eight brackets. The four brackets marked with the “I” will go on the inside part of the hood (middle four square holes).
The four brackets marked with the “O” will go on the outside parts of the hood, two on the left, two on the right, for a total of eight brackets.
They are different lengths, so this is important.
The bracket will lay down first, which is wrapped over the end of the hood, then pop in the square white plug through the bracket and into the square cut out in the hood.
Then start the pointed screw into the white plug by hand.
It will all hold in place temporarily, even though you have not screwed it down yet. Repeat seven more times.
SCREW DOWN THE BRACKETS
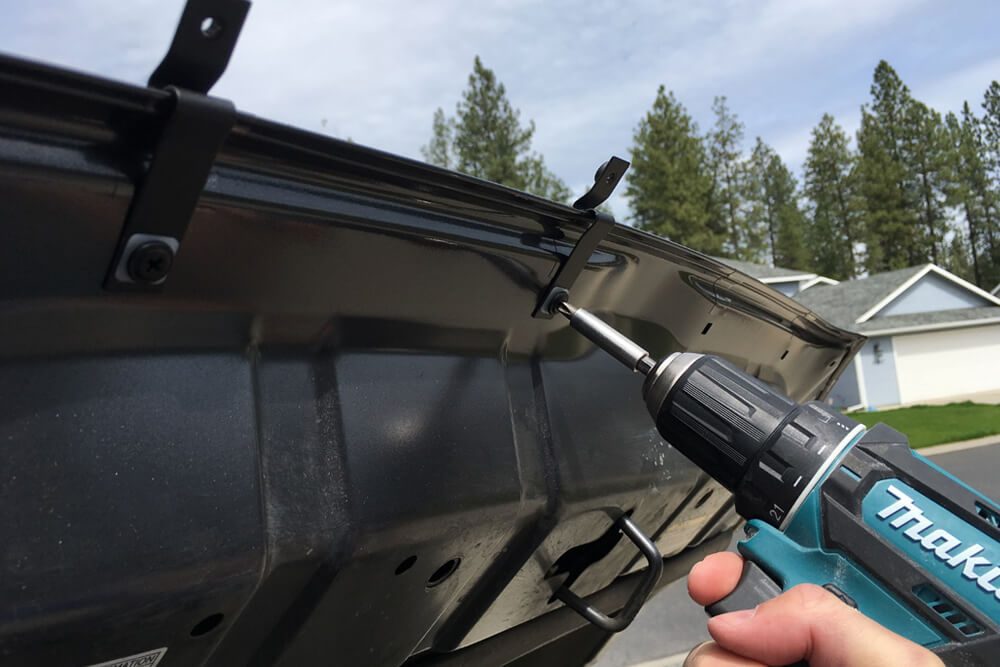
Take your cordless drill (or whatever you have) and screw down the brackets most of the way.
Leave a little play for adjustment and don’t drive them in all the way or they will strip.
BRACKETS INSTALLED
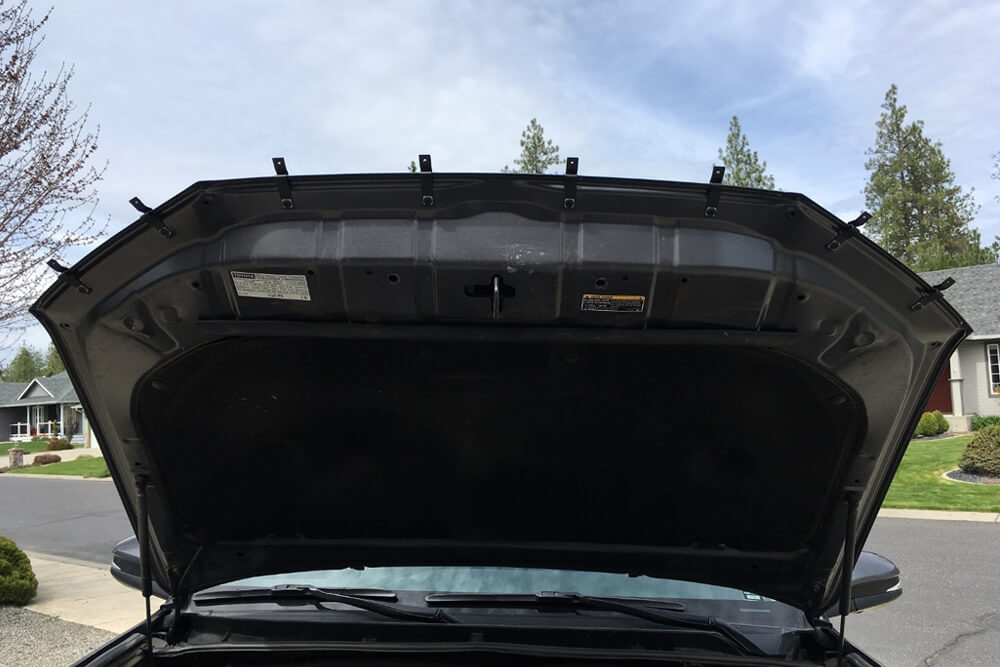
Your hood should look like this once you are finished with the brackets.
Eight small teeth sticking out. Again, don’t fully tighten yet.
APPLYING THE HOOD PROTECTOR

Time for the fun part.
Take your flat tipped screw and run it through the plastic washers, then the bottom of the plastic hood protector, then into the bracket which will have a threaded hole at the tip.
Tighten most of the way, but not all of the way, keep a little play in it. Repeat seven more times.
You will notice the hood protector will have to be manipulated into place a little to line up with the holes, but this is normal.
It will line up with a little help.
CHECK THE ALIGNMENT
With everything screwed in, but not quite all the way, shut the hood and make sure you are lined up with the body lines on the front end of the truck.
Shift things a bit if needed.
BUTTON IT ALL DOWN

Once you are comfortable with the placement, reopen the hood and hand tighten both the pointed screws on the brackets and the flat screws on the hood protector.
Be especially careful not to overtighten the screws attaching the brackets with the square white plugs.
They are plastic and you will strip them if you overdo it.
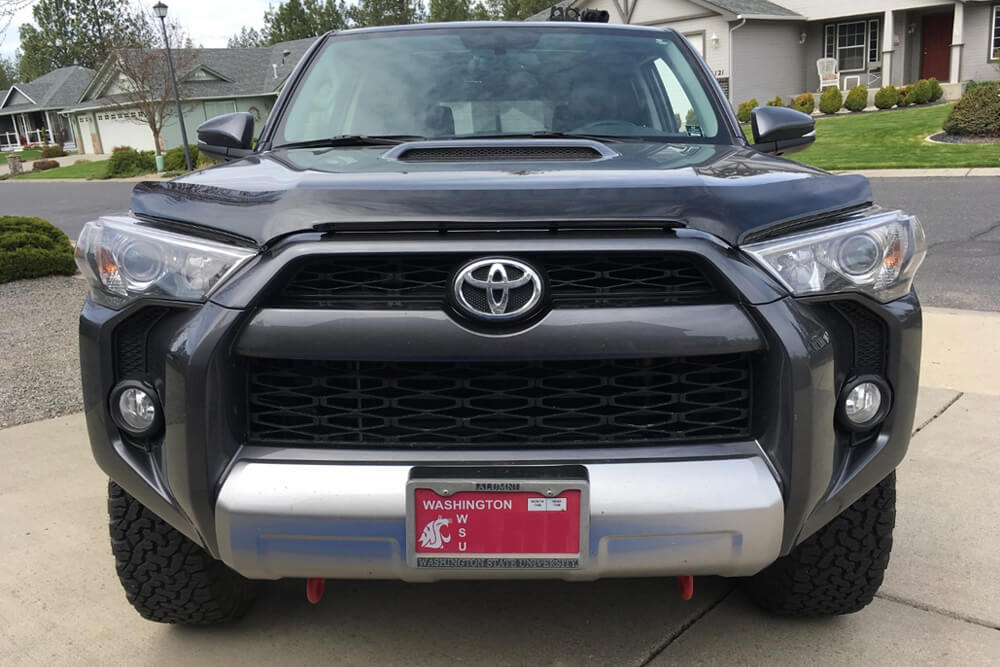
ALL DONE
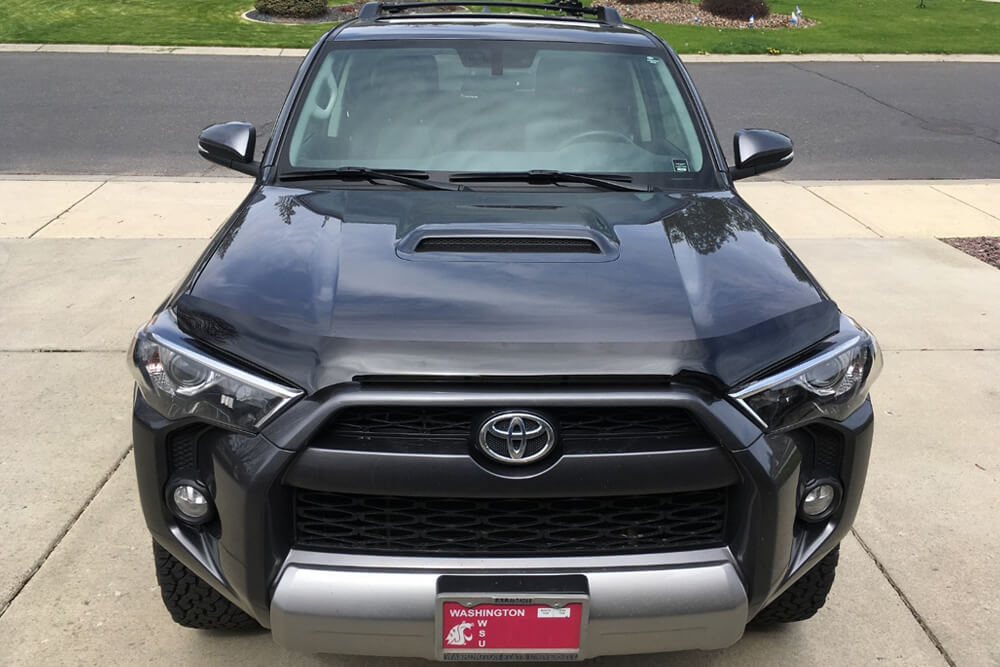
All done and looks great!
Not a lot of contrast with the smoked grey plastic against the metallic grey paint, but I am really happy with the look as subtle as it is. If your truck is pretty much any other color besides black, you will have a lot more contrast and it will really pop.
I am 100 percent happy with my choice of the Toyota OEM hood protector, but there are other options.
In particular, if you are only trying to prevent rock chips, you could go with a Mylar film over the front hood. Toyota offers this installed at the point of purchase for about $300.
Not sure how much they would charge if you just walk into the service department and get it done on your existing 4Runner.
Other options are DIY kits on Amazon. See links below:
PROTECTIVE FILM OPTIONS ON AMAZON
- Self-Healing Clear Paint Protection Film (Hood Strip Kit): Check Price
- Clear Paint Protection (Bundle-Hood Strip, Door Edge, Door Cup, Door Sill): Check Price
FINAL THOUGHTS

If you are hoping to prevent bugs from hitting the windshield, you will be very disappointed.
If you are hoping to improve your gas mileage with this aerodynamic design attached to the front, you will be equally disappointed.
I don’t think it stops much of any bugs hitting the glass, and if anything, you might lose a little mileage, although I have seen no drop in mileage. Still hanging at 17.0 mpg with a couple of tanks of gas since the install.
Feels like you are driving a giant brick in a crosswind, just as before.
If you want to give your rig a unique look though and stop most if not all those nasty rock chips on the hood, this is for you. If you are focused just on the rock chip prevention, you should probably just get the clear protective film for the front of the hood.
It will do the job without changing the look of the truck.
I am personally very happy with my choice and the look. The Toyota OEM hood protector is very high quality and installed with ease.
The only downside I have experienced so far is a very slight loss of visibility over the hood on each side of the hood scoop. It is nominal, but it is there.
Everything else has been on the upside, it was a nice little addition to the truck.
Whether you get the hood protector or protective film on the hood, it’s nice to know you will avoid all those rock chips.
Where i can buy the hardware kit? I have the hood reflector only
So because of the toyota safety sense on 2020 + they discontinued that older style and a new style is in place.
https://cdn.shopify.com/s/files/1/1191/6498/files/4RUN_HDI.pdf?v=1614362413
here is the install link!
Late to the party. 4 years of helping people with these perfect instructions. Thank you so much!
This made the job a piece of cake! Thanks! As far as ‘hood protector vs. film’, I’d doesn’t have to be an either/or. I prefer both of the above.
holy shit these instructions were amazing Bought myself a bonnet protector from https://www.ocamindustries.com.au/bonnet-protectors/ it was so simple yet I was so stumbled at first thank you 😀
Thanks John. Your instructions were dead on ballz accurate. I decided to go with the 2010-2020 4Runner Hood Protector – OEM Toyota Part# PT427-89100. I found it online @ OEM PART SOURCE for around ninety-three usd. Already been through 2 cracked windshields and many “meteorite” chips & dings on the hood before installing this.
Great write up. Thanks.
I wonder if the shield can be painted, maybe with Plasti dip or even permanent. I have a black runner with red accent stuff. Might be cool with a red shield. Or not.
Hi John, just want to say “thanks” for doing a super job on your instructions. Just finished the installation on a 2019 in magnetic grey, and really like the look. Best of luck with your future contributions.
The white 4runner that is depicted on this site has a hood deflector that looks a bit different than the OEM one in this write up. Is it the same or different brand?
Hi there.. is me again, Max
It’s been a few months since you made this install. I am debating between this product and the less expensive options (AVS II or weathertech). These two models are pretty similar and there have been reports that the screws mounted underneath can contact the top of the plastic cover and top of painted grill sitting under the hood and cause damage..see sample below page 8, posts 107 & 108.
https://www.toyota-4runner.org/5th-gen-t4rs/175393-bug-deflector-8.html#post2772439
I would like to ask if after 2 months of use, if you noticed any indentation on these areas or any contact caused by the brackets or screws that may lead to this same type of failure.
Also have you noticed any damage from the brackets to the top painted surface of the hood. Are the 3M mylar strips holding up well? Thanks a lot again
Max
Hi Max, I did an inspection after reading your post. I see no damage at all under the hood like in the pictures you posted. I can see that some of the brackets have had contact on the Mylar tape (can tell from the dust being disturbed). But none look like they have started rubbing through the Mylar or anything like that. Best I can tell all is good. Couldn’t say 100%, unless I removed the whole hood protector and pulled up the Mylar tape, but from all I can see, there is no damage. It took a little getting use to seeing it peeking over the hood an inch or so, and it is slight more work when washing the truck, but otherwise I have had no negative consequences. Mileage did not change. Keeping the front end protected. Looks like new still. Hope this information helps in you decision. Good luck with whatever you decide to go with!!
Hi, I recently purchased a 4Runner Offroad and will be picking it up next week, I am a firm believer of the efficiency of the hood deflector as I had one on my previous vehicle and can attest to its ability to protect due to all the cracks and holes due to flying rocks. I would like to know if the mounting clips cause any wear into the hood, they seem to contour the hood and even though there is 3M tape I worry that with the wind pressure from driving the deflector would cause the mounting clips to dig into the hood and eat through the paint. Would you be able to confirm?
Thank you
Amazing website you have put together by the way, thanks!
Hi Bruno, Congrats on the new 4Runner! I thought about possible damage to the hood over time also. The brackets definitely make some contact with the Mylar tape. I don’t have a solid answer for you, but can share my thought process. This is typically a dealer install, and I figured it likely does not damage the hood or dealerships would be getting a lot of complaints from their customers. I just don’t think dealerships would want a bunch of unhappy customers to deal with, that’s just not good business, so I am guessing they do not damage the hood. I believe the hood protectors have been out for awhile too, so if their was an issues, it would have come up already. Also, the brackets are pretty stiff, and with all eight on there held together by the thick hood protector, I don’t think they really move that much. That all being said, I have only had them on a month, so time will tell. I went ahead and took the risk, I am really not too worried about it. No regrets so far. Sorry I don’t have a more definite answer. Enjoy your new truck! Thanks for reading the install and for the great question!
Hi there.. yes I have a question off topic…. what wheels and tires are those (brand / model and specs) ? they look great! also do you have a lift…? LOL
The bug deflector looks good and the write up is superb. Thanks
Max
Great write up, thanks John! Would give this a 10/10 but I’m docking a point cause you’re a coug, I have no choice. Go dawgs!
Thanks Max! They are actually pretty cheap MB wheels from Discount Tire. Can’t remember exact model, think they quit selling them last year. I just swapped out the weird center cap they came with, with different center caps. I have been super happy with them. They are 8 inches wide with a -6 offset, which pushes out the stance over an inch on each side of the truck. Tires are 265/70-R17 BFGoodrich KO2s. Even though this is stock size, between the wider stance on the wheels and the more aggressive tread, I had to trim the front fenders a bit, as they were rubbing. Easy fix with a Dremel. And haha, no lift! I did have a friend install the Bilstein TRD Pro suspension kit though, which lifted the front end one inch, so it is slightly more level. Been trying to hit that balance of the 29 days a month it’s an every day driver to get to work or a trail head, with the one or two days a month I actually get to run it serious off road. So far I think I have achieved that. Have kept the weight down for on road performance, but still feel very capable off road. Someday would like to add a light weight bumper/winch. Thanks for the questions and feedback. Have a great weekend!
Thanks for all the details. They look good
Thanks for the awesome write-up! GO COUGS!!!!