
Front Durometer Bump Stops for the 5th Gen 4Runner – Built by Toyota enthusiasts for Toyota enthusiasts.
If you frequently explore trails, desert washboards, tow a trailer or carry heavy loads, odds are you may have bottomed out or are eventually going to bottom out. Even if these areas are not a concern, you may bottom out on things like Rail Road tracks, crowned intersections, washouts, and uneven roadways.
Bottoming out your shocks or components of your suspension may cause short-term damage along with the potential for future catastrophic failure. For minimal “insurance” and peace of mind, consider picking up front and rear bump stops for your 4Runner.
We recently did an overview of the rear Timbren bump stops that we installed on the 4Runner. In that overview, we covered many options for bump stops and a pretty decent overview of bump stops in general.
Timbren makes a great product but they are pretty pricey.
Shop DuroBumps:
- Front: Check Price
- Rear
- No Lift Required: Check Price
- 2″ Lift: Check Price
- 3″ Lift: Check Price
Front Dual Durometer Bump Stops

Today, we are talking about the front Duro Bumps (Dual Durometer Bump Stops) on the 5th Generation 4Runner. You can find a set of these for your 4Runner, Tacoma and other Toyota platforms at ToyotaBumpStops.com.
These are about less than half the price of its competition and provide just as much, if not higher quality. You will get more bang for your buck from the front Duro Bump Stops.
The front Duro Bumps eliminate the hard bottom out commonly felt with factory rigid stops. These bump stops offer a smooth initial contact with a firm mid-section to provide the ultimate bump “stop”.
You will see no loss in up travel as these are designed/intended to be compressed under the weight of the truck until fully compressed.
A new set of front bumps on the 4Runner will allow for smooth suspension cycles and will greatly increase the stability of the vehicle. Some people argue that bump stops, in general, offer more support for your suspension components and increase the longevity of shocks. This could easily be debated and is somewhat subjective depending on how you use your truck. I see the points on both sides.
Some reasons you may need bump stops:
- Hammering Suspension on the trail
- Going fast over moguls in the desert
- Towing heavy loads
- You have a heavy truck (rooftop weight, bumper, fridge, drawer system, etc)
- You want to jump your 4Runner
- General on-road driving bottom-outs
All of these reasons above may lead to bottoming out your 4Runner. To prevent damage to your truck, do yourself a favor and pick up a set of suspension protection in these Duro Bumps.
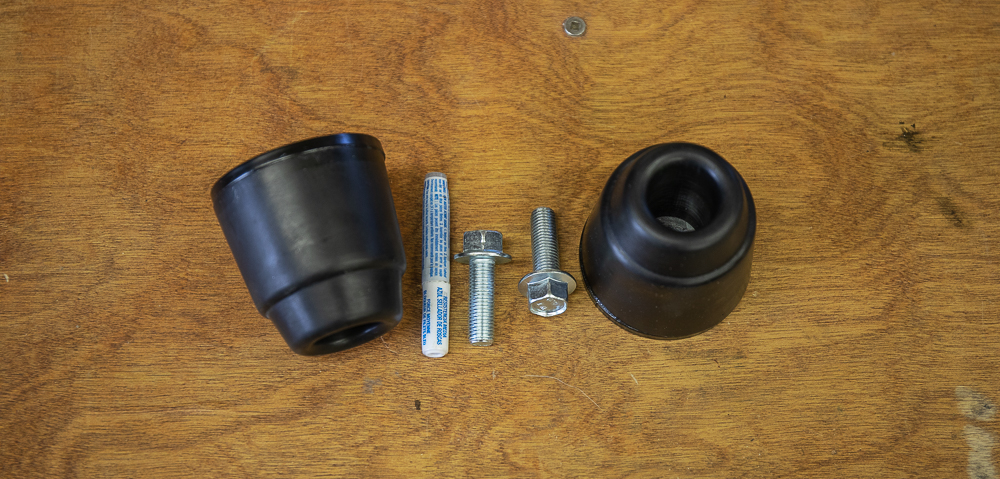
Duro Bump Specs
- Thick 3/16″ steel base plate
- Highest quality raw materials
- JIS, 10.9 Hardware
- Diameter: 2- 7/16″ (61mm)
- Height: 2- 1/2″ (63mm)
Front Dual Durometer Installation
The installation was quite simple. Large channel locks or a large pipe wrench is going to be the most important tool you will need.
We took the tire off in order to get better photos/video, but lifting the truck and taking the tire off is optional.
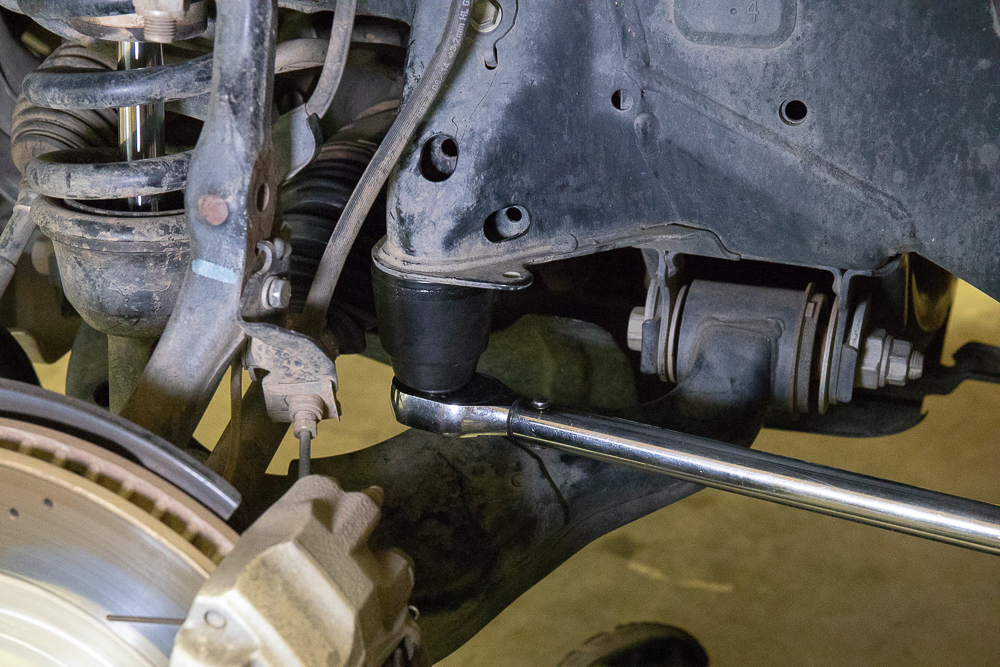
Step 1: Remove old OEM bump stops with Pipe Wrench
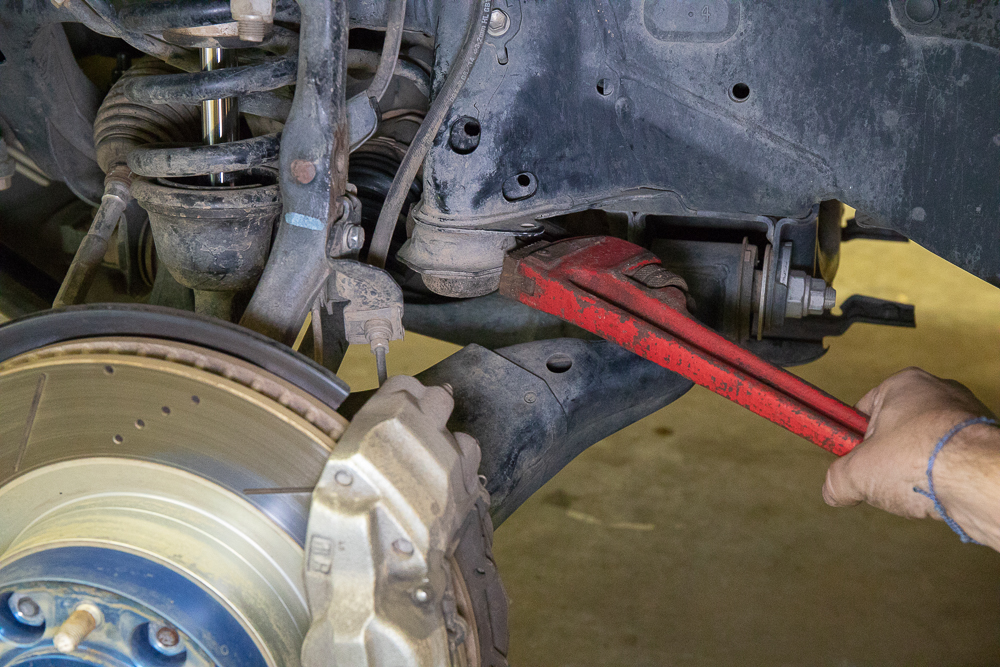
You can use whatever tool you want. It just needs to be big enough to fit around the factory bumps. There is a welded-on nut on the inside of what looks something like a body mount. Just unscrew the front bump front the frame.
Step 2: Drop bolt through bump stop

Drop the provided flange bolt into the new front bump stop and out the other side.
Step 3: Apply thread locker
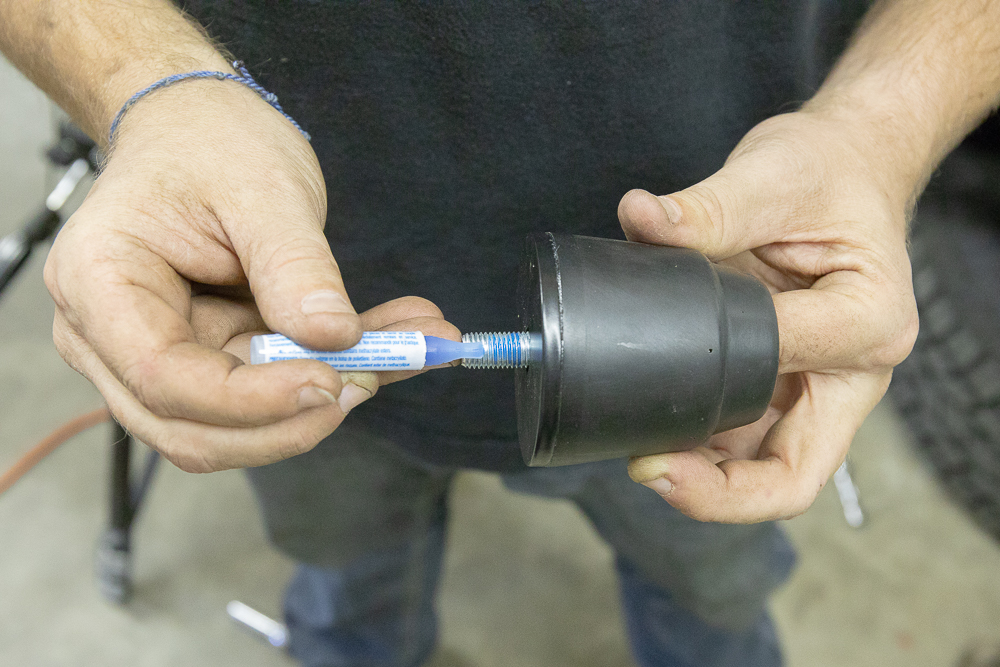
Apply threads with the provided single-use medium (blue) thread locker.
Step 4: Install new bump stops using a 14mm deep socket and ratchet
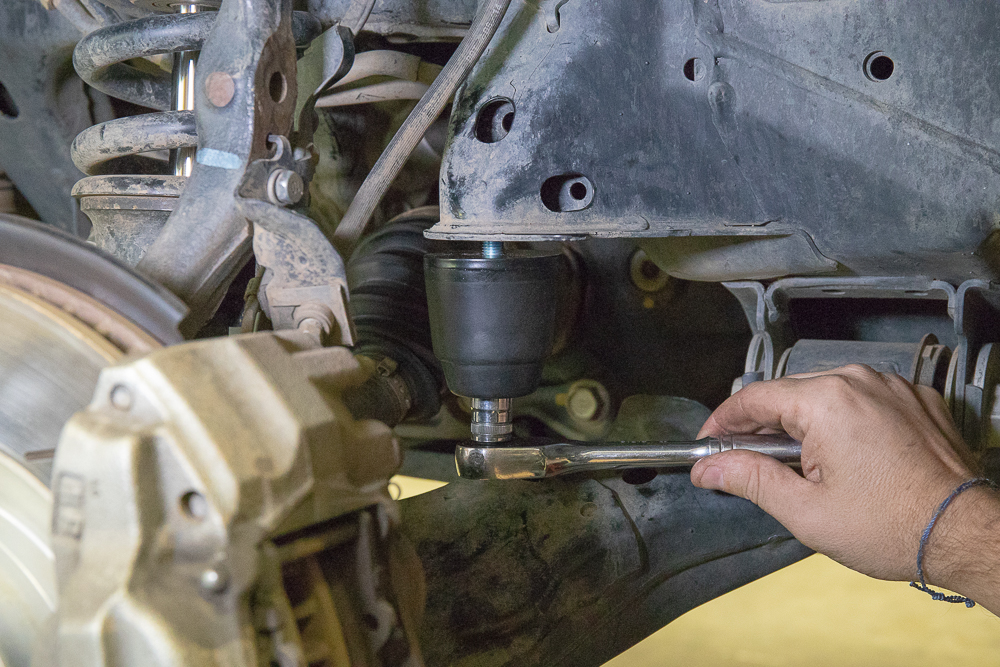
Step 5: Torque to 30 ft.lb.
How do they handle on-road?
I have only hit a few crowned intersections on a rough local road, at high speed, intentionally of course. There is also a Rail Road Crossing that I know is prone to bottoming out and I hit that going about 55 mph.
On both test spots, I was genuinely surprised. We noticed a substantial improvement in not only the smooth contact but also the increased vehicle stability on hard hits.
It’s one of those upgrades that no one really thinks about but has a lot of wow factor when you need it.
How do they handle off-road?
For the brief moment we had the truck off-road, these bumps performed as advertised. I didn’t get a real chance to smash on the suspension all day but did flex on some slow dip/mogul sections.
You can feel these stops come into contact late in the final distance of suspension travel.
They did feel to have a smooth compression rate. That is to say that they slow the suspension movement slowly, not necessarily in a harsh but controlled manner.
I am excited to really push them to their limits.
Thoughts?
The kit arrived on time, in a tightly organized package and the quality was pretty damn impressive in relation to other bumps we have installed. The mounting hardware was high-quality and the single-use thread-lock pack was a nice touch.
Very impressive guys, well-made stops.
Reach out to Duro Bumps today if you have any questions. Curtis is a really genuine dude and easy to work with. I believe they are working on a few other bump stops for other trucks so reach out directly to see if they have your truck in the works.
Let us know what you guys think about these bump stops vs others.
I was not so lucky. My factory bump stops bolt snapped off when trying to take them out. Now i need to figure out how to remove the broken bolt
Do you have photos? I am sure DuroBumps would take care of you on this. You try their support?
i realized it was my stupidity. i turned the bump in wrong direction. now need to figure out how to extract the bolt stuck inside. Do you know if the hole on the top allow me to use a extractor or reverse drill bit on the bolt? i forgot to check yesterday when i had everything open. From the bottom i need to drop the LCA. more complicated and i don’t have enough space to go from bottom without a lift.
Deep, what direction do you go to loosen the bump stop, is it still lefty or to the right.
thanks, Will
Great write up! Note for step 5 per the Durobump website they say to torque to between 15 -18 ft.lb and to not over tighten. https://toyotabumpstops.com/installation-instructions/front-durobumps-2nd-3rd-gen-tacoma/
So is it taller than the stock bumpstops sincr its designed to compress unlike the stiff stock ones? Just want to make sure i dont lose any up travel!
I had these installed. How long do you think they last for?
My front DuroBumps were toast just shy of 2 years use. I developed a bottom out condition. After load testing and taking measurements I decided to remove the front DuroBumps and install some $30 Energy bump stops that I bought on Amazon which fixed my problem (Bottom out condition is gone). The initial reply from DuroBumps was essentially (Keep in mind this was BEFORE they saw pictures) “Your shocks and coils are probably worn out”. DuroBumps requested pictures of my front suspension and after receiving the picture they wanted they stopped replying to my emails! Pretty sad business practice for such a “reputable” name in the 4Runner community!!