WaterPORT Review – Portable, Pressurized, Water.

3.8-gallon self-pressurizing WaterPORT Day Tank Review and Install
I purchased this on a great deal from Costco as they put it on a one-time manufactures coupon. I found this out from WaterPORT when I called them with a couple questions about the unit. Basically, they said, “you’ll never see this deal again and it’s the lowest price that we’ve ever sold it for”.
A quick internet and forum search led me to believe that it was a pretty stable product as not many had anything bad to say about it. Hindsight, I’ve seen it on the Costco.com website again, and it seems to have a couple additions to the ‘Costco Exclusive Bundle’ which includes a pump cap, combination lock, and an additional quick hose connector. Interestingly, when I picked it up, WaterPORT said “look on our website in a couple months for a pump cap to self-pressurize the tank”.
It would have been nice to have, but WaterPORT is selling it for $30 bucks (plus tax and shipping) and the lock for $15. Both a bit pricey sold separate, a nice ‘freebie’ from Costco however if you’re going to pay the $170. I’ve seen it for $150 with everything less the Costco bundle extras.
The WaterPORT website sells it for $200 for the standard bundle. I have however noticed that the WaterPORT and many of the accessories are back ordered on a somewhat regular basis across multiple websites including Costco.com and theWaterPORT.com.
Where to buy?
- Direct from The WaterPORT: Check Price
- Coscto: Buy at the store
What comes in the box

Here is what came in the box:
- WaterPORT Day Tank, 6′ hose
- Spray nozzle and nozzle mount
- Neoprene insulating sleeve
- Mounting systems as described above
- Hose connector (to fill the tank from the garden hose)
- A bag of bolts/washers/nuts with an Allen wrench and light-duty open end wrench
- Heavy-duty [hitch] pin and clip and instructions.
For this review, I’m installing the WaterPORT on a Stealth Gobi rack on my 2014 Trail Edition 4 Runner (the Bar Mount).
The WaterPORT came packaged in a box along with a few mounting options; a Bedrail Mount, a Trailer Hitch Mount and a Bar Mount.
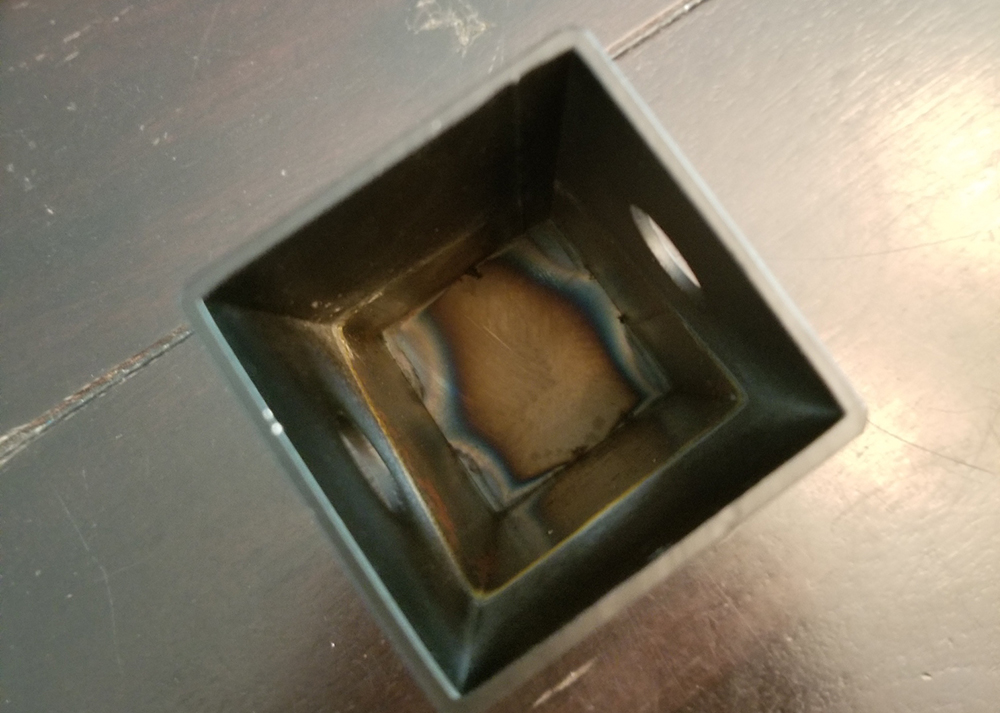
A note on the Trailer Hitch Mount: Powder coated? Or Painted?
Either way, the inside will rust as I can see bare metal.
I will say that while the instructions are somewhat graphically appealing, they did seem a bit incomplete however and left the novice searching for more information.
For instance, right off, there is no parts list included, nor what parts are used for which mounting method. The instructions refer to parts like “clamp A and clamp B” for which you need to identify yourself.
The WaterPORT website does have some online installation videos that are short and to the point on but do not address individual situations.
I have called a few times to their office, you can get them on the phone to answer questions and they are happy to assist.
Installing the WaterPORT on Gobi Rack
So, on the Stealth Gobi Rack, the horizontal members of the rack are too close together for one of the mounting clamps to be mounted on the vertical member of the rack as suggested by WaterPORT (not in the instructions – suggested to prevent forward-backward movement during off-roading).
The WaterPORT mounting clamps barely fit on the top bar and they definitely will be rubbing on the mesh flooring. The clamps and WaterPORT will be at a slight angle to the 4Runner.
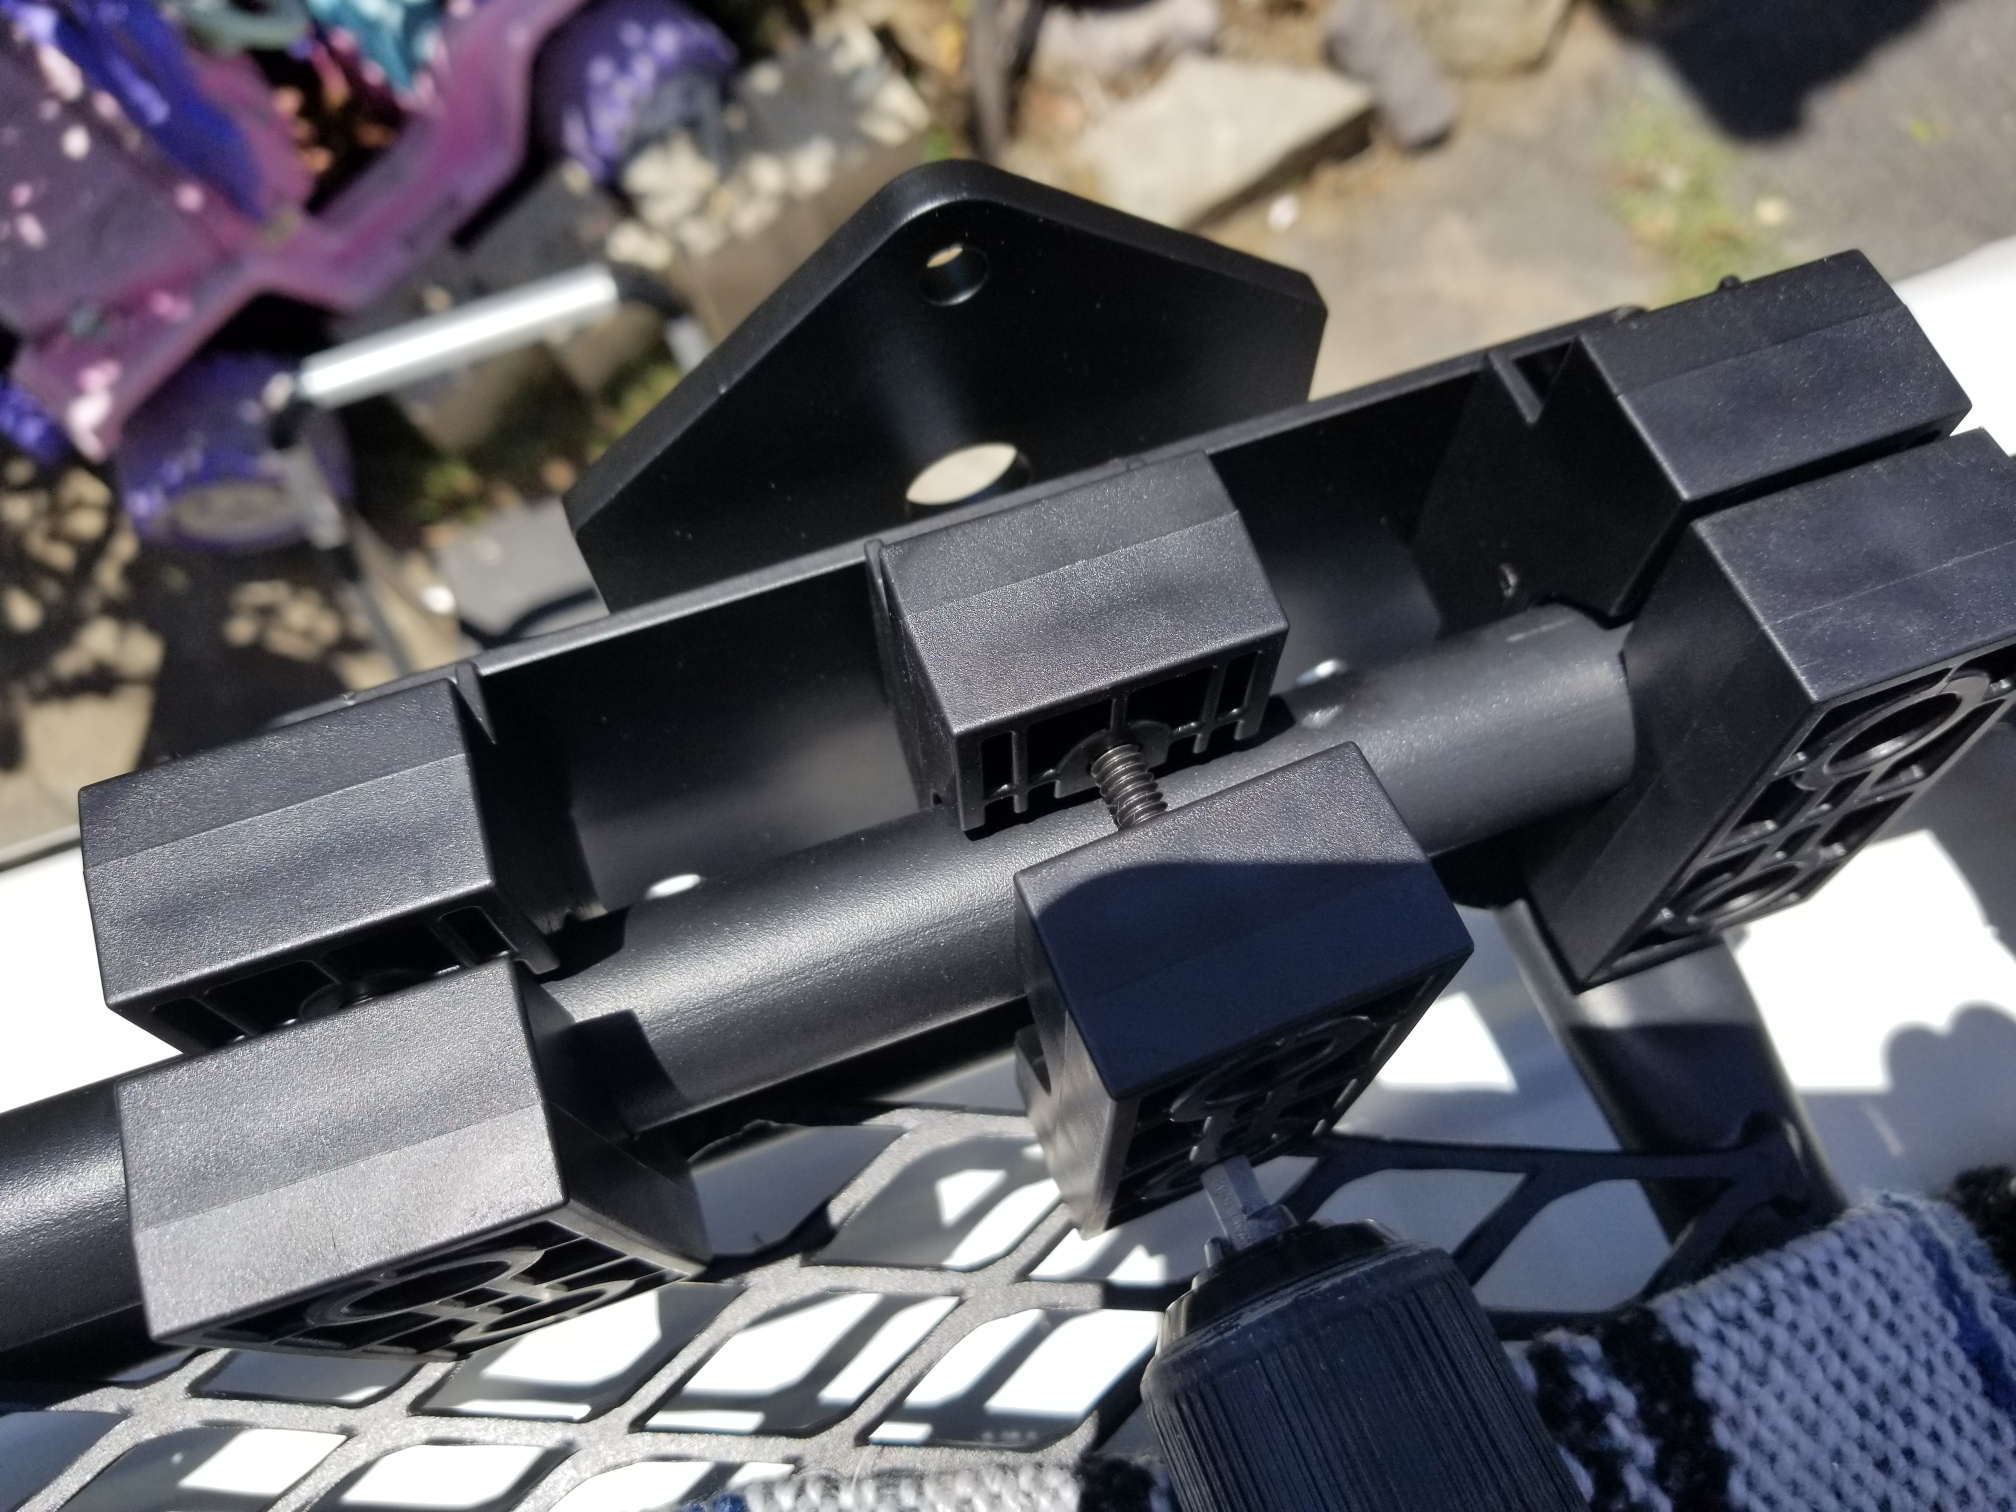
I definitely recommend loosely fastening the clamps on the rack as you’ll need to align the mounting plate next. The black mounting bolts for the clamps are quite long and having a drill and Allen bit will have the installation go faster than the Allen wrench.
From the top, loosely tighten the clamps. You’ll want to be able to adjust them by hand
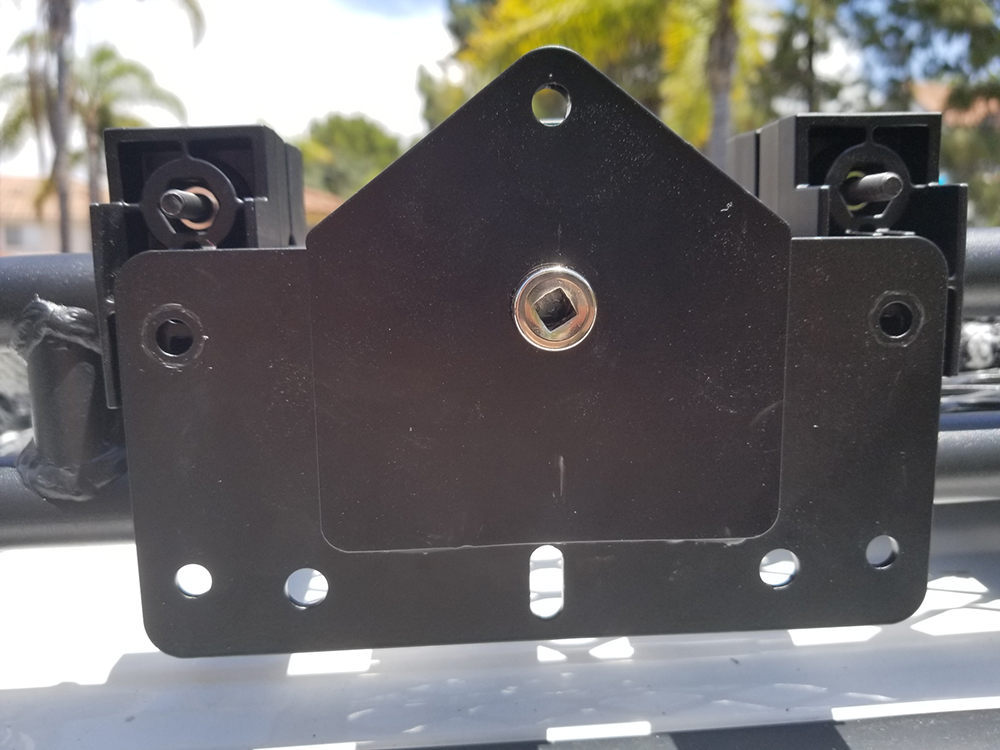
On my first attempt at installing the mounting plate, I found out that the top row of holes does not allow for all three clamps to be used. The holes did not line up horizontally for some reason, at least not when tightening the middle bolt to the middle clamp with a socket (probably possible with an open-ended box wrench if you really want to).
Misaligned mounting holes
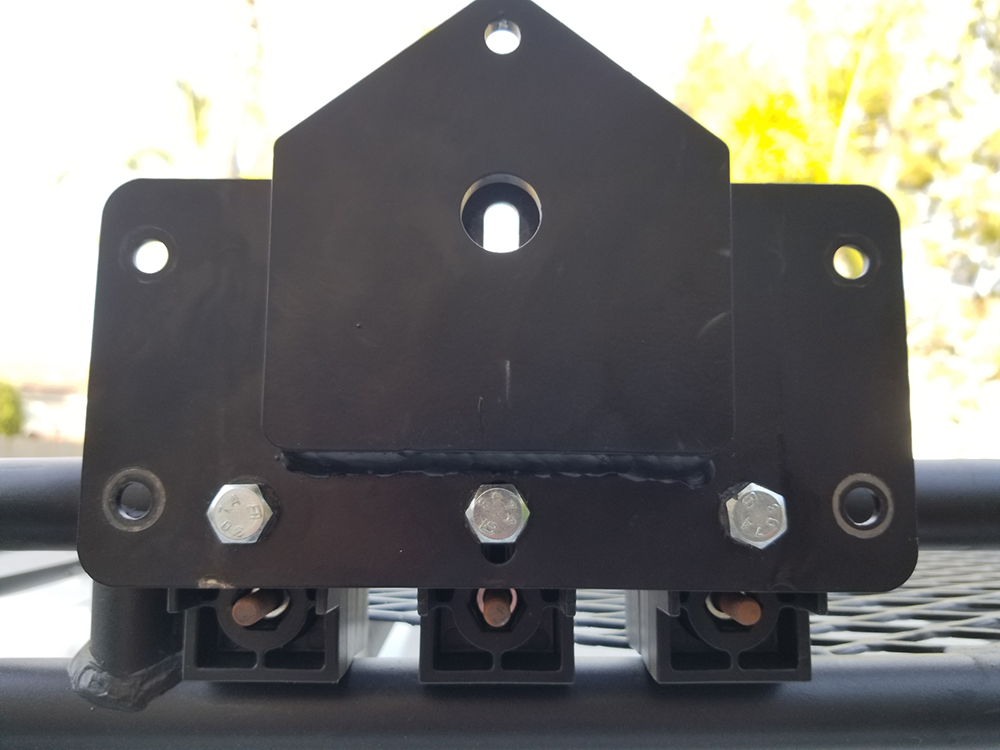
On my second attempt, I found out that the outer mounting plate holes and the middle-slotted hole does not allow for the middle bolt to be tightened with a socket either as the bolt is right up against the weld on the mounting plate (again, probably possible with an open-ended box wrench if you really want to).
I had to remove the mounting plate, loosen the clamp bolts and realign the clamps to be in line with the inner mounting holes in order to use the three clamps provided. Probably a good idea for a solid stable install. I would recommend getting some flat washers for the mounting bracket bolts as it did not come with any and every time I tightened down the bolts, the mounting plate got marred up. Not really a big deal if you get the install right the first time and plan on leaving it.
General Overview and Review
As far as usage is concerned, it’s not that high-pressured, but it does the job. I have not used other products to compare to. WaterPORT suggests that it’s easy to carry around, and while the design of the product does have a solid carrying handle, the water sloshes around inside and makes for an awkward carry. Doable from the hose to mounting, might be too much for a long hike.
Warm/ Hot Water?
I’ve used it a few times and not really got ‘hot’ water out of it, almost cold water on a cloudy day. I have tried filling it with hot tap water and pressurizing it with a pump, and several hours later the water was still nice and warm (on a hot day).
Top Cap/ Openings and Hose Connections
The units top cap is very robust and I do not see it being a problem even in the long term. There are three other penetrations in the unit, however, the Schrader valve (a standard tire valve) for pressurizing with a pump, a pressure relief valve and the quick-connect for the hose.
For a passenger side install I would have to say that the hose connector is on the wrong end of the unit for at least two apparent reasons: one, the hose connector is exposed for road hazard damage and two, this puts the hose up at the rear passenger door… not ideal for showering. It would be better for it to be in the rear of the 4Runner.
WaterPORT Pressure
Interestingly, I had a problem with the WaterPORT keeping pressure. I thought it was me at first, not using it correctly, but I did some testing and it was, in fact, losing pressure, and pretty quickly. Upon further testing, I discovered that air was leaking from the Schrader valve (good ole soap around the connection style) at the penetration.
I called WaterPORT and they said to give the Schrader valve a ¾-1 full turn to tighten and see if that fixes it. It did not. They said to call back and I could come by for them to take a look at it for them to “dial it in” but upon doing so they just offered to send me a new one.
In conclusion, I like the unit, the connection to the 4Runner seems solid and I get lots of people asking about it. It’s not going to give a family of four anything close to full showers, but it’ll rinse everyone off if used sparingly.
Happy showering!
Just a word of caution about installing the Waterport. Make sure you have good clearance between the Waterport and the body of your Runner. I lowered the install from the picture above and during an offroad trip, it dented my Runner.
Additionally, Costco has a coupon right now through November 2018 making it a great price !