
Expedition Essentials T4RPAM Dash Mount System For The 5th Gen 4Runner: Installation Guide and What to Expect
When Expedition Essentials released their T4RPAM dash mount, I knew I had to pick it up. I wanted the extra mounting options for my iPhone and future gadgets like navigation systems, possible CB radio, and or HAM radios.
The T4RPAM is made of 5052 aluminum and has 7 RAM mount locations. With 7 RAM mounts on your dash, you can get pretty creative. An option like this in your cabin makes adding and removing accessories easy and incredibly customizable. Dual USB ports are also included in the dash mount accessory. When you need to power and mount accessories on your dash, consider the T4RPAM.
This is almost a one-size fits all 4Runner dash mount system that will work for many owners. Let’s take a deeper look at what this dash mount panel is all about.
Find it online:
- T4RPAM: Check Price
- Flush Mount USB Charger: Check Price
- Extra Hardware Pack: Check Price
Install Overview
T4RPAM Parts and Materials

The 4Runner dash mount panel comes with:
- The T4RPAM itself
- Two brackets (LEFT) and (RIGHT)
- Hardware bag that comes with all the nuts and bolts
- USB Power Cable
- Instructions and EE sticker.
Tools for Install
- Drill
- Philips screwdriver
- 9mm wrench
- Painters tape or any tape that you have on hand
Ram Mounts for the T4RPAM
- RAM Double Socket Arm 1″ Balls
- RAM Diamond Plate 1″ Ball
- RAM Universal Phone Cradle
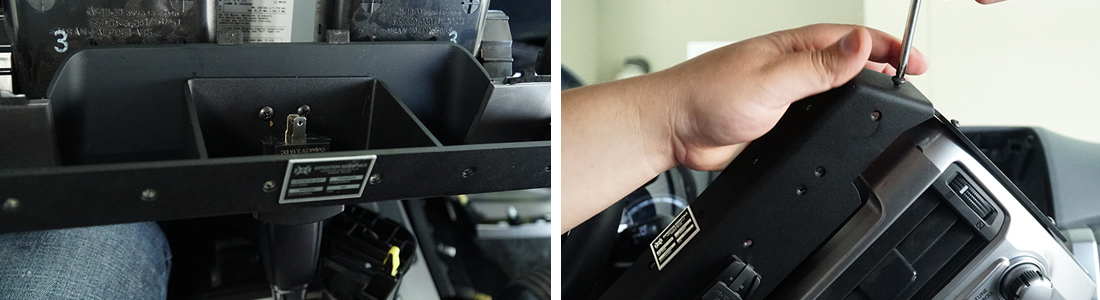
Step 1: Mark points for drilling dash
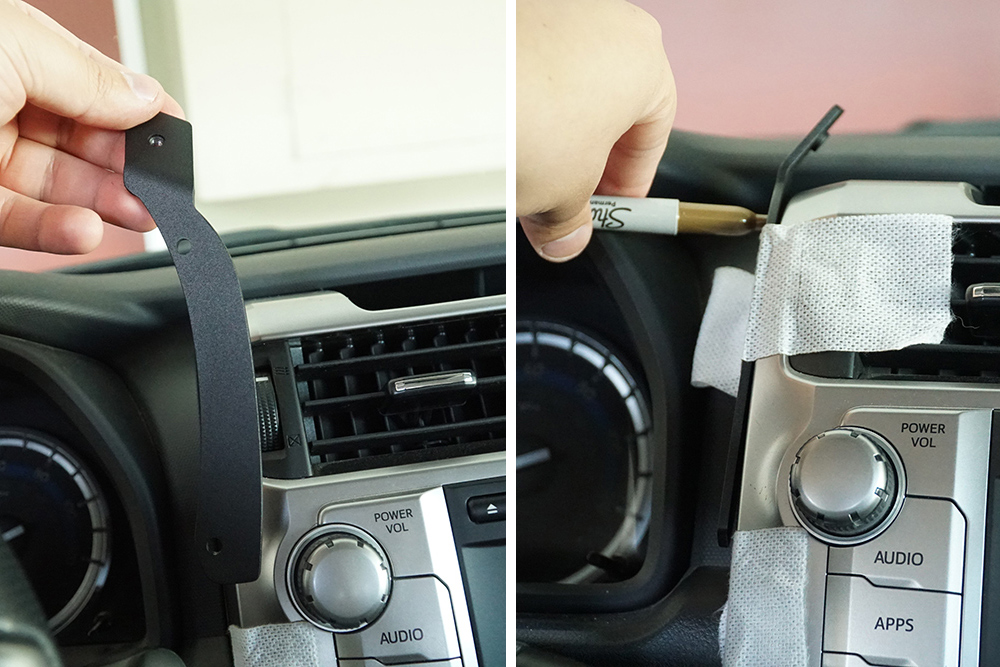
You want to start by marking the points where you will be drilling into the dash. You can use the two brackets as a reference point to where you will be drilling.
Do this by using the tape to keep the brackets in place. Make sure the brackets match up in height and are flush to the radio dash as shown in the photos.
Step 2: Remove plastic dash panel & AC Controls

Next, you wanna remove the dash panels, you have to pull firmly towards you, it could feel difficult but they will come off. Please note that some model 4Runners will have different panels. In the picture above, we have to remove in multiple pieces. With other model 4Runners, like this one, you can just pull the whole dash off in one piece.
If this is your first time removing these it will take a bit more force, you can use a plastic tool to pry it, but its recommend that you don’t because you run the possibility of breaking some clips.
After removing both panels, you will be removing part of the AC controls panel, this step is pretty easy.
The panel comes out with little force and just like the two panels from before all you have to do is grab the control panel from both sides and pull firmly towards you and it should come right out. Do not disconnect any wires, just let it rest over the cup holder for now.
Step 3: Remove 4 Bolts Holding Dash in Place

You will now remove the dash face, you do this by unscrewing 4 10mm bolts located at the bottom of the radio unit.
After removing the 4 bolts you will pull the radio unit towards you making sure you pull in an even force so that you don’t risk breaking any clips.
Once the radio is out you have two options.
Step 3A: Leave Dash Face Connected & Drill
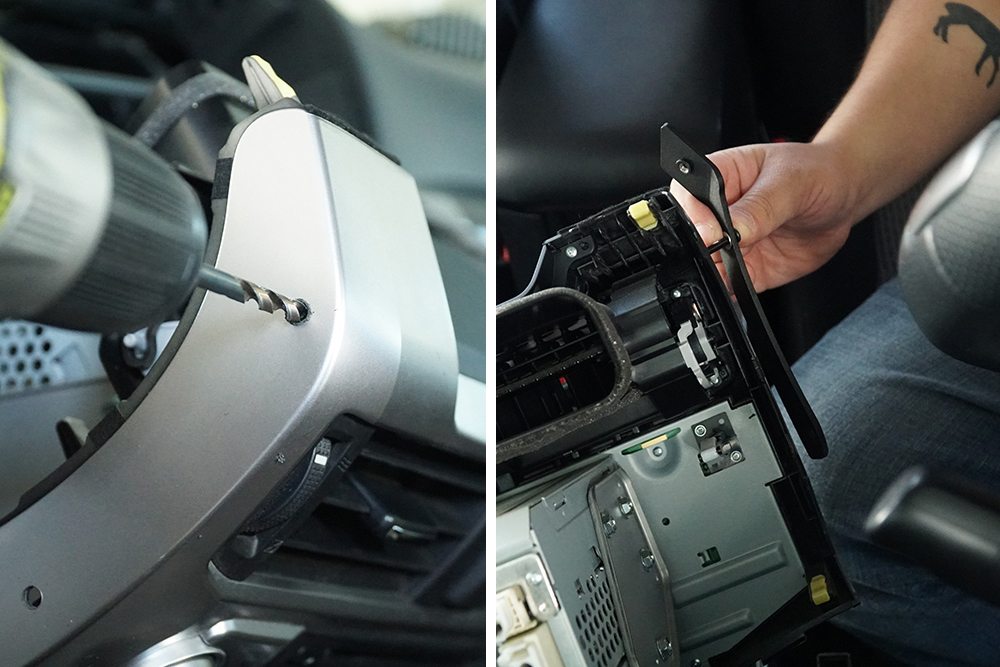
The first option is to leave the dash face unit and harnesses connected and rest the unit on a steady surface. Once you secured the unit in place you can begin to drill your marked holes with a quarter inch drill bit, it is recommended you drill a pilot hole first.
Tip: Use a towel or blanket to protect the touch screen from rubbing on the shift knob,
Step 3B: Disconnect Dash Face & Drill
The second option is to REMOVE all wired harnesses from the unit and place your stereo/radio unit onto a bench and drill your holes. Drill using the same quarter-inch drill bit.
Step 4: Mount brackets loosely to unit
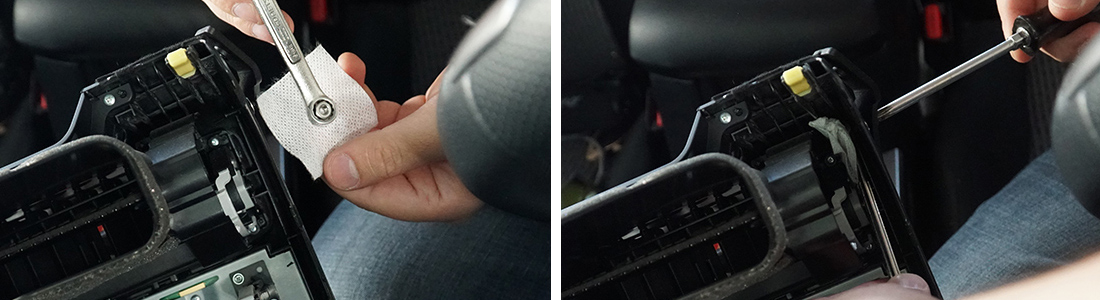
After all your holes are drilled out, go ahead and mount both brackets loosely to the radio unit. This step could be tricky as you will have some difficulty screwing the bolts in since there is very little room to work with, but it can be done.
Make sure you are using the correct bolts, larger bolts go up top, and the shorter bolts go on the bottom. As you start bolting these you will see why they are two sizes.
Step 5: Installing the 4Runner Dash Mount (T4RPAM)
Now you will be installing the PAM mount itself to the two brackets, this step should be easy. If you notice any tension or cant get the bolts on from either side to line up, you may need to reverse the brackets.
Once you’ve installed the PAM mount you can take a Sharpie to mark two more drill points. After your holes are marked you can either remove the PAM mount and drill your two new marked holes or if you have a long enough drill bit you can drill while the PAM mount is set in place.
Step 6: Bolt down unit
After you are done drilling, install all the bolts making sure they are tight enough to withstand some vibrations.
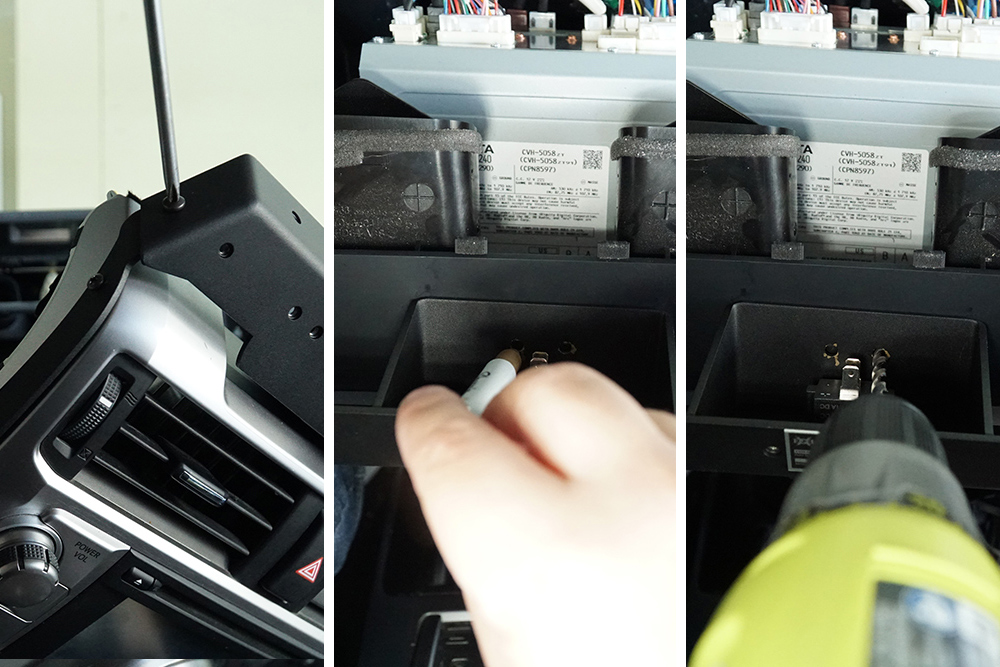
Step 7: Unbolt lower section of the dash
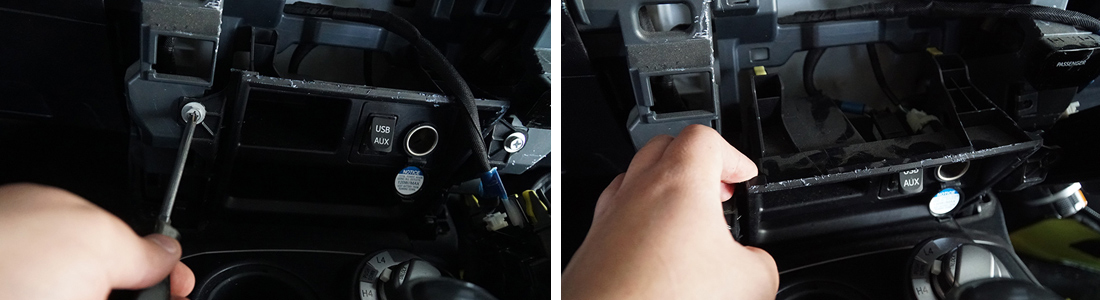
Now its time to install the USB Power cable. You do this by removing TWO Philips bolts from the lower portion of the AC unit. By removing these bolts you will gain better access to the Cigarette plug where you will tap into the wires to provide power to the USB ports on the PAM mount.
Once the two bolts are removed pull the panel firmly towards you as shown in the photo. This panel does not completely come out. It only gives you more room to work with so keep that in mind.
Step 8: Installing USB Power Cable

After gaining access, locate the Cig plug harness and disconnect it. Next, you will use the two included quick splices to connect the wires together. Using some pliers squeeze the quick splice and securely close the clip.
- Green = positive
- White and black = negative
Once you tap into the power wires, route the wire to the top of the radio unit area and connect it to the rear of the PAM mount making sure your Positive and negative wires are connected properly.
Step 10: Final Check on Installation
Before reassembling everything make sure you check all your bolts and connections to make sure all your accessories are still in working order including your USB ports mounted on the PAM mount. Everything should assemble back pretty easy without any trouble.
You now have installed the Expedition Essentials PAM Mount for the 5th gen Toyota 4Runner. Expedition Essentials does sell additional accessories for your PAM mounts, like a CB mic mount, RAM X-grip, and some RAM ball mounts which are recommended to buy if you’re looking to mount any additional accessories.
Great review and detailed instructions!
I’m wondering why you couldn’t use the power for the clock, instead on splicing into the adapter, since the T4RPAM blocks it from future use. Thoughts?
Good morning. I purchased a T4RPAM, which has been awsome so far except for one of the two cell phone holders I bought doesnt have a smooth slide, if that makes sense. One of them you can slide the side in and out easy but the other gets stuck and doesnt open without some force behind it. Is there a way to oil it or anything to make it a smoother operation? Thanks.