
LED Map Light Swap and Bulb Number (194) on 5th Gen Toyota 4Runner
The map lights might be the single most important interior light bulb on your 5th Gen 4Runner. We use our map lights throughout the winter when the days become shorter and there is less light on our side. These lights are great on trails at night, in the grocery store parking lot at night and every other situation when the light is non-existent.
Map lights (directly above your center dash) might be touched more than any other light. The factory bulbs are pretty dim, to say the least. That is why we are going to swap these out.
By going with LED bulbs over the factory bulbs, you will have a better looking whiter light. Not only will the light be a better color, it will also be brighter. The color and brightness of an LED bulb far surpass the output of a stock bulb.
There are plenty of options for interior lights bulbs, but when it comes to lighting, you never want to skimp. If you care about your 4Runner, grab a set of bulbs that are made to last, manufactured and backed by a quality name.
Whatever you decide to install, just make sure it’s quality.
INTERIOR LED LIGHT BULB SWAP KIT

If you are looking to buy an interior light bulb kit, this is exactly what you should buy. This should cover ever major interior light.
- Map Lights (top front lights): (x2 bulbs)
- Interior Door Courtesy: (x4 bulbs)
- Dome: (x1 bulbs)
- Rear Door aks Rear Hatch: (x2 bulbs)
- Vanity aka Visor Light: (x2 bulbs)
Total Interior Lights you need to buy:
- DE3175 (x3) – Check Today’s Price
- 168 (x6) – Check Today’s Price
- 194 (x2) – Check Price
Map Lights Only
- Map Lights (top front lights): (x2 bulbs)
- 194 (x2) – Check Price
- The Plastic Pry Tools: Check The Price
Step #1: Turn off lights (bulbs are very hot)

Start by turning off your lights. These bulbs can get incredibly hot. Turn off your lights and let them cool off for about 5 minutes.
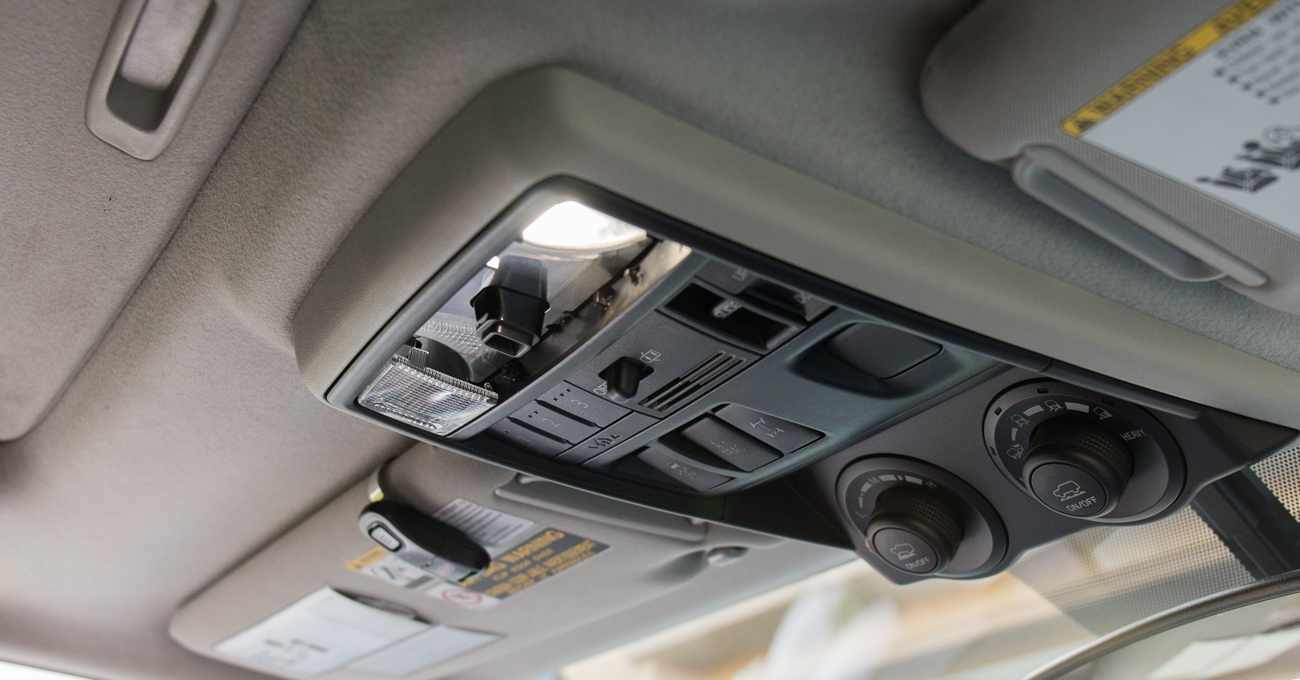
Step #2: Plastic Pry Tools
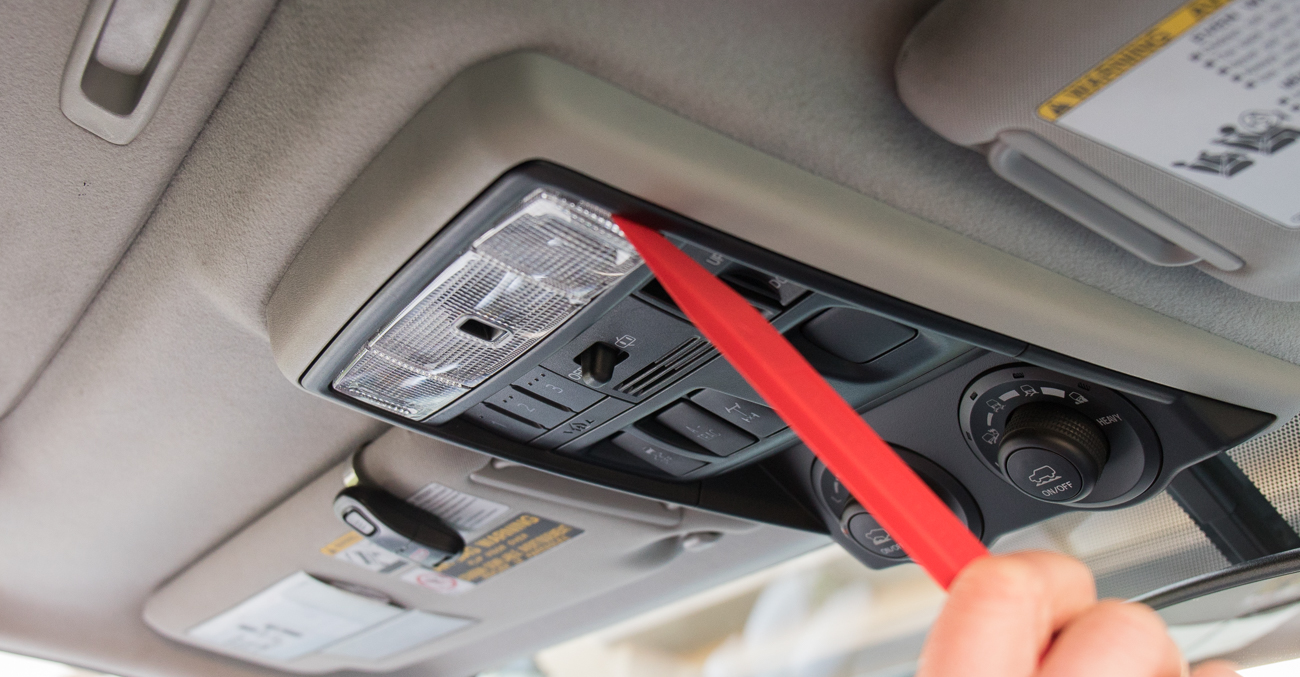
There are four tabs holding the light cover in place. Start by popping off the edge of the light cover with your plastic pry tools. These plastic pry tools are probably the most used tool on the 4Runner these days. They help for almost every mod out there. After your first two tabs pop off, you can easily pop the other two tabs off.
Step #3: Large Scotch Tape
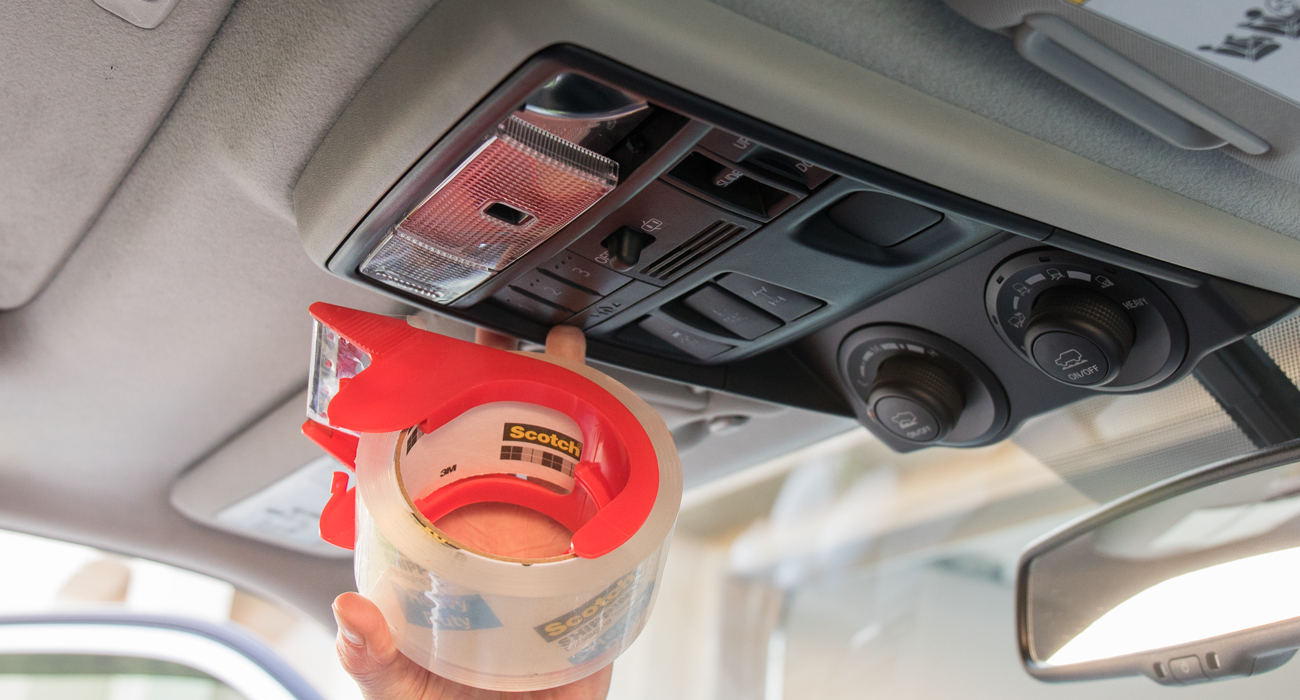
You will WANT this tape. You can probably get away with a smaller roll of scotch tape, but the larger tape helps a lot when it comes to removing the light bulb. I have seen other videos out there of people using tape to get the bulb out. But, I think the best way to remove the lights is our way.
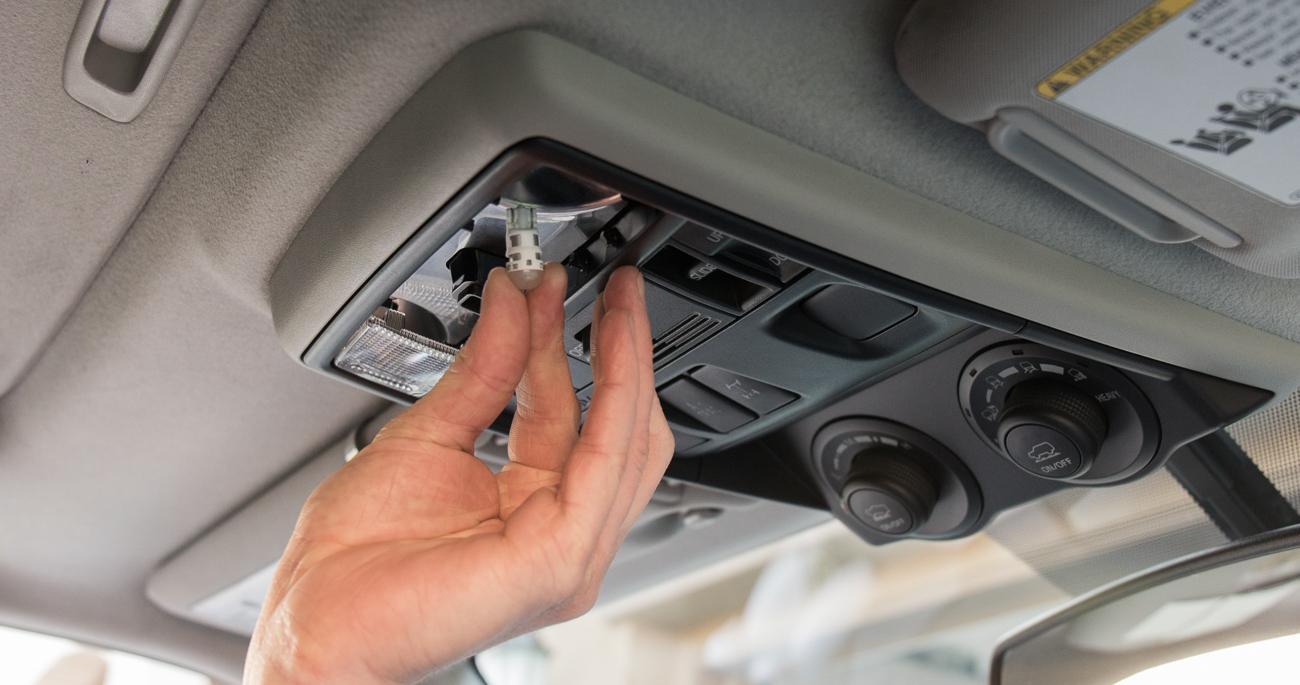
Step #4: Create small “inside sticky” double sided roll
After a bit of “thinking”, this is what I came up with. The strategy makes removing the bulbs incredibly easy. With your large scotch tape, make a cylinder with the tape. You want the sticky side of the tape on the inside. Check out our little step by step below and in the image above.
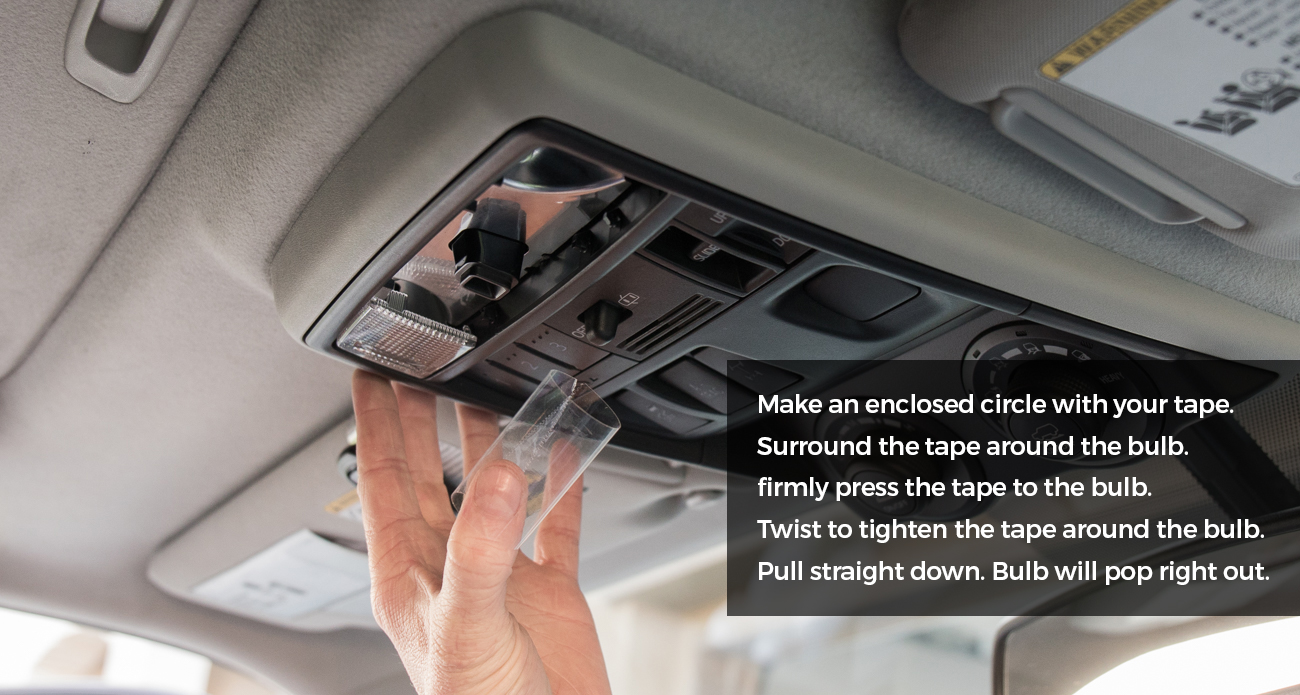
Map Light Replacement Swap (how to get the bulb out)
- Make an enclosed circle with your tape.
- Surround the tape around the bulb.
- Firmly press the tape to the bulb.
- Twist the tape to tighten the tape around the bulb.
- Pull straight down.
- The bulb will pop right out – DONE!
This process makes removing the bulbs SO EASY.
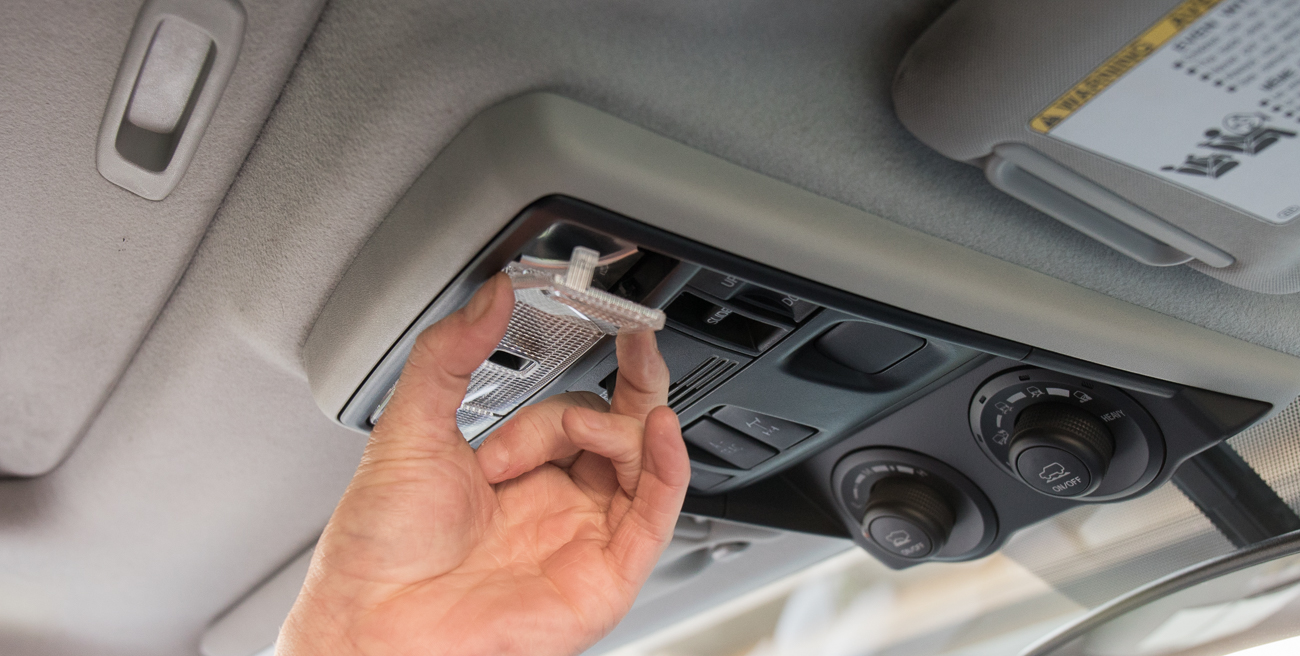
Step #5: Pull straight down (bulb out)
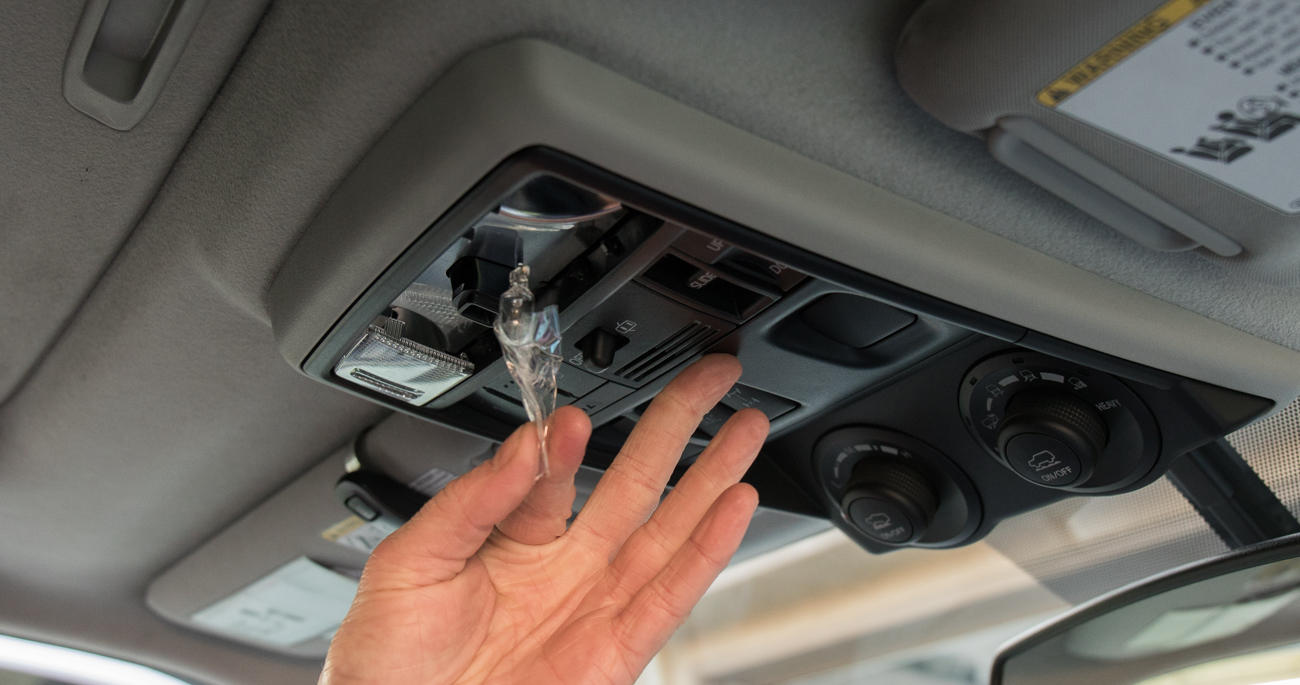
This is what you should see when you pull the bulb out. You can see the tape stuck to the bulb.
Step #6: Insert New Bulb
Step #7: Test Light Bulb
Step #8: Pop Cover back on
Map Light Upgrade Overview
The only difficult part of this process is pulling your OEM bulb out. If you follow our step by step instructions above on removing the bulb, you won’t have any problems. Now that I think about it, this process would have worked great on removing the vanity lights as well. Those lights were in there pretty tight also.
I tried this several times, along with allot of other things. The tape/tools always slides off. I’m convinced the bulbs are glued in. Ugh.
Thanks for the step-by step! Much better than removing the entire overhead unit.
Instead of the tape, I used a fine point Hook/Pick tool. Took me about 30 seconds to replace each bulb.
9 upgraded bulbs so far, 4 door lamps to go on my ‘21 Nightshade
I followed your steps exactly including the tape twisting for the tiny front lights, they came out on my first try. Great directions and pictures! Thank you.
Thank you! After trying everything else for 2 hours, I was about to give up. Using the tape cylinder method and twisting the tape tightly before pulling, worked great! Wish I had found your method sooner. Would have saved me a couple hours.
Jordan – awesome. Thanks, man! It doesn’t work for everyone but I am glad it helped you out. It worked for me as well.
I wanted to replace my map and dome lights with LED’s. In the how to video I found the guys used a long pair of needle nose pliers. I didn’t have any but I did have a 2” spring clamp. Works perfect. Strong enough to grip without breaking and has rubber grip on end so it doesn’t slip.
Can you not change the smaller light in the middle?
Not really, no. That little light is a diode that is built onto the circuit board.
Thanks m8!
I thought I saw a link somewhere to a complete interior 11 bulb kit, rather than having to piece it out. Can’t seem to find one on Amazon. Anyone have an idea if such a thing exists or was I imaging things.
Would love to swap out the bulbs, but not at $10 per bulb.
Any help would be appreciated. Maybe it’s me, but this is seeming more difficult than it probably needs to be.
I bought the set on amazon. Brishine Led kit. Came with all bulbs and tool
Is there a second method for bulb removal (or small tool)? I’ve tried this tape method many, many times to no avail. Tape keeps slipping off bulb, no matter what I try.
thx
I would recommend painters tape. Make sure to make extra slack, crimp, and pull off. Less slippery than packing tape. Cheers!!
You can pull down on the entire housing. It will come off the headliner. You can then reach your hands in between the housing and headliner to access the bulb. The bulb inserts into a small housing that if knocked out of place, can be tricky to put back in place. Or, you can try a pair of tiny bent tip needle nose pliers. Something like this: https://www.amazon.com/Tronex-Model-752-Sturdy-Pliers/dp/B00KZ3AGI8/. Also, you may want to wrap the tip in masking tape or duct tape to prevent cracking of the bulb. IDK if those exact ones will even work, just putting out ideas.
Hello I have a 2019 trd pro and install the map lights 194, did not turn on neither side the proceeded to replace with the original now they don’t turn off, any suggestions?
Did you try reversing the polarity (just rotate the bulbs 180 degrees) and then plug it in again?
Much easier to remove the 2 screws behind the Glasses holder and pop off the console cover from the front and rear– once removed, simply twist out the bulb sockets and replace the bulbs.
If you use the tape method, as I did, stubborn or stuck bulbs may not come out or you stand the risk of pushing in the bulb socket into the console —
Thanks
If you have a limited 4Runner, that would work. Thanks Dan!
Using tape to aid in removal of the map light bulbs is almost essential, but I had to use an additional step which others might find helpful. No matter how tightly I pressed the tape on the bulb, it would just slide off when I pulled it. After a dozen failed attempts, I left the tape on, with the lights on, for a couple of minutes to allow the heat to melt the adhesive. I then let the lights cool for a few minutes in order to create a strong bond before pulling the tape. The bulbs finally popped right out!