
Shot Cred: @Dumbo_t4R
Rago Fabrication Ditch Light Brackets w/ Baja Designs Squadron Pros
I purchased my Rago Fab ditch brackets as part of their Black Friday and Christmas sale event. I received them about 5 business days after the order which impressed me during the holiday time they also came with the ditch light factory replacement switch.
I received the Baja Designs Squadron Pros two days after I ordered everything as a package. Rago was extremely informative the entire time and answered a ton of questions I had pre and post-purchase.
Pricing was fair for what I was buying especially with the incentive of a mail-in rebate from Baja Designs themselves and the discounts from Rago Fabrication.
I can say though, it’s been a month and I haven’t received a rebate yet, but am not worried about it right now coming out of the holidays.
Packaging from Rago was perfect. They had the ditch brackets labeled and padded to ensure a flawless delivery with the installation.
The Setup
- Baja Squadron Sport: Check Price
- Rago Ditch Light Brackets (Low-Profile): Check Price
Install Overview
Installation of the ditch brackets themselves is straightforward, especially following the Rago Fabrication written directions delivered in the package. And, Rago Fabrication has many YouTube videos linked on their website. The light install was not as straightforward, unfortunately.
The wiring harness that comes from Baja Designs with the lights is too short to reach both sides while tucking away and leaving a factory look.
Luckily this was an easy fix while considering myself to be slightly mechanically inclined. Baja Designs also offers spare connectors with their Squadron lights, so I extended the harness.
2 to 1 Wiring Harness After Extension of BD Harness

The harness that comes is to “join the 2 lights” into one connector so they can both turn on and off simultaneously.
There is a longer set of wires (passenger side) with a connector for the pods and a shorter set (drivers side).
I used some spare black and red 16-gauge wire and attached a new male connector to one side.
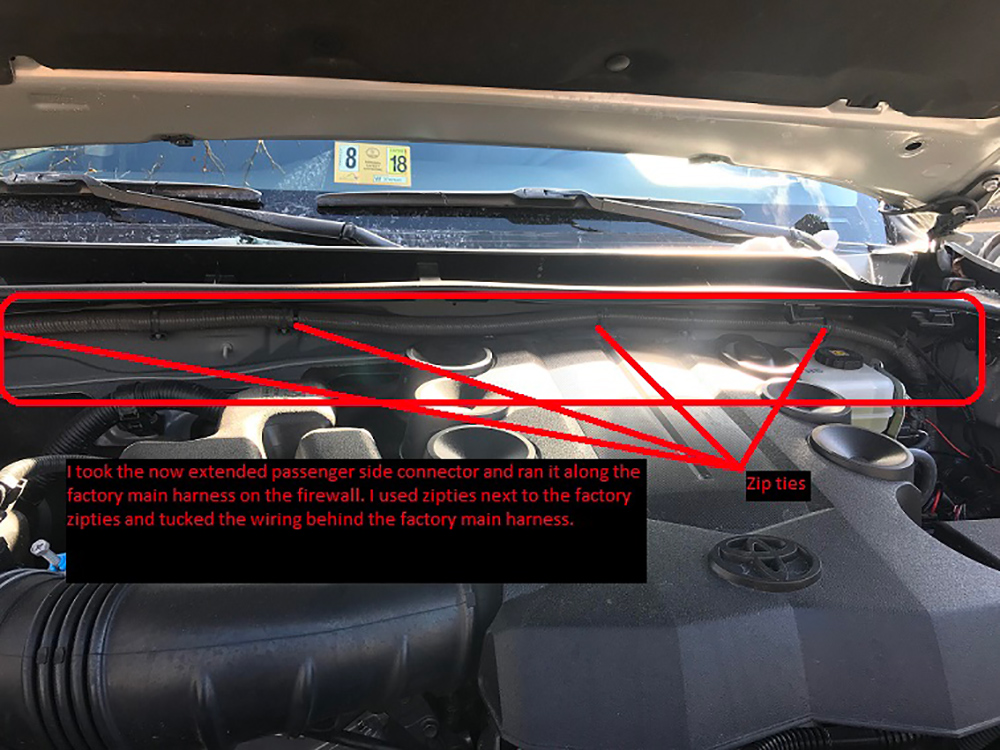
After measuring the length so I could run the wires along the factory main harness on the firewall I wrapped it in plastic flex wire loom to be a bit safer and give a more factory look.
Connector Wiring


Once run across and in the position I wanted, I cut off the original passenger side wire set.
I then spliced in the longer set I made with the driver’s side, using weatherproof butt splice crimp connectors that I also put extra heat shrink on as a safety precaution.
It then became a 2 to 1 connector again, it looked and would function as it did before just with a longer passenger side wire connector.
From there I used the BD supplied power cables that already had connectors for the battery with an inline fuse, I ran it and set it up but did not connect to the battery just yet.
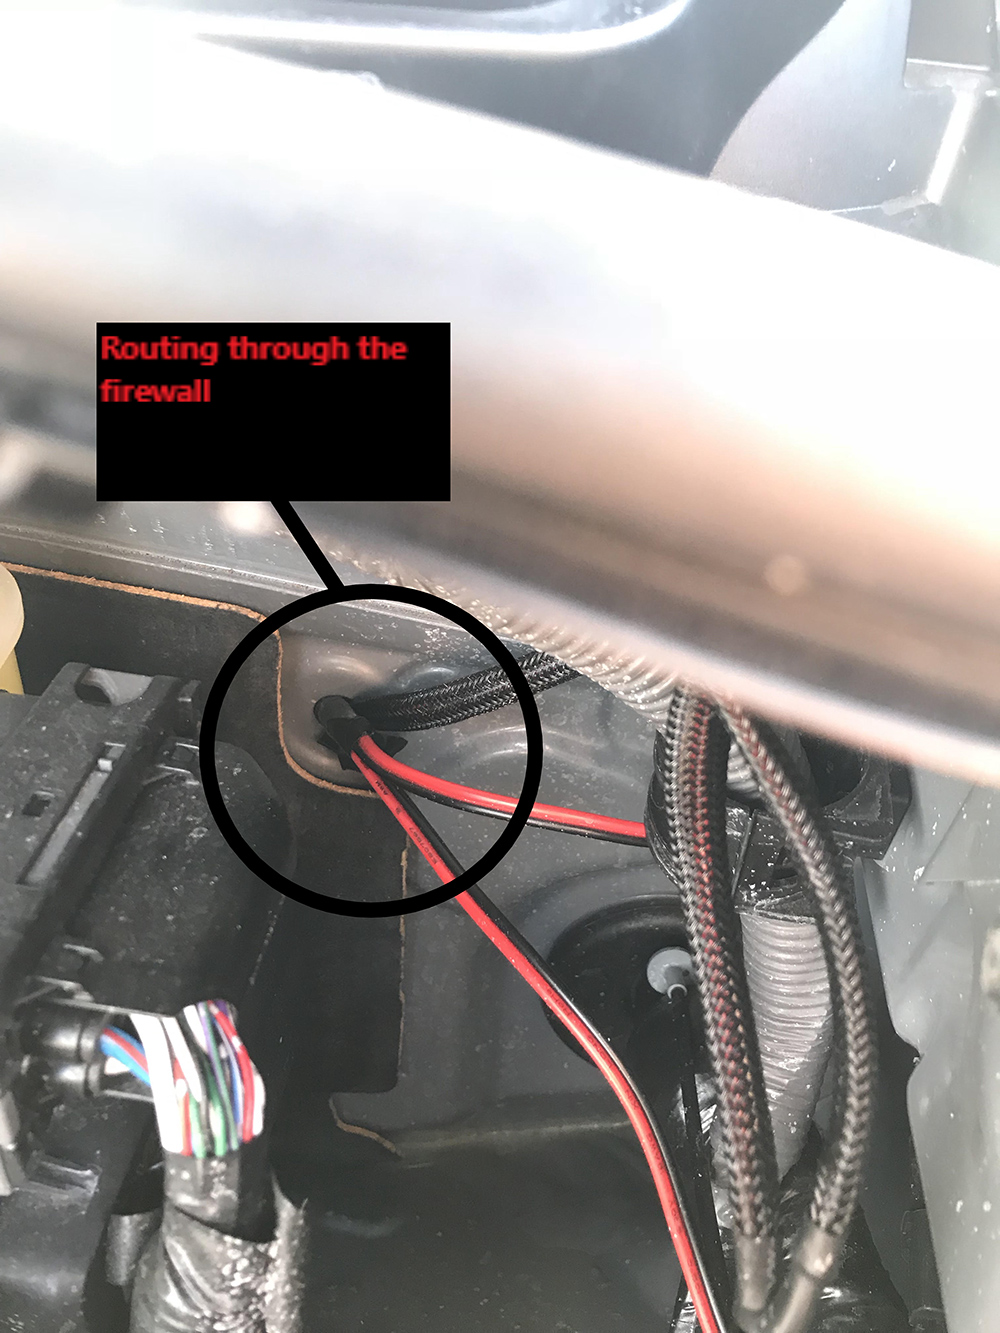
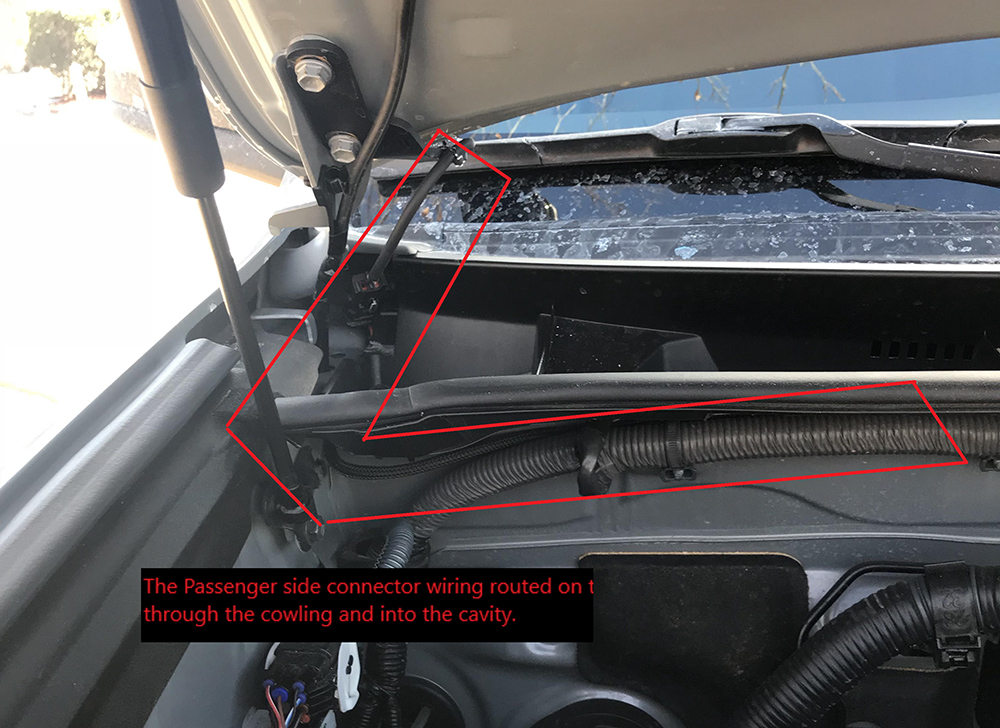
I routed all the wires that connect to the factory replacement switch through the firewall and into the cab (don’t mind the pictures I pulled everything out to be seen once tucked away they are not easily seen.)
I then routed the wires to where I was placing the factory switch and yes there was a lot of extra wire but I bundled and zip tied it together to no get tangled or be messy. From there I wired the switch according to the schematic on the Rago website.
I used my power source for my running lights by using a t-tap connector on the green wire of my wiper heater switch. This is the power source for the running lights on that circuit. As shown in the pictures you’ll see my wire routes on both sides along the firewall and through the firewall. You’ll also see the switch illuminated and the t-tap connector.
The Switch
The switch itself is of great quality and a quick install. My only dislike is the blue running light only seems to illuminate the words and not the actual feature of the ditch lights on the switch so it is as if half of it is not illuminated when my running lights come on. Not a big deal just my own OCD and gripes this may not bother others.
Now as far as the lights, these things are POWERFUL at about 4500 lumens each they are insanely bright. I put them to the test and went to a football field in the dead of night and turned them on I could see the opposite end zone and then some pointed straight forward.
I did buy the spot lenses and an extra pair of wide cornering and have yet to try out the wide cornering. The Rago product is amazing coupled with a truly fine lighting product and these are near perfect so rating time.
Quality of Rago fab brackets 10/10 quality of BD Squadron pros 10/10 quality of factory replacement ditch light switch 8.5/10.
Ease of installation, I give this a 2 out of 5 and a total time of 1.5 hours because I took my time and extended the harness. All and all amazing amazing amazing.
Final Look

So I have what I think is the same setup you’re using here. The BD relay harness just has 2 wires (red and black for power and ground) coming from the harness, but the rago fab switch has 4 wires. Can you offer some help on where all these wires went?
Thanks for the feedback guys this is my rig and would be more than happy to help anyone out with questions or anything Instagram: @Michael - @Dumbo_T4R
Nice blog very descriptive, @deadpool_trd is my ig and I’ve been looking at your blogs to see what upgrades I can do to my pro!
Love rago design and this write up as usual super informative