
Recently, we reviewed the Rhino-Rack Pioneer, which stands out among other off-road roof racks like the Front Runner Slimline 2, Gobi Stealth, Baja Rack, and K9. All these racks are solid options for the 5th Gen 4Runner. We chose the Rhino-Rack with the Backbone Mount System, but unfortunately, it was back-ordered at the time.
Backbone Kit (700lbs Load)
- Rhino-Rack Pioneer Rack (60″ x 49″)
- Rhino-Rack Backbone Mount (Factory Rail Replacement)
CXB Leg Kit (175lbs Load)
- Rhino-Rack Pioneer Platform (60″ x 49″): Check Price
- Mount Option 2: Heavy Duty CXB Leg Kit (Factory System): Check Price
- Eye Bolts for mounting gear: Check Price
The Backbone Mount System is a recent addition to the Rhino-Rack Pioneer Platform lineup. It replaces the factory rail system with factory bolt placements, offering a much higher load rating—700lbs compared to the 175lbs of the Factory Rail Kit.
We decided to move forward with the Rhino-Rack due to its slim design, lightweight build, and competitive load rating. However, since the Backbone Mount system was out of stock and we already had the Rhino-Rack Pioneer Platform, we opted for the CXB leg kit.
After installing the Rhino-Rack with the factory rail mount CXB leg kit, it looks great and works well, especially for those not planning on mounting a roof-top tent or frequently standing on the rack. For those who plan on using the rack for heavier loads like a tent, the Backbone Mounting Kit is a better choice.
We’ve also installed new tires (Toyo Open Country AT ii – 285/75r17) and wheels (Fuel Anza Bronze 17×9 -6), and we’re excited to replace our ToyTec Leveling Kit with an Icon Suspension soon.
Stay tuned for an upcoming post on installing the Rhino-Rack with the Backbone Kit.
Table Of Contents
1. Unpack all Parts

The first and most important thing when starting any projects is making sure you have all your parts. The Rhino-Rack Pioneer came separately for us, so we made sure everything was in the box for the rack first. Unpack your Rhino-Rack Pioneer and make sure everything is organized and ready to go.
2. Unpack CXB Leg Kit

Same goes for your CXB Leg Kit. This one is pretty self-explanatory. There are four legs and one universal allen tool.
3. Slide CXB Legs to Pioneer Rack Crossbars

The first step for this incredibly easy install is to slide your legs onto the Pioneer Rack Crossbars. There is a metal spacer bracket that bolts down to the Pioneer Rack Crossbars. Slide the Pioneer Rack Crossbars under this section and then under the plastic section as well. They just slide right on. A piece of cake. Repeat this process for all four legs.

4. Hand Tighten Leg To Crossbars
Once your legs have been added to your Pioneer Rack Crossbars, hand tighten your legs to the crossbars. If you do not hand tighten your legs to the crossbars, the legs will slide back and forth while you are measuring, and adjusting a few other items. With the legs hand-tight, you will still be able to slide them around for adjusting the width of the legs. Repeat this process for all four legs.
5. Slide Pioneer Crossbars Into Rack
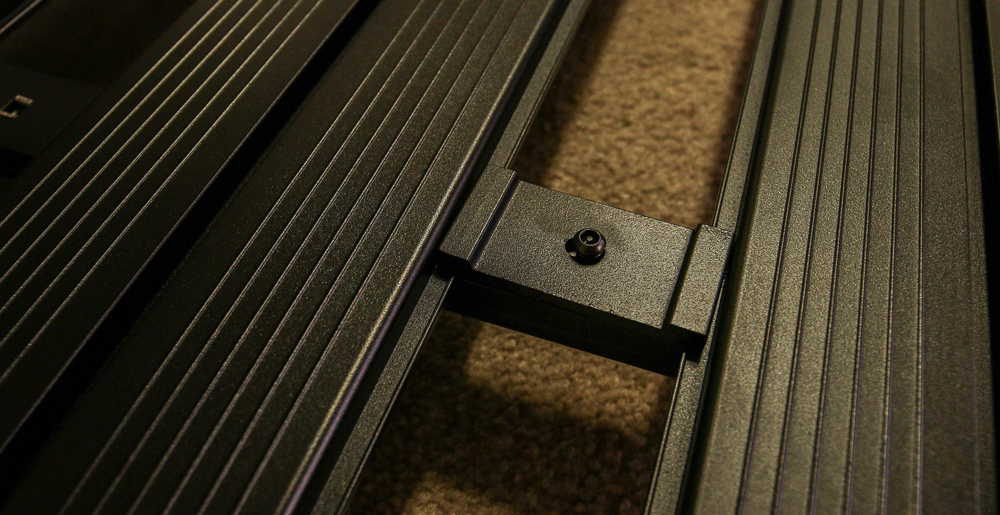
Once you have your legs on your crossbars, drop the cross onto the rack, while the rack is upside down. You want to start with the crossbars at an angle so that you can swing them perpendicular to the stationary crossbar. The crossbar will slide underneath the edge of the Pioneer roof rack under-rail to which you will bolt down with given hardware and a spacer.
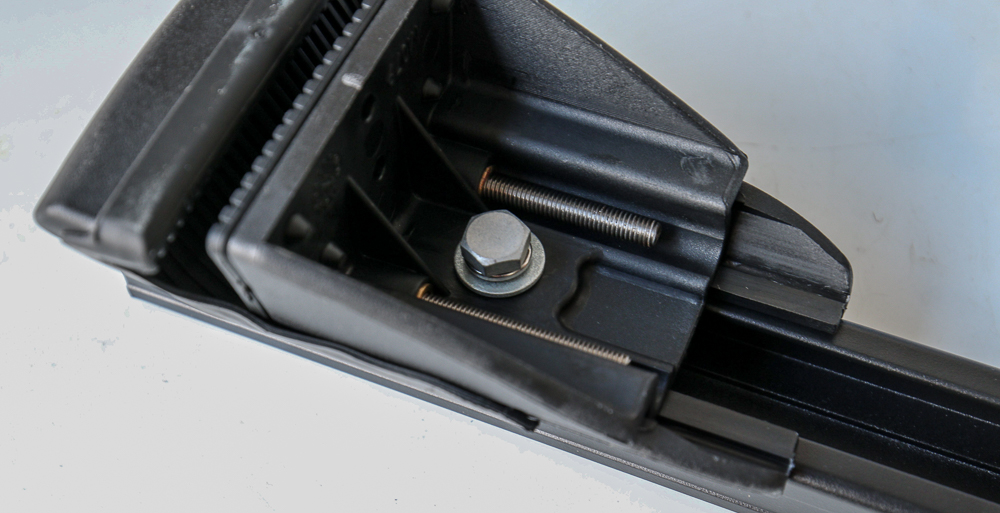
6. Insert Spacer & Screw Down Hardware

Step 6A – Drop in spacer provided perpendicular to the crossbar.
Step 6B – Drop washer onto spacer. With the index finger, turn spacer 90 degrees.

Step 6C – With the index finger, push the spacer underneath the Pioneer rack rail & screw down
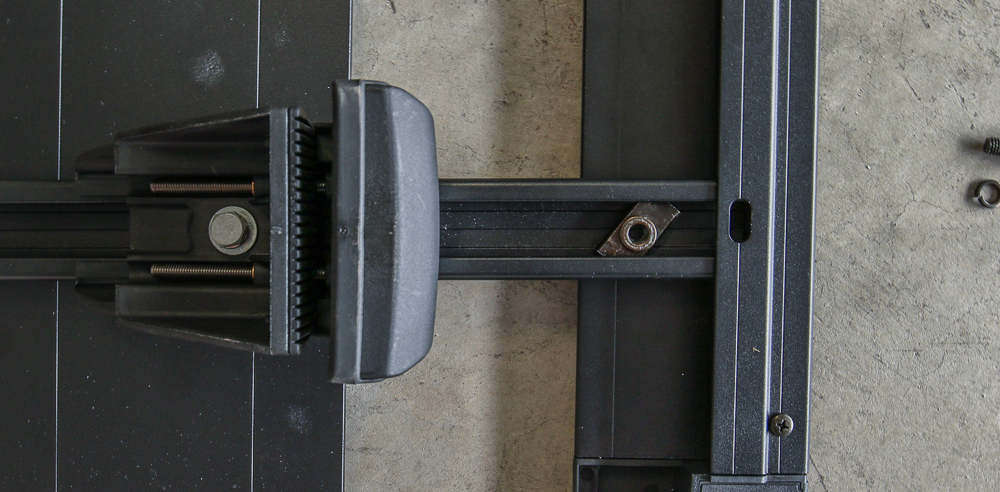
7. Measuring Crossbars Width (41.5″ on Center)

You will not have to do this step, as we did it for you. The distance from the center to center on the factory roof rails is about 41.5″. So, you want your width of the openings on the legs to match up with this.
8. Bolt Down CXB Legs to Crossbars at 41.5″ on center

BEFORE YOU DO THIS STEP: Open up the spacing of the legs all the way. Using the provided allen, loosen up the leg space on all four legs before bolting down. This will open up the legs and allow the rack to drop right into your factory rails.
MEASURE & BOLT LEGS: Set legs about an inch away from the edge of the rack. This will give you 41.5″ on dead center. Using a 1/2″ socket, bolt down the legs to the crossbars once you have the perfect inch spacing.
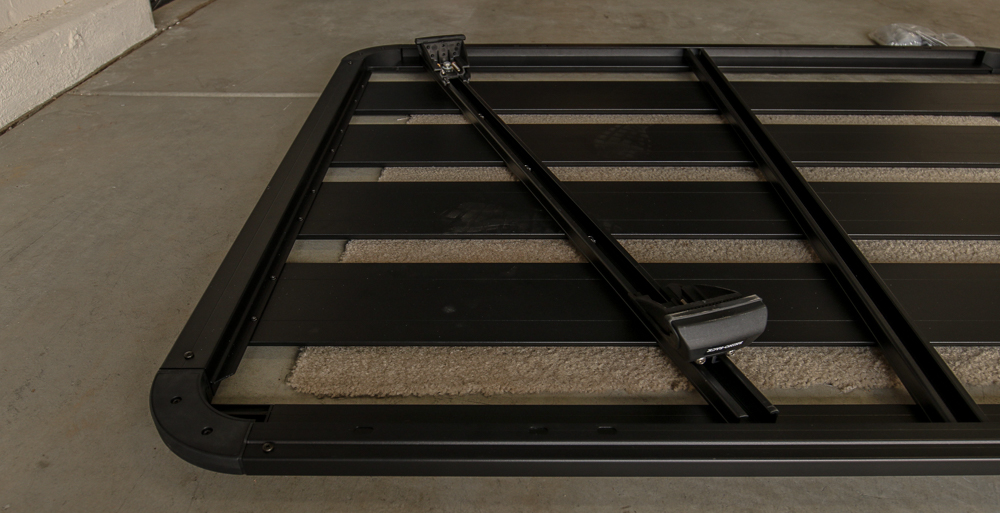
9. Turn Rack Over & Mount Bracket Hardware
Once everything is buttoned up below, turn your rack over and mount your brackets from the top down.
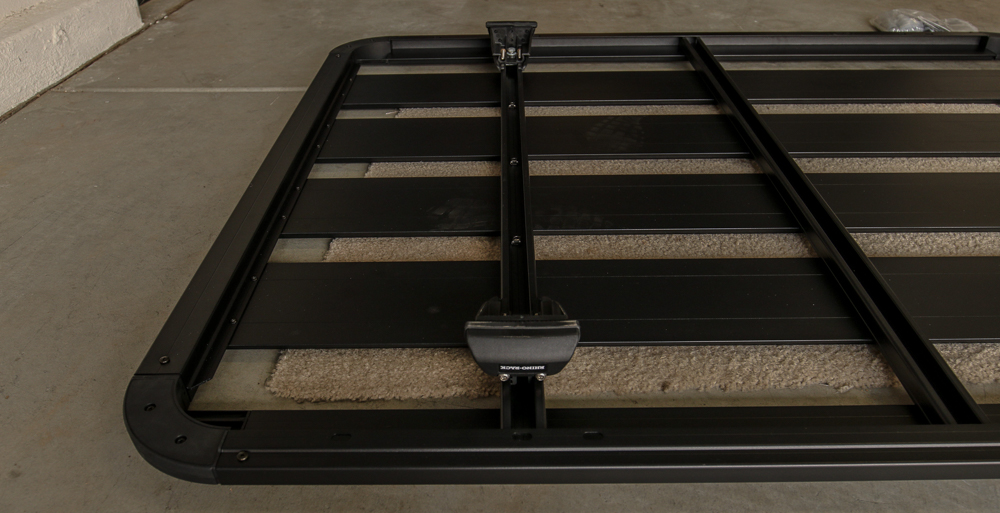
10. Mount The Rack!

Everything should be nice and tight. Ready to mount!
Using two people, lift your pioneer rack up onto the factory rails. Everything should line up perfectly. If the legs do not automatically seat into place, just give them a little pressure and they should pop right in. Once all of your legs are into place, you can tighten down the legs to the factory rails.
Super Easy!
Final Thoughts
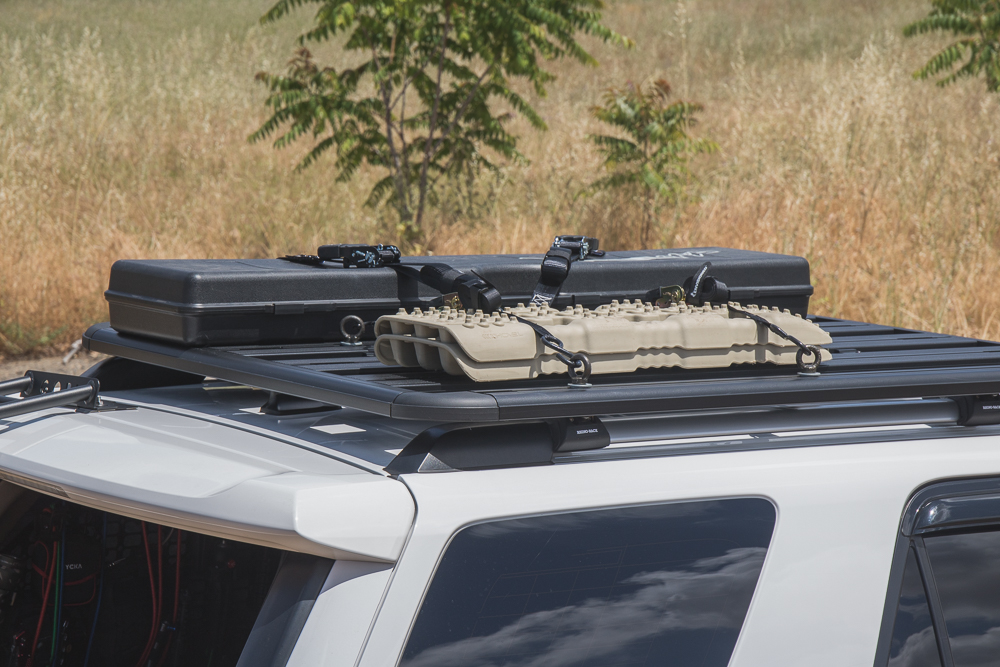
Super clean, low-profile, easy to install, and affordable—what’s not to love about the Rhino-Rack Pioneer? It’s a great introductory roof rack for those not wanting to spend over $1000. Additional hardware is available for securing almost anything on the rack. It serves well for most uses and is easy to swap out if you decide to go a different direction later.
While we haven’t taken it off-road yet, the on-road performance has been good, with only a slight wind drag noise, rating about a “2” on a scale from 1 to 10. We’ll provide an update once we use it off-road. Let us know what you think if you try it!
Man prices have changed! The platform alone is already $1,000+. Add the leg kit and you’re looking at close to $1,500. I really like the simplicity and almost OEM+ look, but at nearly $1,500, all racks are now a consideration. I checked multiple online vendors, ebay and amazon, prices vary but they are all pretty close.
Since the CBX mounts to the rails, could you theoretically go with a wider platform?
just installed the rack using the SX legs!
I had to move it forward a bit because the sx legs sit lower than the cbx ones and the rack was hitting the antenna housing. No issues with the sun roof though. Also needed allen keys with the ball end to tighten it down.
Jon, did you install the sx legs to the optional sx crossbars or just bolt the sx legs directly on to the platform?
I realize this is an old comment, but I just got the 5 series 60” x 49” Pioneer platform and the SX legs attach directly to the platform. Like mentioned above, you have to set it far enough forward to avoid the shark fin, because it doesn’t clear vertically.
Update: I didn’t love how far forward it was sitting, so I just moved the crossbars about 6-7cm forward each from the Rhino Rack recommendations, and was able to put it over the sharkfin in the back. Clears the sharkfin barely and clears the open tailgate by a few inches. I think it looks better like this, and sits more like the pictures in the post above.
would it be possible to use the longer 76″ pioneer rack in this method?
Hi, Does the two cross bar, comes with the pioneer platform?
I own a 2020 4Runner sr5 with sunroof. Can you recommend a roof platform/rack that utilizes my existing factory roof rails and maybe existing cross bars that will allow me to stand on and take photographs? I don’t plan on ever using a roof top tent or even carrying much offroad gear. If there is nothing on the market maybe something that will utilize existing factory holes and no drilling.
Is it recommended to use the backbone with a 60×49 rack? When i go to their website it recommends the 76 x 49 but I don’t want one that long and would like the weight capacity for an RTT. Thanks
Hi! I see there is a ladder in the pictures above. What brand is the ladder? I’m looking for a roof rack and ladder for my husband for Father’s Day. I really like the Rhino rack but it doesn’t seem to come with a ladder. Do you mind sharing a recommendation?
Thanks! Michelle
Brenan, I have been looking through the “trail4runner.com” website to find different mods for my 2017 4Runner and I came across this rack install that you did. First, I want you to know that I really appreciate your write up and it looks great. While researching this rack, I came across a Youtube video of a company called “Rack Outfitters” and they showed the same rack but the longer version. I wanted to ask you two questions about the one you chose.
You went with the 60″ X 49″, why? Also, I see that you dont have that added accessory “full rail kit”, is that just a preference thing? It looks like it would keep things on easier/better, I’m just curious why you left it flat and didnt add this.
In this video, “https://youtu.be/2gygWQjZDzc” by Rack Outfitters (Toyota 4Runner with Rhino Rack Backbone Pioneer Platform) they show you the full length WITH the full rail kit. In another, they show you the same rack without it. They went with the 84″ X 49″.
What do you think about this set up? I think it looks better and gives you more room to strap things down. I would just like to know why you went with the shorter version. Do you think the longer one decreases your MPG? More wind noise? Do you think it interferes with the sunroof?
I appreciate any info you can give me, thank you.
I liked the look of the 60″ X 49″ at the time. Super low profile and clean. At the time I didn’t have much of a need for storage, it was more of a just in case, and common trips to the hardware store. I like the backbone set-up as well. The shorter rack does not interfere with the moonroof at all, but the larger one will (not much but enough to look up and notice it). If I could choose between the two, I would go with the backbone system. Its longer, can fit more storage on top or possibly an RTT. The backbone rack is a bit more aggressive as well. MPG shouldn’t be too big of an issue but you will have a slight increase in wind noise.
I had no issue with the products from this company. I assembled the 74″x49″ Pioneer Rack, Wind Faring, Full Rail Support, Grab Handles, Tie Down Hooks, and Backbone System on my Trail Premium and love the outcome. 720lb static load and very low profile made this rack far and away the best option for my needs.
I chose the rhino rack backbone system to add weight support and keep the profile low. The powder-coated rails were imperfectly level and took some extra muscle to complete the install but overall a very sturdy setup. Highly recommend.
Would the 72×57 rack work with the 4Runner?
Can this rack be bolted to the factory crossbars on a 2018 4 Runner?
I just installed this earlier today. I used the SX100 legs with vortex bars. Rhino Rack, etrailer (awesome CS), etc have this as a specific package now with the legs, bars, adapter kit packaged together. This is different bar and legs than what’s described here. The SX100 legs actually do clamp properly the the 4r factory rails. Also, you will HAVE mount the bars and legs first, then the platform. The platform will sit over the clamp adjustment which is why.
I love the looks, no noise,etc. Thank you trail4runner for this write up or I may have ended up with something different.
Hi. Do you have a photo?
I’m getting a lot of wind noise and somewhat regretting purchasing the 76 inch Pioneer Platform. If I use flaring to reduce the wind noise it makes my sunroof obsolete. Does anyone have any suggestions?
I only notice wind noise it I have the sunroof up. I bought the fairing but not sure I’m putting it on yet.
Thanks. I think the difference is that the platform runs across the sunroof. I can hear a lot of wind noise when the sunroof is closed. It is actually quite bothersome.
Will this hold a roof Top tent weight?
Can it hold it? Probably. Is it recommended? Definitely not. For an RTT system, you should look at the backbone system if you want the Rhino-Rack.
Not making a recommendation but just sharing my personal exp, I’ve had the Pioneer SX Platform mounted to my factory rails on my 5th gen for awhile. Mounted my Front Runner RTT to Rhino’s accessory bar they offer — been on the trails/long commutes, 0 issues. Granted this RTT is lighter than most, and my gf and I are fairly petite.
Does anyone know which slots I should use for the legs? Does it matter? I have the 42100B model (60×49).
What are the wheels in the top picture?
ATX – atxwheels.com. I think those are discontinued, though.
noooooooooooooooooooo….yeah i finally found it in another post and checked their site and couldnt find them. Thinking if I can find the exact model, maybe I can find someplace that has a set sitting on the shelf. really like those wheels.
btw – love your site…keep up the good work..
Shane, Some ambiguity here. Do you mean by “interfere” it prevents the sunroof from opening or do you mean will it cover all or part of the sunroof window? The front edge of a 60″ rack is just aft of the sun roof, so . . . The other “interfere would probably depend on the way the rack is mounted and I doubt you would/could mount the 79” Rhino-Rack on the stock roof rails.
I pulled the trigger with this recommendation. Love the low profile look.
Wish I saw this earlier, I need a rack!
Pretty sure it’s actually up for sale. Can’t speak for Brenan as to why, but it’s been listed on Overland Market.
Yes, I saw this on the Overland Market Instagram after I put my order in. No worries, I’m looking forward to getting mine set up.
At almost a year, has your opinion of this rack changed at all? Have you purchased more accessories for the rack? I’m looking at this rack for my 5th gen and am looking at including the new Pioneer Platform fairing and the Hi-Lift jack mount for starters. Appreciate the great write ups!
Matt, I really did enjoy this rack while it was mounted. I didn’t have anything permanently mounted, but I had about 8 eye bolts and strapped a bunch of gear up there. I mounted recovery boards, storage boxes, storage totes, Christmas tree, Home Depot runs, etc. and everything worked as advertised. It was a really nice, simple, low profile platform that worked for my needs at the time. The only downside is you shouldn’t mount an RTT up top, but for some people, that doesn’t really matter. At the end of the day, I would recommend this rack for sure.
Paul, It is currently for sale for $650 (still available in Sacramento if someone wants to take it). With 8 eye bolts and the CXB leg kit, the total was $950 +tax. You’re basically getting the leg kit and the over-priced eye bolts for free. Updated the post with some current shots.
Is there any alternatives to the rhino rack eye bolts? They seem overly expensive.
Thanks in advance.
Any negative reason why you’re selling it now? I’m about to pull the trigger on one with the backbone system and I don’t want regret it a year later when it cost me $950.
No reason other than I am ready for a change and I have an opportunity to have a custom full-length built for a good price. It’s a really nice rack and I will miss it for sure.
Good to know, It seems to be a excellent rack for its price. I appreciate the reply.
ive had my rack for a little over a month now and i love it. purchased a shovel mount and also made a custom bracket to mount my water tank. only thing i was worried about was over tightening or not tightening the clamps enough. be careful when you install it as i placed it too far forward and it scratched my sharkfin antenna a little.
did u have any issues eith the cxb leg kit not clamping down all the way on the factory rails? mine doesn’t seem to hook all the way under.
Yeah, ours did not clamp down underneath either. But, with all four corners clamped down, the rack is solid. I have had the Rhino-Rack mounted for almost a year and not one issue. Solid rack man.
Does the 76″ x 49″ interfere with a sunroof if you have one?
Not at all. The next size up would.
Hey, so the 84 would interfere with the sunroof? In what way? I’m trying to decide which one to purchase. 76 or 84?
The 84 would sit over the moonroof causing some extra wind noise, I would think. If you are cool with extra wind noise, it may work for you.
Thanks, I did some measuring and it looks like the 76 would sit about half way across the moonroof. You wouldn’t notice it when driving. The 84 would sit right above your sight line if you look up. I am a stickler for noise so maybe the 76 would be the way to go.
Could you install a ladder with this rack? Trying to decide between this (with the Backbone) and the PrinSu 7/8 RoofRac. Most likely going to use it for hauling stuff and maybe some occasional rig-top lounging…
Paul, yeah man. I installed the Gobi with this rack. You can see that post here.
Be very careful with the products from this company – I ordered this platform with the backbone mount and received 1/2 the hardware to put it together. Contacted Rhino – (Rhino who) no- one replied or answered emails. I contacted the vendor – they ordered the hardware but will take 3-4 weeks to get it. Gave up and went to the hardware store to try and find black oxide stainless metric security bolts – Good luck with that – also purchase the front rail kit for this rack – also missing hardware and mounting feet – Same story again – as above
Great looking and beefy product – horrendous service/ poor Quality control and poor instructions – (Measurements were not even close to mount the rack on the for the Back bone mounting system)
Just thought I would give you guys a heads up
I didn’t have as much trouble with mine but I lost two of the little spin nuts to mount to the backbone. I ordered them over a month ago and they still aren’t here. besides that I love the rack