
The aesthetics of the 5th Gen Toyota 4Runner are already pretty awesome straight from the factory. However, they can easily be changed with some simple modifications that don’t have to break the bank. One such upgrade is doing a chrome delete on the turn signals and making them sequential in the process.
The 4Runner Lifestyle sequential turn signals add a sleek look and increase visibility with larger LEDs compared to the OEM ones. They’re offered in either black or smoked colorways; this review will cover the former. The turn signals are an inexpensive upgrade at under $100 and are a simple plug-and-play, DIY mod. In my opinion, they’re a no-brainer upgrade to the OEM turn signals.
Find It Online:
- 4Runner Lifestyle Black Sequential Turns (Pair $80): Check Price
- Suparee Black Sequential Turns (Pair $55): Check Price
Table Of Contents
Installation

For the mechanically challenged like myself, it took about 60-90 minutes for the installation. Part of the hang-up for me was properly seating everything back in place and not having any panel gaps on the mirror housing. I also took my time so that I wouldn’t break any tabs.
Tools:
- Phillips Screwdriver
- Trim tool (optional)
- Mirror/Glass Cleaner for cleaning fingerprints
Step 1. Position The Mirror

Angle the mirror forward so the cap is closer to the fender and hood side. This will allow your fingers to have access between the mirror housing and the mirror itself.
Step 2. Remove The Mirror From The Housing

Press the mirror in on the right side so that a gap is exposed between it and the housing. Using your fingers, carefully pry the mirror away from the housing. Take your time in doing this, as you want to be careful of the wires connected to the mirror.
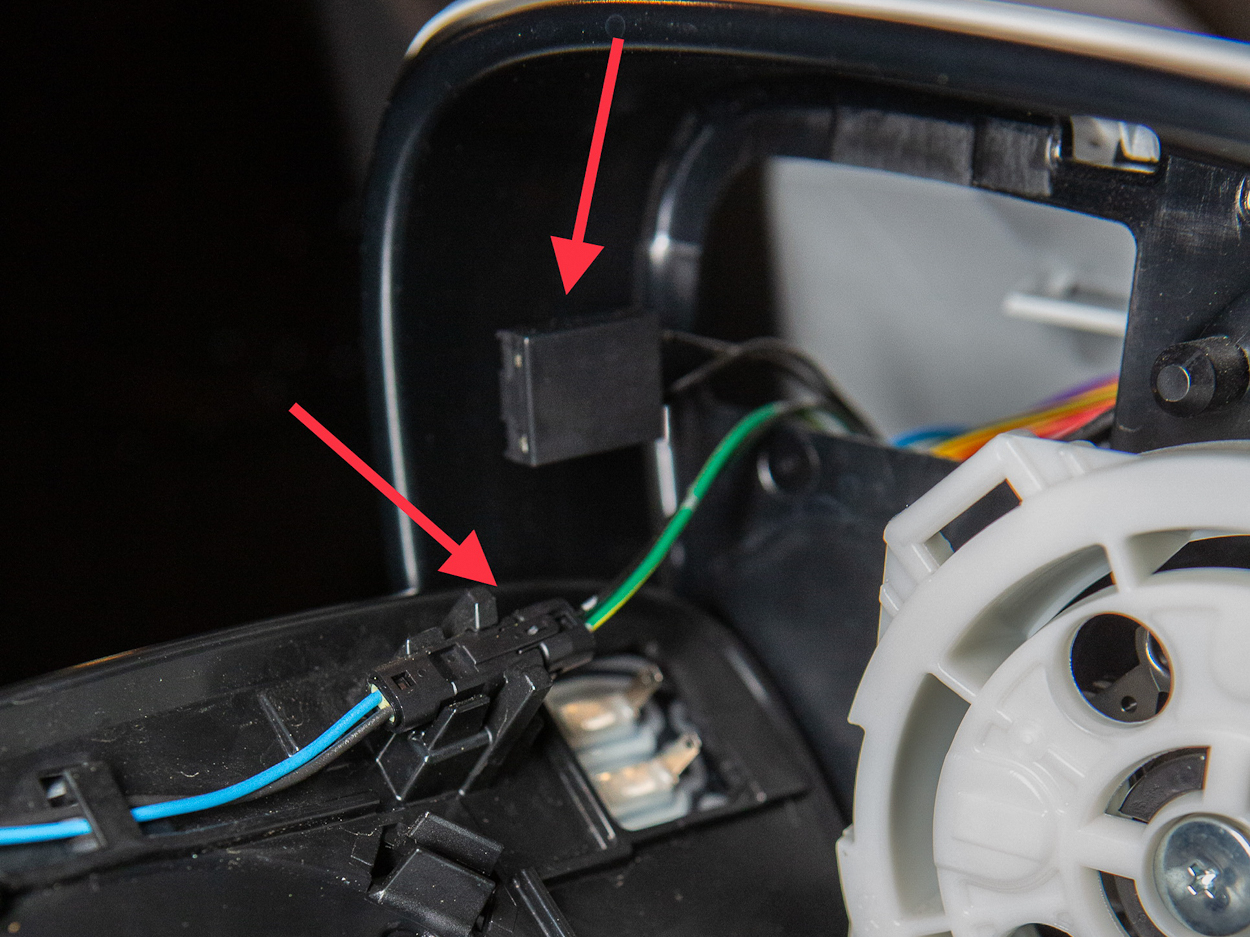
In my case, I have the blind spot monitor and heated mirror wires connected to the mirror in the top left corner. Pull up on the tap of the blind spot plug to disconnect. Skip this step if you don’t have this feature. Set aside your mirror after disconnecting the wires.
Step 3. Remove Mirror Cap

To remove the mirror cap from the housing, press on the body color tab. In my case, the tab is white.
Pull the cap away from the housing, and you’ll have additional access. You can work from one side and go across to work the cap off.
Step 4. Remove Black Cover
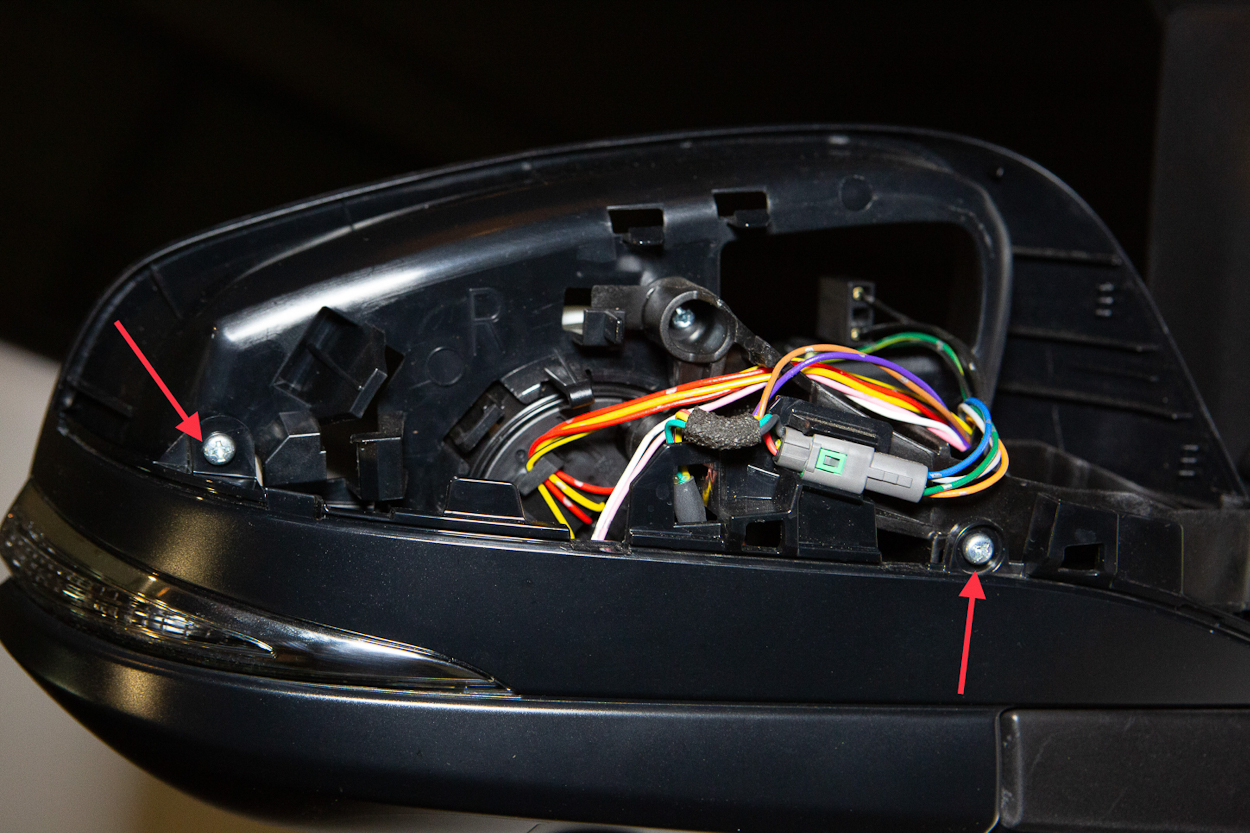
Remove the two screws on the front-facing side of the mirror housing.

From there, you’ll want to go to the rear-facing side to push the tabs to release the black cover.

Then, you’ll be able to access the turn signal in the housing on the other side, where the black cover is. Push down on the wire harness plug to disconnect the OEM turn signal.
To install the 4Runner Lifestyle sequential turn signal, line up the male and female connectors. Then, test the turn signal to make sure it works properly before reassembling everything back together.
Step 5. Reassembly

Reassemble the black cover with the new signal by holding it in place so that they are one solid piece. Make sure the signal is seated correctly so that the weatherstripping isn’t out of place relative to the black cover.
Next, attach the smaller end first and then work your way to the signal side. From there, you can go ahead and screw things back in place and work in reverse order for assembly.

I found it easier to put the mirror back on first and then go to the front side to reconnect the wires to the mirror. That way, the heating and blind side connectors were easier to access.
Line up the mirror cap and work it back onto the housing. I found myself using a little extra force when popping the cap back on. Repeat the process on the other mirror for installation.
Final thoughts

Installing the 4Runner Lifestyle sequential turn signals wasn’t difficult, even for a mechanically challenged person like myself. It won’t take you a full weekend to do, more like 45 minutes or less. I took my time since I didn’t want to break any tabs and have everything seated correctly.
As for the aesthetics, I felt that removing the chrome signals and going with the black option made my 2023 4Runner look more updated. It certainly blends in better with the lower black housing. The overall look is sleek and much brighter than the OEM turn signal.

Note: The aftermarket signal is about a 1/3 bigger compared to the OEM.
They are bright and light up from end to end, increasing the visibility and effectiveness of the signals. Overall, it’s an affordable upgrade that anyone can do to hold them over while saving for bigger ticket mods.
Suggestion: Replace the puddle lights on the bottom of the mirror housing at the same time you do this. The stock puddle lights are so underpowered that I didn’t even realize there was lights on the underside of the mirrors until seeing an install guide on this site (when replacing all interior lights with LED’s). They’re not very noticeable in the city, but when you hit the unlock button when approaching your 4Runner on a dark road, you’ll be glad you have the upgrade. Doing them at the same time just means the chances of breaking any clips or the mirror are just less when only opening/prying/squeezing that housing once.. I got the Suparees about 2 years ago, still working great!