
KC Cyclone V2 DIY Under Hood Light Kit Wired to 12-Circuit Switch in Cabin on the 5th Gen 4Runner
While I was upgrading my switch set-up on Jade I decided to install some KC Cyclone Under Hood lights.
Having a set of KC Cyclone under hood lights has helped me out many times on my last 4Runner. I’ve used my under hood lights for everything from inflating and deflating my tires at night, jumping batteries in the dark, working around the engine bay on my switch, and much more. On my last 5th Gen, I installed the plug-and-play KC Cyclone underhood light kit using the V1 Cyclone Lights. That was almost 5 years ago and a lot has changed since then.
KC has since launched its Version 2 Cyclone light and they are much brighter. Not only is the light brighter but it also uses magnets to mount anywhere there is a magnetic surface. For this installation though, we’re not using magnets. Instead of using the supplied magnets, we’re using rivet nuts on the hood of the 4Runner.
My old 2014 5th Gen 4Runner didn’t come with a hood insulation pad (pn: 5334135161) but my 2016 TEP “Jade” does have one. With that said, the installation process for Jade’s under hood light install is going to be a little different.
A really popular kit if you want one, is from AJC Customs. AJC Customs offers a plug-and-play under hood light kit that uses a magnetized on/off switch as the hood opens and closes, however, it only comes with two lights, and I wanted to use four. For placement, AJC kit uses the magnets on the cyclones to mount on the front part of the hood which points the beam pattern toward the back of the engine bay. Although that beam pattern is wide enough to cover the engine bay at night, I wanted even more output around and even outside of the engine bay. Lastly, the AJC kit is $150 for two cyclones and the KC Cyclones are only $29 each. That means for $120, you can afford four lights and wire the lights to a switch like a Switch-Pros, SPOD, or in my case, an S-Tech Switch. Also, for reference, for only $89 you can buy the two-light under hood light kit straight from KC with the switch.
KC Cyclone Lights:
- KC Cyclone V2 Amber: Check Price
- KC Cyclone V2 White: Check Price
- KC Cyclone Under Hood Light Kit (with switch): Check Price
Optional AJC Kit:
- AJC Customs Under Hood Light Kit: Check Price
Tools and Materials

Find the tools online:
- Klien Ratcheting Crimps: Check Price
- Klien Strippers: Check Price
- GearWrench Clip Removal Tool: Check Price
- Rivet Nut Gun (ADN14): Check Price
- Rivet Nut Gun (ADN38 (up to 3/8″): Check Price
- Waterproof Wire connectors
- Braided Sleeve
- Heat Shrink
- Pliers
For this installation, you will need some electrical experience, basic electrical tools, and a rivet nut gun. For the majority of people even interested in this mod, you will already have common tools like crimps, strippers, connectors, wire, rivet nuts, and everything else for wiring.
Rivet Nut Gun

Rivet nut guns are awesome. Before I bought this, I didn’t think I would use it that much but now that I have it, I use it all the time. I put rivet nuts everywhere. I have both versions of the Astro tools ADN14 and ADN38 (up to 3/8″) and they’ve been great. Both tools have made so many of my installations so much more professional, not to mention serviceable.
Instead of just throwing zip ties everywhere or using self-tappers on sheet metal, now I insert of rivet nut and usually just bolt everything in place. If you don’t have a rivet nut gun you should look into one. And if not the expensive drill attachment one, at least a simple handheld one. They will change your automotive life if you plan on taking your build the distance.
1. Remove Rivet Clips
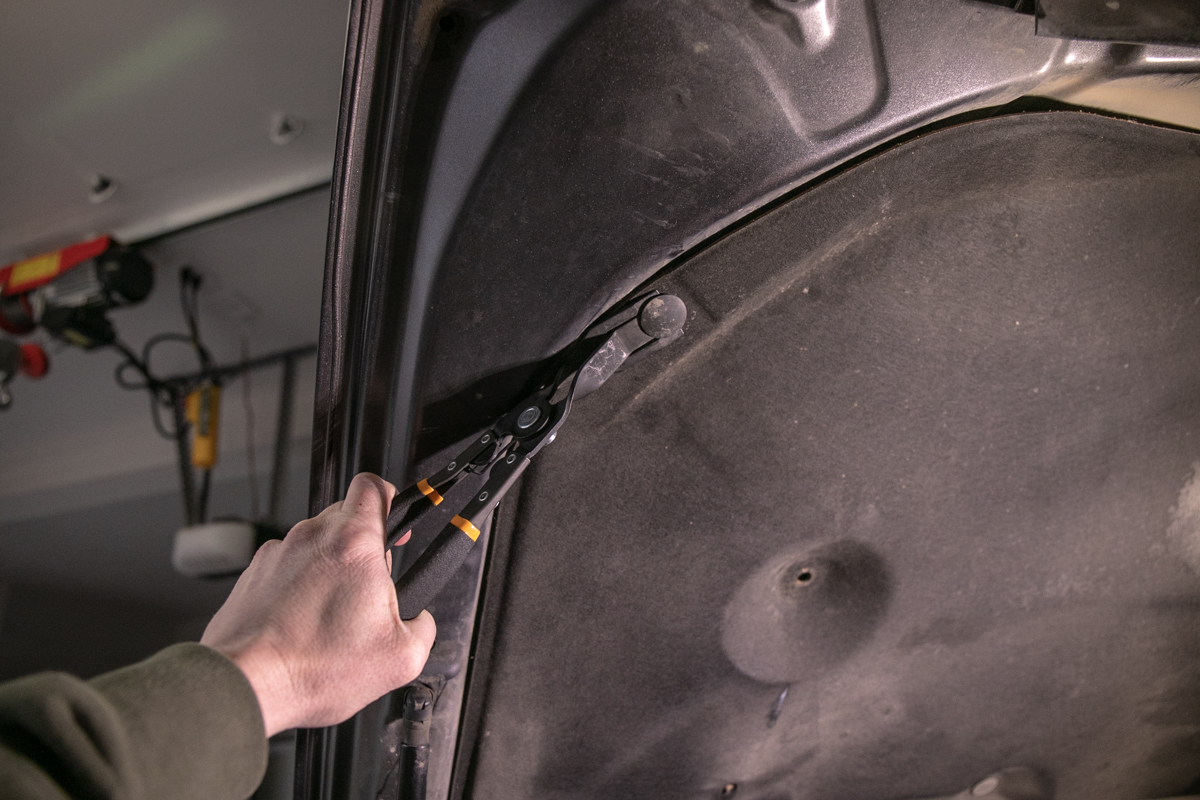
Start by removing the rivet clips you know you’re going to replace with the lights. Out of all the plastic clips on the Toyota, these are some of the easiest to break. Don’t plan on re-using them.
2. Insert Rivet Nuts

We used #10-24 rivet nuts. They fit the provided hole perfectly and are a very common bolt size if we ever need to replace any hardware. For the two outside points, you can go behind the insulation pad but for the two inner points, you will need to wiggle your rivet nut under the pad before securing it down.
3. Prep Cyclone Lights

Determine which color lights and which version of cyclones you’re running. We’re using an old set of diffused white V1 cyclones for the outside and amber V2 for the inside.
4. Connect Cyclone Lead

Connect the provided lead from your cyclone pack.
5. Braided Sleeve & Heat Shrink

Throw on some braided sleeves and heat shrink.
6. Heat Shrink Lead

Heat Shrink your lead before mounting the light.
7. Mount Inner Cyclone
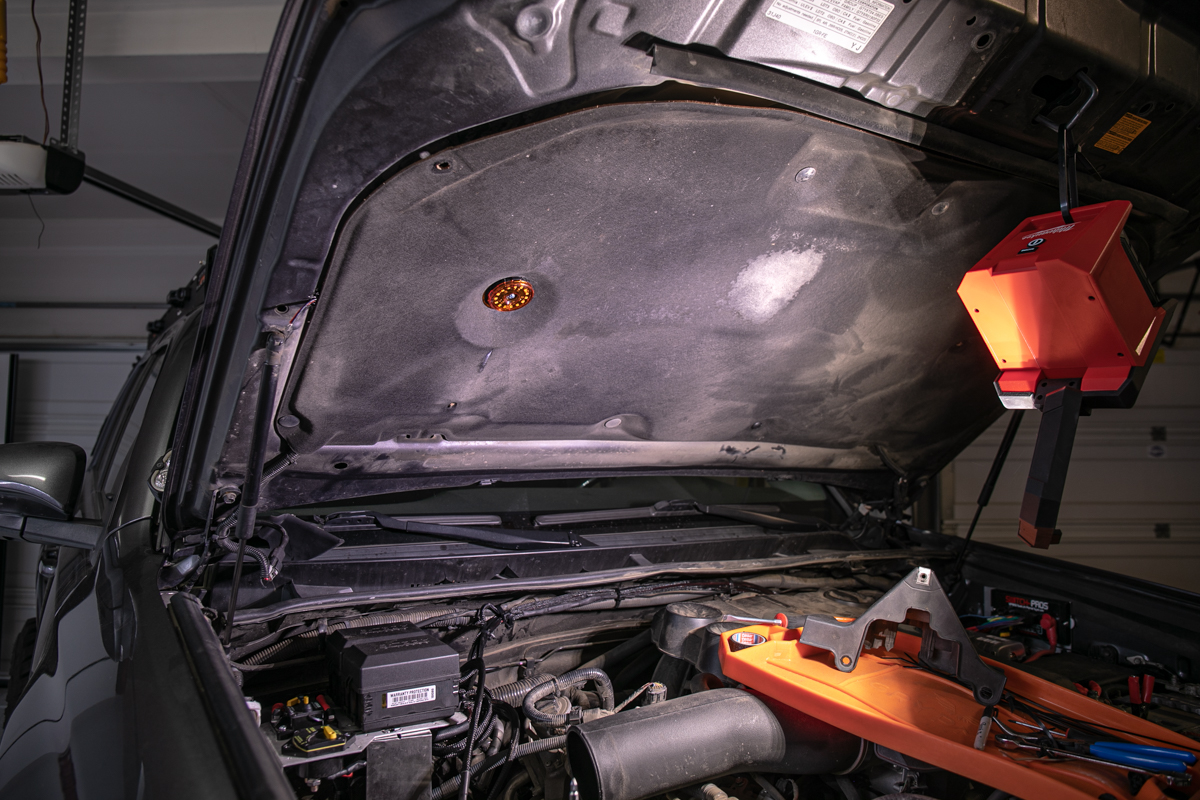
Mount the first cyclone with your #10-24 hardware or preferred hardware of choice.
8. Mount Outer Cyclone

If the lead is preventing you from positioning your outer cyclone you can drill a hole in the insulation pad just outside of the provided hole. This will allow you to slot your lead into one hole and then mount your cyclone through the main hole.
9. Crimp Connectors

Position your wires outside the insulation pad and then crimp your connectors in place. Repeat these steps on the driver side.
10. Fish Lead through Insulation Pad

Take a wire fisher or method of choice and send a jacketed lead over to the opposite side.
11. Connect Harness

Connect your harness and heat shrink everything down of your braided sleeve and jacket. Tuck the excess wire underneath the insulation pad and 3M tape the insulation pad to the hood sheet metal to close any unwanted gaps.
12. Connect Main Lead

Back on the passenger side, now connect a main lead to your harness. This will be the lead that connects up to your switch.
13. Braided Sleeve & Heat Shrink Main Lead

Apply a length of the braided sleeve to your positive and negative wires and then tighten everything together with heat shrink. Tuck the excess wire underneath the insulation pad and 3M tape the insulation pad to the hood sheet metal to close any unwanted gaps.
14. Run Lead to A-Pillar

Once your harness is ready, feed the length of wire under the insulation pad and over to the A-Pillar. We already have a set of ditch lights, so we’re following that lead over to our 12-Circut switch on the passenger side. For your installation, you may want to reverse this setup if you’re running a switch on the driver’s side.
Final Thoughts

The KC Cyclone lights are proven to be some of the highest quality under hood lights on the market and there are many ways to mount them. At first, I thought the cyclones facing outward were going to be almost too bright or even blinding. However, after mounting them temporarily and then standing back to look, that thought went away. The lights are incredibly well placed and create a perfect beam pattern of light on the engine bay and just outside around the wheel wells.
Pretty stoked with the outcome and the install was very easy.
Always wanted to put lights in that hood insulation pocket. Never thought about rivet nuts, good call. Looks clean.
Aiden James Customs has a prewired kit. Simplifies the wiring aspect of the install.
I’ve seen that kit. It’s popular, it’s just not the cleanest install.
What size of braided sleeve did you use? Clean job. Awesome work.
I use a combination of 1/8″, 1/4″, and 3/8″ – mostly use the 1/4″ though.
Super clean as usual Brennan. Why did you decide to have the switch in the cabin opposed to something in the engine bay? Aren’t the underhood lights supposed to be run on a switch in the engine bay?
I just had so many switches available in the cabin that it made sense to utilize a blank. I am running a switch pro (8 switches) and an S-Tech switch (12 switches) so 20 total switches that I needed to fill. Plus, sometimes switches in the engine bay can look a little tacky. To each their own though.