
Front Wheel Stud Replacement Step-By-Step DIY Install For the 5th Gen 4Runner
How To Replace a Front Wheel Stud
Rotating your tires is a necessary reoccurring maintenance item for every vehicle, threading off and on lug nuts every time. Unfortunately this time, you hit an uh-oh moment where it begins to cross thread. In this case, the only way out was to break off that lug with an impact, replace, and start with a new wheel stud.
Some shops may charge around $100 – $200 for parts and labor when it really only takes less than $10 to replace this on your own.
Installation Process
This a pretty simple DIY that can be done in under an hour depending on your experience level. There are many videos out on the internet on how to replace a stud, I found this one helpful.
Parts Needed:
- Toyota OEM Wheel Stud: Check Price
- Upgraded ARP Wheel Studs: Check Price
Tools & Materials:
- Tire Iron
- Impact Wrench
- 17mm Socket
- Torque Wrench
- Screw Driver
- Rubber Mallet
- Sledge Hammer (Small)
- M12 x1.5 Open-Ended nut
- Larger Open Nut
Prep Work
Like any vehicle servicing. Apply the emergency brake, chuck your wheels before jacking up your vehicle. Then lower on to a jack stand before beginning your work. If you are working on your rear wheel hub, you will need to depress the ebrake in order to remove the drum from the hub.
Step 1. Remove Wheel & Tire

In my case, my lug had begun to cross-thread on the lug. The only option at this point was to use the full power of the Ugga Ugga, impact wrench, and full send that sucker off, inevitably breaking the wheel stud.
Carefully back out all the other lug nuts and remove the wheel.
Step 2. Remove Brake Pads & Caliper
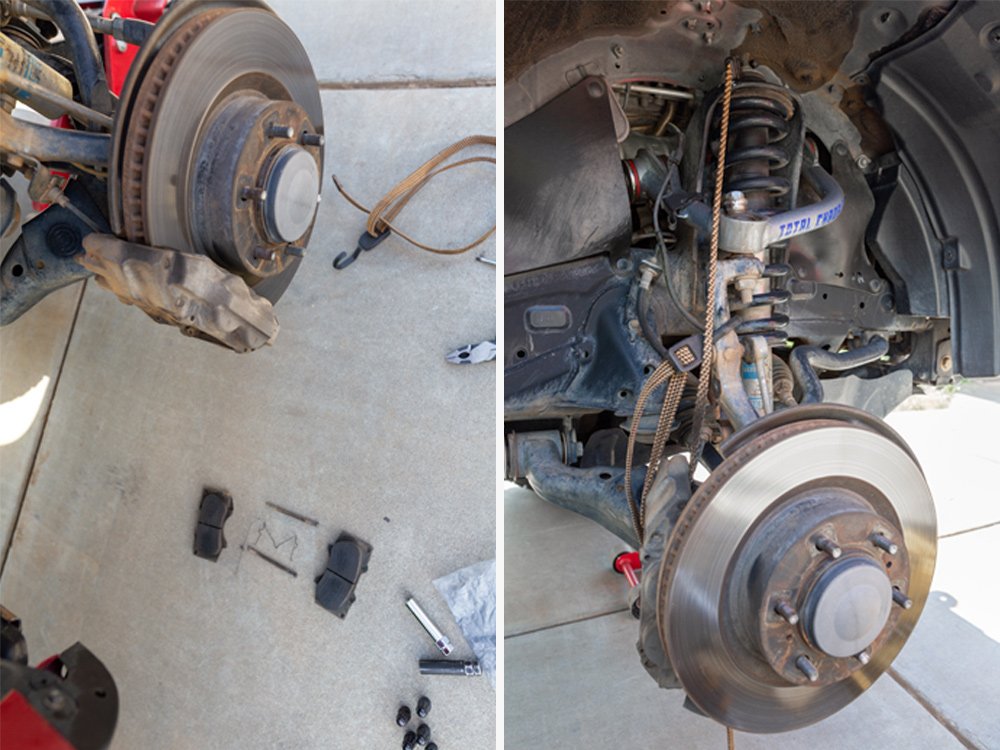
Remove the wire clip securing the pins into the caliper. Pull out the pins and remove brake pads. Residual pressure can hold the pads in place. You can carefully use a screwdriver to apply pressure on the pistons, creating space to slide the pads out.
Using a 12mm socket, remove the brake line bracket to the spindle. Then, using a 17mm socket wrench, back out the two bolts on the backside that hold the caliper to the hub assembly.
Secure the caliper away from the rotor using a bungee cord.
Pro Tip: You can also find more details on removing brake calipers and rotors here.
Step 3. Remove Rotor
The brake rotor makes take some fineness to dislodge it from the hub and wheel studs. It could just pull away, or require some persuasion. A few good taps should release it from the hub. A rubber mallet to the surface will not damage the brake’s surface, if it needs a little extra oomph, use a small sledgehammer to the inner part of the rotor near the studs.
Step 4. Replace Stud

With a hammer tap out the broken stud away from the hub. The old stud will fall out the backside.
Take the new wheel stud and feed it through from the back of the hole in the hub. To help secure the stud to the hub. I fed a larger nut onto the stud, tightening it down with a threaded open end nut.
An impact wrench can really speed along the process to pull the wheel stud into place. After it is secured, pull off both nuts and clean up wheel studs with a wire brush.
Step 5. Reverse Process Putting Assembly Back Together
When securing bolts back into the caliper assembly, remember to torque to spec:
- Two bolts holding caliper to 91 ft-lbs
- Lug nuts to 81 ft-lbs
Install complete!

Congratulations! You have just saved yourself over $100 on replacing your wheel stud!