
Setting up the ARB 2000 Awning & an Overview on Care
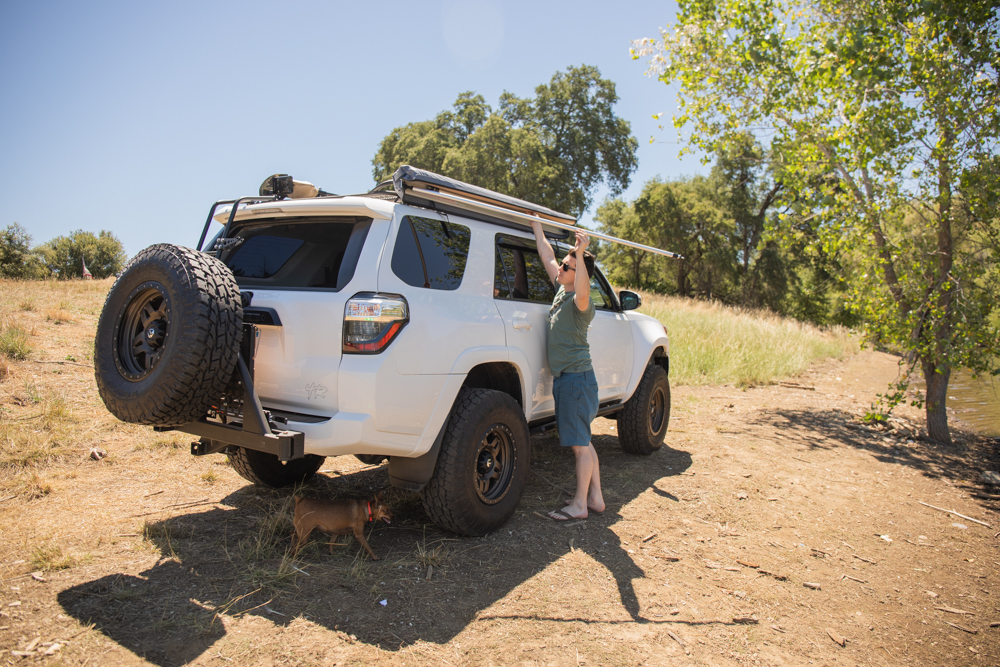
When I first got the ARB 2000 awning, I was super excited but the instructions were a little less than helpful in a few places. When it came to setting up the legs on the awning, I was a little confused.
Even after a few YouTube searches I still didn’t find anyone that showed exactly how to lock the legs into place.
Call me crazy, but it took me a solid 5 irritating minutes before I figured out how to lock the legs into place.
All you do is twist the legs (Step 6). Anyway, that’s it. That’s how you lock the legs into place.
Enjoy the awning!
ARB Awning Options
- Small: Check Price
- Medium: Check Price
- Large: Check Price
- Aluminum Housing: ARB offers the large (2500) in an aluminum-encased housing with improved functionality. They lose the zippers and instead have three quick release bungee cords that will release the aluminum housing lid. You can read more about that aluminum version here.
Step 1: Unzip Bag & Release Straps

Undo the zip on the PVC bag and release the buckles holding the awning in place.
Step 2: Release Velcro Straps

Step 3: Release awning arms
Release the awning rafter arms from the main aluminum extrusion. Swing both rafter arms slightly more than 90° away from the vehicle.
Step 4: Unroll Awning

Allow the awning to unroll in your hands to its full length.
Step 5: Release Awning Legs
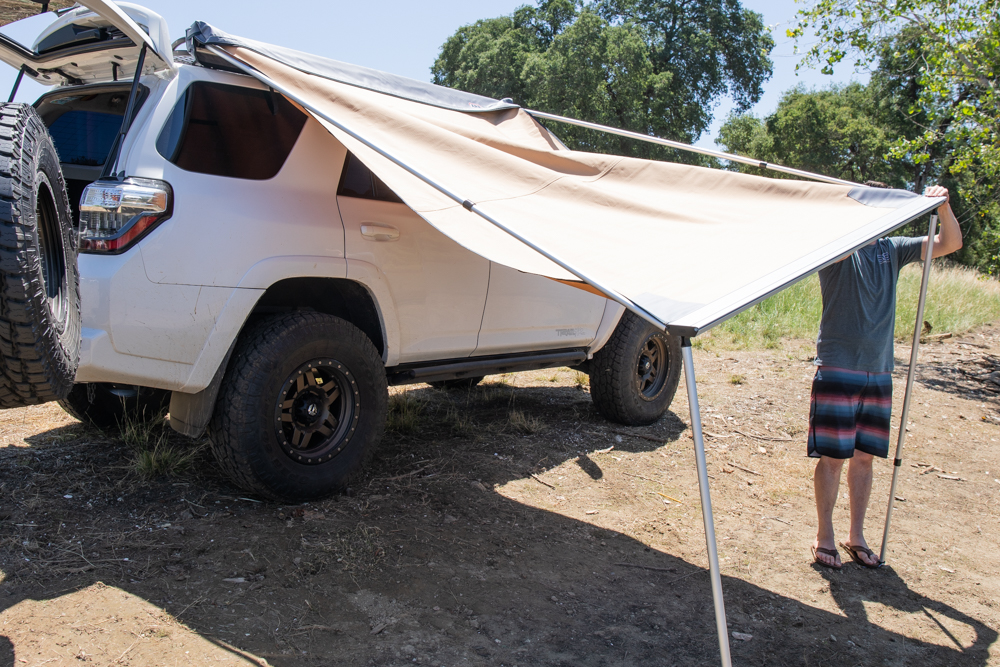
Release the legs of the awning from inside the front beam. Slide the inner leg tube to the desired height and engage the twist lock of the leg by turning the bottom half of the leg to lock the leg in place.
Step 6: Position rafter arm into place
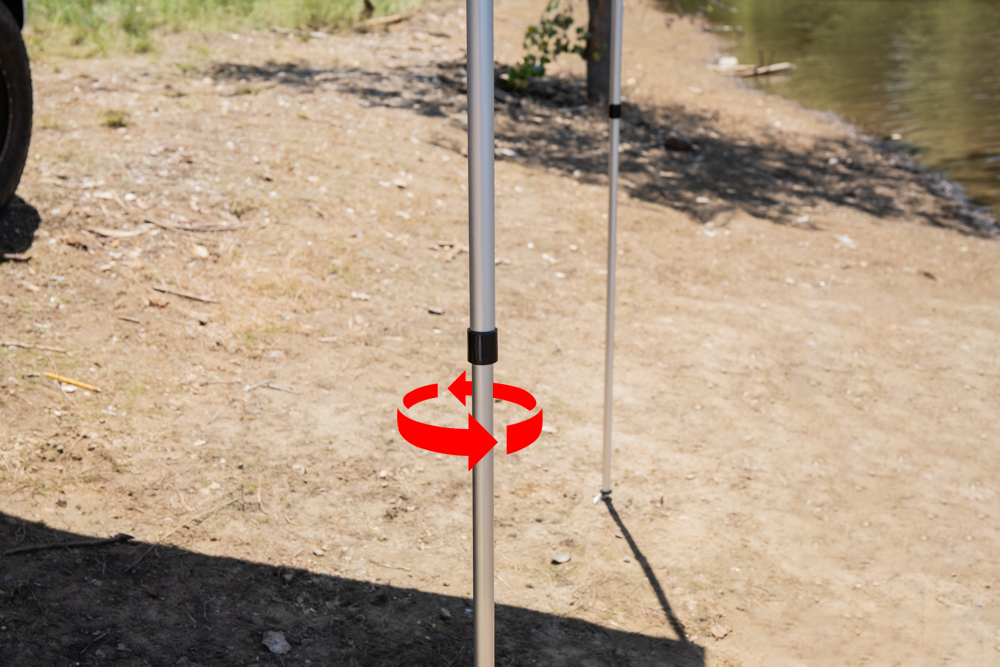
With one hand holding the front beam, extend the rafter arm and placed the arm pin into the corresponding hole in the front beam. Twist the arm to engage the twist lock. That’s it, just twist the two legs to lock them together.
Step 7: Loop velcro straps around the rafter arms
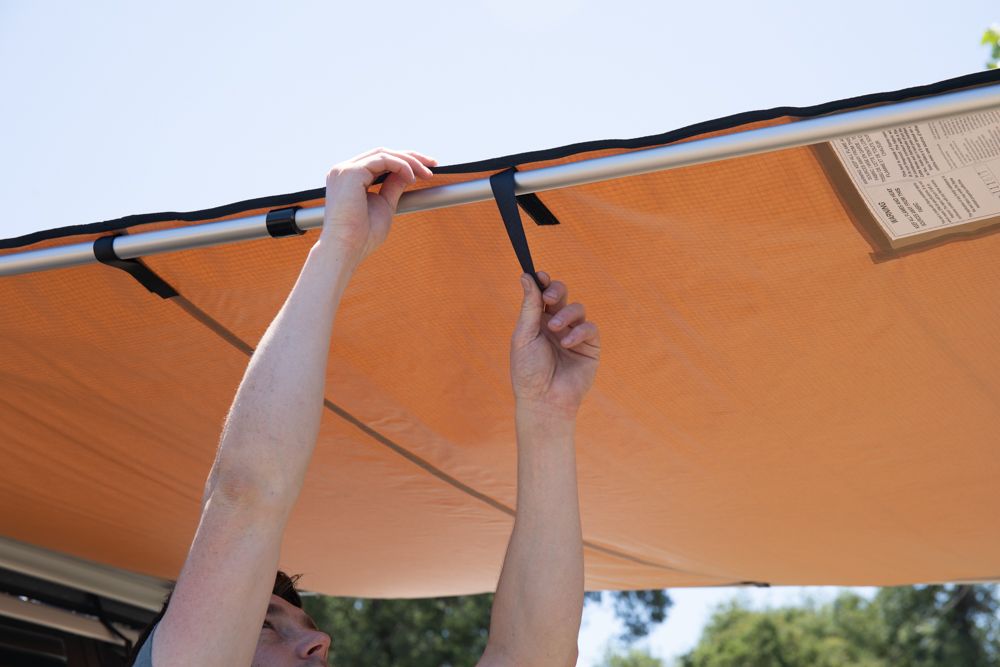
Secure the fabric to the rafter arms using the Velcro tabs.
If you are in a windy situation, you may want to secure the awning the ground. Continue with pegging the legs to the ground using the rope loops in the feet. Once the legs are secured to the ground, use guy ropes to secure even further.
Packing up the awing is simply the reverse of the above procedure.
Awning Tips:
Rain & Snow: If you are setting up the awning in rain or snowy conditions, ensure that the awning is set to the appropriate angle to allow rainwater to run off and not accumulate on the top of the awning. To do this, just set one of the legs slightly lower. This will allow water or snow to funnel down one side.
Wind: In windy conditions, it is essential that the awning is secured to the ground to prevent damage to the awning into the vehicle. Even a slight gust of wind can shift the awning pretty fast. Under windy conditions, staking the legs and using the guy ropes is highly recommended. Doing this will prevent the wind from lifting the awning which can cause damage to your awning and the vehicle.
Storage & Care Guidelines:

Do not store the awning wet.
The ARB Awning is made from a very high quality 300 GSM poly/cotton canvas and is fully waterproof. While the awning is resistant to fungal attack, mildew will form if the awning is stored wet for an extended period of time.
If you suddenly get rained on, it’s ok to roll up the awing and get out of the rain. You can store the awning wet for very limited amounts of time but as soon as you have a chance, open it up and let it dry out as soon as possible.
If you do see mold inside your awning, you may use a sponge and mild soapy water to wash the only material. After washing, rinse thoroughly with clean water and allow to dry before extended storage.
Before you head out on trips, its recommended to check the awning, and all nuts/bolts holding the awning in place.