Scosche MagicMount Review and Overview

Universal Magnetic Windshield Phone Mount on the 4Runner – Full Review
Are you interested in a good mount for your phone? I think I’ve found one of the best on the market – the Scosche MagicMount.
Often you run into the problem of where to put your phone in your 4Runner…or any car for that matter. In the case of the 4Runner, there really isn’t a great spot, unfortunately, especially since iPhones and Androids have become bigger and bigger.
Sometimes you can find a spot to stash your phone, but what if you want to use the navigation feature on your phone? This is where you need a mount for your phone.
There are numerous options on the market, but I wanted something that was non-invasive. What do I mean by non-invasive?
No drilling required (like this phone mount Brenan did), no screws required, no gluing, or anything like that.
You might be wondering, what other methods are there to attach the mount?
The answer is suction.

The Scosche MagicMount requires nothing but a flat surface (such as your windshield) to mount to. The MagicMount utilizes a small suction cup that is very strong and sturdy.
You can take my advice; the suction cup is very strong. Now let’s dive right into the general features of the MagicMount and how to use it.
How the MagicMount Works?

As previously discussed, the MagicMount uses a suction cup to mount to a flat surface, which in this application will more than likely be your windshield.
The way the MagicMount holds onto your phone is by magnets. The end of the MagicMount has a large magnet that will hold your phone.
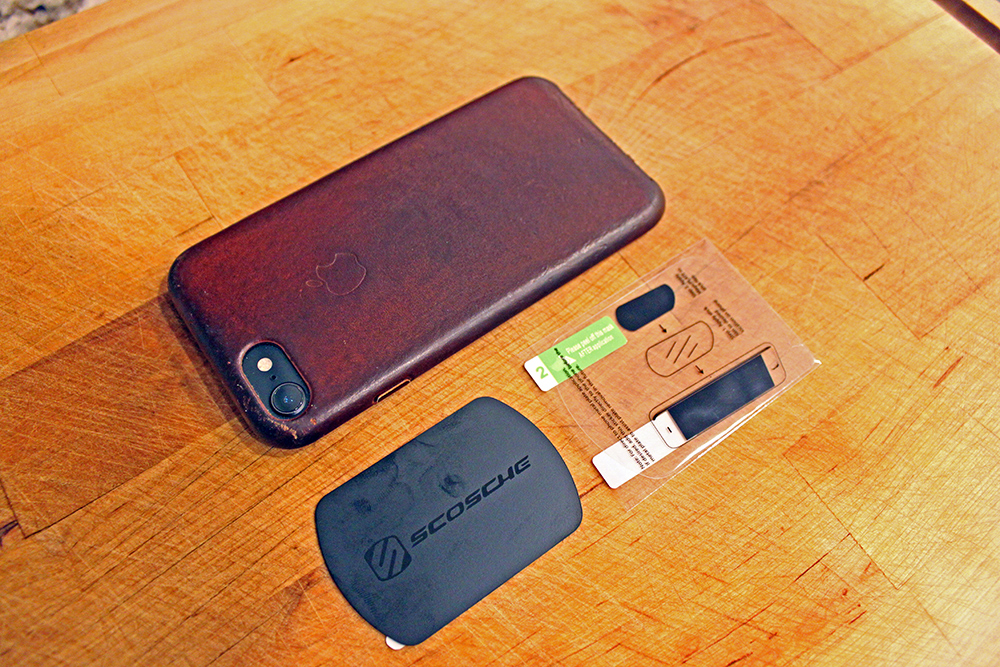
Your phone isn’t going to work by itself though, you have to install a small plate to the back of it. Yes, I know this sounds invasive, but Scosche did a great job at making it quick and simple.
You essentially use the provided MagicPlate, that is very thin, and adhere it to the back of your phone or phone case. I was a little worried that attaching the MagicPlate to the back of my phone would cause the case to not fit properly, or bulge, but it didn’t do this at all. You would never know it was there.
In order to understand a little better how the system works and what the fit and finish is like, lets go ahead and go through the step by step process for installation.
Step 1
Decide where you want to mount the MagicPlate to your phone. You can either mount it the phone itself or on the outside of the case.
If you have a thin case, I would mount the MagicPlate on the phone for a sleeker look. If your case is thick, you might want to mount the MagicPlate to your case.
I decided to mount the MagicMount to my phone and then use the case I have to cover it all up.
Step 2

Scosche provides a couple different MagicPlates for your phone. I’d use the largest one possible. Go ahead and clean the area you plan to adhere the MagicPlate to with an alcohol wipe.
If you are applying directly to your phone, you will still need to clean the area you plan on placing the MagicPlate, but you will also need to use a plastic protective film sticker.
Step 3
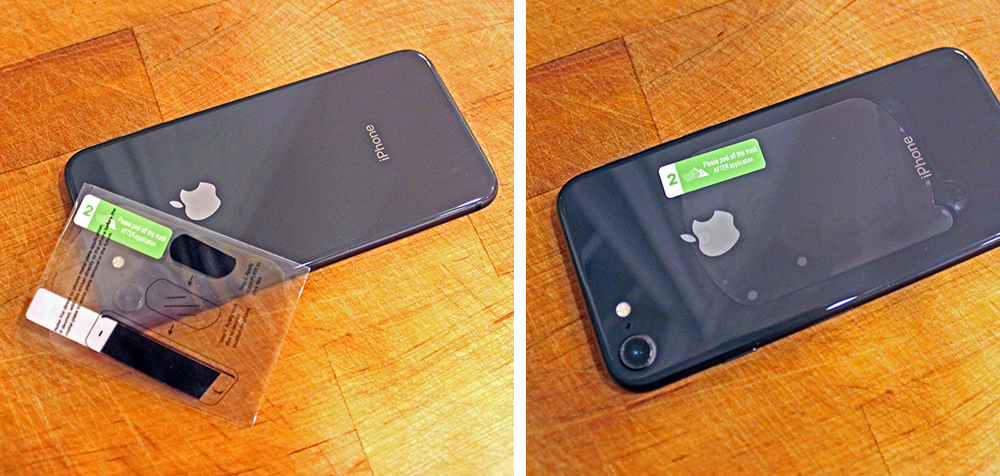
If you are placing your MagicPlate directly to your phone like I did, you will need to apply the plastic protective film sticker at the location you want the MagicPlate to go.
Don’t do this until all the remaining alcohol form the alcohol cleaning wipe is dry. After the alcohol has dried, go ahead and place the plastic protective film on the back of your phone.
Step 4
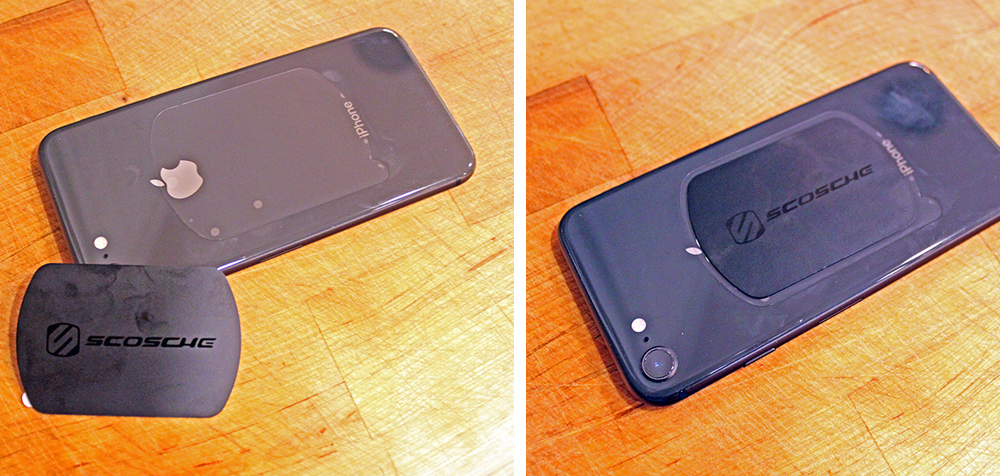
Place the MagicPlate on top of the protective film you put on your phone. Try to press firmly on all areas of the MagicPlate for proper adhesion.
Step 5
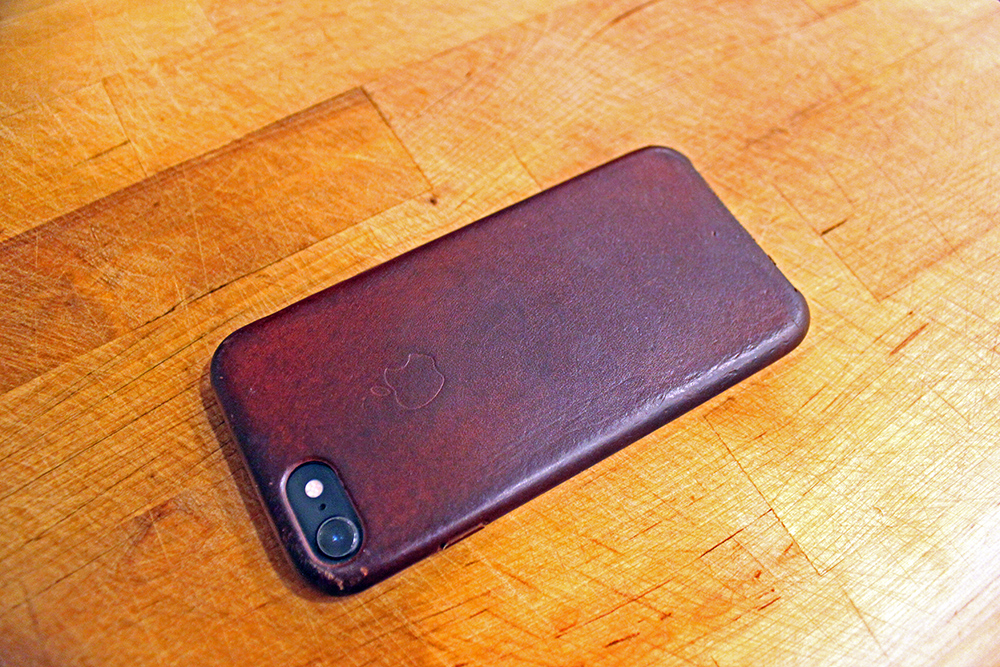
Go ahead and replace your case on your phone. Now you can mount your MagicMount. The way I did this was first place my phone on the MagicMount and then try to position your MagicMount where you want it.
I wanted my phone out of the way and slightly to the left of my vision. You can put your mount anywhere you would like though. There is a lever on the MagicMount that will create suction. Once you find your desired mounting location, put the suction cup on the surface and pull the lever on the mount completely.
As long as you are mounting the MagicMount to the windshield you should have a secure mount, however, go ahead and test the strength of the mount. It shouldn’t move around at all. You can now move the adjustable arm to position your phone just how you want it.
Overall Impression of the MagicMount
Have fun enjoying your MagicMount and hands-free capability.
Regardless of price, the MagicMount is awesome! In consideration of price, the MagicMount is less than $20! It doesn’t require any drilling and is non-invasive.
You can always move the location of your mount if you want to as well. What I like is how the MagicPlate on my phone is not noticeable at all. You could not tell there was a small plate on the back of my phone for the MagicMount to attract to.
This is a great product if you are looking for a solution to mount your phone in your car. It works really good for navigation and also just having a spot to store your phone.
Something that really impressed me is how good the attraction between the MagicMount magnet and the MagicPlate on the back of my phone is. I have gone off-roading and in over rough terrain and my phone remains in the same spot.
I was initially worried my phone might fall off of the MagicMount if I hit a large pothole or was going off-road, but the MagicMount has worked flawlessly for me thus far. I am very impressed with the quality of the MagicMount and think it was $20 well spent.