
Running CB Antenna Cable from Inside to Outside Your 4Runner Without Drilling – and an overview on the Rago Antenna Mount (2010-2019 5th Gen 4Runner)
What is a CB Radio?
A Citizens Band radio, or CB radio, is a shortwave radio commonly used among 4×4 groups as a way of the vehicle to vehicle communication. Unlike HAM or GMRS, there are almost no legal requirements for operating a CB radio. CB radios have 40 assigned channels to chose from (channel 9 on the CB radio is dedicated for emergency communications), and when installed properly in the vehicle, have a range of 7-10 miles.
This is an overview on running CB or HAM radio to the Rago Fab mount. Whichever method of communication you choose is to you, but this install process will work for both. If you are running CB or HAM, you have the option of running your main radio to an antenna mount for a better range. In our case, we are using a Midland 75-822 and a Rago Fabrication antenna mount.
Install Time: 1-2 Hours
The installation time for this entire process, both step 1 (mounting the Rago Fab mount) and step 2 (running the Firestik CB Coax cable and Firestik FS CB Antenna) is around 1-2 hours depending on your level of experience. This is a fairly easy install, though. The process should go pretty quick.
Parts used for install
- Antenna Mount: 2010-2022 5th Gen Toyota 4Runner: Check Price
- Midland CB Radio: Check Price
- Coax Cable: Check Price
- CB Antenna: Check Price
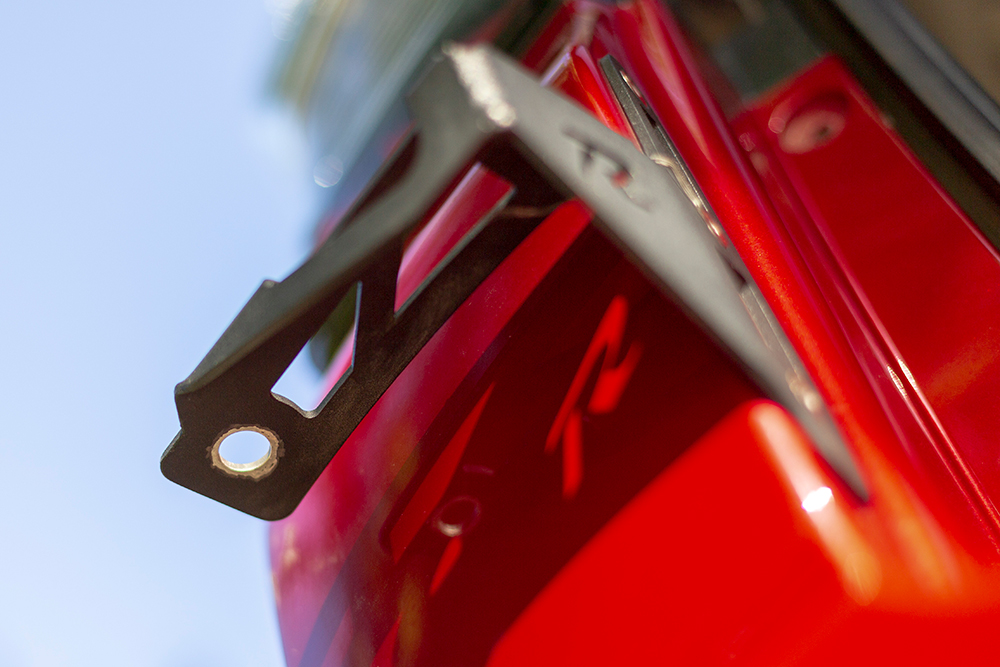
PART 1. Rago CB Antenna Mount (2010-2019 4Runner)
The Rago Fabrication CB antenna mount is made from stainless steel, making it a great choice for an antenna mount. Stainless steel is stronger than steel, nonmagnetic (so it won’t interfere with your antenna), and will not corrode or rust. For this portion of the installation, you will need to drill. For the second portion of the install below (running your CB cable), you will not need to drill.
Included:
- CB Antenna Mount
- Backing Plate with Rivet Nuts
- Three 1/4 x 20 Stainless Steel Screws
Tools Required:
- 10 mm Socket wrench – Socket Set
- Allen Set
- Sharpie
- Pilot Bit
- Step Bit
- Drill
- Utility Knife
PART 2. Running the Antenna Cable
Tools for the Antenna Cable Install:
- Flathead Screwdriver
- Dremel Tool with Sanding Drum
- Deep 10 mm socket wrench
Step #1 A: Grounding your Antenna Mount

Now that the Rago Fabrication CB antenna mount is installed, it will need a proper ground. The easiest way that I was able to achieve this was to run a dedicated ground wire from the frame, directly through the middle hole of the mount, then tightened with the Allen screw.
During this process, I used a multimeter to test for continuity from the grounding point on the frame to the CB antenna mount. The last continuity test I did was from the underside of the antenna mounting hole, to where the grounding wire meets the middle Allen screw.
Step #1 B: Sanding Rago Fab Mount
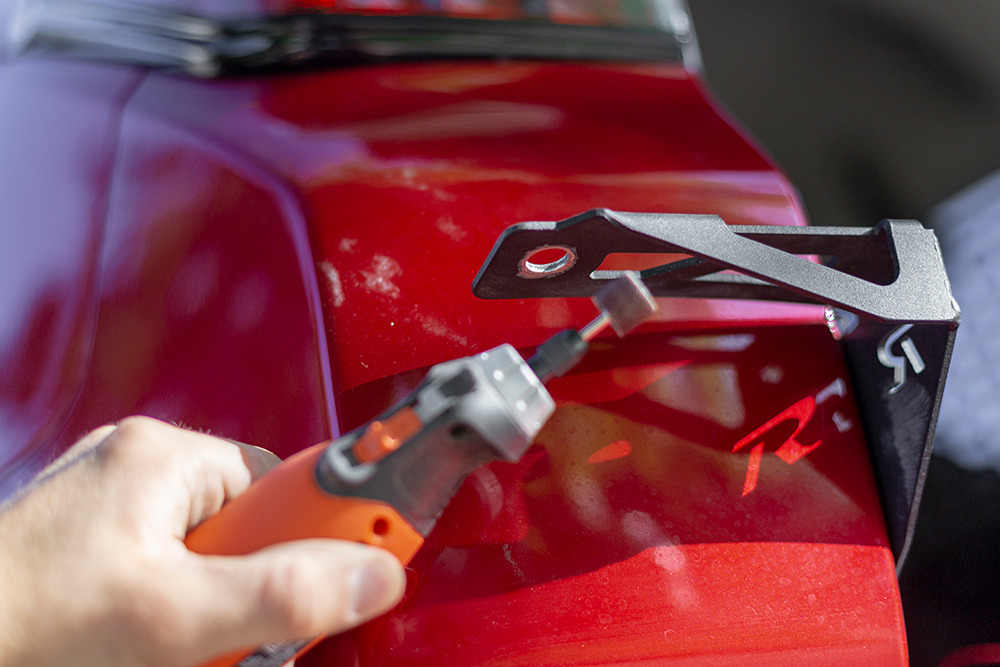
Using a Dremel tool and a sanding drum, I removed the powder coat around the future location of where the base of the antenna hardware will meet the CB antenna mount.
Removing the powder coating will ensure that the antenna stud makes contact with the antenna mount, and ultimately to the chassis via the grounding wire. A bad ground will result in an untunable antenna, less than desirable SWR levels, with possible damage to your radio.
Step #2: Removing the Rear Cargo Area Trim Piece

Start by removing the narrow trim piece between the carpeting and rear bumper. The trim piece is held on by 3 plastic trim anchors. Grasping firmly with two hands I was able to lift up on both sides of the trim, working my way from one side to the other, removing the trim.
Step #3: Lifting the Carpet/Insulation Panel
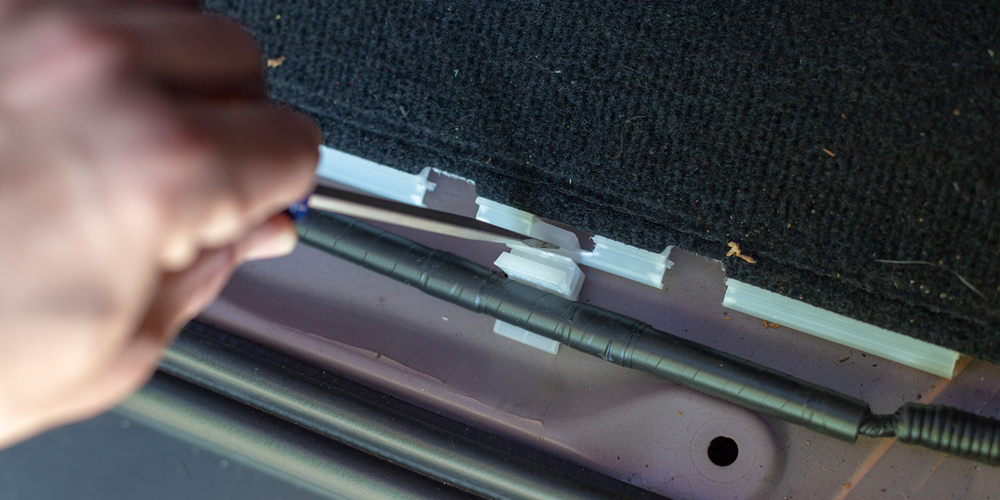
The carpet is held on by 3 plastic clips that will release easily with a flathead screwdriver
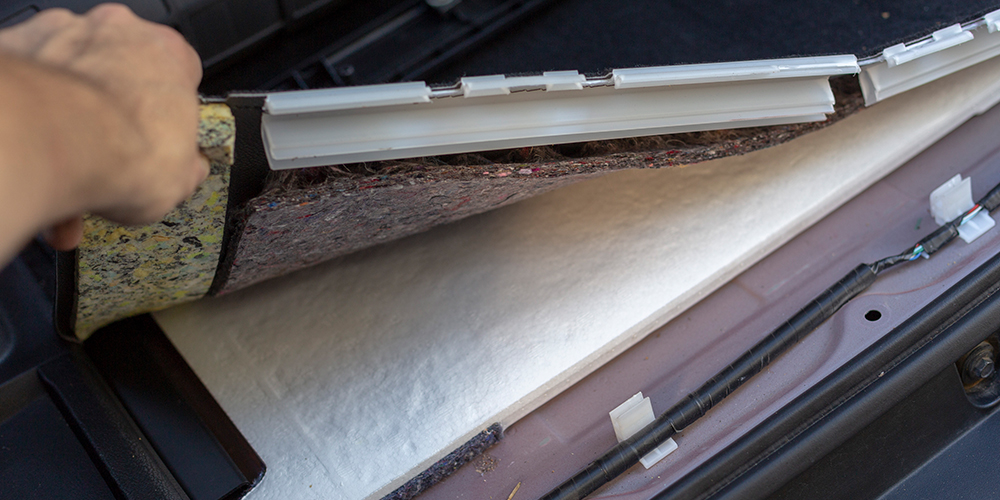
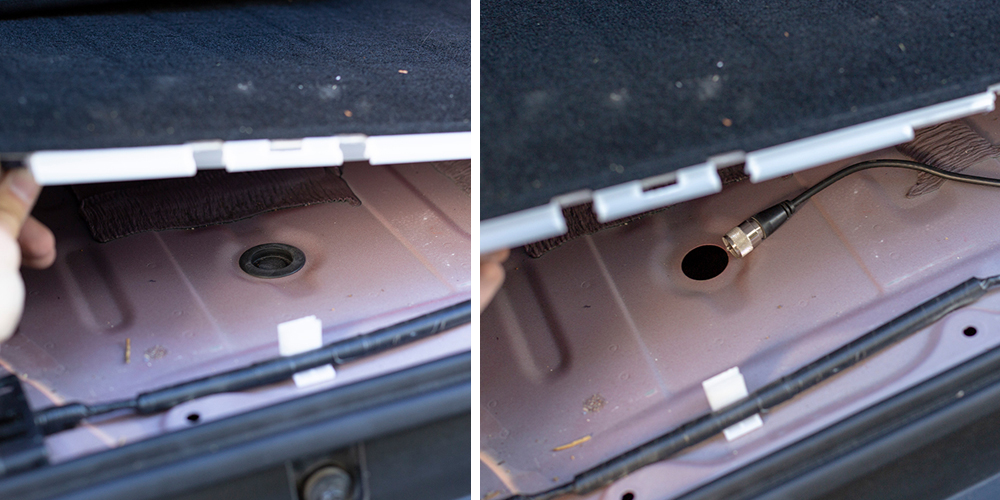
Gently pulling the carpet up you’ll also be able to lift the under carpet/insulation panel revealing a rubber grommet that you’ll use to run your antenna cable though.
Step #4: Remove the Driver Side Tail Light

Using a 10 mm deep socket wrench, remove the two interior nuts holding on the taillight. Remember to disconnect the wire harness from the taillight as well. The light is held on with plastic tips. From the exterior, using both hands, pull the tail light off directly backwards from the vehicle.
Step #5: Running the Antenna Cable
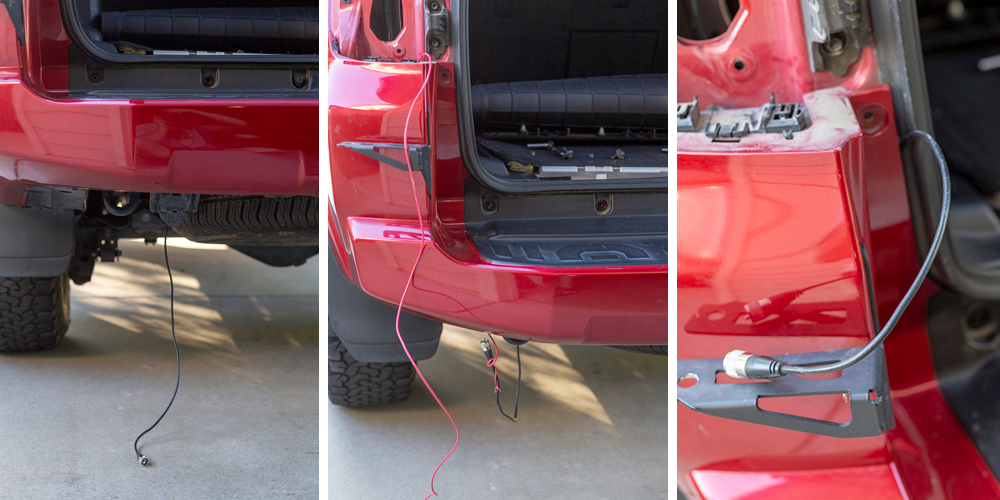
Remove the rubber grommet and feed your antenna cable through the hole in the floor. The cable should drop down under the vehicle, in-between the spare tire and the frame rail. To help run the cable up from under the bumper, remove the three 10 mm bolts on the driver’s side of the plastic bumper to the body.
Using wire fishing tool (I used a spare wire lying around) feed the wire down from the top of the bumper to the underside of the body. Attach the wire fishing tool to the antenna cable, and prepare it to be pulled up.
TIP: Wrapping both ends together helps hold the to together as you pull the antenna cable up into the bumper.
Pull out an appropriate length to reach your antenna mounting location still keeping some slack. (Keep in mind you’ll need to have enough length to stay loose when you close the rear hatch).
Step #6: Replace rubber Grommet from Step #3

With the rubber grommet that was removed in step #3, use a utility knife, or a sharp object, to cut the grommet from the outside to the center. To ensure a proper fit, trim the inner of the grommet to better fit the cable that will run through it.
With the grommet around the antenna cable, replace grommet inside the body hole in the floor of the vehicle.
Step #6: Reverse previous steps
Reverse previous steps replacing taillight, hardware, carpeting and trim pieces.
Congratulations! You now have run your CB antenna cable from the interior of the vehicle, to the outside, without drilling through the body.
This is the missing write up I needed! I’m a ham as well and have my 2m setup in the front, and previously ran HF from the back in my last rig. I needed ideas and guide on how to get the coax into the cab from the rago mount (along with ideas around cleanest grounding).
This looks to provide both answers. Still applicable today for those using Ham radio!
Why not run the antenna cable through the hole where the tail light is?
Hi frank. After installation of the bracket. My antenna whips around like crazy. I have a medium spring. Should I take the spring off?
I ran into the same issues. I know others have taken just the spring off. After a few hard wacks to the tail light. I converted the bracket to hold a Baja Design S1 back up light. Then moved on from CB to a HAM/GMRS radio set up.
How has this mount held up? The cable link is for an 18′ cable – how much slack did you have in the cable after this install? Would a 9′ cable work for how you ran it?
Matt, the mount has held up great. I ran CB for a little while but then upgraded to HAM. Which is far superior. I now use that rear mount for a Baja Design S2, which is perfect for backing up or setting up camp late in the dark.
I had a good extra 3 ish feet of cable looped in the cab. 9 feet might be pushing it close, but could possibly work.
Did you use the Rago ham hood mount for your ham install? I’m planning on two of those up front (on either side) for my GMRS and ham radios and one of these in the rear for my CB. For your ham, how/where did you install the main body and head unit?
Matt, I am using a portable HAM unit with no antenna mount up front.
Other than the antenna cable running outside to the mount, why run the cable outside at all?
The cable needs to run outside to connect with the antenna.
Alternatively, you can enter the vehicle via the tail light holes. That is what I just did with mine because I have drawers in the way of this method.
Can you take a picture? Please?
I don’t have a photo. I also have removed my CB, and now I use the mount for a rear dust light.
Hey man! Love the write up. Where did you attach the braided ground strap? Thanks for the awesome content.
I attached mine to the body of the runner after scraping the paint off with a screwdriver near a threaded hole.
I attached mine to the frame, at a stock bolt location.
Well. I literally am working on this project now and was going to do something similar, in fact I was deciding whether I wanted to run the cable underneath and then drill a hole through the body. Looks like there is another way! Timing is perfect, could not have set that up better myself. Thanks again!