
How To Replace The Front Axle Seal (How to Remove a CV Axle) On Your 5th Gen 4Runner
You walk outside, towards your 4Runner, only to be disappointed when you spot a puddle underneath it that wasn’t there the night before.
On further inspection, you see that fluid is coming from where your CV axle meets the axle housing. Congratulations, you have a leaking axle seal. Don’t worry, the fix is simpler than you think and can be done in your own driveway if you’re mechanically inclined.
We will walk through the steps to get the oil pan out from below and your 4Runner back on the road.
This guide will double as a reference point for how to replace a CV Axle on your 4Runner. Our overview is for replacing the seal but the process of replacing or swapping out a CV Axle is the exact same.
Front Axle Seal Replacement Step-By-Step Install
Tools & Materials:
- 3/8” Drive
- Ratcheting Wrench
- 10mm Socket
- 1/2” Drive
- Ratcheting Wrench
- Extensions
- 18″ Breaker Bar
- Torque Wrench
- 19mm Socket
- 21mm Socket
- 35mm Socket
- 2lb. Dead Blow Hammer
- Flathead Screwdriver
- Ball Joint Separator
- Seal Puller
- C4RS CV Axle Removal Tool
- 2” PVC Coupler
- Shop Towels/Rags of Choice
- Nitrile Gloves
- Mechanics Gloves
- Floor Jack
- Jack Stands (x2)
- Large Piece of Cardboard
Parts Required:
- R Side Axle Seal (PN 90311-47026) / L Side Axle Seal (PN 90311-47027)
- Differential Crush Washers (Drain – PN 90430-24003), (Fill – PN 12157-10010)
- 2 Quarts Toyota Genuine Differential Gear Oil (LT 75W-85 GL-5 or equivalent)
- Left seal: 90311-47027
- Right Seal: 47026
- Left seal: 90311-47027
- Right seal (bigger diameter) 90311-47013
Parts For Install (Optional):
- Hub Grease Cap (PN 43514-28010)
- CV Dust Cover (PN 41336-35020)
- CV Axle Nut (PN 90178-28002)
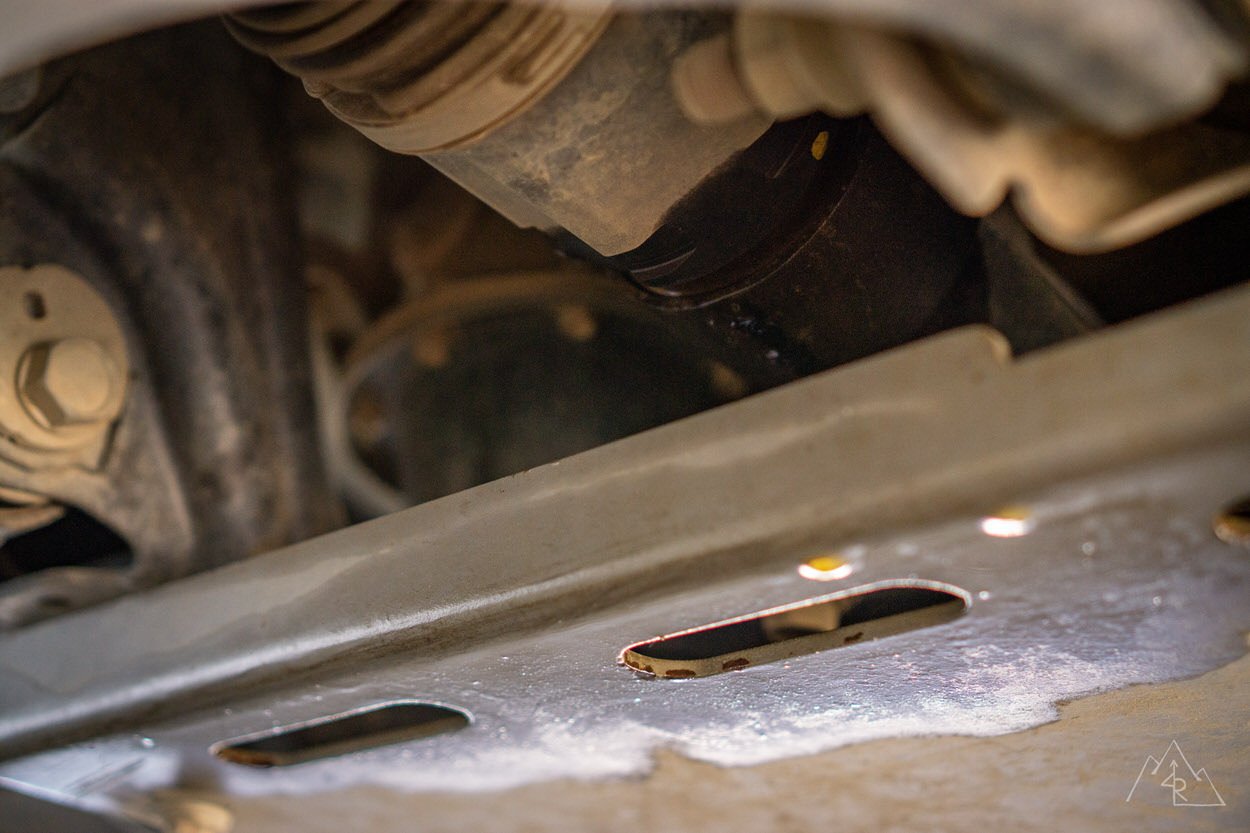
Step 1. Drain Oil
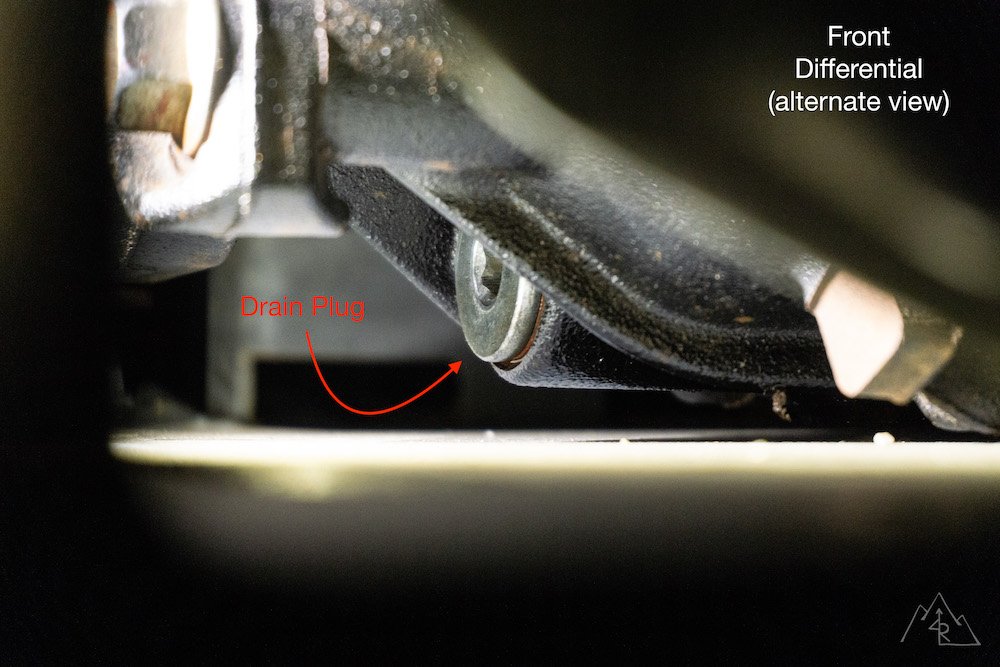
Drain the gear oil from the front differential. You can use this article as a guide for draining and refilling your differential. If you have a skid plate, you’ll need to remove it before draining the differential fluid.
Step 2. Jack It Up
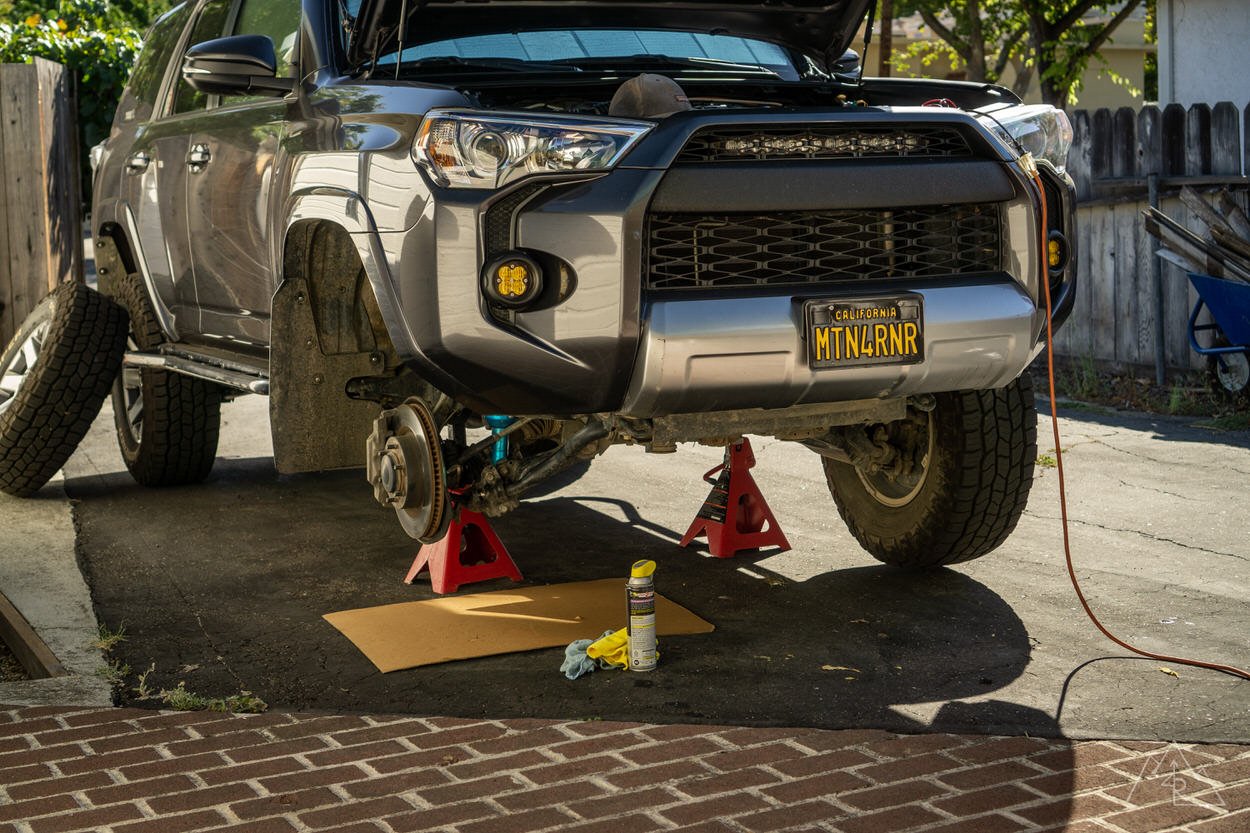
Get the front end of your 4Runner in the air with appropriate jack stands and prep the working area by removing debris from under the side you’ll be working on. Then remove the wheel/tire on the side with the leak.
Step 3. Remove ABS Sensor Wire
Unplug it from the speed sensor on the spindle, unbolt the bracket attached to the spindle using a 10mm socket and secure it above where it can’t be pulled.
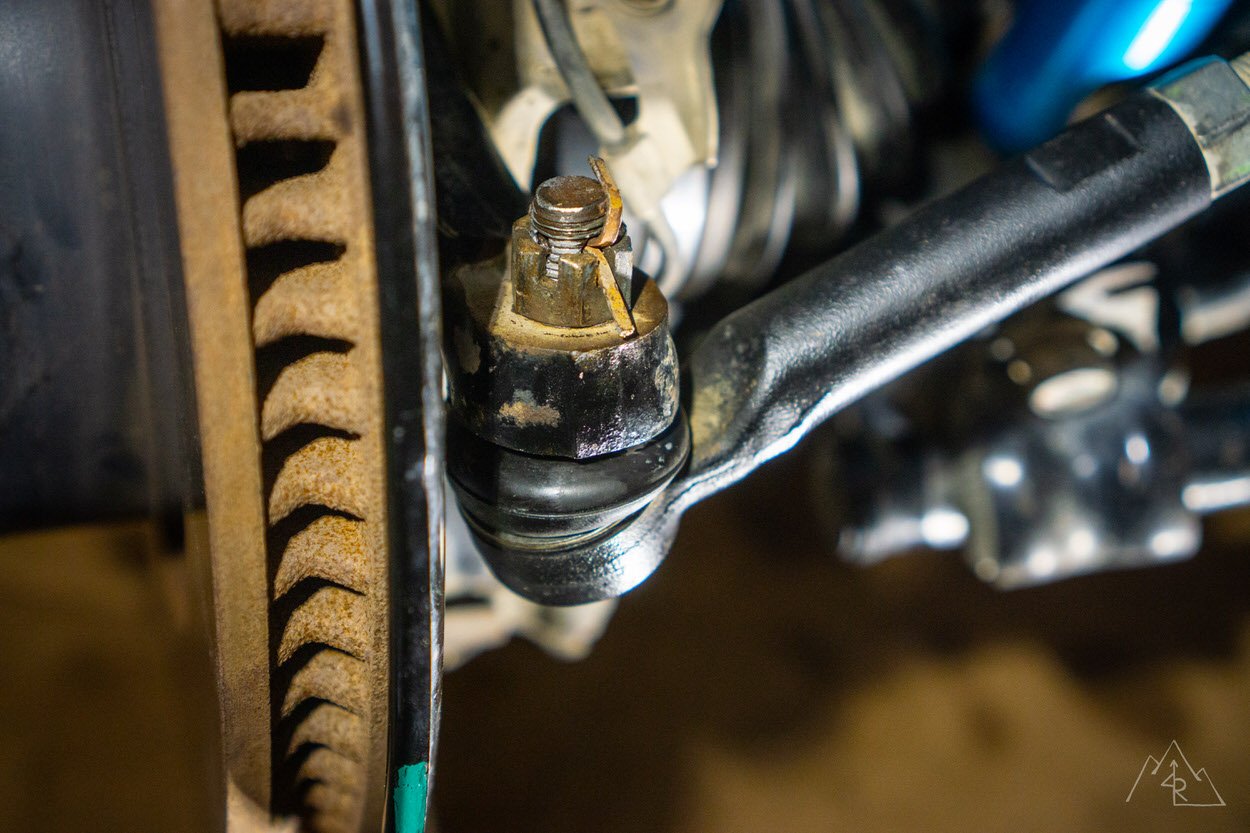
Step 4. Remove Tie Rod End
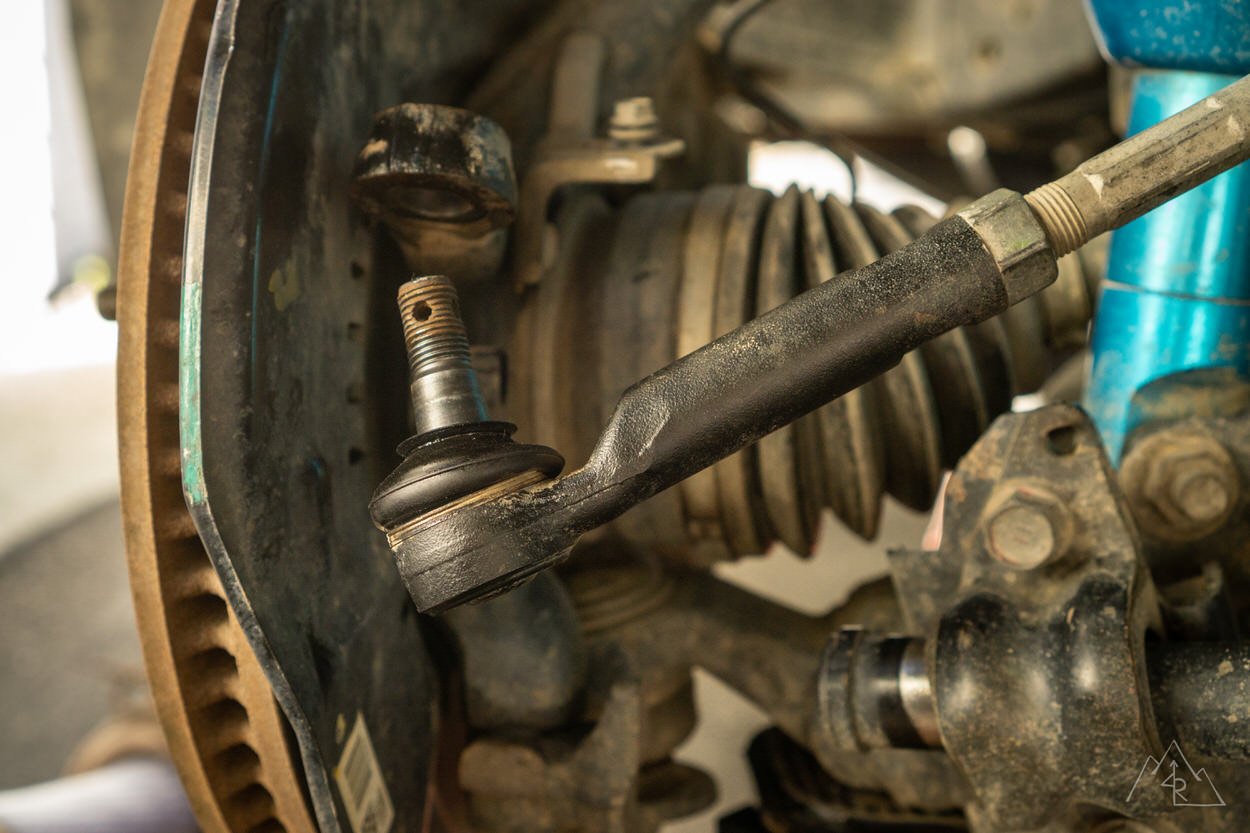
Remove the cotter pin on the tie rod castle nut. Throw this pin away and replace it when reassembling.
Then remove the 19mm castle nut on the tie rod. Use penetrating fluid as needed. Then using the ball joint separator, taking care to not pinch or rip the rubber boot, separate the ball joint from the spindle.
Make sure the tool remains square to the rod end to avoid any slipping under tension which could damage the threads.
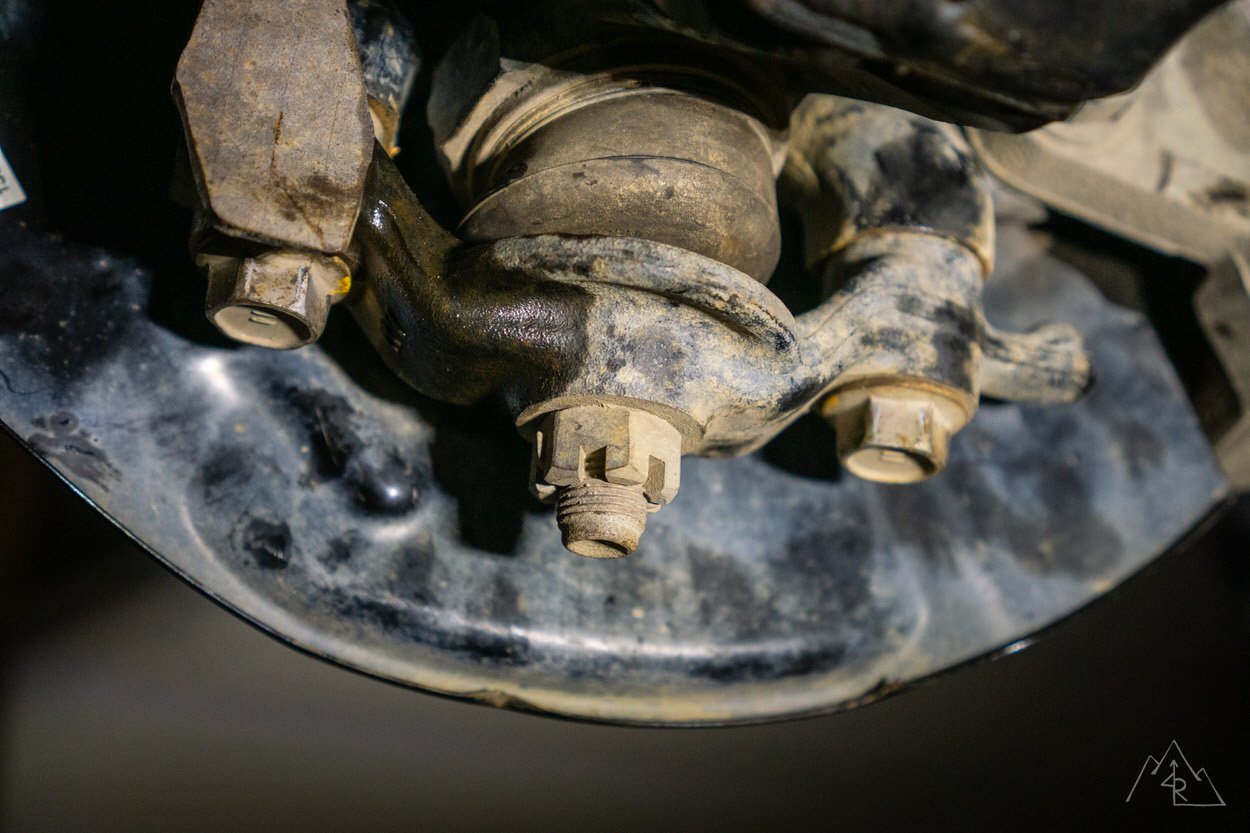
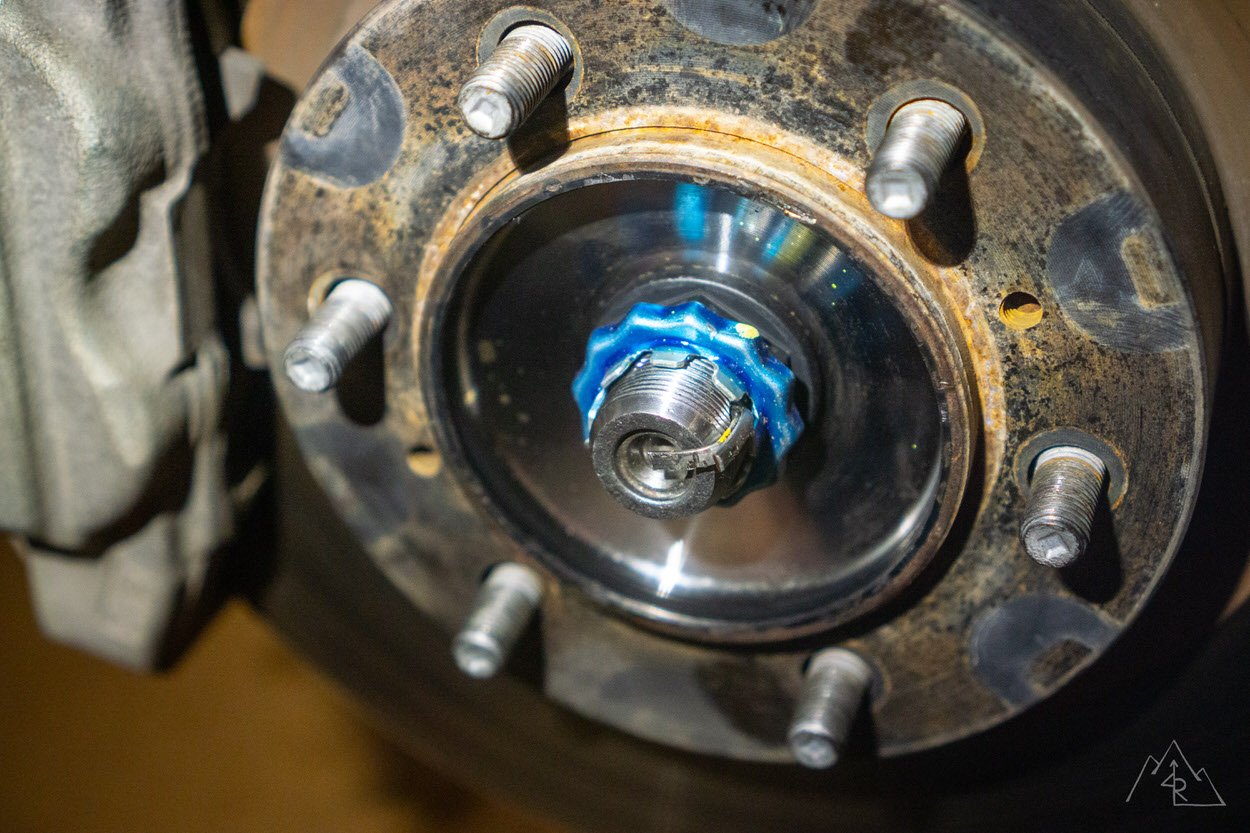
Step 5. Remove Axle Nut
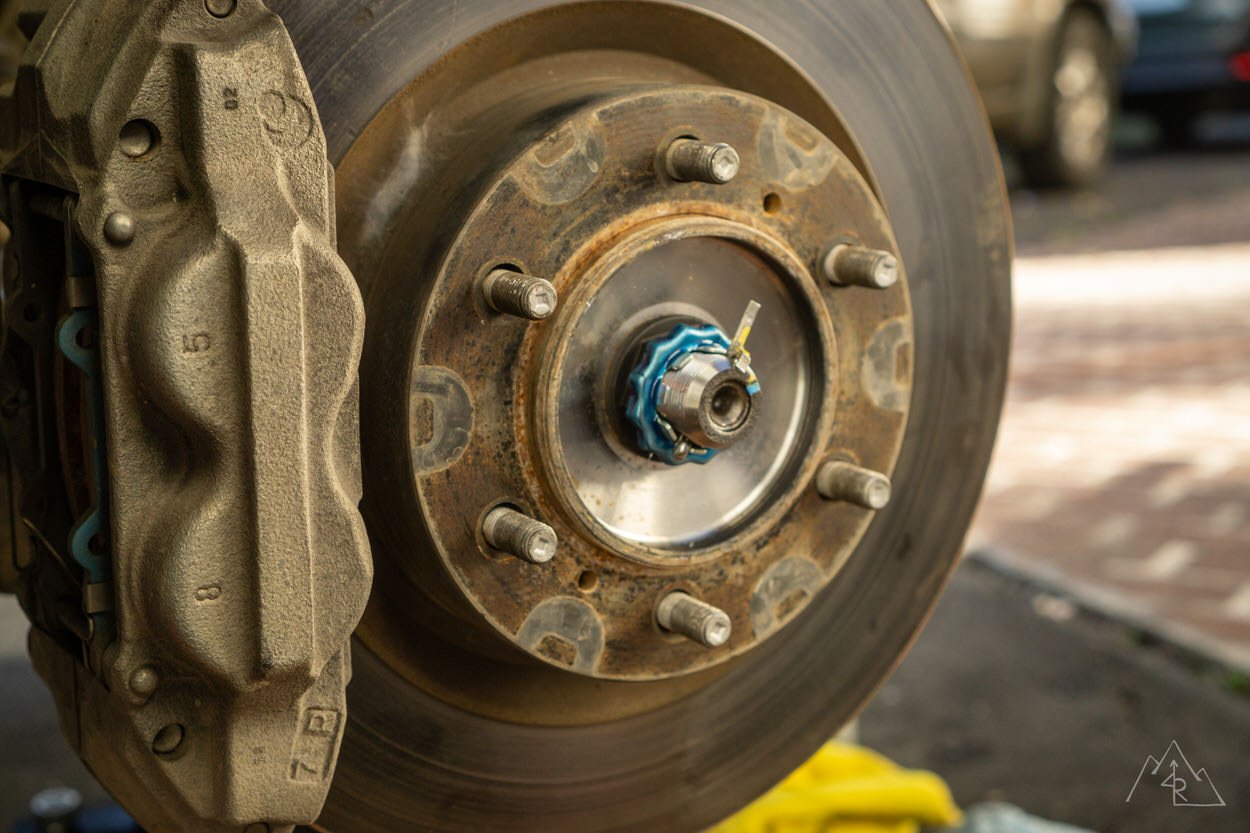
Remove the axle nut dust cap with a flat head screwdriver and a dead blow hammer. The pointier the end the better for the screwdriver as you wedge it between the cap and the hub assembly.
Work your way around the cap until it pops off. You may damage the cap in removing it, which is why I recommend having a spare on-hand. With the cap removed, take out the cotter pin on the retention cap.
Metric Axle Hub Nut Socket Size: 35mm
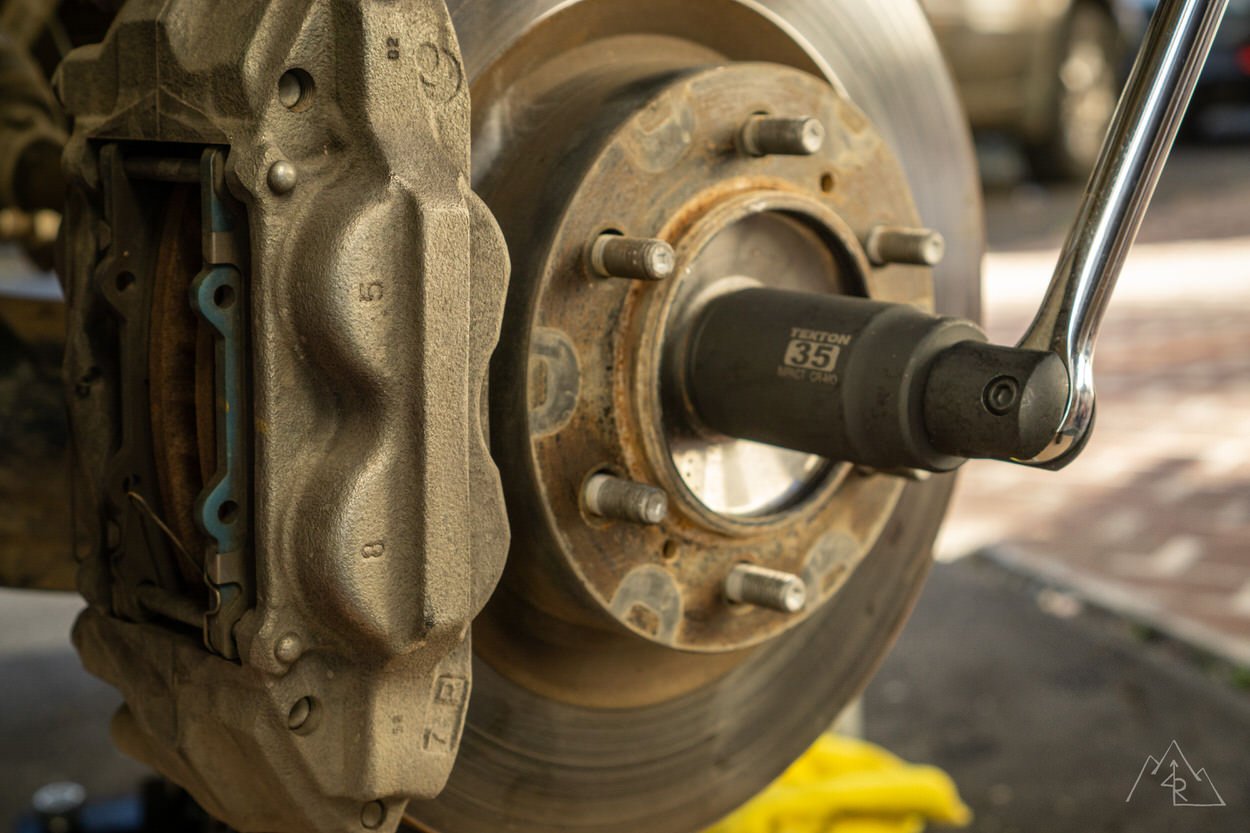
Remove the retention cap, then take your 35mm socket and breaker bar to spin the axle nut off.
Make sure your 4wd is engaged and parking brake on to keep the axle from spinning. Remove the nut and set it aside.
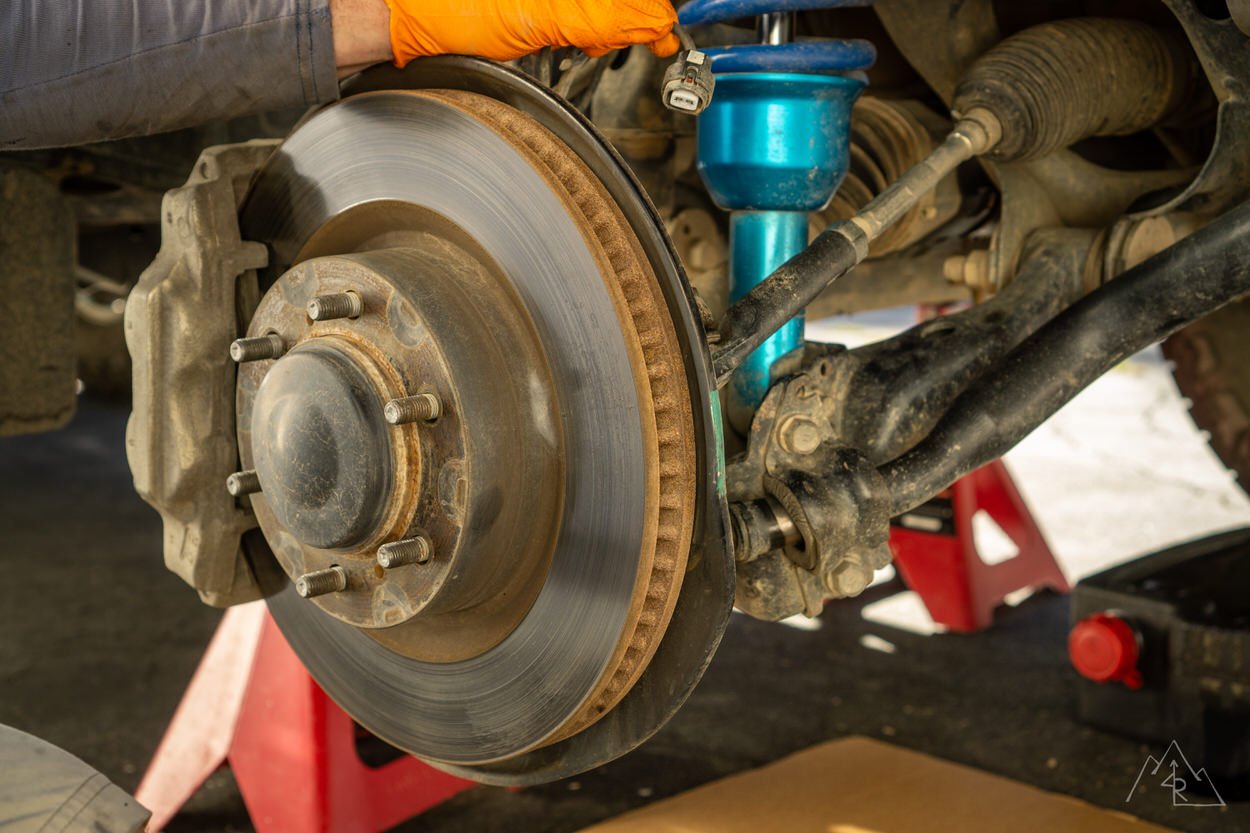
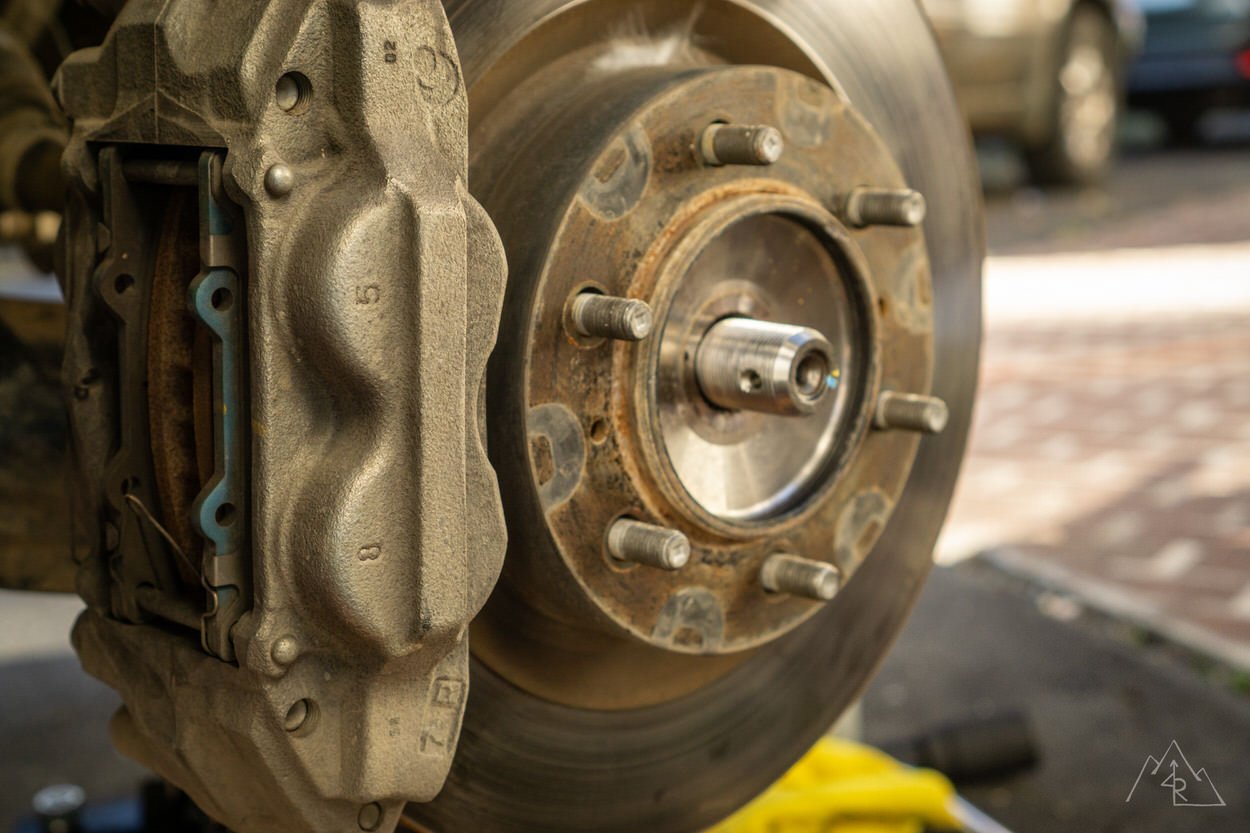
Step 6. Remove LCA Bolts
Remove the two 19mm lower control arm bolts, allowing the spindle to move freely.
Step 7. Remove Axle From Hub
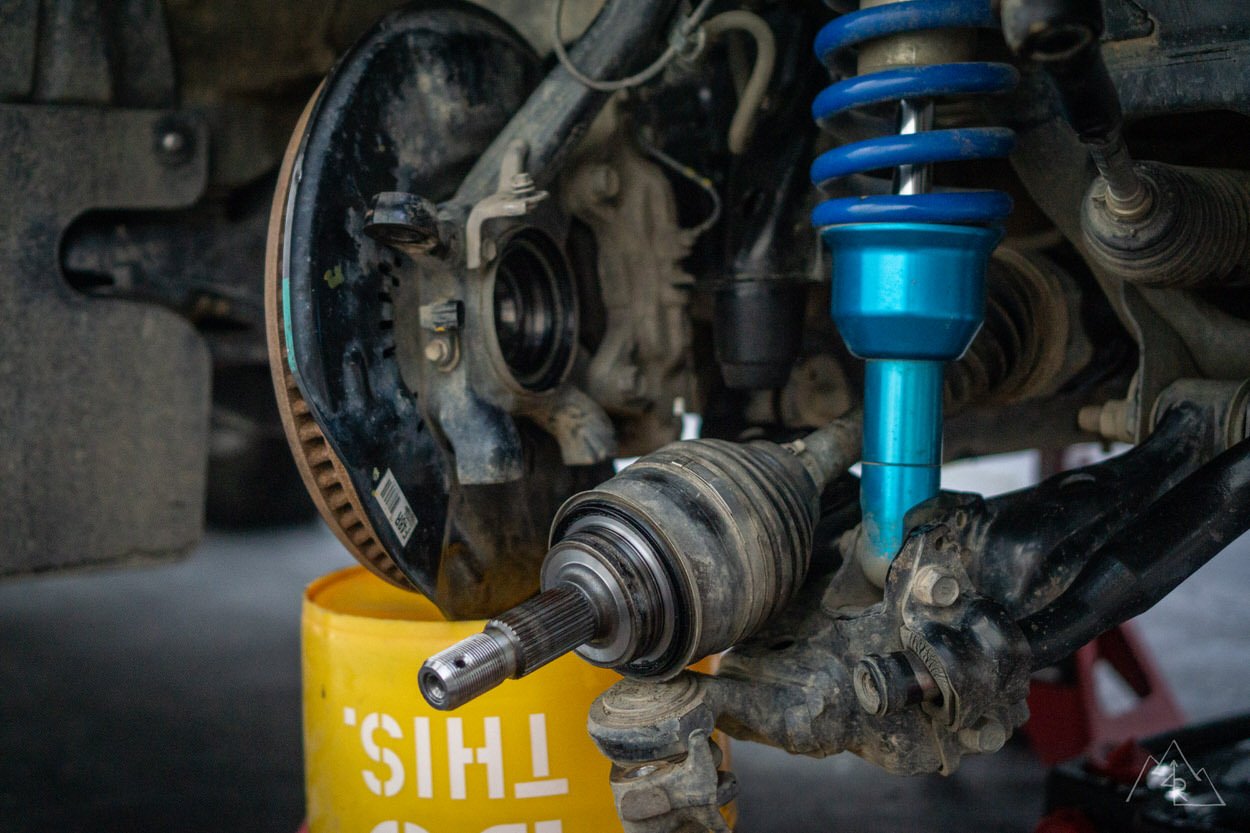
Take the axle nut and thread it on backward until the axle is almost flush with the nut. This will allow you to hit the nut with the dead blow and not damage the axle threads themselves.
While holding the spindle away from the lower control arm, hit the end of the axle until it breaks free from the hub. If the axle doesn’t move, you can use a block of wood against the nut and a larger sledgehammer to break it free. If it remains stuck, spray penetrating fluid on the splines and wait the designated amount of time to try again.
Once the axle is free from the hub, pull the spindle to one side and secure it using a strap or bungee.
Step 8. Remove CV Axle
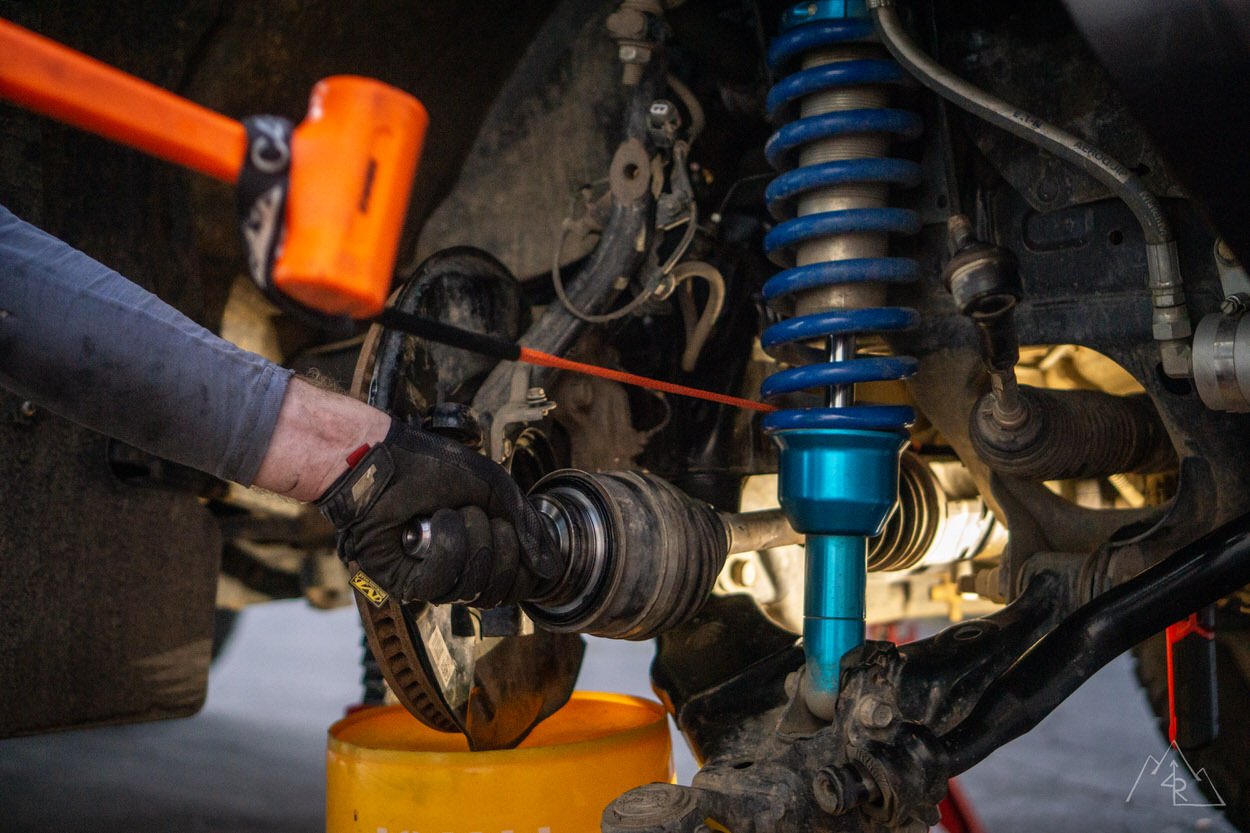
Using the C4RS CV tool and following the provided instructions, remove the CV axle from the front differential.
There is an internal clip holding in the CV axle. If the axle is difficult to remove, rotate the axle 90º and try again, leaving the puller knot in the same location each rotation.
The dust shield on the CV can be damaged in this process, which is why it’s good to have a spare handy.

If at any point after removing the CV axle you need to stop and take a break from working, use a latex shop glove to cover the open axle end to prevent any contaminants from getting into the differential.
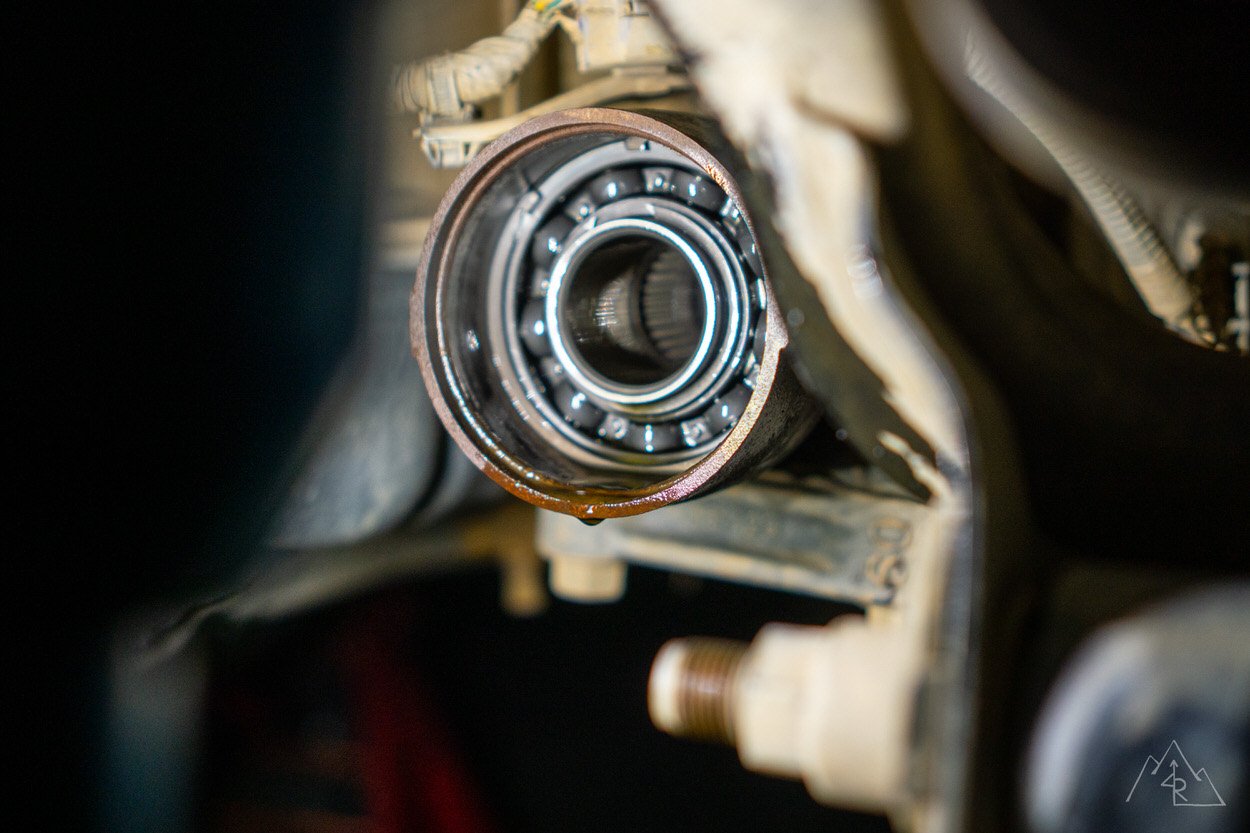
Step 9. Inspect Existing Seal
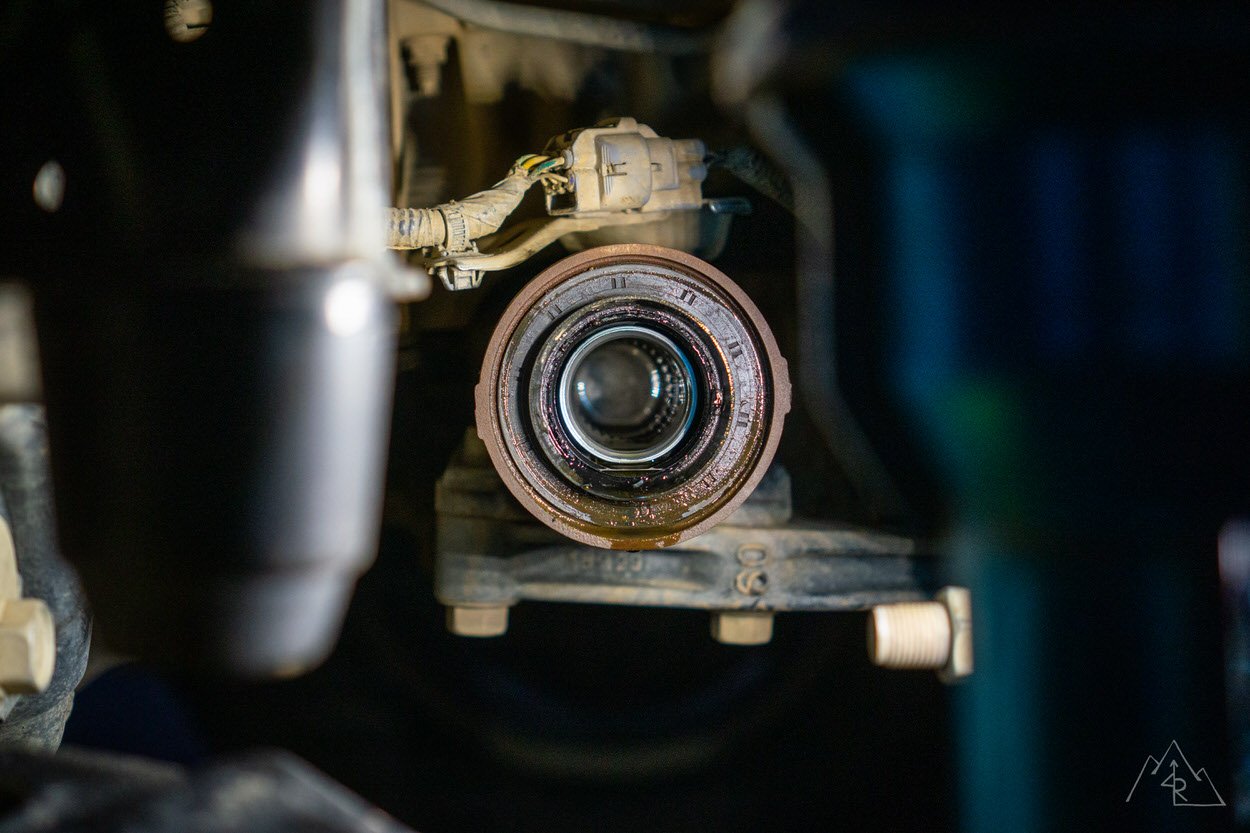
Before removing the existing seal, you’ll want to measure the depth that it was installed and take a photo for reference. You’ll want to match this depth when installing the new seal.
Step 10. Remove Old Axle Seal
Using the seal remover tool, remove the old axle seal. You’ll want to have some cardboard or a small oil pan under the axle when you remove the seal as there is a chance some remaining gear oil will run out.
Get the tip of the tool behind the seal and work around the seal while pulling outwards. It’s ok to damage the old seal… but take extra care not to contact the inside of the axle housing with the tip of the tool. If you damage this surface, you risk damaging your new seal when you reinstall. No Bueno.
Step 11. Clean Surface
With a shop towel, wipe away any remaining gear oil or debris from the axle housing. Inspect the housing for any damage that might have occurred when removing the seal.
If you did damage the housing, you’ll need to evaluate and fix it before installing a new seal.
Step 12. Prep New Seal & Housing

Take some fresh gear oil and coat the seal and the inside of the axle housing. This will reduce friction and allow for an easier install.
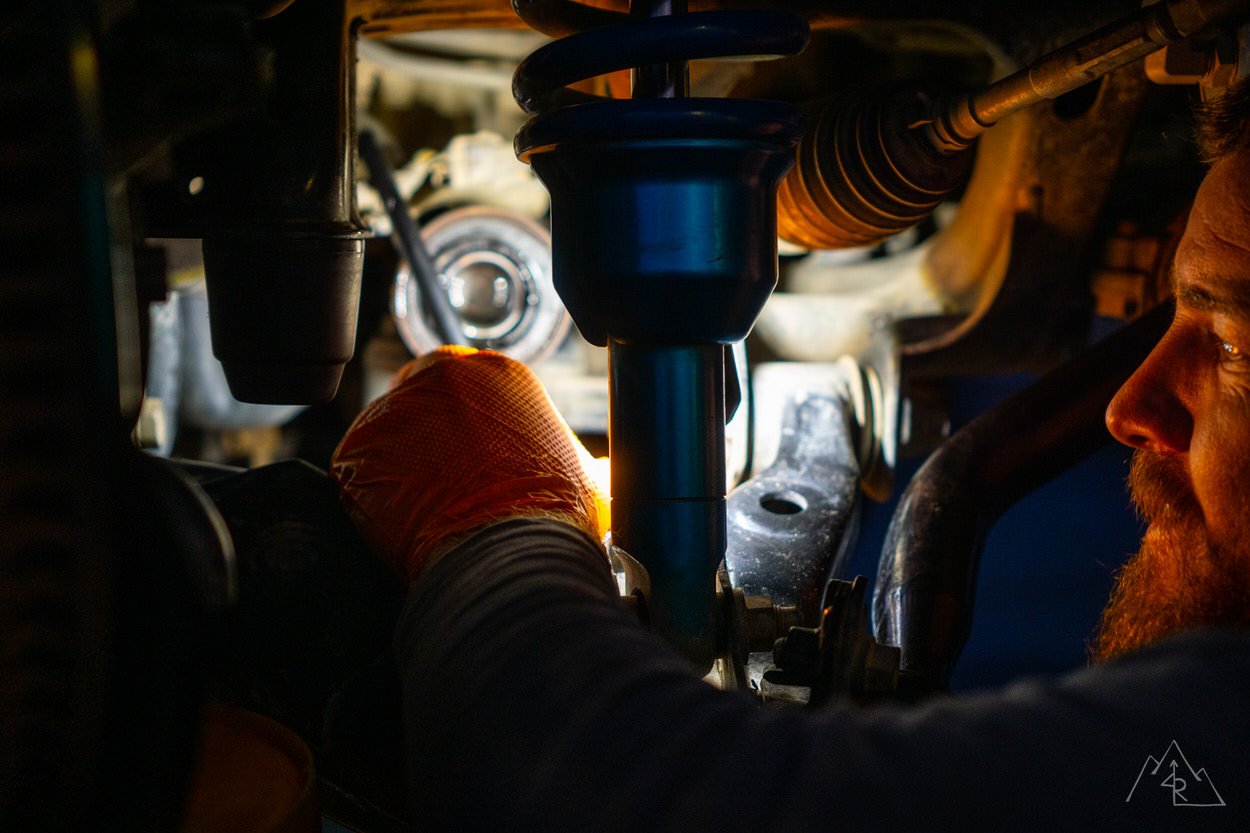
Step 13. Install New Seal

Square the new seal in the housing. Set the 2” PVC coupler against the seal and with the dead blow, begin to tap the seal into place. I found that using the end of the hammer thrusting in towards the center of the vehicle was the most effective way to keep the seal square with the housing as it is hammered into place.

Refer to the photo you took of the old seal to determine how far in to seat the new seal. Once the seal reaches the appropriate depth in the housing, wipe any excess oil away.
Step 14. Reinstall CV Axle
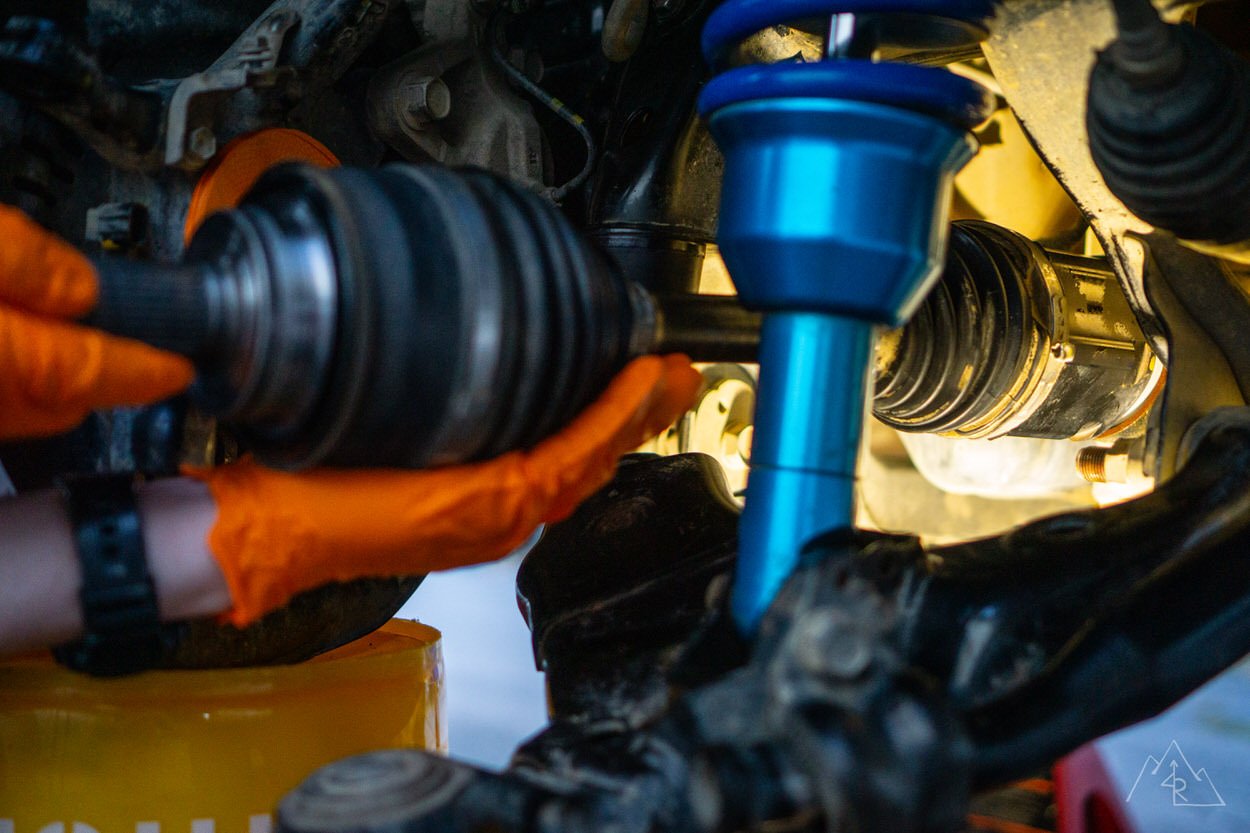
Clean your removed CV axle on both the shaft ends and the boots.
CV boots clean of debris last longer and they’re much simpler to clean off the vehicle, so do it while it’s easy. Orient the axle with the correct end towards the axle housing, and the open side of the clip facing down. If the clip rotates, the axle won’t slide into the housing.
Take care to not damage your new axle seal when sliding the CV into the housing. With everything lined up, a good shove should allow the CV to pop into place. If the CV doesn’t want to pop in, pull it back and check the clip orientation.
As a last resort, you can strike the end of the CV shaft with the dead blow towards the axle housing holding the CV perfectly in-line with the axle.
Step 15. Reinstall CV Into Hub

Make sure both the CV splines and the hub splines are free of surface rust or debris.
Any surface rust should be removed with a small wire brush and sprayed with brake cleaner to remove all debris or penetrating fluid from the removal process. Add a light layer of anti-seize onto the hub splines to keep rust from forming for the next time you need to disassemble the front end.
Make sure any of the other dust and debris boots are clean. Align the hub and axle and slide through until the boot on the outside of the axle contacts the inside of the hub. Don’t install the axle nut yet.
Step 16. Fasten Spindle To LCA
Using the two 19mm bolts, align the spindle to the lower control arm and install the bolts. Torque them evenly to 118 foot-pounds. Mark the bolts with witness marks as a reference.
Add Loctite to the lower control arm bolts for additional security.
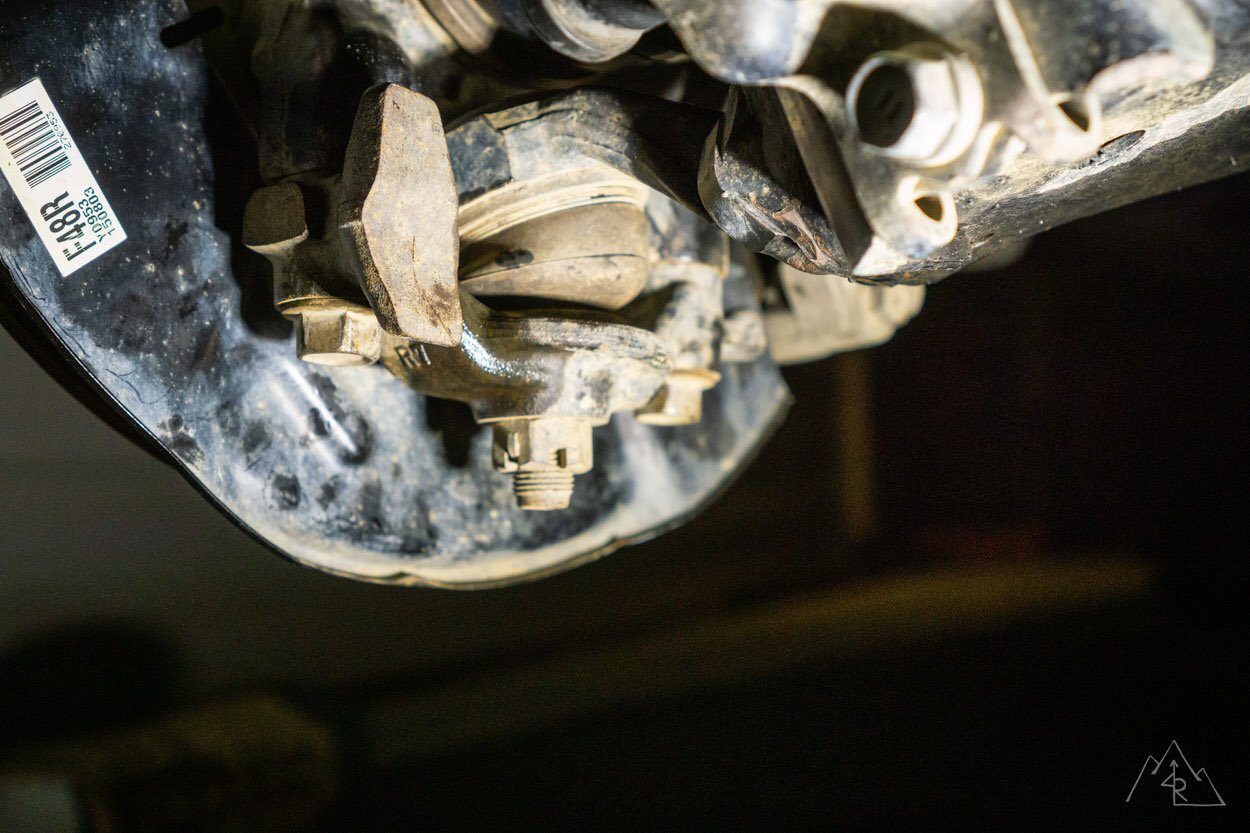
Step 17. Reinstall Axle Nut
Inspect the existing axle nut to make sure it’s true and free from deformation that might have occurred during the removal process or when removing the axle from the hub. If damaged, replace it with a new part. Thread the axle nut onto the axle and torque to 174 foot-pounds using the 35mm socket. Have someone sit inside the vehicle with their foot on the brake to keep the hub assembly from rotating while setting to spec.
When the hub is torqued, reinstall the retention cap and new cotter pin. Take the hub cab and square it up to the hub. With a centered a firm hit, strike the cap with a dead blow until the cap is fully seated.
Step 18. Reinstall Tie Rod End
Reinstall the tie rod into the spindle taking care to not damage the dust boot. Inspect the boot for any previous damage that might have been caused in the removal process. Replace if needed. Torque the castle nut with a 19mm socket to 67 foot-pounds and install a new cotter pin.
Step 19. Connect ABS Sensor
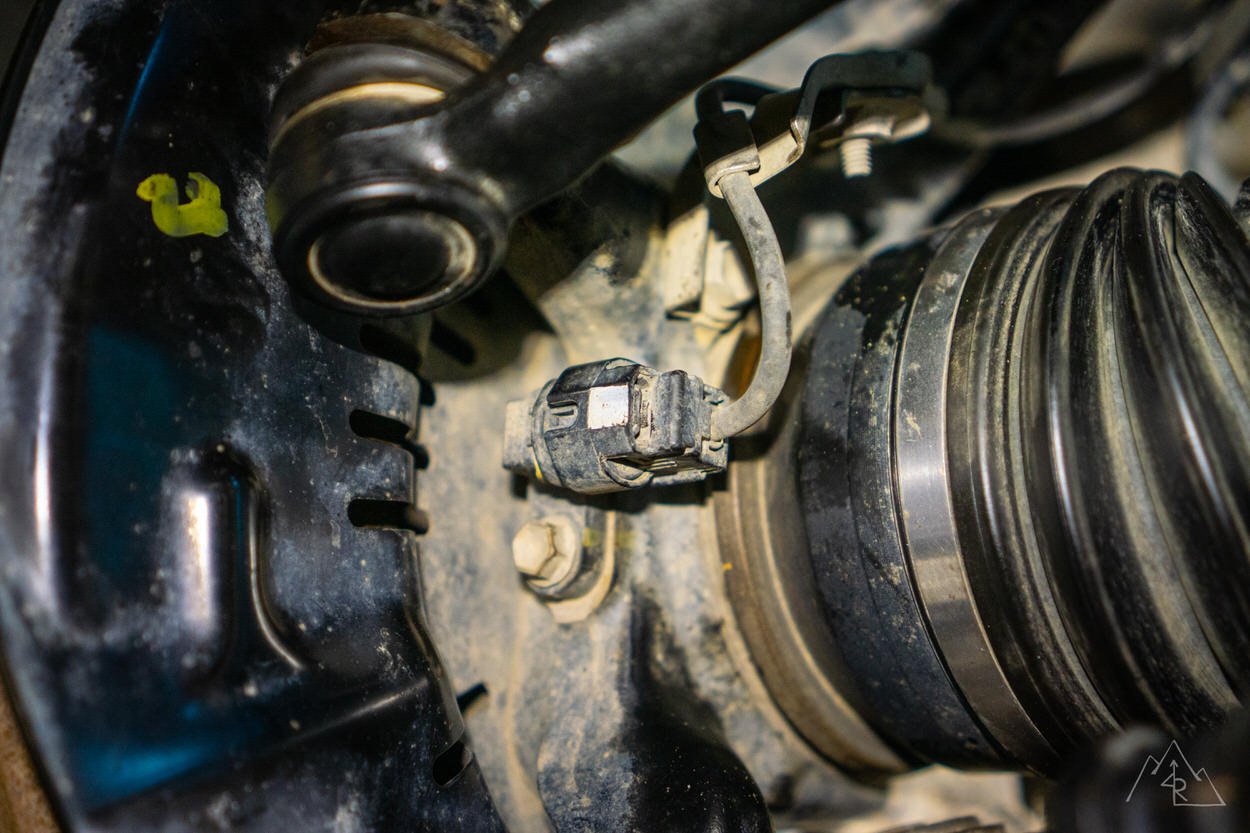
Using a 10mm socket, bolt the ABS wire bracket onto the spindle and plug the wire into the speed sensor on the spindle.
Step 20. Fill Front Differential
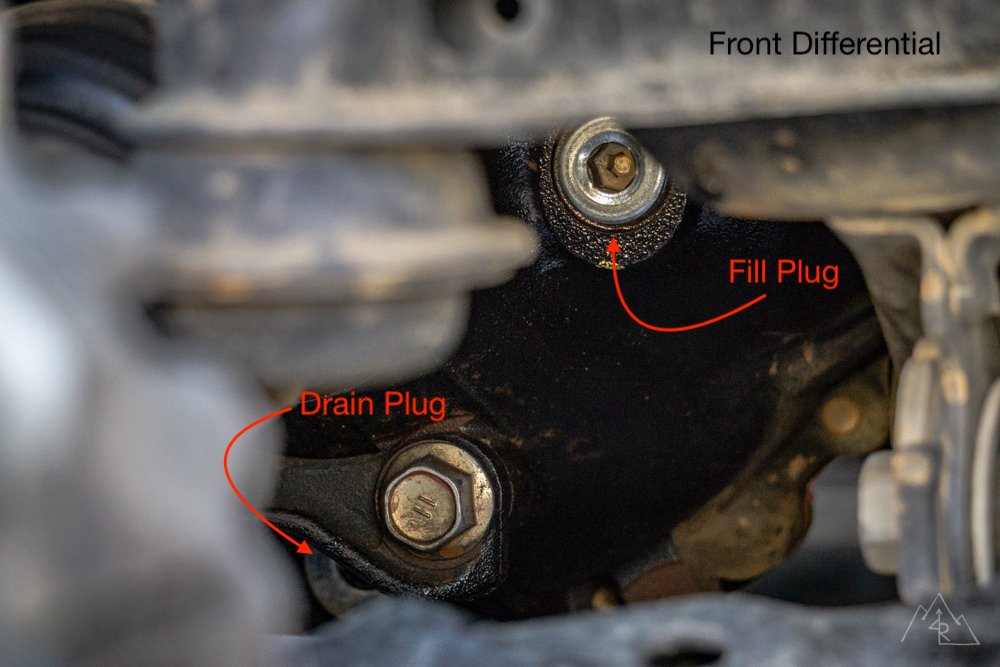
Refill your front differential with the appropriate amount of fluid using this guide.
Step 21. Inspect For Leaks & Reinstall Wheel

Let the vehicle sit overnight if possible to inspect for any leaks after everything is back together and full of gear oil. If everything is dry, reinstall your wheel and torque the lug nuts to 85 foot-pounds. Then reinstall your skid plate and you’re finished!
Final Thoughts

I hope this guide has given you the confidence and know-how to get this repair fixed in your own driveway! Many of the skills learned in this process will be needed if you replace a CV axle on the trail and need to make a trail repair!
Better to practice at home first when the dealership and parts are local and easy to access!
I did this job recently and it seemed to have gone well. A month later I’ve noticed a squeak from the passenger side axel. I pulled the tire and use a stethoscope to locate the source. It is definitely coming from the passenger side diff tube area. Done anyone know what might squeak? Could the new seal squeak like that?
thanks
mike
Excellent writeup!
For those looking for an easier way to set the seal, there is a specialty tool available from Wits End in Medford Oregon:
Toyota 4WD IFS Output Shaft Seal Driver (ASD-2) (absolute-wits-end.com)
It’ll take the guess work out of the seal depth and a uniform setting. Hey, PVC works too!
Thanks and Cheers,
Mike
Great write-up Max. To prevent the disc from turning while removing/installing the axle nut…you can simply place a screwdriver down into the vented disc slots. The screw driver will rest against the calliper while torque is applied.
excellent , truly amazing step by step post including great photos..thank you so much..
question about seals.
.am I understanding this correctly about the necessary seal replacement to have on hand at time of work
seal for the differentia or seal output shaft seal
and anti dust seal on back of knuckle
so two for each side..
is this correct or am i missing something.
any help would be greatly appreciated
Max,
Do I need to drain the diff or can I just swap out the axle. I’ve seen other vids/write ups where the dif drain is not mentioned or done with minimal leaking of residual fluid at the seal. If seal is in good shape, I’d prefer not to disrupt factory set up but I do have the seal just in case. Drain and refill is due but I have a time crunch and the cv boot was damaged by shop heating during alignment, I believe. I swapped both axles on my 4th gen but that was many years ago. Thanks for all!! Steve
You don’t need to, but you’ll lose some of the fluid when changing things out and you’ll need to adjust the level accordingly after the CV install. Best of luck! // Max
Awesome write up and great content as always! Are there additional considerations for a vehicle equipped with KDSS? Routine maintenance will be done in shop (under warranty), but I like to have info set aside for any trail repairs to limp back to someone with more than my youtube / googling skillset.
Nothing KDSS related for this one as the lower control arm isn’t touched, which is where your KDSS bushing is. Best // Max
What is the 21 mm socket used for? Nice work.. tackling a needle bearing replacement on a 5th gen this weekend.
I hope your project went well over the weekend. The 21mm is for the lug nuts. You can also sometimes use a 13/16″ socket too, depending on your socket type.
Project is done and went well.. figured out what the 21 was for when I went to take the lugs off!! 😉
👍🏻
Excellent write up. Definitely seems like a manageable DIY repair. Nice work.
It’s a pretty straight forward repair if caution is taken, and can serve as a great “practice” for replacing a CV on the trail if needed!