Door Edge Trim Guard Protectors – 5th Gen 4Runner

Protect your 4Runner’s paint with a set of Door Edge Trim Guard Protectors by Lamin-X
I really enjoy keeping the 4Runners clean.
Currently, we have two 4Runners, one (Jade – 2016 TEP) that will be kept extremely clean and our second, the original white 2014 TEP (that’s our first post btw).
Our original white trail edition has incurred some serious scratches so protecting our door edges is almost out of the question. After ripping off valances and causing 3ft gashes in our body on rocks, minor scratches on the door don’t really both me anymore.
With that being said, I also have an OCD side.
Keep your 4Runner free from paint chips and scratches
Protecting paint from chips and scratches will help resale value, and for us, crazed OCD people alike will help our peace of mind knowing the 4Runner is protected.
For Jade, we wanted to go with as much protection possible. We already added the door cup guards for the 4Runner and wanted to protect the door edges as well with the Lamin-X invisible door edge guard.
These things do exactly what you would expect, protect the edge of your doors against nicks and dings.
Why Lamin-X Door Edge Guards?
- Comes in ½” x 24 universal strips
- High-strength 8 mil glossy film
- Easy to install
- Adhesive-backed
- Edge guards (universal): Check Today’s Price
Sounds pretty good right? Yeah, I thought so too. Well, let’s keep those door edges chip-free and get these installed.
Installation
This installation/application is about as easy as it gets but there is an art to it. I would recommend grabbing a set of the door cups so you get the provided water spritz bottle in that kit.
The only difficult portion is installing the trim on the rear door in the small section between the upper and lower portion.
Clean the door edges

You can use water, and microfiber to thoroughly clean the door edges inside and out. Remove all dirt, grease, and grime.
Clean your fingers thoroughly and then keep them moist with water during the entire installation. This will prevent fingerprints in the adhesive.
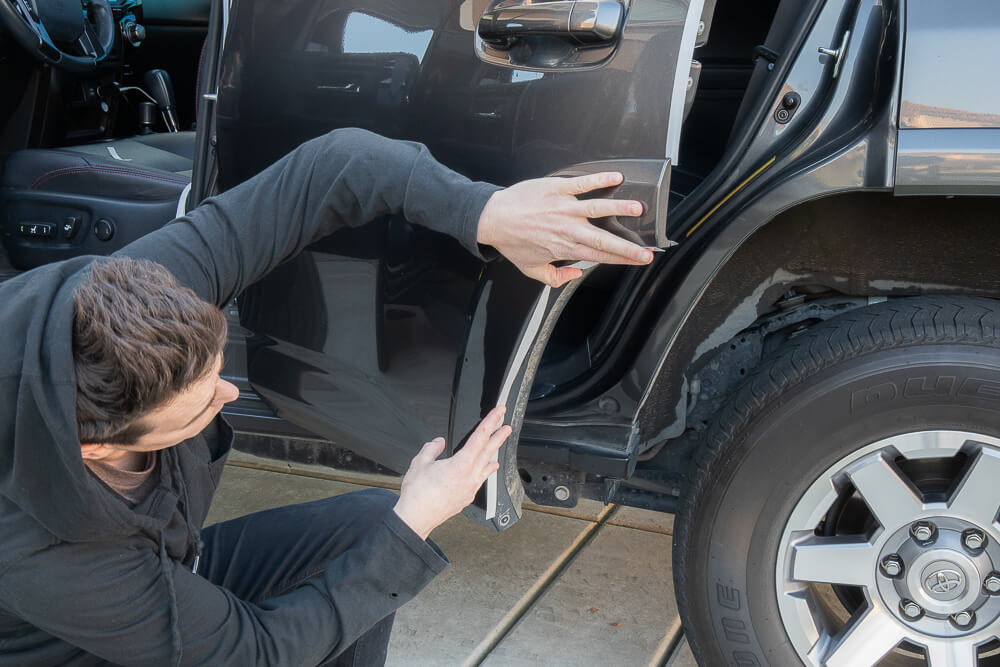
Measure and Cut Film

Start by measuring the length of the door edge with each strip of film and cut to fit.
NOTE: Save this piece for the rear door install.
Apply the Film

Apply the film to the top outer edge of the door leaving half of the material width to wrap the inside of the door.
Using your moist finger, apply the film down the outside of the door with very little stretching/pulling pressure on the film. Make sure the film alignment is straight and even during this process. If the film becomes misaligned, just pull back and reapply. Wrap the remaining film around the edge of the inside of the door. Allow a couple of weeks to allow any small pockets to disappear.
Installing Rear Door Trim Guards

You want to start by installing, measuring and cutting the first section on the rear door. Then use the cut section from the first part of the application on the front door.
The small portion of the Lamin-X door edge from the front is difficult to install/apply at first. Let the water apply to the adhesive and relax. Then, it will start to mold to its section.
Last Strip of Lamin-X on the Rear Door
Apply the last strip of Lamin-X on the lower curved portion of the rear door.
Maintenance
Wash the film regularly with the same car soap that you use on your cars finish. Wax the film at least 3-4 times a year to maintain the UV inhibitors.
Are the door edge guards worth it?
If you have any intention of taking care of your truck, I would say absolutely. They are more affordable than taking your truck to a body shop for chip repair, that’s for sure.
Whats the width of the strips?
Tom, the Lamin-x Clear Door Edge Guards come with four (4) and measure .5″ x 36″