
Utilizing T-Slot (extrusion) crossbars that are twice the size of others on the market, AL Offroad is on the scene with the beefiest of roof racks.
Their racks are offered in full-size length with an aerodynamic flush fit fairing down to the windshield. AL Offroad currently offers racks for the 5th/4th Gen 4Runner, 2nd/3rd Gen Tacoma, 2nd Gen Sequoia, and the FJ Cruiser.

While there are other modular roof racks on the market, AL Offroad is raising the bar using top-quality components in their design, a super stout mounting system, and noticeably larger crossbars.
Fast Facts
- Larger 3” “Wumbo” T-Slot aluminum bars (1.5” x 3” x 50”)
- Made in the U.S.A. (Greenville, TX)
- Drill-free mounting
- Rustproof (aluminum components with stainless steel hardware)
- Noise-proof aerodynamic design
- Load Rating: 400lbs (dynamic) / 800lbs (static)
- Total cross bars: 6
- Overall weight: 70lbs
Table Of Contents
Installation
From start to finish, the AL Offroad Roof Rack can take anywhere from 2 to 3 hours. If you choose to prep and clean your roof surface when your roof is bare, it could take slightly longer. When removing your OEM roof rack, be sure to set aside all parts and hardware, as some will be reused with the AL Offroad Roof Rack.
Tools Required
- 10mm 1/4″ drive socket wrench
- 13mm flex head ratchet
- 3/16″ Allen wrench
- Soft blanket or microfiber towel
- Blue painter’s tape
- Clear RTV silicone
- Tape measure
Step 0. (Optional)

When installing a new roof rack, it’s a great time to take advantage of giving your roof a good cleaning when all the accessories and racks are removed. If you’re new to paint protecting your 4Runner, Adam’s Polishes offers a wide variety of products for paint maintenance.
With the OEM rack removed, I was able to:
- Wash and use a clay bar to remove all surface contaminants
- Touch up any paint chips or scratches with a Toyota color-matched paint pen
- Polish the surface with a dual-action polisher and finishing polish
- Ceramic coat the roof
I highly recommend this process, since after you install your roof rack, you won’t have this kind of access anymore.
Step 1. Prepare All Pieces

Start by laying out all of the rack components on a table. Being able to prepare all the items on a flat workspace helps to visualize the placement of all the parts and hardware you’ll need during the installation.
NOTE: For the prep photos, I did have an early version of the B-Pillar brackets. However, they were swapped out for the correct updated version moving forward.
PRO TIP: Lay a soft blanket out on your roof to protect the area and provide a safe workspace.
Step 2. Install Rubber Grommets

AL Offroad includes pre-cut rubber grommet strips that provide a soft sealing base around the B and C Pillar mounts to the roof. This increases the contact patch, as well as decreases the amount of silicone needed to seal around the bolting locations on the roof.
The grommets have a snug fit. Utilizing a flat-head screwdriver or plastic putty knife, push the grommet into place.

Once the rubber seal was properly installed, I hit the holes with some clear silicone.

NOTE: By the time you finish the install, you may need to cut or remove your black roof panel weatherstrip. This removes easily just by pulling upwards. This is good to note while you are taking everything apart and starting your installation.
Step 3. Install B & C Pillar Brackets

In this step, you’ll utilize the OEM hardware you removed earlier. Attach the B-pillar brackets in the following order onto the rubber grommet:
- Shim spacer
- Spacer
- B-pillar bracket

Then, bolt down the B-pillar assembly with the OEM hardware.
Be sure to torque down the OEM roof rack bolts to 18.0 Nm +/- 3 Nm or 13 ft·lbs.

For the C-pillar brackets, repeat the same steps previously with the B-pillar. Keep in mind that the tops of the bracket will point towards the center and forward on the vehicle.
Bracket #3 (notated by the three holes on the top) will go into the driver’s side location, and bracket #4 will go on the passenger side.
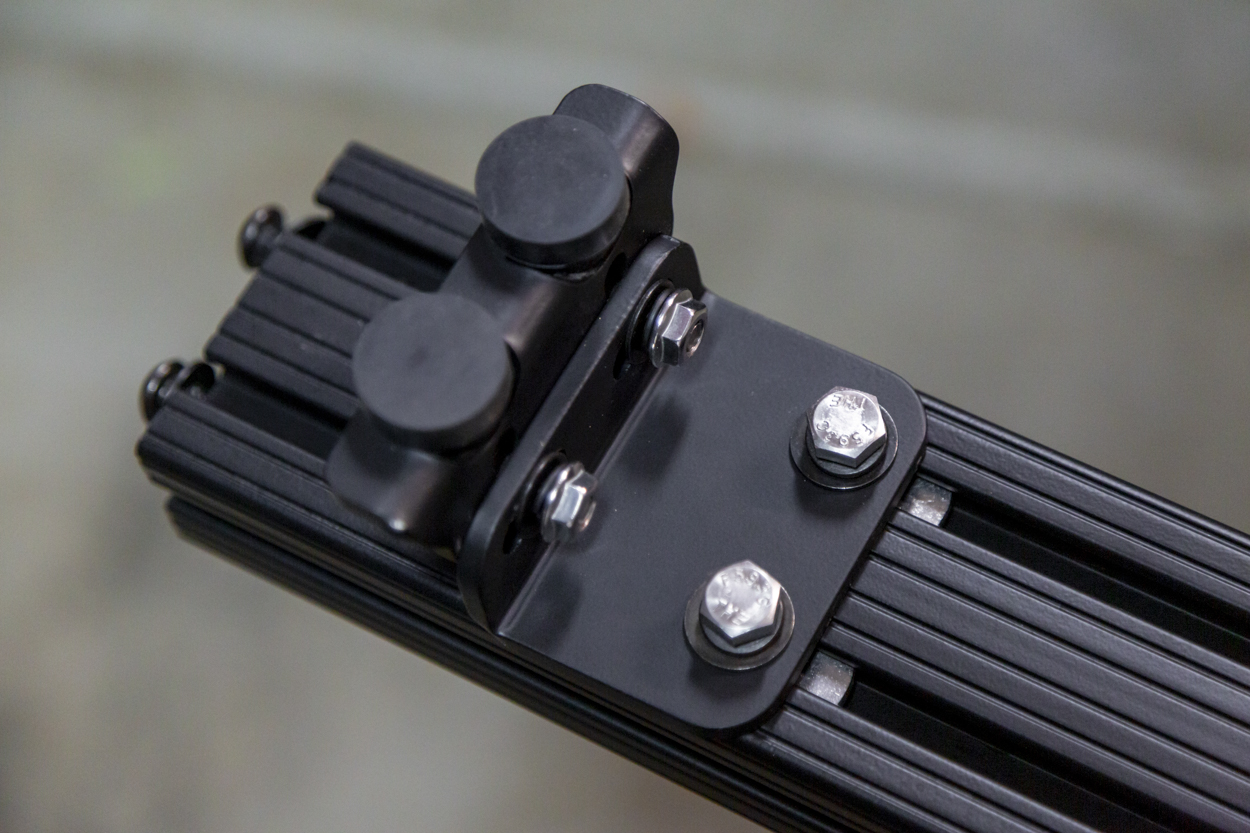
Step 4. Attach the Crossbars

The T-Slot hardware will install on the brackets with the bolt feeding up from the bottom. As pictured above, the assembly sequence is:
- Bolt (feeding up from the bottom of the bracket)
- Lock washer
- Washer into the bracket
- Then locked in on top with the T-Slot nut
Make sure the T-Slot nut has the protrusion facing upward towards the inside of the crossbar. Prepare to slide the crossbars on by facing the T-Slot nuts towards the inside of the vehicle. Slide one side of the crossbar into the bracket, then feed it into the opposite side of the vehicle.

Once the crossbars are in place, start by checking each side using a measuring tape to make sure that the bracket and crossbar are centered.
When the bar is centered, tighten down the hardware with the 13mm ratchet head wrench.

Example of mounted crossbars above.
Step 5. Attach the Side Rails

The side rails are labeled “R” (passenger) and “L” (driver) to designate the sides at which they attach to the crossbars.

I would suggest using a friend when installing the sidebars to ensure even placement and to prevent any accidents, like scratching the paint.

The rearmost bracket has two designated holes for the crossbar to mount with the side rail.
During this step, only attach the B-pillar and C-pillar crossbars to the side rails using the flat washers and button head bolts.

PRO TIP: The rack has very tight tolerances. I would recommend using blue tape on the A-pillars to prevent any accidental bumping or scratching before getting ready to set the front support rail.
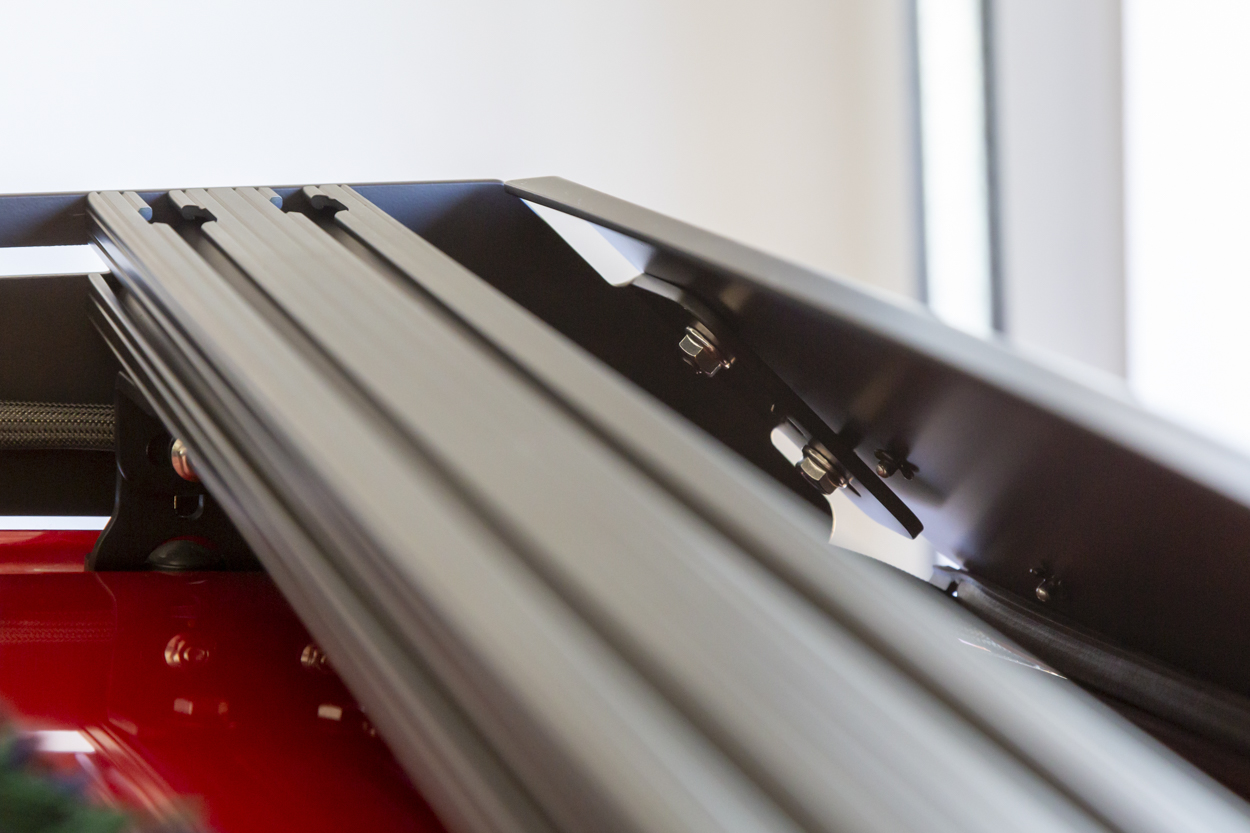
Step 6. Install the Front Support Rail

Grab one of the crossbars and prep it by installing both rubber feet brackets on the bottom (the side without the notched openings).

Leave the hardware somewhat loose for adjustability in the weather stripping track to ensure proper placement.
PRO TIP: I found the installation went best when I fully extended the brackets to the highest setting before mounting it to the side panels and adjusting later.

Install the crossbar in the double hole openings at the front of the two side panels.
Adjust the two front feet for proper placement. When finalized, tighten all bracket hardware into place.
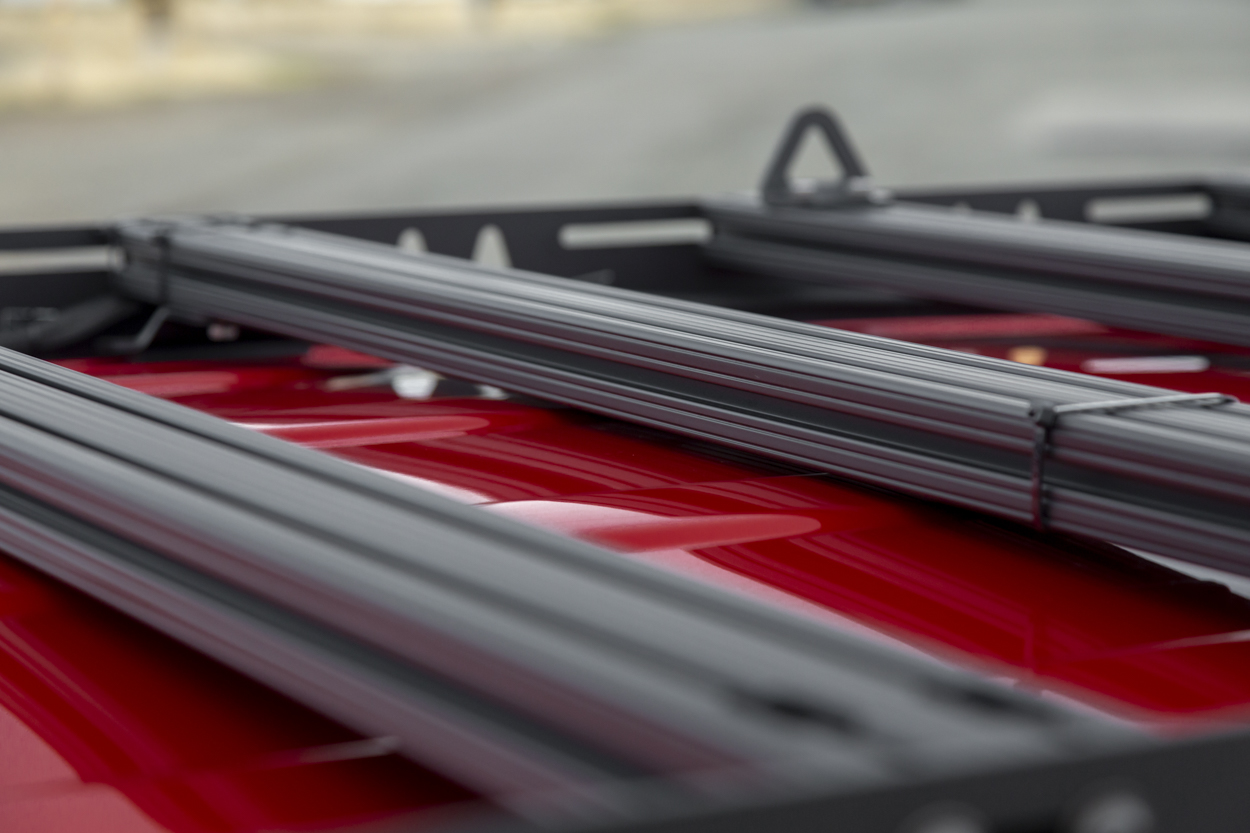
Step 7. Attach the Remaining Crossbars

Now that all the main points of contact to the side rails are connected, space out the remaining two bars to your choosing.
PRO TIP: This setup is designed with the sunroof in mind. For those without a sunroof, I recommend purchasing an additional seventh bar to fill that gap.
Step 7(A). Mid Roof Crossbar Footing Support

As described in Step 6, use the third smaller foot to attach to a crossbar from the underside with the supplied hardware.
This mid-roof footing will help add extra support and reduce any lateral movement between the B and C-pillars.
Step 8. Install the Wind Fairing

When installing the wind fairing, it’s best to install one side first before the other.

Install by using one button head screw and washer, then fasten on the rear with the flanged nut.

When installing the other side of the fairing, you will need to use a bit of pressure as the fairing will rest right up against the paint, causing a slight curve.
This is by design to ensure a curved fit across the roofline.
The space between the most forward-facing crossbar can be tight, so you may need to enlist the help of someone with small wrists to complete this step.
Accessories
The AL Offroad rack system has lots of available accessories.
Tie-Down Brackets

The tie-down brackets install like all accessories and hardware on the AL Offroad rack; lock washer, then washer feeding onto the bolt, into the bracket, and locked on the underside with the T-Slot nut with the protrusion facing into the crossbar.
The tie-downs are about 2.5 inches tall with a decent side opening to utilize straps, hooks, or ropes to hold down anything you might be hauling on the roof.
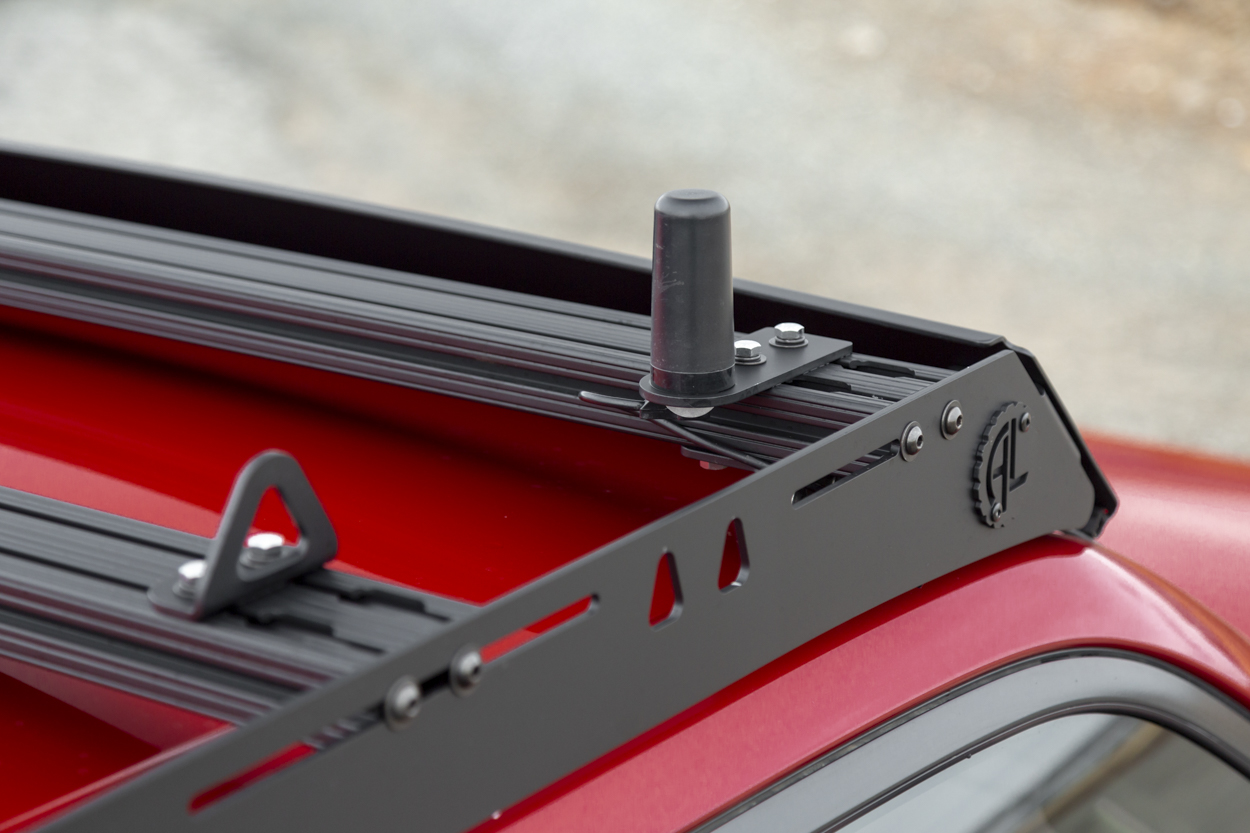
Radio Antenna Mount

The AL Offroad antenna mount attaches to the slotted crossbars with two points of contact for the hardware to run through, just like the tie-down brackets. The bracket has a 3/4” hole for GMRS or other radio antennas.
Initial Impressions

This is my second modular style roof rack that I have had on my 4Runner, and I can honestly say that I prefer the AL Offroad rack hands down.
It has a nice smooth powder coat over the side rails. All the edges, cuts, and attachment points are smooth to the touch, implying a high-quality metal cut.

It’s the little things that really made this rack stand out to me. The included rubber grommets for the weather channel to help keep out water, and the rubber feet for the front crossbars make a noticeable difference!
In my previous rack, I had just used a bent piece of metal with an adhesive foam strip. The AL Offroad rubber feet are about 1/4” thick!

Most importantly, their side rails sit FLUSH with the crossbars! Overall, this rack has a great fit and finish.
Final Thoughts

Overall, I was most impressed with the fit and finish of the components and pieces in the AL Offroad roof rack.
The most difficult part of the installation was getting the fitment of the rack to line up perfectly. With how low the rack sits to the roof from the crossbars to the front wind fairing, AL Offroad designed their rack with tight tolerances. There were moments through the installation where I had to double-check my measurements and how I had the pieces installed.
At times, I had to backtrack to make sure I had the footings and brackets installed at the right heights, angles, and positions. Then again, I really wanted to make sure I got everything as perfect and evenly aligned as possible, as my previous rack spent a few years on my 4Runner. I hope this one will too!

In the end, I am very satisfied with the design, how flush the side rails fit up against the crossbars, and how the rails contour the roofline.
Paired with the straight-up beefiness of these crossbars, this rack should support anything I throw at it throughout all my future adventures.
I just bought this rack and also have no instructions. Where can I find them or have them emailed to me. Thank you!
Hey Frank. Any further thoughts on the AL off-road rack?
Thanks
Klaus
Will the AL OFFROAD ONYX ROOF RACK FOR 5TH GEN 4RUNNER work on a 2000 Chevy Tahoe?
no
Does the rack height support a tilting sunroof on a 2021 4Runner?
You do have the full function of your sunroof.
Does the rack allow for operation of a factory sunroof? Specifically interested for a 2008 Sequoia.
.
Yes, you will have full function of your sunroof. The bar that is above the sunroof is structural and can not be removed but the sunroof does have full function.
I love the cover caps on the factory rail bolts, so many other design leaves them expose to UV damage and eventual breakdown leading to leaks.
We have an engineered industrial-grade gasket material that is UV-rated. The gasket is also covered by the spacer from UV light. Time will tell but if it is installed properly there should be no leaks.
Our rack just came in and had no instructions so thanks for posting this. I’m installing a vinyl wrap before I install the rack since I do t think it will ever be reachable for a good cleaning in the future.
The instructions were emailed to you. I have been emailing them to customers so that there is an open line of communication in case there are any questions.