
Old Man Emu BP51 Suspension Kit 2.5-3″ Lift Kit For 10+ 4Runner (with KDSS) – Install Guide, Overview & Initial Thoughts
Designed and engineered by ARB, the nitrogen-charged and progressive valved OME BP-51 high-performance shocks introduce a new level of competition to the current players in the game such as Fox, Icon and King.
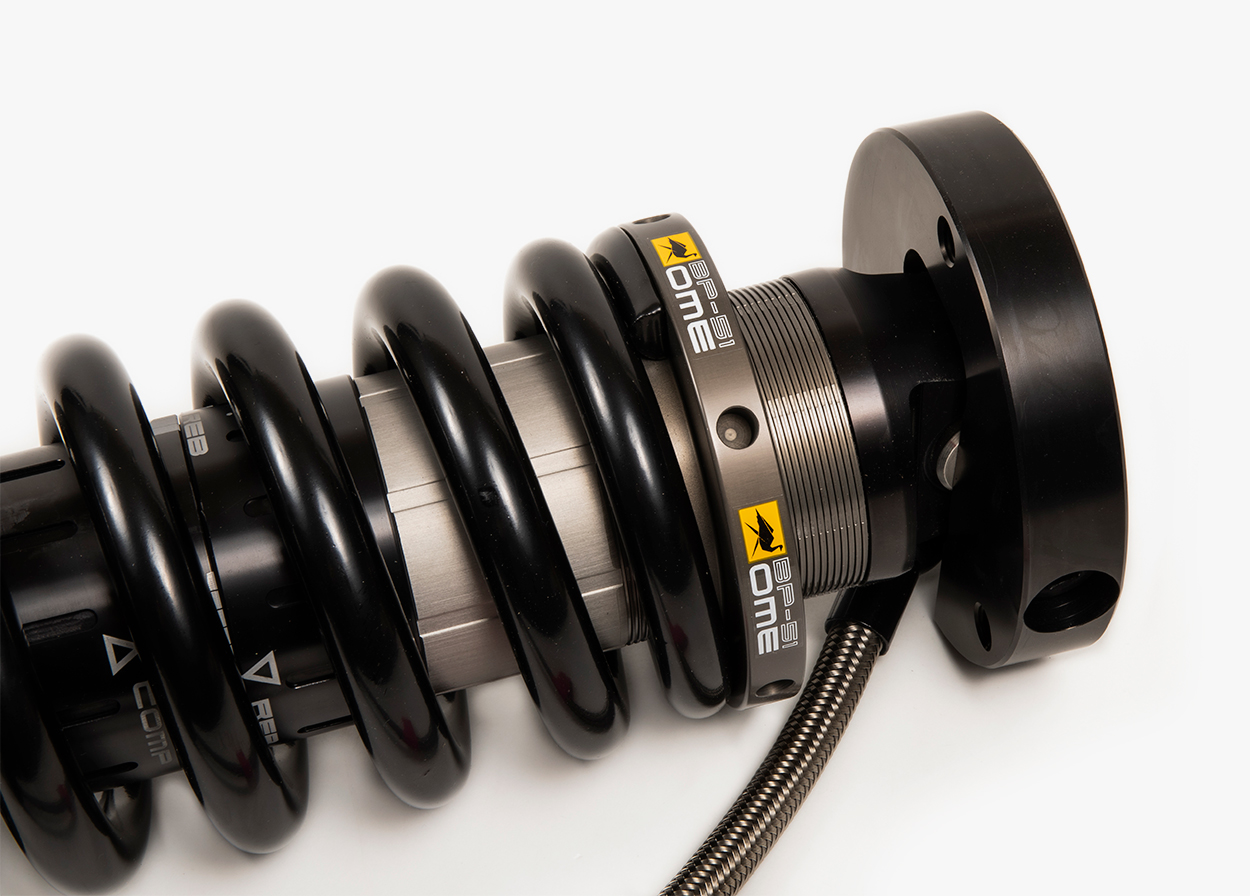
The new OME BP-51 offers a 51mm (2.0″) shock piston with internal bypass technology pushing the OD (outside diameter) to almost 3″ with remote reservoirs all the way around.
Each shock is independently adjustable for both rebound and compression offering true race technology off the road and well-mannered behaviors for everyday applications. The shock bodies are made of hard-anodized aircraft-grade 6061 T6 aluminum giving them an absolutely stunning finish. With the introduction of the shocks, ARB and the OME BP-51 line of shocks are looking to disrupt and truly compete with the well-known race shock manufactures.
The ARB/OME engineers took the concept of an external bypass race series shock and redesigned that into the internal compact core of a traditional shock, giving the BP-51 a modern-day truck fitment with race class heat dissipation technology.
What’s so special about the BP-51?

You really get full control of compression and rebound adjustments with an ultimate user-friendly experience. Most “adjustable” shocks out there are really only designed to adjust the compression of shock, not the rebound as well.
What’s compression and rebound?
- Compression: The direction the suspension/ shock travels in relation to the impact of the obstacle the vehicle has traveled over.
- Rebound: The direction the suspension travels after the compression stroke. Rebound is determined by the stored energy of the suspension components at full compression.
With a simple turn of the compression and rebound dial, you can literally change the shock performance on the fly; more comfort (soft), or increased control (firm). An increase in either setting stiffens the shim pack inside of the shock absorber. In return, this restricts oil flow within the bypass and increases the damping stroke throughout the bypass zone.
Depending on the terrain you are driving, you can adjust the shock compression and rebound individually from anywhere between a 200% – 300% increase in valving variance from full soft to firm through the adjuster. Simply put, when you make these adjustments, it will cause your suspension to respond in a softer or more firm manner.
Why is it so special?
The BP-51s are as close as you will get to “custom-tuned” shocks that can be done by you… in your garage. Very few shocks let you have full control of how you tune your compression and rebound. I am not saying these are the best shocks out there; however, they might just offer the most functionality and features within this price range. After wheeling with them a couple of times, I would put them up against my Icons any day that ends in Y.
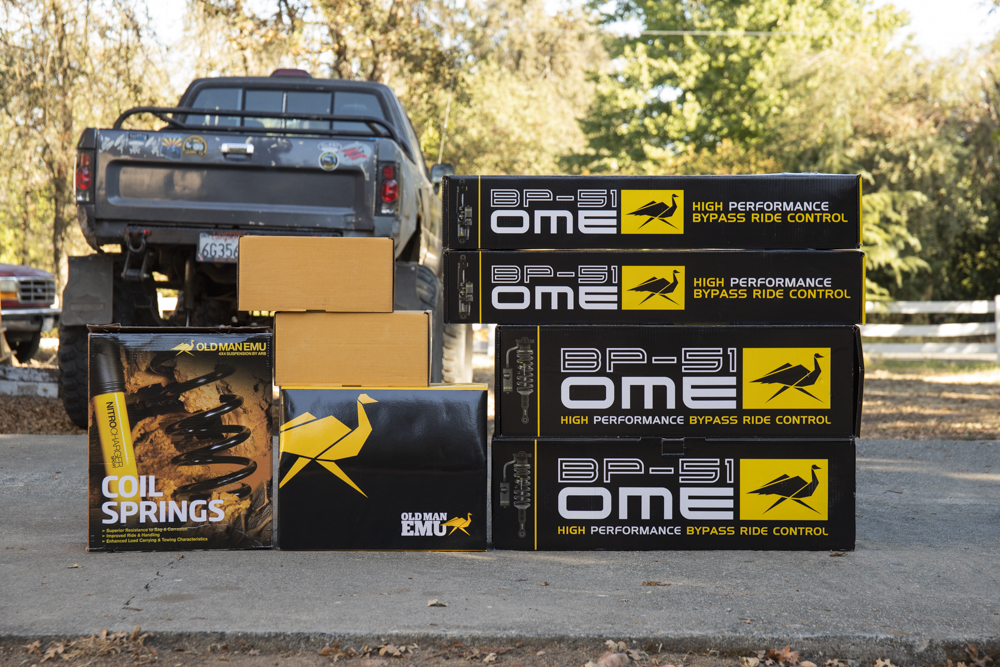
Product Highlights
- 3-year/37,000 mile warranty
- Internal bypass shock absorbers
- Progressive valving
- Remote reservoirs with advanced heat dissipation (also allowing increased travel of the shock body)
- Compression adjusters (all corners)
- Rebound adjusters (all corners)
- User-friendly valving adjustments
- Competitively Priced
Find them online:
- Non-KDSS 4Runner
- KDSS Equipped 4Runner
Product Options:
- 3″ Heavy Kit (Non-KDSS) – OME4RNR10HKBP51
- 3″ Medium Kit (Non-KDSS) – OME4RNR10MKBP51
- 3″ Heavy Kit (KDSS) – OME4RNR10HKBP51KD
- 3″ Medium Kit (KDSS) – OME4RNR10MKBP51KD
Resources:
BP-51 Full Overview
Keep in mind, these are not a true 2.5-inch shock like the rest of the mainstream race shocks out there. They are a 2.5-inch body but the piston within is smaller (51mm) than something like a 2.5″ FOX, Icon or KING. Old Man Emu really has focused their design and engineering around making the shock work better, not necessarily to be larger.
They developed their internal bypass shocks to be fully adjustable in both compression and rebound, while most shocks focus on compression adjusters alone. The internal bypass means that, within the shock body itself, there are zones that essentially reroute the oil past the main active piston. Combine that with compression adjustment plus the rebound adjustment and you really have the ultimate shock adjustment for all types of offroad terrain along with great driving characteristics on road.
The OME BP-51s offer some of the most customizable shock adjustability available right now without going fully custom.
You can get these custom-tuned by your local shock expert but right out of the box, these are some of the best that we have seen in terms of DIY tuning and adjustability. Finally, price these against your other top tier race shocks, and it’s clear to see that OME is going to earn their place in the race shock category once more people start to run and appreciate their performance.
Old Man Emu BP-51s Vs. Other Shocks

For a little context; I have now run spacer lifts, Bilstein 5100s/6112, Bilstein 5160s/6112, a Falcon Suspension, an Icon Stage 2 Extended Travel suspension and now these BP-51s.
After running a set of Icon shocks for the last 2.5 years, we were excited to get these new progressive BP-51s out on the trail and start pushing them around.
On-Road

Without adjusting the compression or rebound on the BP-51s, we tested the shocks.
We instantly felt the difference between the digressive Icon valving and progressive valving found on the BP-51s. The progressive valving found on the BP-51s offers superior ride comfort when cruising around town. Hitting sharp city corners, speed bumps, potholes, backing out of the driveway and dropping off curbs never felt so plush, whereas the Icon valving is a little jerky and stiff. When you hit these same everyday driving conditions with the Icons, you feel it a lot more.
The BP-51s are stiffer than stock but nowhere close to the level of stiffness that you will find on Icons. Out of the box with no adjustments from their factory-default position, the BP-51s offer a more comfortable on-road driving experience than Icons, hands down.
The Bilstein 6112 is very comparable to the BP-51 on-road. They both offer that comfortable “Cadillac” driving experience. On both the 6112 and the BP-51 – compression/rebound is tuned very well for on-road driving. When you hit dips, you barely feel them. The downside to the 6112 is they lack adjustability in all areas; compression, rebound and a threaded shock body ride height.
Off-road

We took the shocks off-road and put them through a few tests.
Fast
First, we took them up to 30-40mph and hit some rough dirt roads — whoops, rutted sections, loose rock and gravel. The compression handled all the dips with precise control as expected, but what surprised me was the rebound. Instead of an instant rebound jerk like you would find on a stock suspension, you barely even notice the suspension is working at all. Hitting a whoop at 35mph, both my passenger and I held on for dear life. To our amazement, the suspension soaked it up with ease and the 4Runner didn’t jerk around much at all. We continued to hit rutted sections and whoops for well over 30-45min. It was fun!
Out of the box at speed, the BP-51s offer a very capable off-road driving experience. You can drive this suspension hard and fast and really expect it to show up. Especially with the remote reservoirs, the oil inside the shock will dissipate heat with ease.
Slow
We aired down the tires and crawled around the rocks to see how shocks performed. Although we didn’t notice too much a difference compared to the Icons, we did notice that the BP-51s are softer. When crawling around mild (1′-2′) rocks, the BP-51s provided a very controlled and smooth compression and rebound cycle. I keep wanting to compare them to the Icons because there really is that much of a difference. The Icons are firm and will jerk you around whereas the BP-51s are a bit more forgiving.
At speed and low range, the BP-51s offer a more comfortable ride all the way around.
Installation Guide
For a full suspension with remote reservoirs and working with KDSS, this was a pretty simple install. If you are working with KDSS, try adjusting the KDSS accumulator assembly to release pressure in the lines in order to gain more droop. Some guys swear by it, but we rarely release the valve; to each their own.
Difficulty
- Moderate
Time & Assistance
- Hours: 4-8
- People: 2
Tools and Materials
- Floor jack
- Jack stands
- Socket Set
- 3-12″ extensions
- Wrench Set
- Torque wrench
- Impact Driver (optional)
- Trim removal tool(s)
- Scissors
- PB Blaster/WD-40
- Allen Wrench Set
- Plier Set
- Large crowbar, prybar or 2×4
- Coil spring compressors
- Shop gloves
- Grease gun
- Grease
- Zip ties
- Replacement push clips
Installation Viedo
Step 1. Remove UCA ABS Line
As with any suspension install, start by loosening and removing the ABS line bolt/bracket on the upper control arms along with the brake line bolt/bracket on the spindle.
Step 2. Remove Ball Joint Nut & Cotter Pin From Spindle

Once you have the ABS and brake line brackets removed, you can pull the cotter pin from the ball joint nut. This will allow you to remove the ball joint nut holding the spindle in place.
Step 3. Loosen Spindle From UCA Ball Joint

Once you have the ball joint nut loose, do not remove it. Leave it a few turns away from the ball joint.
With the ball joint nut still threaded on, take a large rubber mallet or soft hammer and hit the flat portion of the spindle until the spindle is free from the ball joint. By leaving the ball joint nut in place, you will prevent the spindle from coming loose, thus pulling the wheel hub assembly aggressively to one side.
Step 4. Remove Engine Splash Guard Clips

In order to gain access to the upper control arm bolts within the engine bay, you need to pull all the plastic push tabs holding the engine splash guards in place.
You don’t technically need to remove all the plastic push tabs but it does help in order to gain access to the 19mm bolts holding the upper control arms in place.
Just in case you don’t have a professional plastic trim removal tool, you may want to order an extra set of plastic push clips if you plan on reusing your engine splash guards.
We removed ours and will be adding new Rad Rubber Design splash guards.
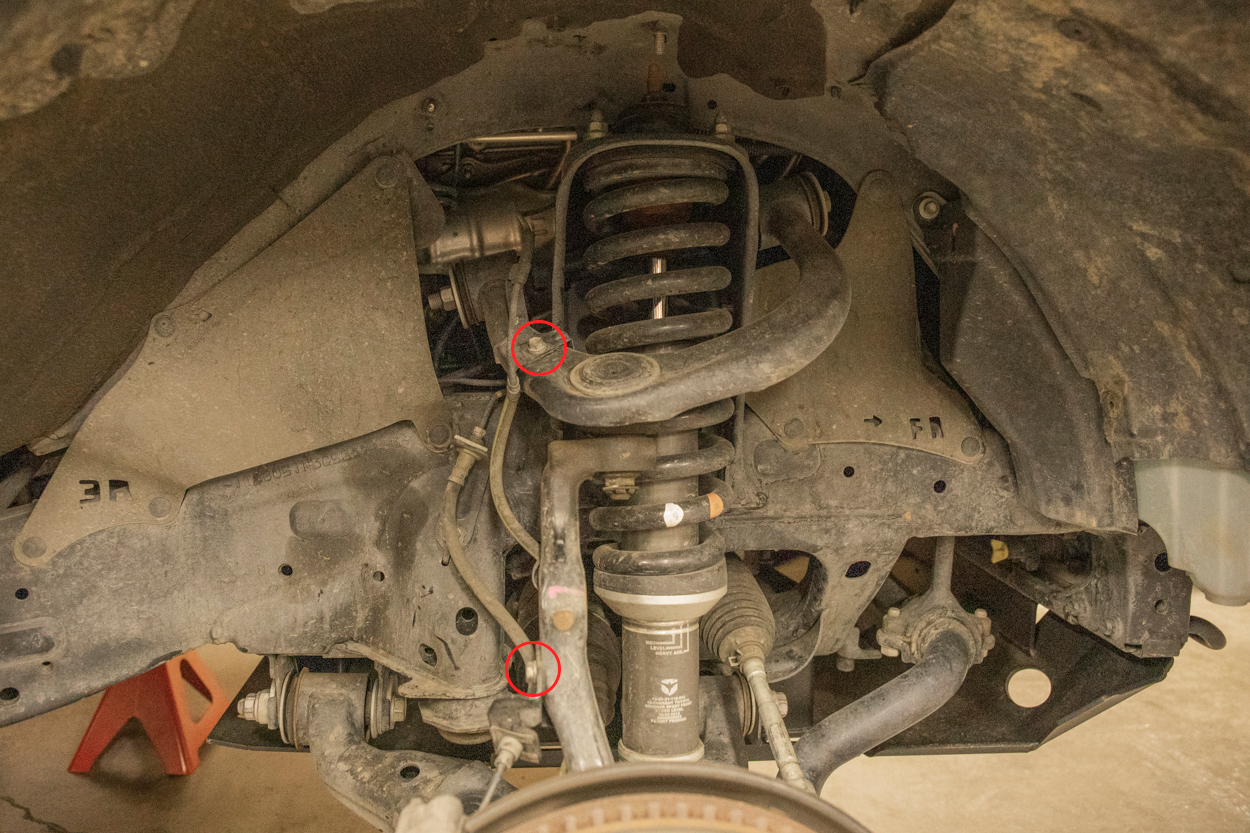
Step 5. Remove Upper Control Arms
Removing upper control arms usually takes the help of a friend.
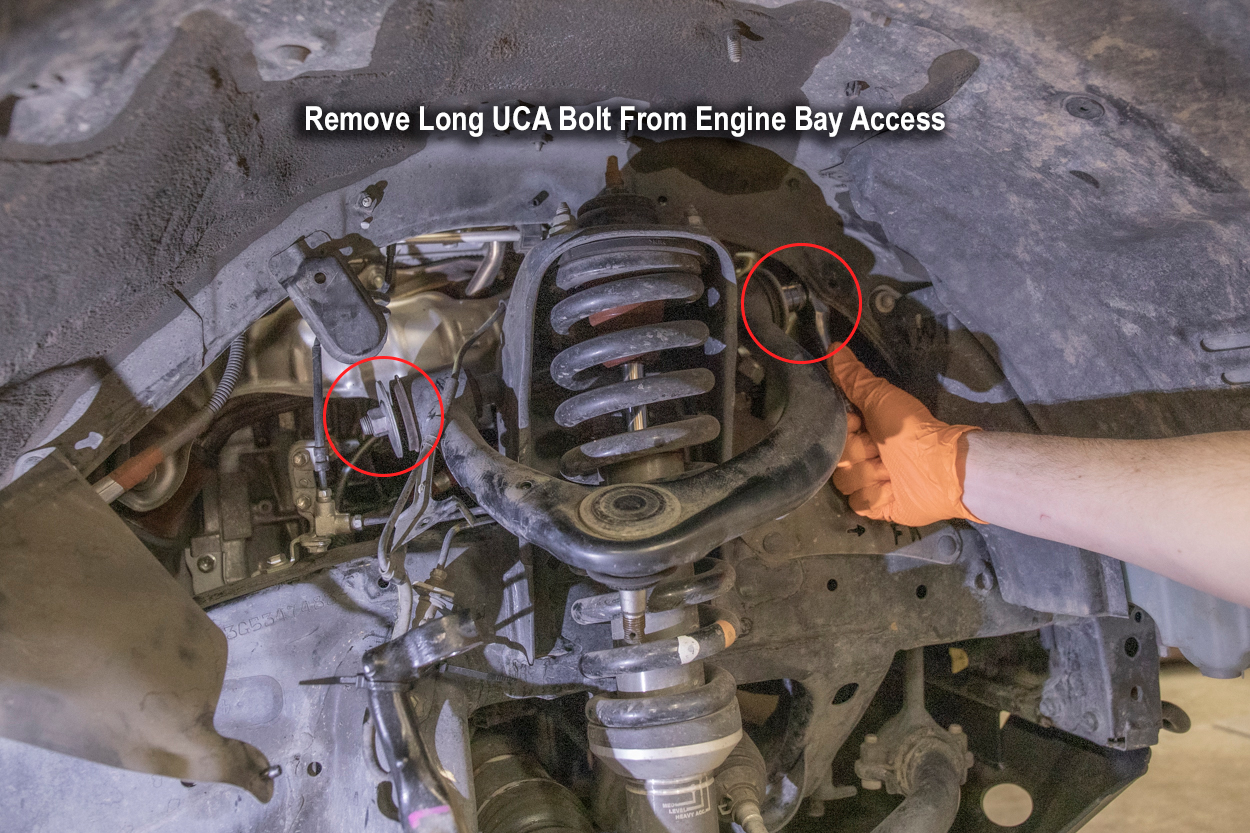
Once you loosen the upper control arm bolts push the long upper control arm bolt through the backside of the strut tower towards the front of the 4Runner.
While one person is underneath pushing the upper control arm bolt out, another guy should be in the engine bay reaching down and pulling the long bolt directly out. This can be a very challenging task if you’re alone but very easy if you have the help of a friend.
Step 6. Remove Top Strut Bolts

Now you can proceed to unbolt the top three bolts that hold the strut into the tower. You have two bolts in the front and one in the back. Use an open-end wrench or box end to access the bolt in the back.
Step 7. Remove Lower Strut Bolts

You will need two 19mm sockets in order to remove the lower strut bolt.
While holding the left side 19mm bolt tight, turn your other ratchet until the nut is free from the bolts. Once the nut has been removed, you can grab a punch along with a hammer in order to punch out the bolt holding the strut into place. When punching the bolt out, you want to press down on the lower control arms in order to release the pressure from the shock.
The factory strut (or whatever strut you’re running) should now be free from the strut tower and lower control arm.
Step 8. Remove Struts

Removing struts from an SR5 4Runner or any 4Runner without KDSS is simple. All you do is press down on the lower control arms and then pull out the strut. Removing struts from a KDSS-equipped vehicle on the other hand is tighter. Two people for this is preferable.
One person should be using a long prybar or 2×4 piece of wood in order to gain enough pressure on the lower control arms thus releasing the pressure on the strut. Once you have put enough pressure on the lower control arms, the struts should pull right out.
Congratulations, you are now ready to install the new suspension!
Step 9. OME BP-51 Coilover

The Old Man Emu BP-51 Coilovers feature remote reservoirs, along with the provided remote reservoir brackets and all the provided hardware you need to install them on your 4Runner.
We will not be using the provided hardware as we will be stacking aftermarket Ekstrom Designs Strut shims on top of our coilovers in order to gain a little more lift.
Step 10. Install OME BP-51 Coilover

Now it’s time to place the new BP-51 coilovers into the strut tower. Use the same method that you performed when removing the factory struts. Use a large crowbar or 2×4 to press down on the lower control arms in order to place the new coilover in the coilover tower.
At this point, you can bolt the coilover into place.
We are using two strut shims provided by Ekstrom Design. You do not need to follow the step. If you want your 4Runner to have added lift in the front, then you can install one or two strut shims. The Ekstrom Designs allows you to add 1″ of lift without adjusting preload on your coilovers. 1 1/4″ shim equals 1/2″ lift and two 1/4″ shims equals 1″ of lift.
Because we are using strut shims on top of our coilovers, we needed to get new, longer hardware from Ace Hardware. The hardware that’s provided with the BP-51 coilovers are black and blend seamlessly with the install. That’s why our’s featured here is silver and doesn’t quite blend in.
Step 11. OME BP-51 Remote Reservoir Bracket (Driver)

This is what your driver’s side remote reservoir bracket looks like. You have the actual bracket, all the hardware and the supplied stick nuts.
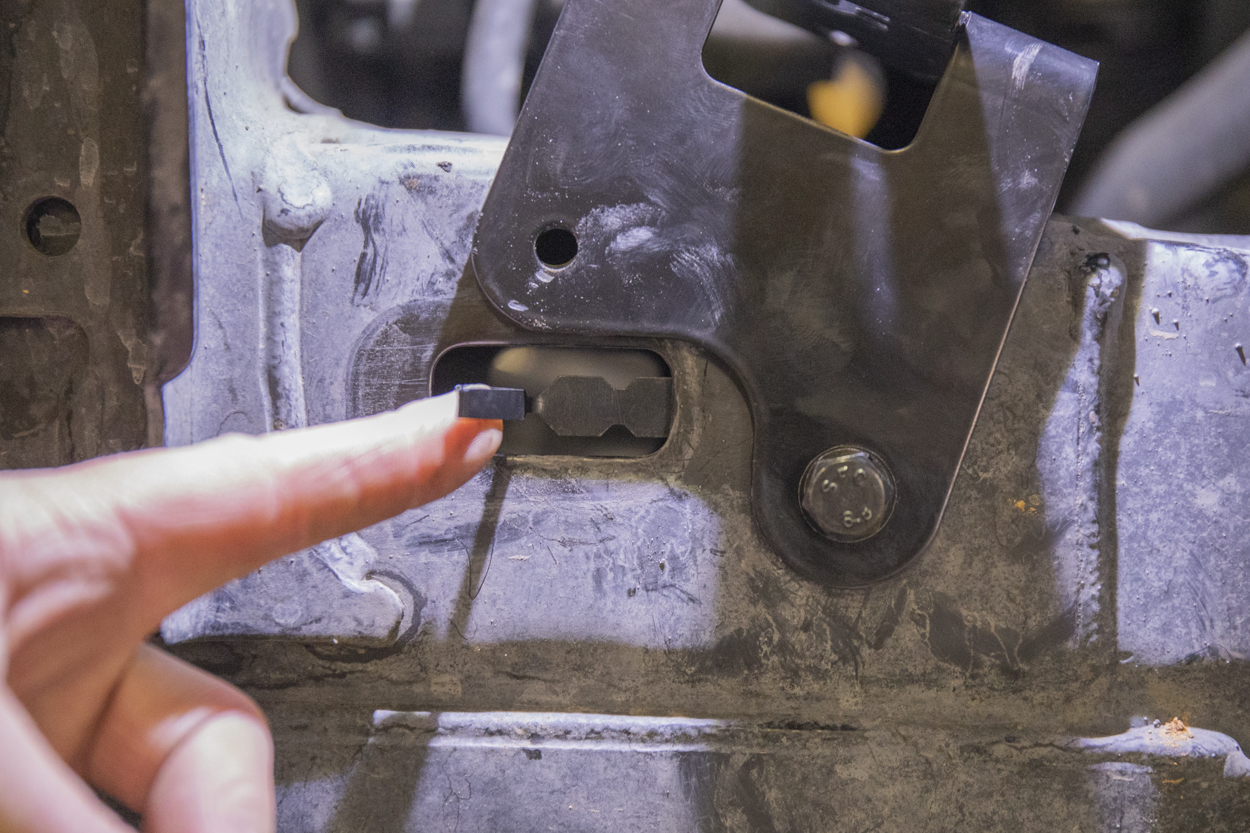
Step 12. Prepare Stick Nuts For Reservoir

Get an idea of how the stick nuts work and locate the plastic cover along the frame rail. You start by inserting the threaded nut into the stick and then the threaded nut will clip right into place.
Step 13. Install Stick Nuts For Reservoir

The actual stick portion of the stick nut can be bent at each groove.
By bending the stick in each location, this lets you rotate the actual nut which will run parallel behind the frame rail. This provides an easily accessible nut directly inside the frame rail. The concept is similar to a rivnut (rivet nut), however, stick nuts are a little more universal.
Step 14. Install Reservoir Bracket Onto Frame Rail
While holding the stick nut in place, proceed to bolt the provided hardware through the bracket and the frame rail into the provided nut. Repeat this step for the other provided nut. The remote reservoir bracket for the driver’s side should now be installed correctly.
Step 15. Position Remote Reservoirs

Once you have your coilovers in, you can start to position your remote reservoirs within the remote reservoir bracket. It helps to loop your right arm underneath the frame rail holding the remote reservoir while with your left hand adjusting the reservoir bracket.
Step 16. Install OME BP-51 Reservoir Onto Bracket
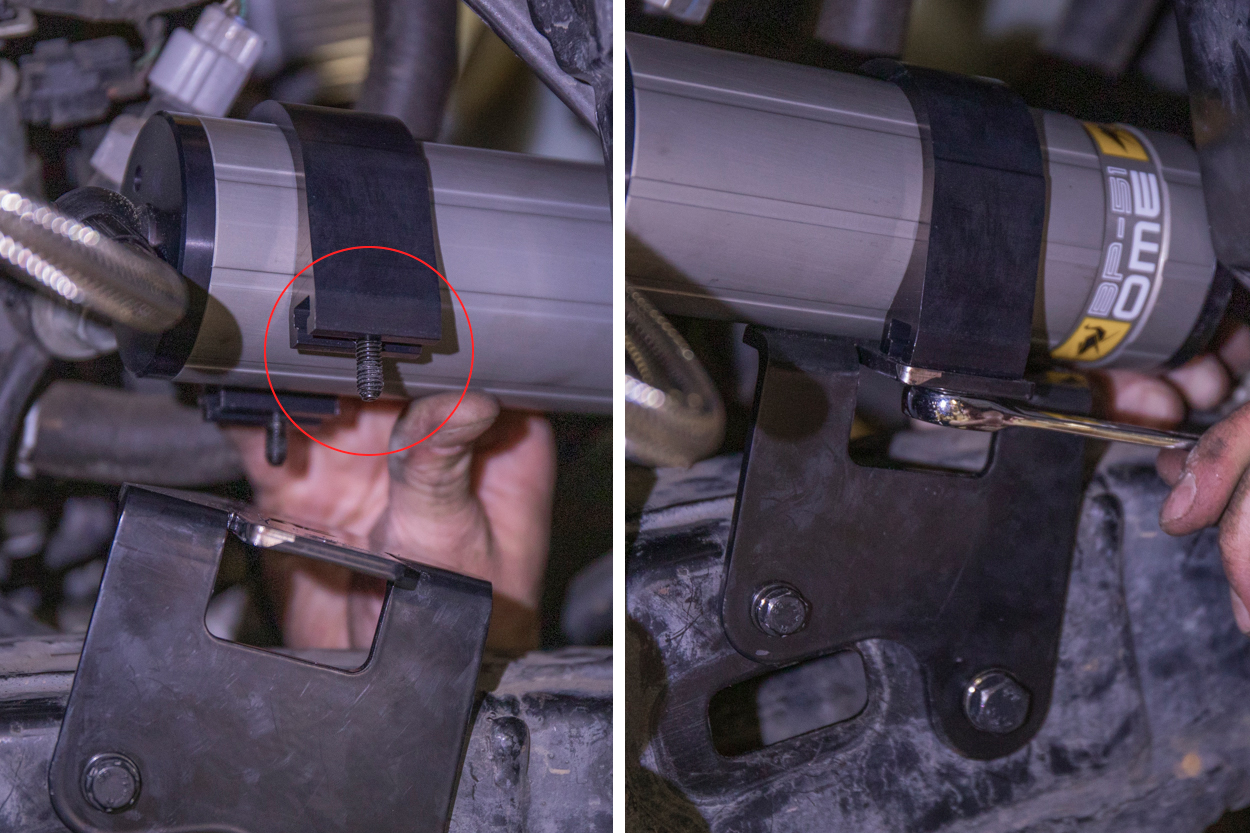
Before positioning the actual remote reservoir and bracket on top, first, slide the T-nuts into the channel allowing them to seamlessly drop into place. This will help to attach the remote reservoir to the remote reservoir bracket
Step 17. Install Driver’s Side KDSS Reservoir Bracket

The driver’s side is easier than the passenger side.
The driver’s side has 3 bolts that thread into currently open slots. The bottom portion of the bracket is held in place by a factory Toyota bolt and the top two bolts are held into place with provided hardware from old man emu.
Step 18. Prep OME Upper Control Arms

For installing the OME upper control arms, focus on the factory upper control arm washers.
You want to make sure that the washers go back onto the OME upper control arms the same way that they were removed from the factory upper control arms. You can see in the image above where the bolt on the outside of the upper control arm has been pressing into the washer. This portion of the washer faces the outside or away from the coilover.
Step 19. Install OME Upper Control Arm Long Bolt

Once you have positioned the OME UCAs into place, slide the long upper control arm bolt through the UCAs and through the backside of the coilover tower. This is where you will need assistance from another person above you reaching down from inside the engine bay just below the air intake box.
Step 20. Push OME Ball Joint Into Spindle

Once the upper control arms have been successfully installed, you can position the ball joint through the spindle. Once the ball joint has been pressed through the spindle, you can the thread on the newly provided nut.
Step 21. Grease Zerk Fitting On UCAs

We pushed about 10 to 15 pumps of grease through the ball joints on the Old Man Emu upper control arms.
Step 22. Torque UCAs to 82 ft-lbs

VERY IMPORTANT: Lower your 4Runner back to the ground FIRST, then torque upper control arms to 82 ft-lbs.
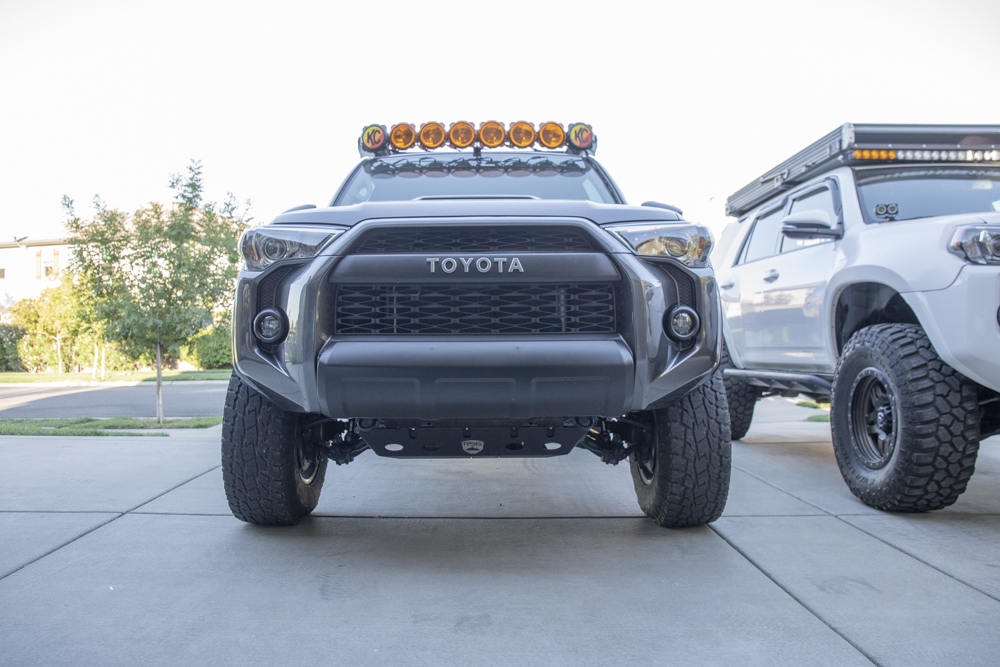
Step 23. OME BP-51 Suspension 5th Gen 4Runner (FRONT COILOVER)

Congratulations, you have now successfully installed your BP-51 coilovers and OME upper control arms
Step 24. Begin Rear Suspension Installation
Now, start the rear installation process.
Jack up your 4Runner and (for added security) place your tires directly underneath the center frame rail. Just in case your jack stands or jacks fail, your tires help to prevent severe injury.
Step 25. Remove Top & Bottom Rear Shock Bolts

Remove your factory or aftermarket shocks. You want to start by removing the top shock bolt and the bottom shock bolt.
Step 26. Remove Rear Spring
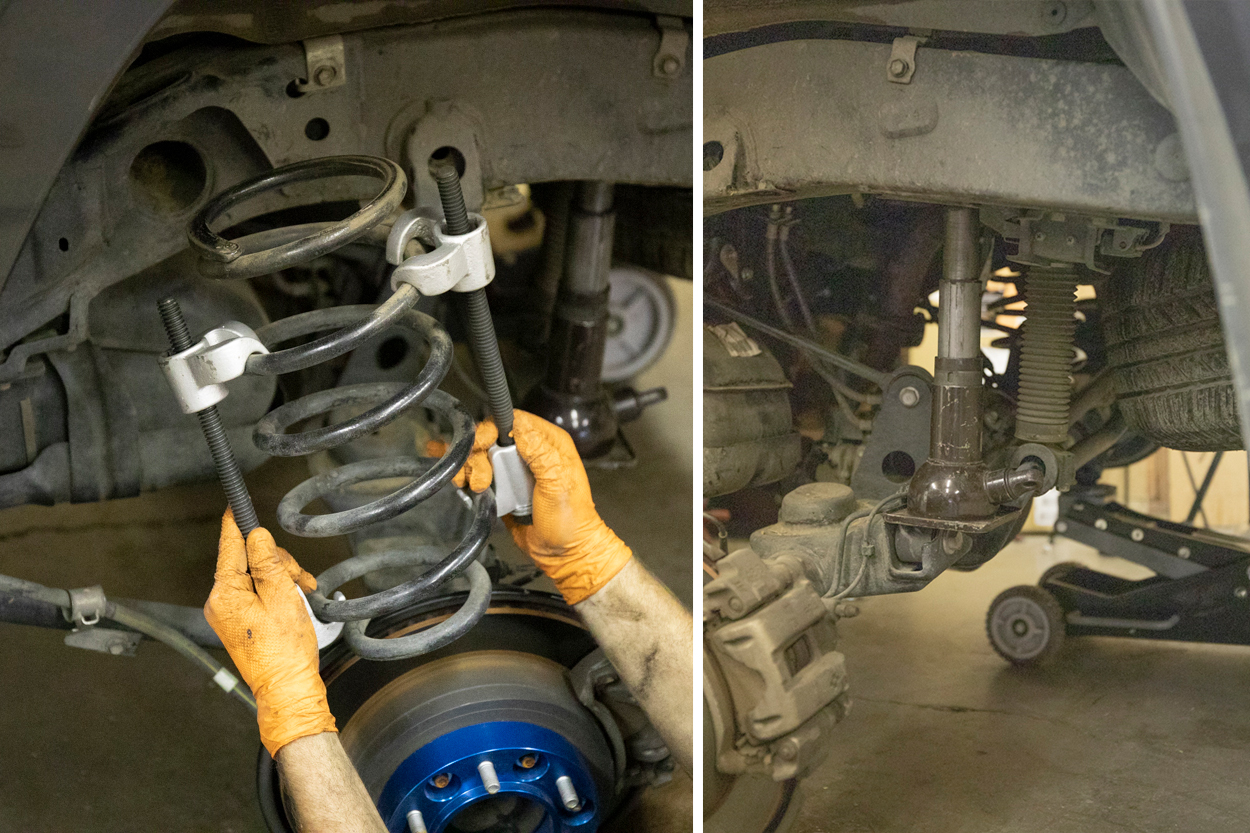
Once your shocks have been removed you can move on to your rear springs. Rear springs can be tricky if you have a KDSS equipped vehicle or if you have larger than factory springs. The factory springs are pretty easy to remove but once you get up into the 2″ and 3″ springs along with springs + spacers they can become a little bit more difficult to remove.
Pro Tip: One trick that we have learned over the years is to jack up one side of the axle in order to droop the other side. This will allow one side to fully droop thus making it easier to remove a coil. To gain even more droop from one side of the axle, you can place a bottle jack in between the axle and the frame rail.
Remember folks, we are not responsible for how you work on your truck. This is merely a suggestion. We are absolutely not perfect nor are we expecting you to think we are perfect, nor are we working in a professional shop or paying professional shop prices.
If you are not comfortable with working on your truck in your garage, we highly recommend you take your truck to a professional installer.
Step 27. Install new OME 889 Coil Spring

Once you have your old coil spring out, you can now install your new OME 889 coil spring.
Step 28. Raising passenger or driver side axle

Here is a look at jacking up one side of the axle in order to droop the opposite side.
This helps with the installation and removal of rear coil springs. Everyone has their own process though and to each their own when removing rear coil springs. Again, we highly recommend you take your struts and coil springs to a professional installer if you are not comfortable working in your own garage.
Step 29. Assemble Rear BP-51 Shock Guard

The OME BP-51 rear shock guards come in a few pieces. You have the actual shock guard and then the yellow clip that the shock guard sets into. Pull the yellow clip into place first and then pull the shock guard over snapping it into place.
Step 30. Install Rear BP-51 Shocks Reservoir Bracket
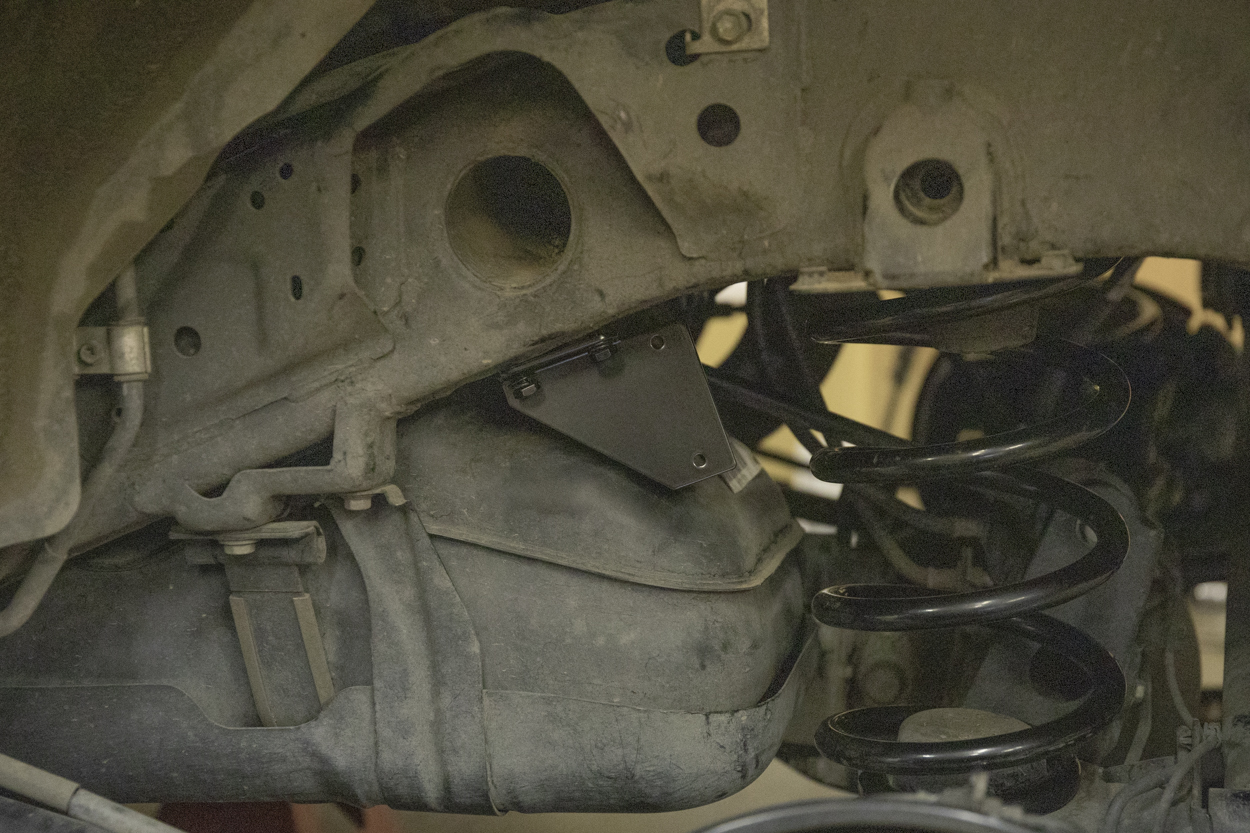
The rear bracket installation is pretty simple. Using the provided hardware, you can bolt the bracket into place using factory bolt locations.
Step 31. Install Rear BP-51 Shocks (Top + Lower Shock Bolt)

Slide the top portion of the shock into place first and then thread the nut on top. Then you can slide the lower shock bolt through the eye of the OME shock.
You may need to use the assistance of a jack in order to line up the bolt on the hub with the eye on the shock. Once you have the shock bolt through the eye of the shock, thread on the nut.
Step 32. Install Remote Reservoir for Rear Shocks

Once you have the shock successfully installed, you can proceed to position the remote reservoir and bracket.
Alignment Specs: Negative Camber & Negative Toe
You will need to get your alignment checked after this installation. Especially if you are installing the Old Man Emu upper control arms.
Here is our before and after alignment sheet.
Final Thoughts

After taking the suspension off-road and daily driving for well over a month now, I am incredibly impressed with the OME BP-51 suspension. The suspension is almost perfectly tuned for an out-of-the-box experience and if we want to start tuning ourselves, we can. That’s the real beauty of these shocks—you can tune compression AND rebound yourself.
For the price, I don’t think there is anything better on the market. I rarely use the word best, but this is close to “best in class” when it comes to a $3000 budget. I will say these are by far the most feature-packed for the price. For around $3000, the BP-51 shocks are currently the most adjustable shocks on the market. On top of an adjustable threaded shock body, they feature remote reservoirs all the way around along with full compression AND rebound adjustment which allows the end-user full shock adjustability. For the price, you can’t find anything else like it. To top it off, the BP-51 is levels of comfort above a stage 2 Icon when it comes to everyday driving.
We are going to follow up with a full review once we start adjusting the shock’s compression and rebound. Once we get some trail time with them at speed and on the rocks, we will have more detailed information coming.
how the heck do the front splash guards attached after this is installed? There’s no way they fit over the reservoirs.
I’ve just bought the BP51 kit, I’ve been trying to find SPC UCA’s but looks like there sold out everywhere. How do you find OME UCA’s going to be running 285’s on 0 offset wheel
Thanks!
How do you adjust the rear struts without turning the whole strut? I feel like I’m gonna break the hose from torque.
you probably figured this out already, but get a strap wrench (like for a oil filter) and use that to hold the shock body while you make the adjustment.
Hey Brenan or anyone else,
I am currently installing this kit (not including the spacers) on my 2017 TRD Offroad non-KDSS. The factory setting of 20 mm on preload recommended for a diesel, wench and bar, I am adjusting to 5 mm as I have no addons at this time. I have completed one I hope I am not making a mistake. Has anyone else adjusted to 5 mm as well or any other experience at different preload adjustment for other wise stock 4Runner. I was under the impression this kit should clear 285/70R17 on factory wheels. possible front bumper trim. are the Ekstrom spacers necessary from that standpoint your think? TIA
Also curious what your wheel specs are? Looks very nice.
thanks
Hey Brenan,
Curious what mods you had to make to fit the 295s on there. Are those the spidertrax 1.25″ spacers as well?
Thanks!
Thanks as always for the great content! I’m curious, if you had to choose between the OME BP-51 or the Dobinson MRR kit, which would you choose?
I am running the BP51s at the 20mm coil preload. I am also running a bumper with winch. I think the front has settled some and want to bring the front up to pretty much level it. Will the shims do the trick? Thanks
My shop guy says the BP-51 with no other spacers and mods won’t clear 285/70/R17 on a TRD pro wheel without other potential mods, likely BMC. I see the author went bigger than 285, but has an extra inch up front.
Anyone else have thoughts on clearance for 285s with this kit? I may just run E rated 275s for now.
Truck is a 21 Venture w/KDSS.
James, you can clear those tires with this lift by possibly removing the mud splash guards and slighting trimming the front bumper. You will not need a BMC with this kit and 285/70R17s. I have cleared 285/70R17s with a 2″ lift and no BMC, however minimal trimming may be required. You can see that here.
Really informative! I have a 2021 4Runner Venture w/ KDSS and I was trying to do as much research as possible prior to a suspension upgrade. I read conflicting views on having a 2.5″ lift vs 3″ lift and how it can impact the KDSS system. I was also wondering about rear coil springs. Can you run the OME shocks and use the stock rear coil springs? Do you recommend a 1″ coil spring or going 2″ with the OME? Also, when looking at fitment the OME site says their suspension will fit on a 2020 Venture w/ KDSS but not on a 2021? Sorry so many questions…these shocks sound amazing, especially for both on-road and off-road but I want to make sure I’m not fouling up my whole KDSS system if these are going to be running too tall. Thanks from a rookie.
I run the 2″ spring in the rear + a 1″ spacer on this kit putting the rear to 3″ with expectations of future weight pulling it down. Eventually, I will add a 3″ rear spring (icon overland spring or Dobinsons 701) once the tire carrier, fridge, and drawer system go in. I have been running a 3″ lift height on my 4Runner with no negative effects on KDSS whatsoever (on both 4Runners for over 5 years). This 4Runner pictured is equipped with KDSS and rides at a height of 3″ front and 3″ rear. No problems at all. If they say it does not fit on a 2021, it’s common for sites/vendors to wait on install confirmation of compatibility before updating their site. That said, nothing has changed for 2021 so you are in the clear.
Hi, just wondering what the mounting bolt size is? You had to buy new longer ones to accommodate the 1/4 inch spacer. Thanks for the write up.
I just matched up the thread pitch and bolt size at ACE hardware. I believe those were M10x1.5×30 out of the box so we took the length to 2″ and that was enough to clear the spacers.
What size Coopers are you running on this one?
295/70R17
How tall was the lift after it settle?
It’s sitting at roughly 3″ in the front.
is it possible for you to provide your stock vs this set up “center hub to fender” measurements? Thx
Brian, I am continuously impressed by your commitment and dedication to working I your suspension. I will I was younger, had time, tools, passion, additional passionate friend, a garage, and great weather. I am sure I missed a few things.
If your ethousiast blog was around in the early 90s I would have loved it. The suspension is the first thing I would tackle.
I wish you or ChisFix were my neighbors. Please keep it up, stay safe, and I genuinely wish you the best.
Solid review, I am now stuck between OME BP51s and fox factory race series 2.5 remote reservoir with DSC. Have you ever had experience with the fox set up? what are your thoughts?
Not yet, no. I would be stoked to run a set of those though.
What is the difference between the KDSS AND NON-KDSS kits. I was told it is just the brackets for the reservoirs, but would like to know if that is the case.
Yeah the driver side bracket is different. That’s it.
Wow! New owner of a 2021 ORP and this site have been a honey pot for ideas. Might have to go with these once I’m ready to upgrade the stock suspension. Thanks for all the info!
Did you get the heavy or medium kit for yours Brenan?
Medium 889 OME coils in this kit. The heavy OME coils are the 898. I will go with the heavy coils if I start to add weight in the rear (tire swing, drawers, spare tire, etc.).
I installed these on my 4R about 3 months ago and absolutely love them! I did go with the heavy springs and with fully loaded drawers and my loaded down trailer, RTT, & full size spare there is no sag at all.
I am curious though, do you know if you can adjust the height of the shock? My left side seems to sit about 1/2″ lower than the right.
You can adjust the ride height. Lift your 4Runner off the ground (ARB actually recommends that you remove the shock completely) and then adjust the preload on the shock body until you reach an even ride height.
I’ve been riding on BP-51s and Total Chaos UCAs for about a year now on my 5th gen ORP and they are by far my favorite setup. I had Icon’s on my FJ and Radflo with compression dampening but nothing feels better then rebound and compression dampening on the front AND the rear. And I live in Colorado where the trails are bountiful enough to really use these setups.
What compression and rebound settings are you using?
Factory right now. We are going to adjust it all the way up, all the way down, and then back to center in order to get a good idea of what to expect. That information should be dropping in a follow up soon. Article is already drafted and tests have started.
I am looking forward to the follow up. Thanks
Thanks for the article and write up… your comments are in line with my experience running this setup. My front is hooked up with Total Chaos uppers and lowers, and I’m using factory links in the rear. About 2.5 years and +30k miles on them, and I love them. Comfortable on the road, easy to adjust compression and rebound, and great performance off road. From rocks and trails to long dirt roads and cross-country road trips, I have no complaints!
How well do you think these would hold up in the salt belt? I see they use hard anodized aluminum…is rusting on after market suspension still a thing?
If you’re worried about salt, buy a suspension system from an Australian. Off-roading on the beach is basically a national pastime for those guys. This equipment is brutally tested in the outback and on the beach dunes to make sure it will hold up for the long haul. BP-51 is a good bet if you are worried about salt.
Thanks Brenan! Great point…one I definitely should have remembered! Appreciate the info and review!
no lie – I own a Jeep but want to buy a 4Runner because of that first photo. Just going to sign this unknown. lol
haha, yaaasss! Thanks man.
I’ve been wondering about the OME coilovers on the 4Runners after reading good reviews about them on a Tacoma install. So thanks for the write up! But I’m running Icon 2.5 remote reservoirs with the CDV and I think they are too soft in any setting less than 5 or 6. But with 100k on them now, something new will be going on soon.
Frank, gotcha.I would have liked the Icon adjusters to see how much adjustment you can pull out of those. Are you not able to find a full range of firm to soft on them or do you just have such high miles they just need a rebuild now?
Since they were new, I didn’t think that there was a huge difference from soft to hard but I’d adjust them depending on the conditions, sometimes. When I did it was somewhere between 5 and H (hard). Icon recommends rebuilding them at 40k but mine have been great up until recently where I can tell they need either rebuilding or replacing. I’m good with 100k miles of service though. I just have to decide if I buy the same thing or try Fox or OME for the next go round.
Curious to what Jack that is….or what recommendations you have for a Jack for lifted rigs.
This is the Big Wheel Pro Eagle Jack. We put together a review on this awhile ago. If you want a garage jack though, I would not get the big wheel. It’s hard to maneuver on the garage floor with its big rubber wheels. The tend to stick to the floor making you do multiple 3-point turns everytime you need to move it.
Does OME make a lower tier suspension, like the Bilstein 6112/5160?
Yeah they do. You can get a really nice OME kit comparable to the Bilstein 6112/5100. You would look at the 90010 OME front shocks with 885 front coils for the front. Then for the rear you would get the 60080 shocks with the same coils here; the popular 889 medium load springs. For KDSS 4Runners, you can get the front trim packer (OME95PF5). This is all around the same price as well. Under $1000 for a full kit minus the UCAs.
Thanks for the BP51 review! With the shims above the front coilovers did you get a full 3″ of lift? Did you install a diff drop? Thanks in advance
No diff drop yet but I will install one for sure. I was able to get just under 4″ of lift in the front without adjusting the preload on the shocks and with a 1″ spacer on top of the 2″ 889 coils in the rear put my rear at 3″. I wanted to keep the shocks as close to factory tuned spec as possible in order to keep as much internal shock piston travel. Even though we have KDSS on this truck limiting full travel, it’s always nice to know you have the travel there in the shock body if you need it. I don’t think we will need to adjust the preload anymore but we will see how it sits after a front bumper, and winch.
Dude! so thankful for your article write ups and reviews! Had found out that my local shop put on ICON 58640s instead of the extended travels and now I’m switching it all up to these to make room for growth. With adding in 3″ coils, should I be too worried about bouncing too much until I get the rear bumper done?
I ran that overland spring without any weight in the rear for a long time (1-2 years). It was great. No bouncing.
Thanks for the great write up. I installed a set of the Falcon Tow/Haul lift/level kits on my 2020 TRF ORP non KDSS after your review of it. No front shims and falcon rear spring spacer. 285/70R17 Falken wildpeaks on SSC BR6 17X8.5-10. I really love the ride I get with the Falcon kit. I just wish it had a little more lift in it. I would love for it to look like the 4R in the opening shot of this article. Any recommendations on getting more height out of my Falcon kit? How does this OME compare to the Falcon tow/haul kit? Does the OME kit recommend extended sway bar links?
Thank you and keep up the excellent work!