
NashFabCo Ladder Review & Step-By-Step No-Drill DIY Install For the 5th Gen 4Runner
A ladder can be a useful addition to an Overlanding rig, particularly for owners who have invested in upgrades to the roof rack system. A relatively new manufacturer, NashFabCo., has joined the market with a well-made, moderately priced and no-drill ladder that mounts to the driver’s side of your 5th Gen 4Runner.
Based in Clackamas, Oregon, NashFabCo. is headed by fabricator James Nash. In his own words, James started out on this adventure not too long ago.
Current offerings include rear ladders for the Lexus GX460 and GX460 and the 2014-2018 Subaru Forester. A side mount ladder for the Lexus GX460 also resides in the catalog.
An updated version of the 4Runner ladder is in the works, and the inventory of the current model is out of stock. According to James Nash, the new 4Runner ladder will feature square steps that are ten inches wide instead of eleven. The new ladder will also have one fewer step than the outgoing model. In profile, it will resemble the Forester model pictured on the website. The updated version should be available in late March of 2020.
James also mentioned that he plans to offer accessories in the near future, such as mountable gas cans.
Below, I will highlight the key features of the outgoing ladder model and also a step-by-step installation on your 5th Gen 4Runner. Check out these key features of the NashFabCo. ladder and let us know your thoughts in the comments below.
Find it online:
- The ladder: Check Price
- New Ladder Struts: Check Price
A+ for Service, Packing & Shipping

Within an hour of placing my order, I received an email promising next-day shipping. A few days later, my ladder arrived in Fairbanks, AK, in a 48x10x10 box.
The merchandise was expertly packed in protective wrap. Removing the veritable cobweb of packing material revealed the following contents:
- One Ladder (with Lower Mounting Brackets Attached)
- One Upper Mounting Bracket with Hardware
- Installation Instructions
Solid One-Piece Construction

The ladder sports a semi-gloss powder coated finish.
The welds are clean and the finish free of runs or scratches. While different from the matte finish of my roof rack and other black or grey surfaces on the 4Runner, the ladder finish does not clash with these.
Wide Steps w/ Non-Slip Surface

The rounded steps measure a full 11″ (inches) in width. The textured top surface provides a firm grip even in icy conditions.
Diamond Plated Top Step w/ Customizable Logo
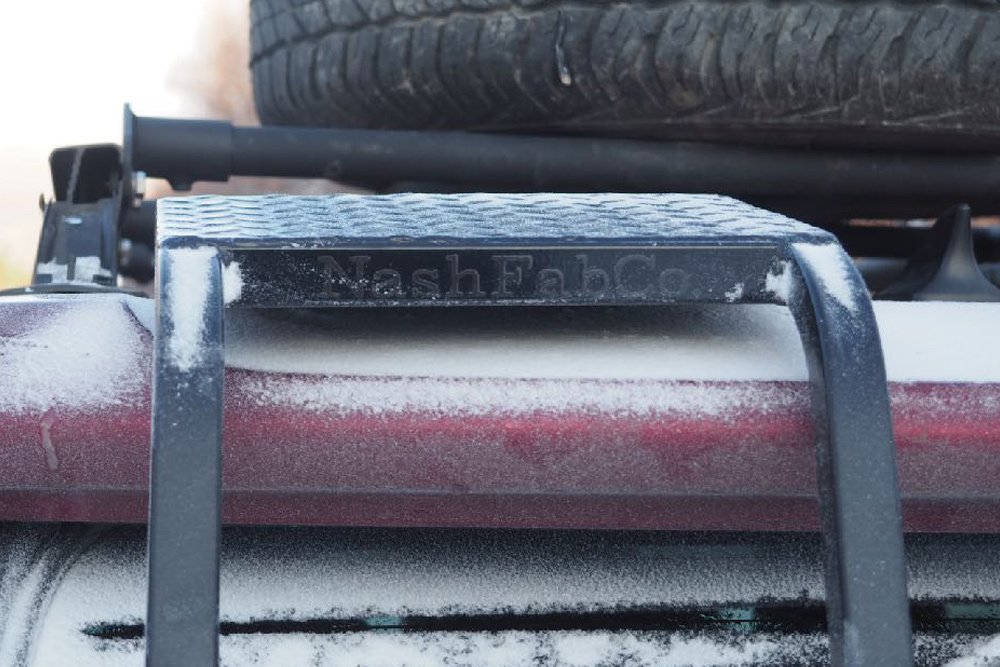
The diamond-plated top step surface provides for confident footing.
The logo and step surfaces can be ordered in a variety of colors, some of which can be viewed in the gallery on the manufacturer’s website.
The unit in the image above features a black logo and step surfaces.
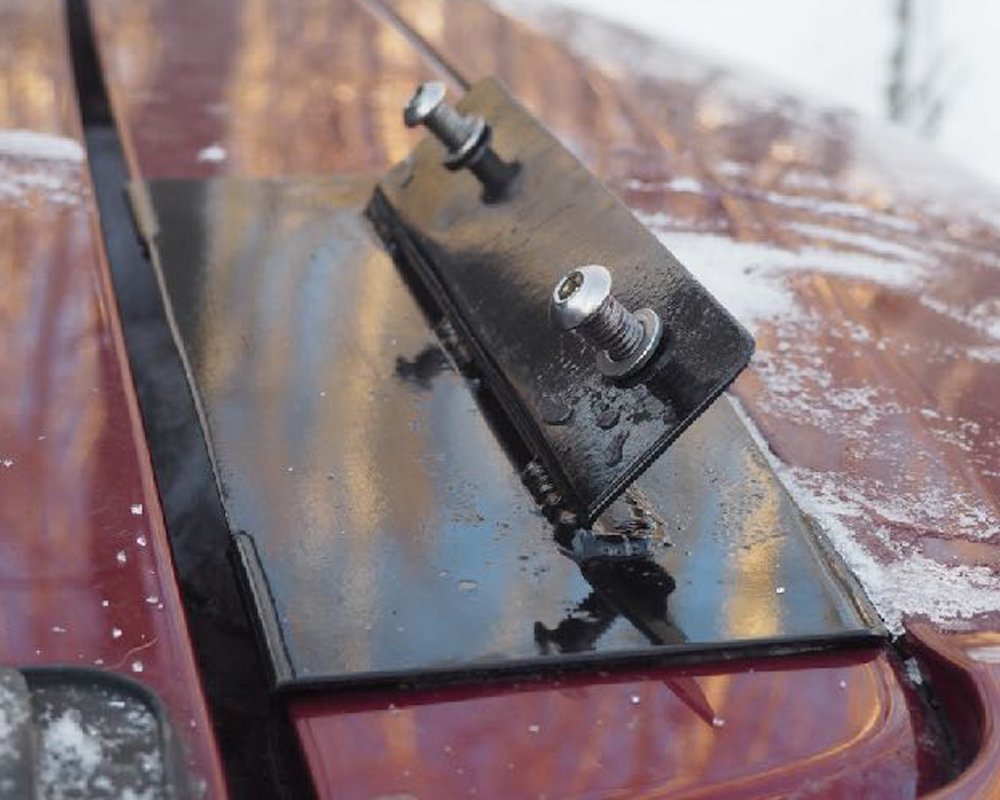
No-Drill Installation
The mounting bracket attaches to the top of the liftgate using two adhesive strips. Foam padding in the lower brackets prevents metal-to-metal contact.
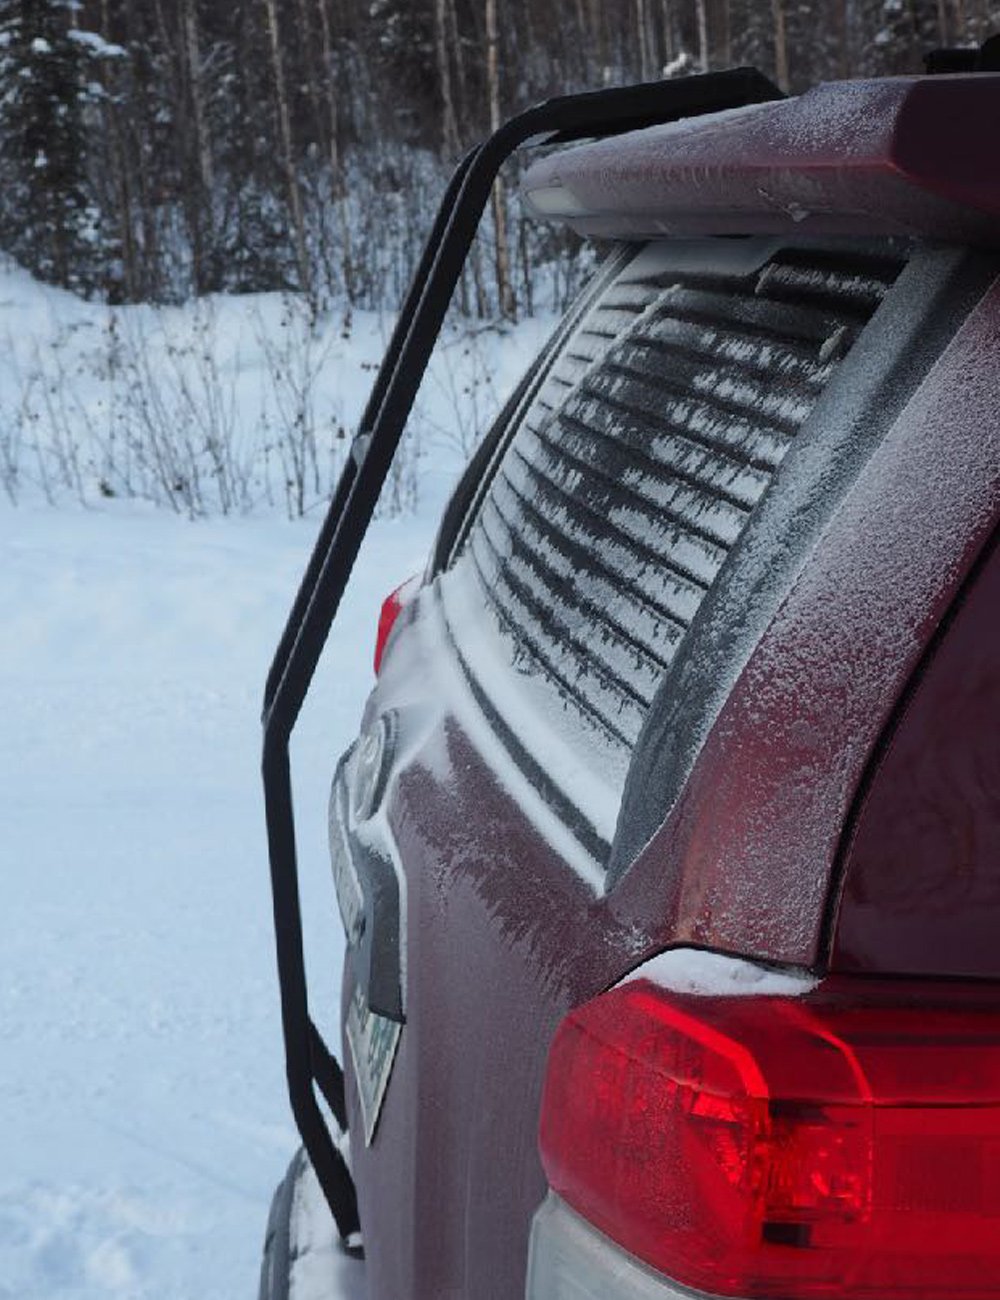
Good Roof Clearance

With the liftgate open, the top of the ladder easily clears the stock roof rails. This ladder should be compatible with many aftermarket roof racks as well.
NashFabCo. Ladder Install
Installation is a simple process that can be completed in just a few minutes with common hand tools that you will most likely have in your garage.
Materials Needed For Install:
- Degreaser + Cleaning Cloth Suitable for automotive use
- Allen wrench set
- Level
- Measuring Tape
- Stepping Stool for those less than 7’ tall
Step 1. Prepare Mounting Surface
With the liftgate closed, matching the contours of the mounting bracket to identify the mounting location.
The left end of the bracket should roughly line up with the right end of the rear driver’s side roof rack mount.
The mounting bolts should face toward the front of the vehicle.
Once you have identified the mounting location, remove the bracket, clean and degrease the area where the adhesive will contact the paint.
Step 2. Attach Mounting Bracket

Once the mounting surface has dried, peel the protective strips from the adhesive on the mounting bracket. Carefully place the mounting bracket into place using steady pressure. If the bolts are still in the bracket, remove them now.
Step 3. Attach Ladder to Mounting Bracket

Gently lift the ladder into place on the mounting bracket. Align the holes in the bracket with those in the ladder and thread the bolts (with lock washers) into place.
Note: Do not fully tighten the bolts.
Step 4. Attach Bottom of Ladder to Liftgate

Carefully open the liftgate.
Back the mounting bolts out of the padded clamps at the base of the ladder until the clamps slip over the bottom lip of the liftgate. Tighten the bolts to provide some clamping force, but do not fully tighten yet. The ladder attaches to the bottom of the tailgate via padded clamps.
Gently close the liftgate.
Use the level and/or measuring tape to check for vertical alignment of the ladder. Once the ladder is aligned to your satisfaction, tighten the four mounting bolts.
Step 5. Check For Lift Support & Replace, If Needed

However, within a couple of weeks, I noticed that the liftgate would sag 3-4 inches at fully deployed height—just enough to inconvenience the top of my head. This may have been a result of the age of the lift supports (roughly seven years), or perhaps the combined extra weight of the ladder and accumulated ice on the liftgate. The NashFabCo. Ladder is designed to function with the stock lift supports. Initially, this was true for my installation.
Ultimately, I replaced the stock lift supports with PM3489 from Lift Supports Depot. This unit is designed to hold up to the additional weight of a ladder.
Final Look & Feel: Pros & Cons
Pros
- Favorable Price Point
- Robust Construction
- Super Easy Installation
- Durable Powder Coat Finish
- Customizable Coloration
- Great Customer Service
Cons
- Lack of Aftermarket Accessories, such as Gas Can Mounts, Step Extensions, etc.
Final Thoughts
I am also impressed with the customer service NashFabCo. has provided. In addition to prompt shipping of my order, James Nash replied within an hour to my inquiries.
I installed my ladder from NashFabCo. roughly one month ago. Thus far, the finish has proven to be as durable as advertised. I can also attest to the traction quality of the textured steps in icy conditions.
Overall, I am very pleased with the purchase and would recommend this ladder to anyone in the market.
Is there a picture of this out the rear window to see how much it can be seen?