
There are DIY 4-way inflation and deflation systems out there as well as pre-built 4-way inflation and deflation kits available but I wanted to get one going myself.
I started with the ARB air compressor, which has a 1/4 NPT standard connection.
I choose a 1/4 OD quick connect for all the parts I need. You can use a bigger diameter, but just make sure that you have a 1/4 male NPT to connect to your ARB compressor.
Table Of Contents
Parts List
- Pneumatic Air Line 1/4″ OD Pneumatic Nylon Tube (x2 32.8ft): Check Price
- 1/4″ PT Male Thread 6mm Straight Pneumatic Push in Quick Fitting Connectors (1 pack): Check Price
- Plastic Push to Connect Fittings Kit, 1/4″ 6mm OD Quick Release Connectors (1 pack): Check Price
- 5-Way Air Manifold with 1/4″ Industrial 6-Ball Brass Couplers (4-way or any way; you can option less air-way): Check Price
- AstroAI 4 Pack Air Chuck, Heavy Duty Closed Flow Lock On Tire Chuck, or you can use the Haltec H-5265 Standard Bore Lock-On Air Chuck: Check Price
- Haltec H-5265 (the best air chuck you can buy): Check Price
- Stainless Steel 304 Single Scale Liquid Filled Pressure Gauge with Brass Internals, 0-160 psi, 2-1/2″ Dial Display, +/-1.5% Accuracy, 1/4″ NPT Bottom Mount: Check Price
- Mini Ball Valve, Lever, 1/4″ NPT Male x NPT Female: Check Price
- Vixen Air Inflation Schrader Valve with Push to Connect (PTC) for 1/4″ OD Air Line: Check Price
- Note: This air valve is the best, making the installation process easy.
Tools Required
- Zip ties
- Cutters
- Open and close wrench ratchet;
- 13mm
- 14mm
- 19mm
- Teflon tape
- Drill
- Drill bit 5/16
- Spray Bottled For Water + Soap
How the System Works

This project is simple, easy, and took me 30 minutes to install. It saves storage space and minimizes those air hoses.
It also gives you more time to do anything else rather than bending down to air down and air up.
Step 1. Find a Location For Air Manifold, Tube & Valve
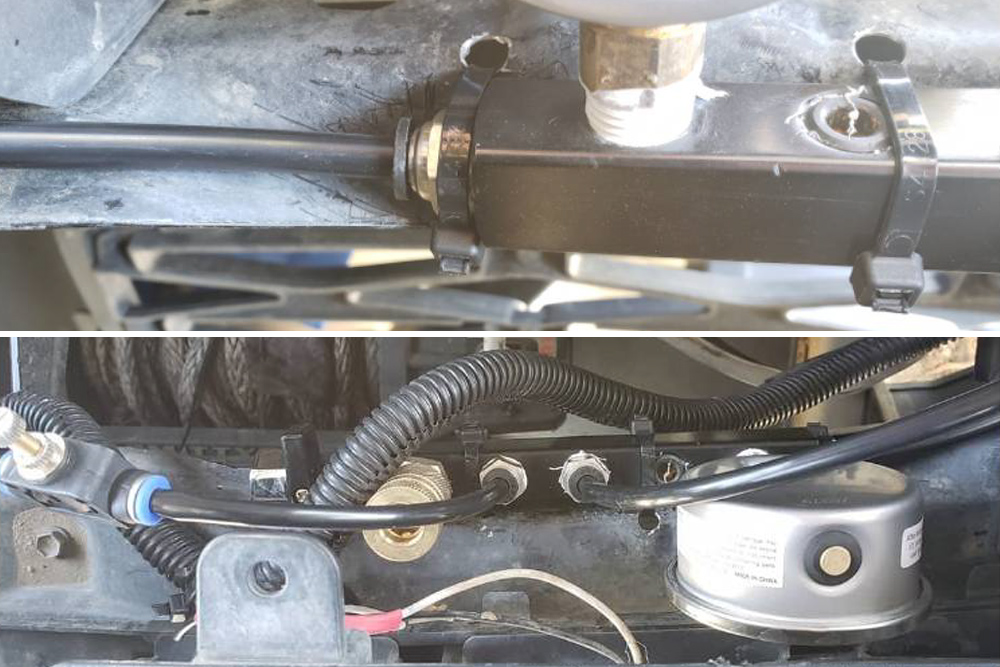
First, determine where to put your air manifold, air tube, and air valve. I put mine on the front, behind the grill, so I can see the gauge even when the hood is closed.
Next, place the tube on the top left of the frame, away from the exhaust. You do not want to burn it and have an air leak later on.
Step 2. Cross Tubing Over Gas Tank
Cross the tube on the top of the gas tank and place it in the middle.
As you can see, I used a plastic push-to-connect fittings kit with a 1/4″ 6mm OD quick-release connector and placed it in the middle of the lines. Measure the nylon tube from both rear tires and use the T-connect to split it from left to right.
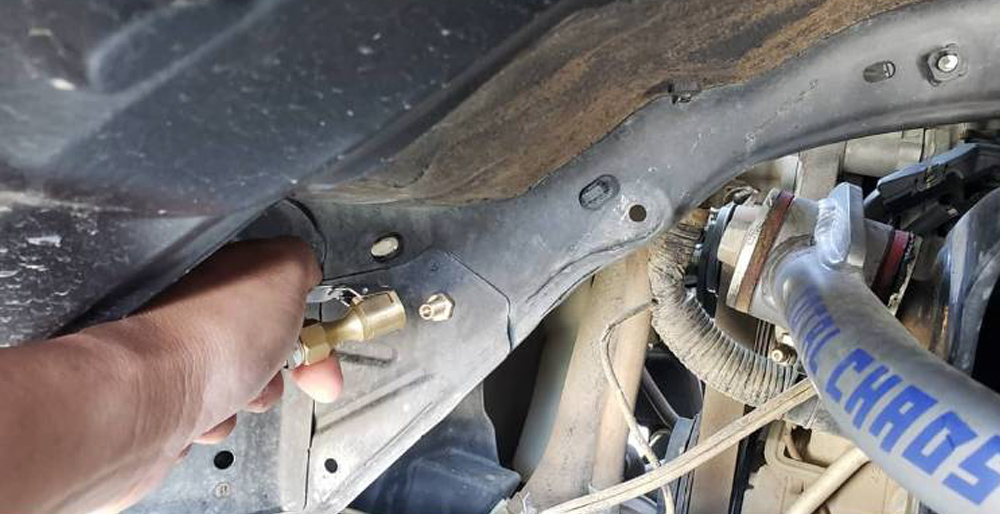
Look for a good location to install your air inflation. Drill 5/16 on the body and install the Vixen Air Inflation Schrader valve with push-to-connect (PTC) for 1/4″ OD Air Line.
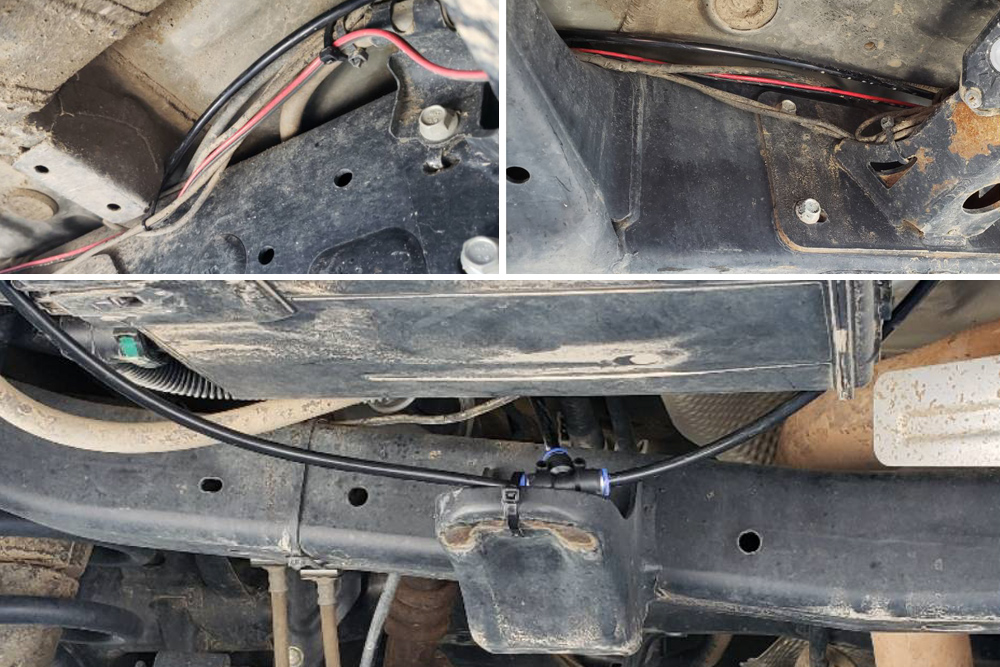
Step 3. Secure Inflation Valve & Connect Pneumatic Air Line

Use the 13mm wrench ratchet and the open ratchet to secure the inflation valve and connect the pneumatic airline 1/4″ Od pneumatic nylon tube.
These will be the same steps for the front.
Step 4. Split Nylon Tube with T-connect & Add Valve Control

Next, you’ll need to split the nylon tube using a T-connect and add valve control.
Wait, why do I need valve control?
Valve control is needed to control and calibrate the air from the front to rear. So, just in case, you’ll be able to make the front air up or down faster than the rear.
Step 5. Connect OD Male Thread to Manifold

Once everything is drilled up, start connecting the OD male thread to the manifold and secure it with a zip tie.
Then, secure the front air inflation with an OD quick-connect nylon tube. Lastly, connect the tube to the manifold to complete this step.

Note: In the picture above, there are two OD Nylon tubes. The one without valve control goes to the rear, and the one with the control is for the front. In the picture below, the nylon tube is coming from the ARB air compressor to the air manifold.
Step 6. Cut Pneumatic Air Line + Connect Male Thread to Air Chucks

Cut the remaining Pneumatic Air Line 1/4″ OD Pneumatic Nylon Tube into four pieces of 4′ in length.
Connect the 1/4″ PT male thread 6mm straight pneumatic push-in quick-fit connectors to the air chuck, Heavy Duty Closed Flow Lock-On Tire Chuck (or the Haltec H-5265 Standard Bore Lock-On Air Chuck).
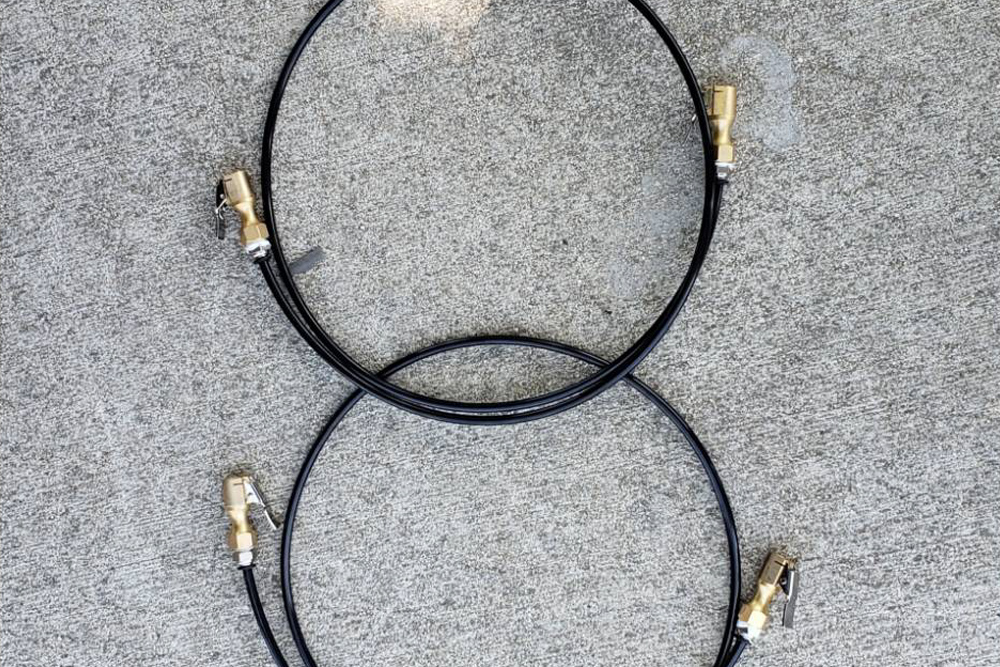
You’re going to need eight air chucks.
Step 7. Test Air System For Calibration
Test your air system and calibrate it if necessary. Use a spray bottle with water and soap to see if you have an air leak.
Final Thoughts

Price may vary; I spent $134.00 for this project and 30 minutes of labor.
Airing down from 35 psi to 19 psi takes about 5 minutes, and airing up from 19 psi to 35 psi takes 5 minutes as well.
That is a minute and twenty-five seconds for each tire and a minute and twenty-five seconds of not squatting down. You can use a bigger hose for a faster result, but that is all up to you.