
Icarus eXtreme LED Hatch Lights from ArcLightLEDs
Although there is a lot of space in the rear cargo area of our 5th generation 4Runners, there is not a lot of light back there to go with it.
A common remedy for the situation involves replacing the original incandescent bulbs with a pair of LED DE3175 or “festoon” bulbs, as is described in this article or you can go with something a little more custom, like this Baja Designs dome light. I switched to LED bulbs for all the interior lights shortly after purchasing my 4Runner, and was pretty happy with them.
I later saw the (very bright) light, when I found out about the Icarus eXtreme Hatch Lights from Li-Young and ArcLightLEDs.
These things are awesome! They are incredibly bright, a simple plug & play installation (white light model), and made in the USA.
Icarus eXtreme LED Hatch Lights
Tools Preferred for Installation
- Automobile trim removal tool (only one needed, but this is a nice set)
- Alcohol wipes
- Isopropyl alcohol wipes, found in the first aid section of most stores and pharmacies.
- Bottled isopropyl alcohol is an option when used with a lint-free cloth
- For installing the white/red LED, switchable light model (not required for the model with only white LEDs):
- Electric drill
- 1/16 inch drill bit
- 5/16 inch drill bit (pilot point works best)
- Precision needle file set – Check Today’s Price
- Permanent marker (i.e., Sharpie)
Features and Options
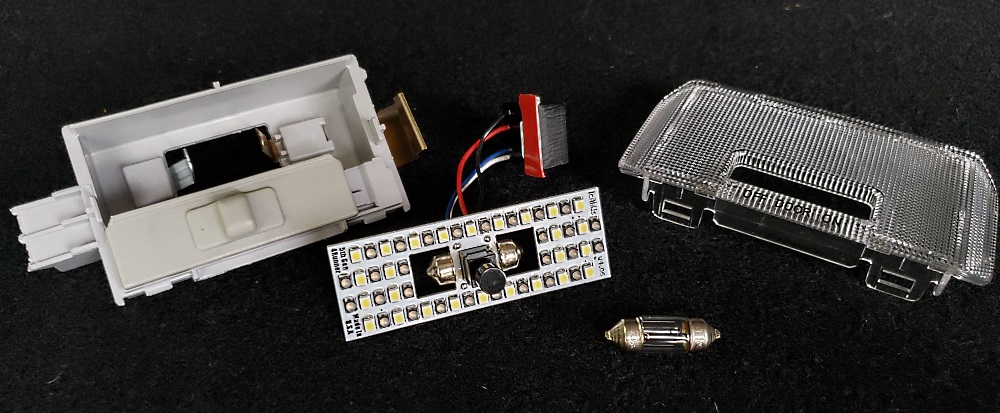
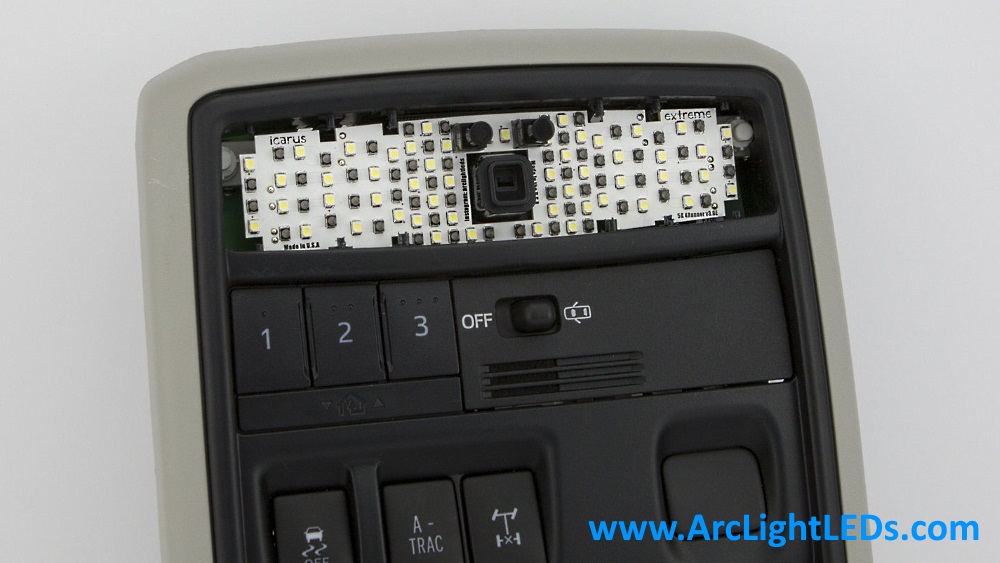
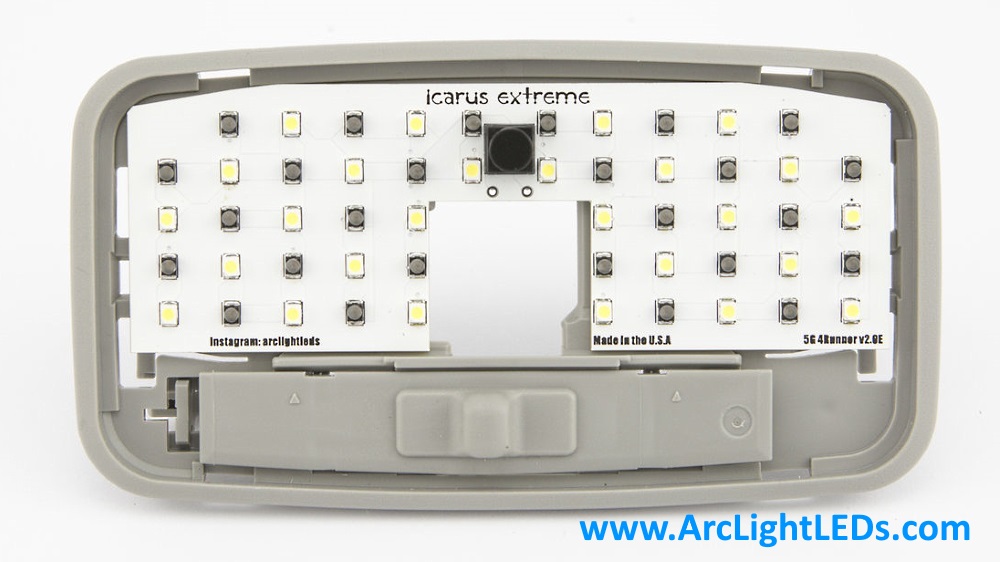
ArcLightLEDs offers the eXtreme Hatch Lights in two versions. Both use a custom designed circuit board that nicely fits/fills the factory hatch light housing, and have digital LED drivers, but options for light colors differ between the two.
One model has only 5700K white LEDs. The other model has white and red LEDs, with a push button switch that is used to switch between colors. For the 2019 models, 8% more LEDs have been shoehorned onto the circuit board of the eXtreme Hatch Lights.
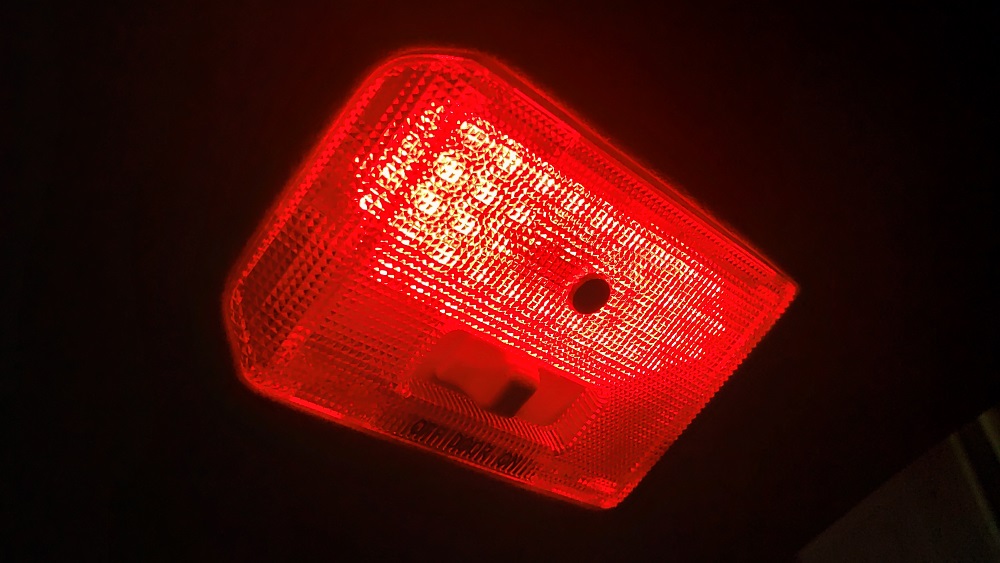
I chose the model with red and white LEDs, as it provides less distracting light when needed, and because many bugs are not attracted to red light.
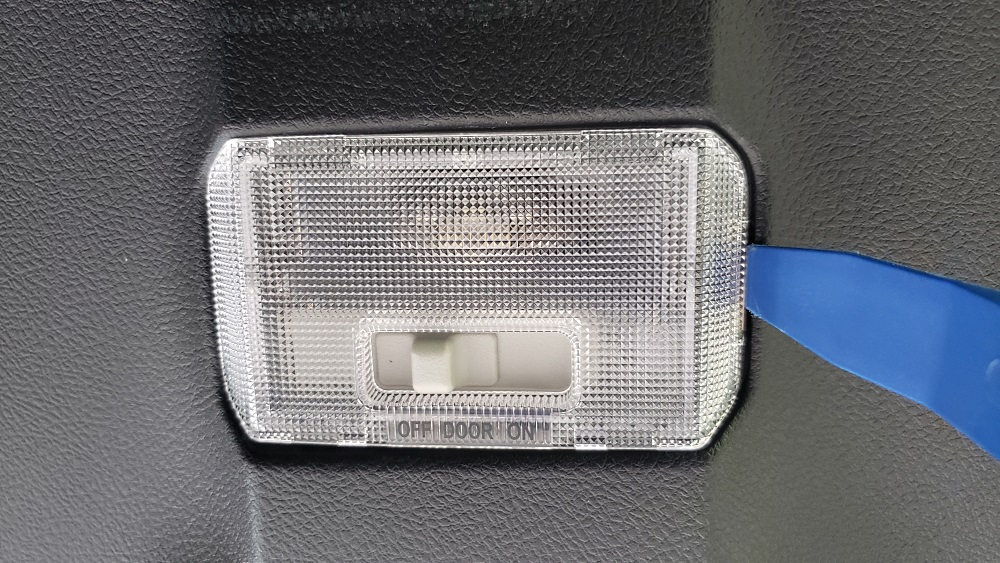
REMOVING THE HATCH LIGHTS
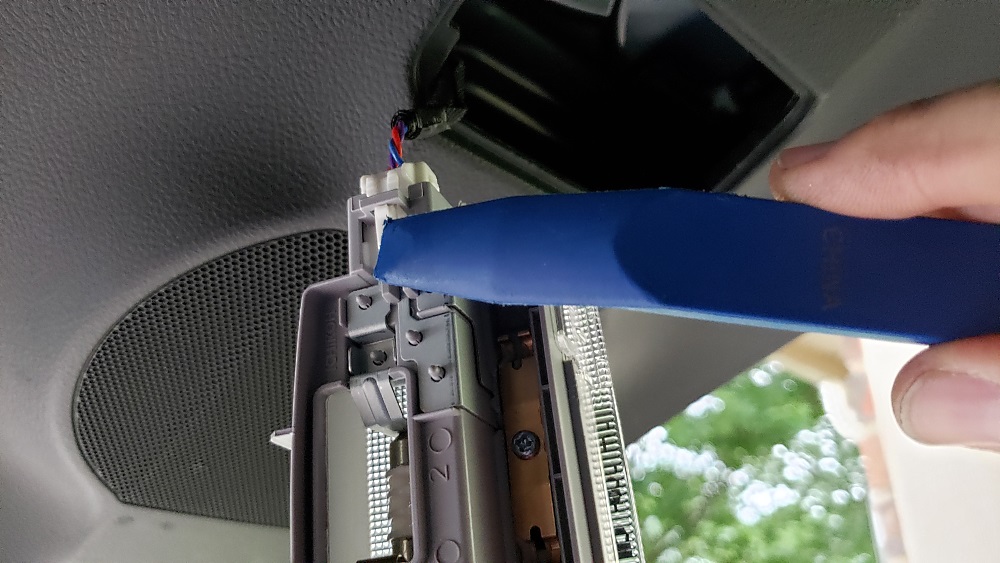
Use a trim removal tool to gently pry under the right side of each hatch light. Press inward with the tool to compress the sprint loaded clip, then pivot the light assembly out of the hole that it resides in.

To release the wiring harness, press down on the retaining clip that holds the plug, and then pull back to remove the light assembly from the wiring harness.
MODIFYING THE LENSES (FOR WHITE/RED COMBO LIGHTS)
The installation of the white only version of the Icarus eXtreme LED Hatch Light requires only the removal of the hatch light lens, swapping the original bulb with the Icarus setup, and reinstallation of the lens and hatch light assembly. This is an easy, plug and play job that should take only ~15-20 minutes.
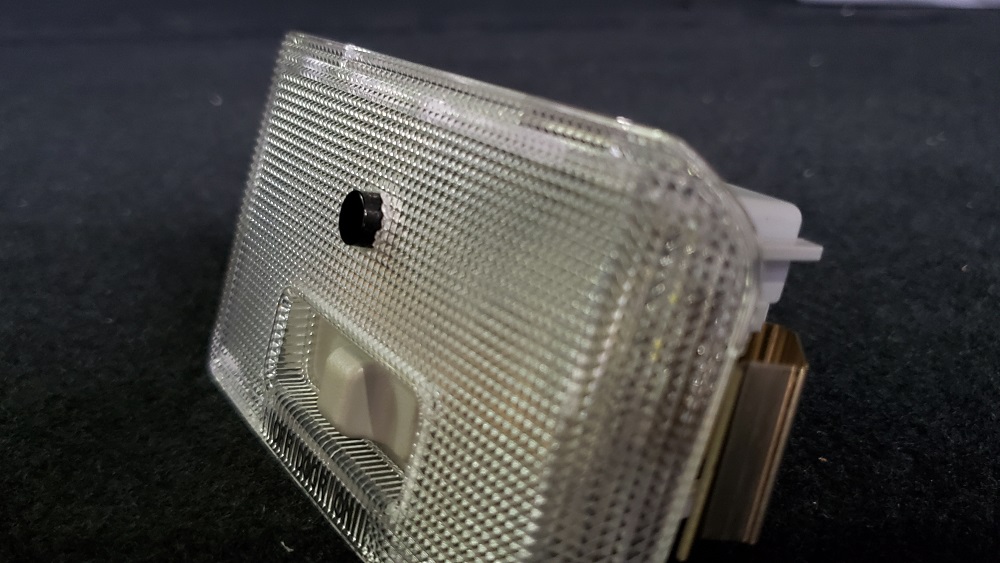
Installing the white/red light version of the Icarus eXtreme LED Hatch Light requires drilling a hole in the lens of the hatch lights, because the push button switch that changes from white to red LEDs protrudes through the lens.
To remove the lens, gently pry back two tabs on one side of the housing, and pull back on the lens, to sort of pivot it off of the other side.
Remove the original incandescent, or aftermarket LED bulb by gently pulling it out of the contacts that hold it in place.


Remove the black plastic head of the push button switch by gently pulling it off. Pay special attention not to loose this, as the ArcLight instructions state that that separate, replacement switch heads are not available.
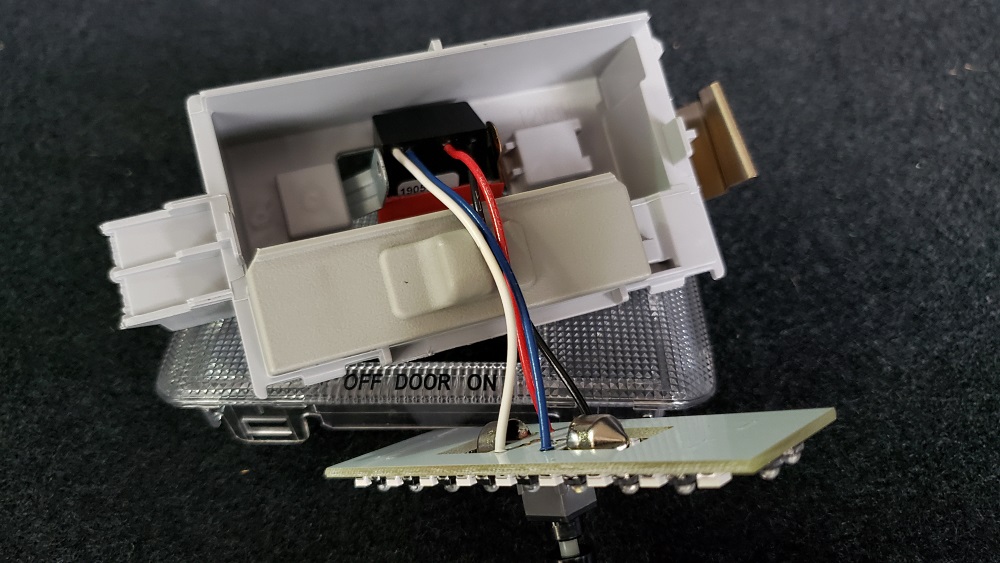
Insert the Icarus eXtreme LED Hatch Light assembly into the light housing, in a manner similar to how the other bulb was previously installed. Before doing this, and snapping the assembly into place, feed the wiring and LED driver through the hole in the back side of the light housing.
Square up the Icarus light assembly in the housing, so that the “post” from the switch is sticking straight up, and the circuit board is level.
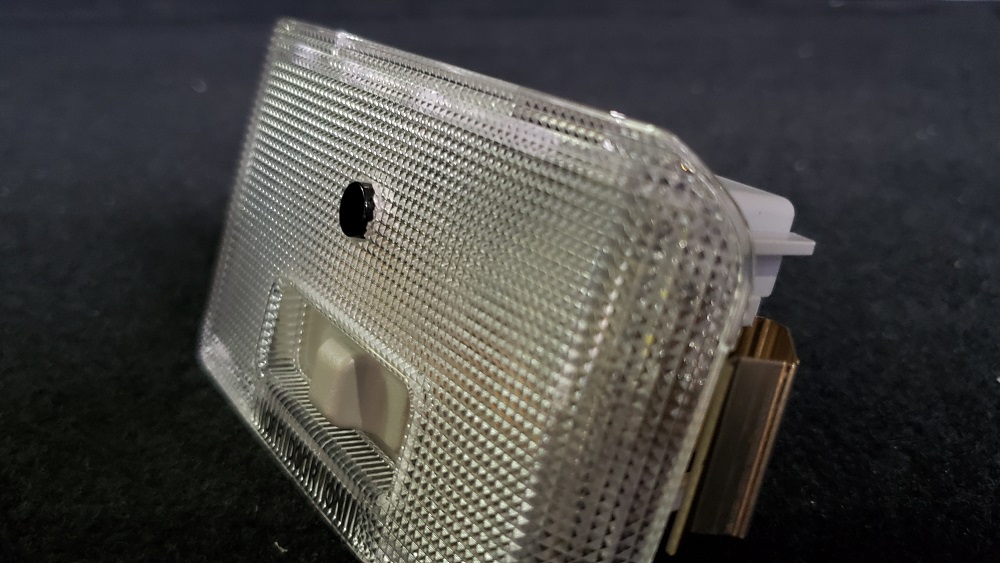
Gently place the lens over the light housing, while lining it up with the tabs underneath it, but not attaching it to them. Make note of where the switch post is touching the back side of the lens, and mark this spot with a permanent marker.
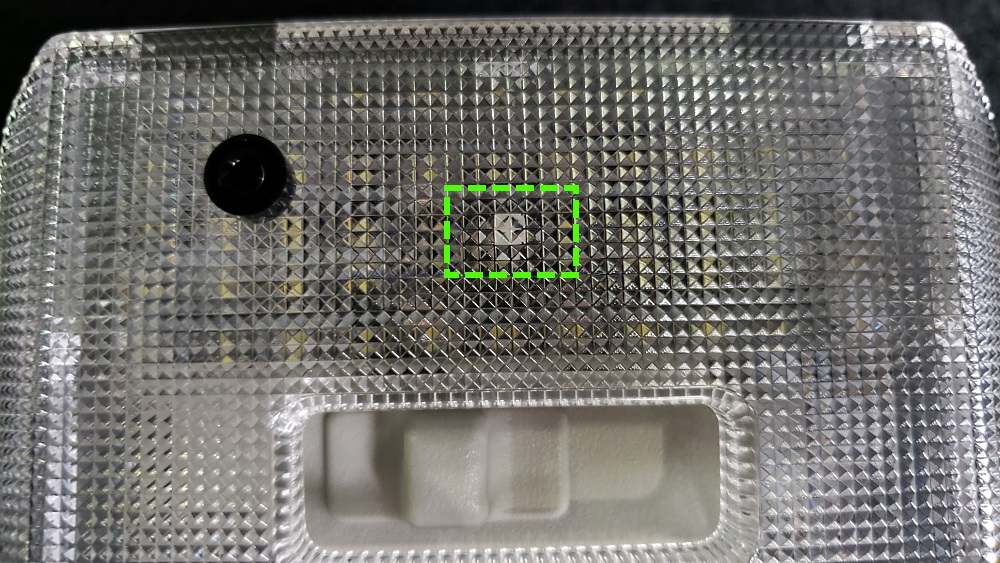
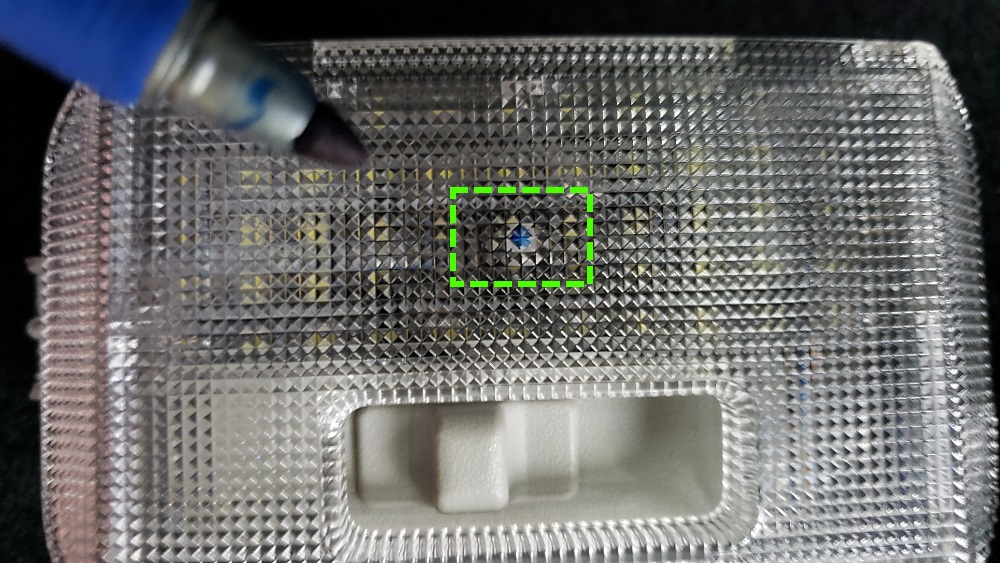
Use the 1/16 in drill bit to create a pilot hole on the front side of the lens, at the spot marked in the previous step. Be careful here, ensure that the lens is fastened down when drilling, and go slowly to avoid cracking the lens. I used my fingers with the bit, to get a good portion of the hole started.
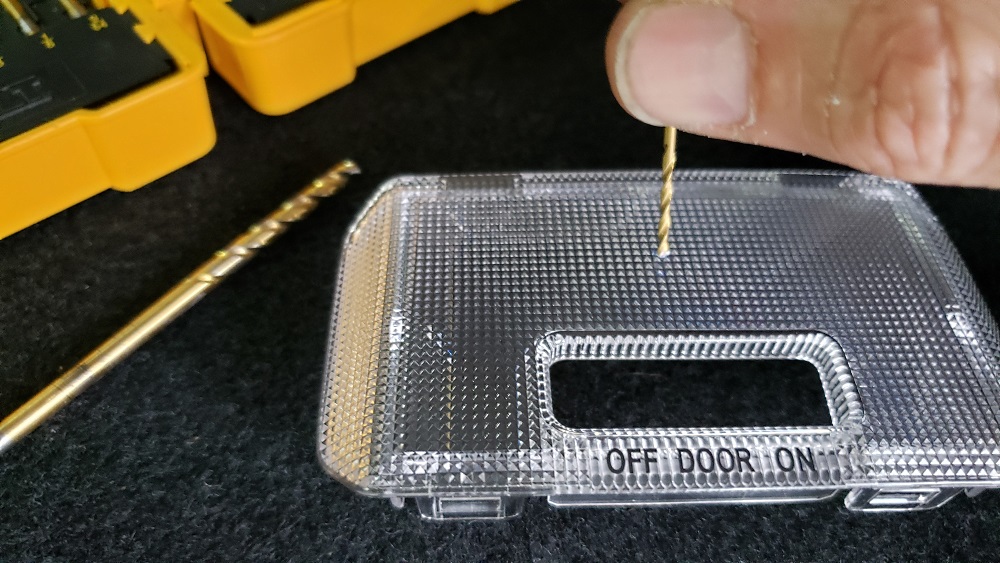
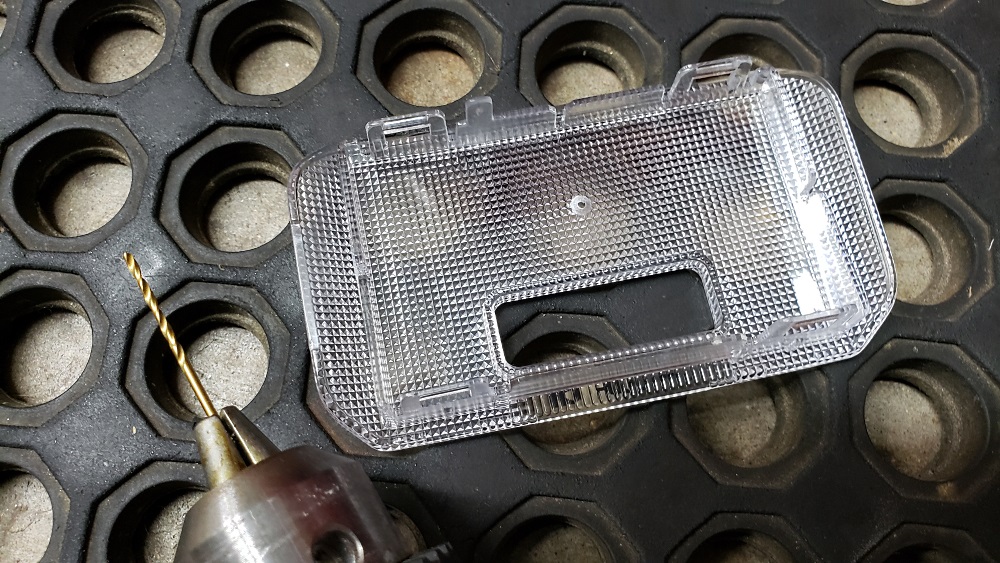
Once the pilot hole has been drilled, flip the lens over, and drill the larger hole using the 5/16 inch bit. I drilled from the back side because it doesn’t have the prism-type texture that the front does, and won’t have the propensity to catch the drill bit. Again, ensure that the lens is fastened down when drilling, and go slowly to avoid cracking the lens. This gets especially tricky right before the drill bit passes all the way through the lens.
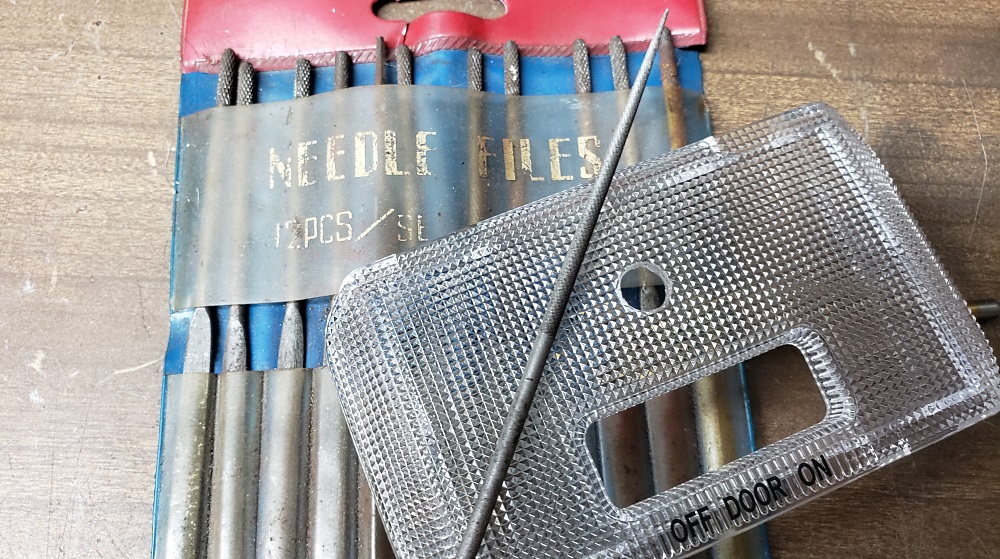
Use a round needle file to smooth the inside and outside edges of the hole, put the black plastic head of the push button switch back on the switch post, place the lens on the light assembly (but don’t snap it on yet), and ensure that the hole is large enough for the switch to move freely. If need be, use the round file to slightly increase the size of the hole.
ASSEMBLY, INSTALLATION, AND TESTING
As I mentioned in a previous step, the wiring and LED driver must be routed through the hatch light housing, followed by placing the circuit board into the electrical contacts of the hatch light housing.
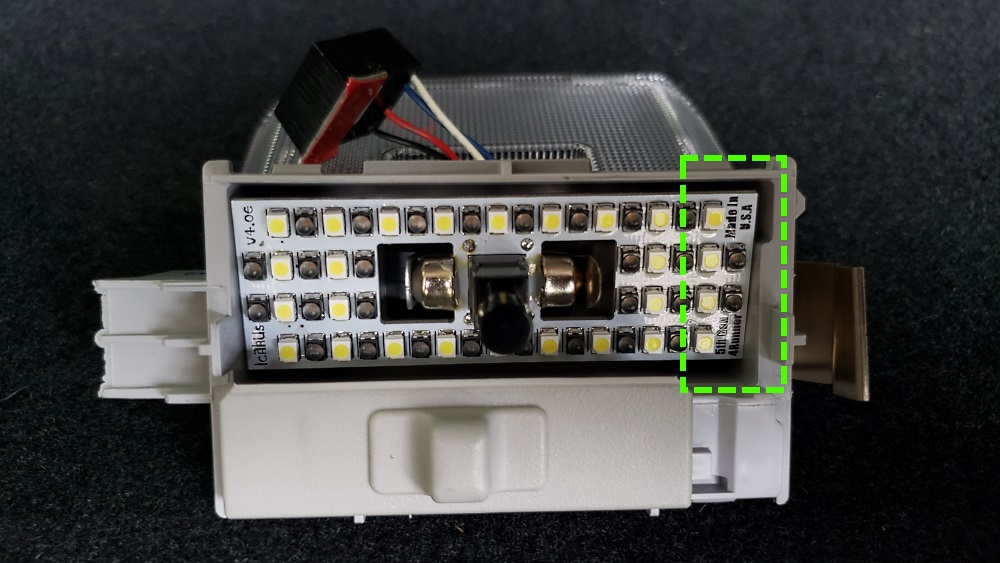
Do this, and before buttoning everything up, temporarily plug the hatch light assembly back into the vehicle wiring harness, to ensure that polarity is correct, and the light works. In my testing, I found that orienting the side of the circuit board marked with “Made in USA” into the right side of the light housing resulted in the correct polarity.
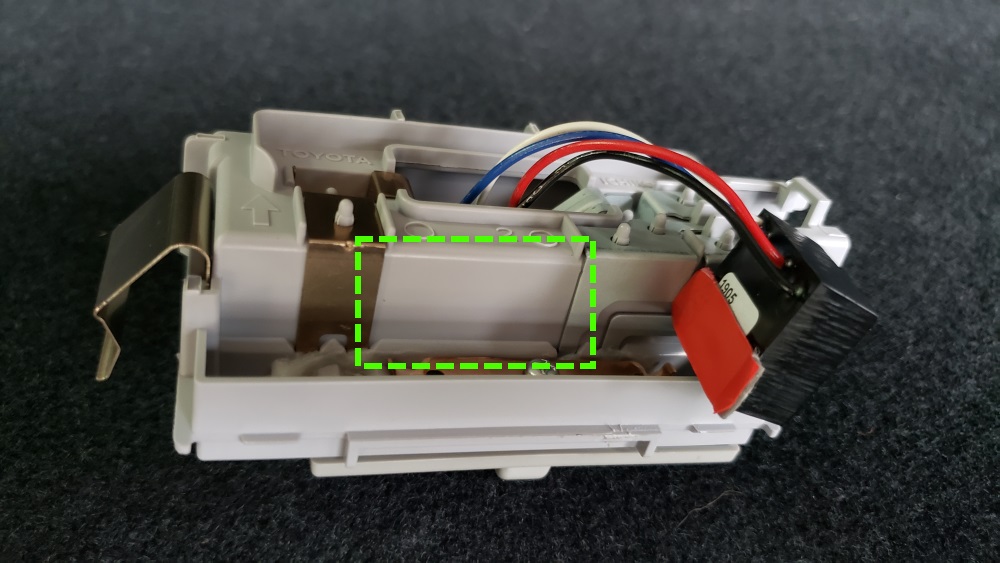
Use isopropyl alcohol to clean the highlighted area of the light housing, remove the red backing from the adhesive tape that is on the LED driver, and attach the driver to the light housing.

Snap the lens back onto the light and ensure that the push button switch moves smoothly. I removed the black plastic head of the push button switch again, put a tiny amount of super glue inside of it, and reinstalled it on the switch post. I did this to ensure that the switch button head doesn’t accidentally come off later. Don’t use too much glue here, as otherwise there is a risk of gluing the switch into one position.
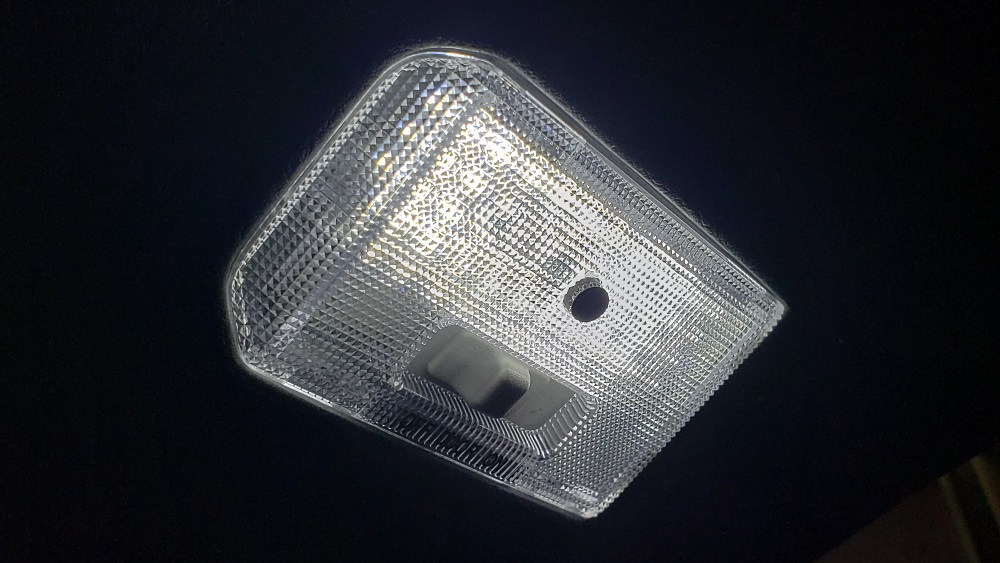
Moving the switch to the down position will cause the red LEDs to light up, and moving the switch to the up position will cause the white LEDs to light up.
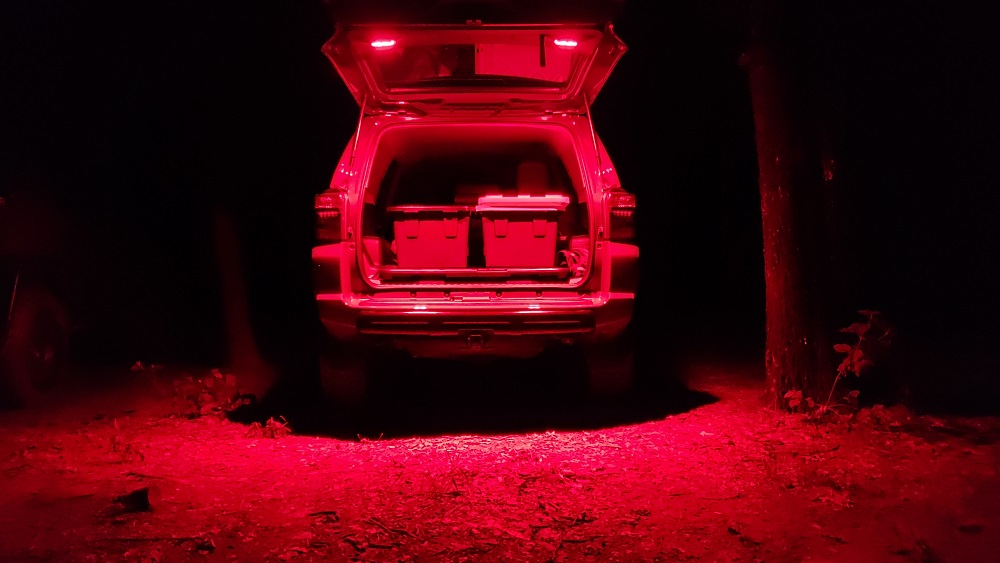
RESULTS

ADDITIONAL THOUGHTS AND OPTIONS
The way that the push button switch is wired by default is such that the up position is for white LEDs, and the down position is for red LEDs.
Since I’ll be using white lights most of the time, I’d prefer that the down position of the switch be for white LEDs, since the switch is less susceptible to damage from anything that may be sliding around the cargo area in this “low profile” position.
I asked Li-Young about this, and he told me that reversing the positions of the white and blue wires on the circuit board (desoldering/soldering required) will swap the white/red switch function. I haven’t done this yet, but it is something that I’m considering.
If you want to go all out with Icarus eXtreme LED lights in your 5th gen 4Runner, check out the map and dome lights from ArcLightLEDs too. They are also available with white LEDs only, or switchable white/red combination:
I wish this was a dial instead of an in-out sort of switch. Other than that, they look amazing.
Hey y’all. Pretty stoked about installing these. I’ve got a question. I’m looking to isolate these lights from the rest of the ones in the 4Runner. For example, when I open the hatch I want these to come on and not the ones inside the cabin. And I don’t want these to time out and automatically shut off when they have been on too long.
my camp kitchen is built into the back of the 4Runner. If the lights shut off I have to pack everything away and close and reopen the hatch to get the lights back on. Additionally, it like the to run off the house battery and not the starting battery. I’m sure I could tear it apart and figure it out but I’m being lazy and hoping someone has the answer for me. Like cut and cap the red wire and run a new wire from the house fuze block and reattach.
id also like to keep the shutoff feature when I close the hatch. Any ideas from you experts?
Ben
Even after reading your disclaimer (Don’t use too much glue here, as otherwise there is a risk of gluing the switch into one position.), I still made this mistake! Got one hatch light installed and working perfectly; the driver’s side light is stuck on red 😐
I just installed all three sets of lights on a 5th gen. They look amazing and are an incredible upgrade. The hatch and dome lights are relatively easy to replace and make an enormous difference as shown above. The map lights are trickier. It requires an entire console removal which is not detailed very well in the instructions and difficult to find help online. I used this link – https://www.4runners.com/threads/how-to-5th-gen-led-interior-conversion.2529/ – which helped a lot. I’ll try list some harder steps below that I struggled with.
– once the crawl control is removed and unclipped remove the two screws in the top. Then pull down the entire console and unclip the main electronic connection
– unclip all of the remaining connections including the white connection to the lights that is tucked under a large bundle of wires
– unscrew the little Phillips head in the middle
– remove the black from tan sections by working your hands around per instructions
– all of the above just to remove the stupid metal barrier!
Hopefully that helps. Best of luck and enjoy the lights!
These lights are amazing compared to stock. I waited a long time for these to be in stock (rather than go with other bulb options) specifically because of the red alternative. When trying to sneak into the woods or field for early morning hunts the red option is fantastic to not ruin your night vision or draw a ridiculous amount of attention to your self with white LEDs.
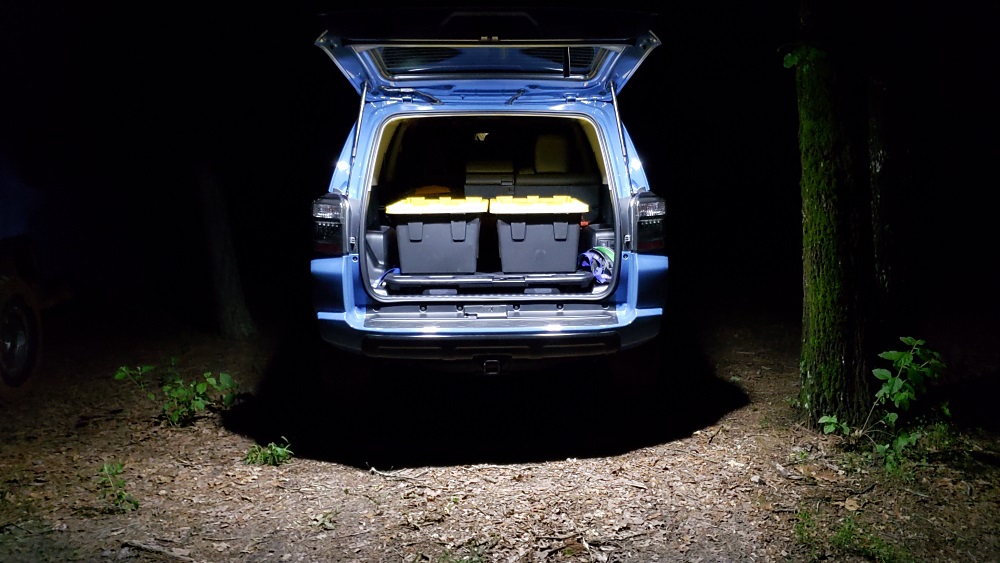
Also, like Eric Shows in his pictures, your entire cargo area and everything behind the car is illuminated. Before i could not even see my stuff up against the back seat when getting ready to hit the woods.
I very highly recommend these!
Agreed, Mike. They’re well worth the price of admission!