DeMello Off-Road Single Hoop Front Bumper Step by Step Install for the 5th Gen 4Runner
The following is a step-by-step process on the installation of the DeMello Off-Road Front Bumper on a 2012 Toyota 4Runner SR5.
These instructions include details on cutting the OEM bumper.
DeMello Off-Road Bumper Step by Step Install
The process will be similar for any 5th generation 4Runner. Before you begin installation make sure you have all the required hardware from DeMello Off-Road.
Step 1. Preparation

1.1 Read Directions Thoroughly
The following instructions give step-by-step details on how to measure and cut your OEM bumper, and install a DeMello Off-Road Bumper.
The bumper we will be installing is the single hoop front bumper, however, the process is the same for all of DeMello’s 5th generation front bumpers.
Make sure to thoroughly read through all of the instructions before beginning.
1.2 Prepare Tools
- Ratchet Sizes: 10mm, 12mm, 13mm, 14mm
- Die Grinder (or Air Saw)
- Dremel: check price
- Sanding bits: check price
- Pliers
- Razor Blade
- Torque Wrench (60 Ft-Lbs): check price
- Flathead Screwdriver (to Remove Pins)
- Masking Tape
- Two Friends to Hold the Bumper While You Install It
1.3 Park Car on Level Ground
Make sure to park you 4Runner on nice level ground.
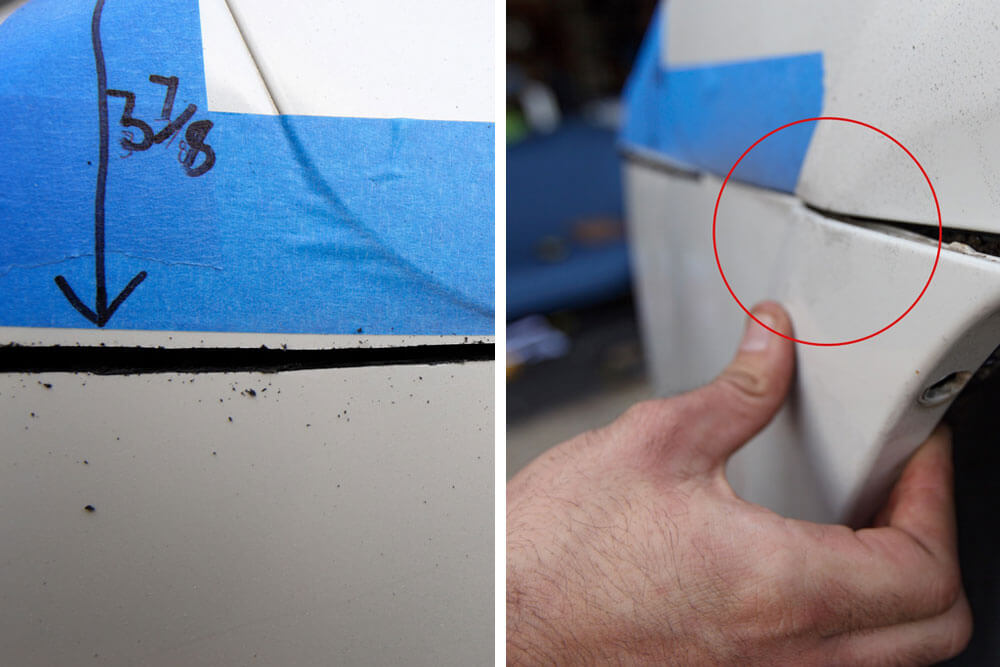
Step 2. Tape Measurement

Lay out the masking tape as shown in the pictures above.
Measure three times, Cut once.
Start from the horizontal factory line of the fender and go along the front of the bumper keeping the tape horizontal.
The pictures show reference dimensions along the way. (Remember these measurements are for a 5th Gen 4Runner before the face-lift).
Step 3. Remove Bumper Bolts

Demello calls for removing the top grill piece on top of the bumper for easier access, however, we did not find that we needed to remove the grill. Remove the skid plate by removing the 4 12mm hex bolts.
Remove approximately 6 10mm hex bolts from the bottom of the bumper. (Number of hex bolts might vary depending on the year of the 4Runner.)
Remove 2-3 10mm hex bolts under each wheel well. Remove any clips holding the bumper as well.
The number of clips can also vary depending on the 4Runner.
Step 4. Disconnect Fog Lights, DRLS / Blinkers
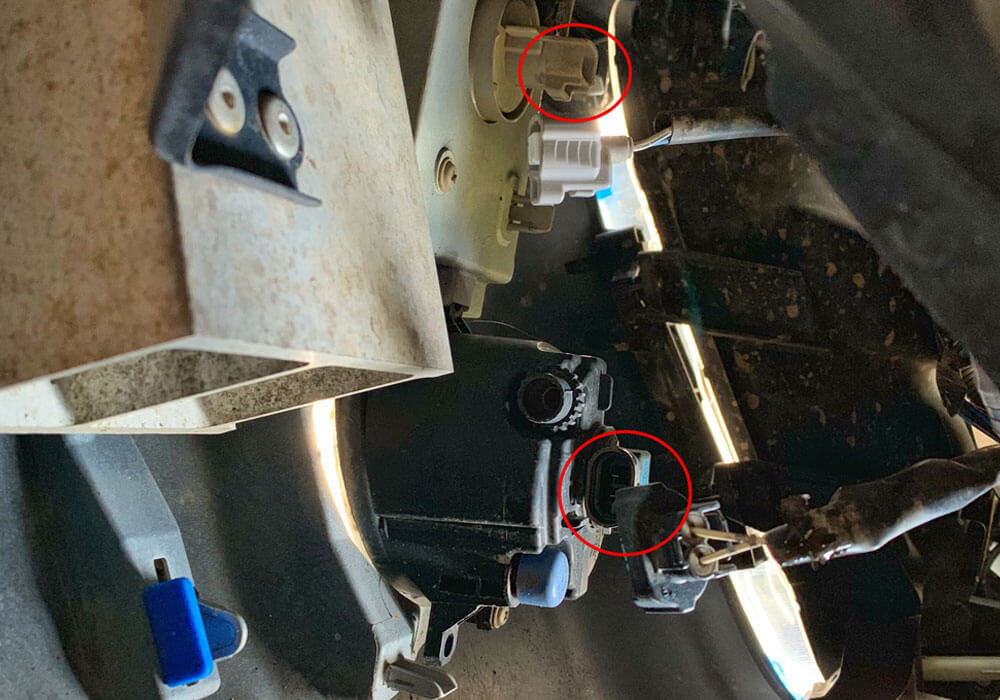
You should be able to reach under the wheel well flaps and disconnect the lights.
You will have to disconnect both the blinkers/day running lights and fog lights for 4Runners before the new face-lift (2010-2013).
2014 and newer will only require disconnecting the fog lights.
Step 5. Cut Bumper

Cut the bumper using your angle grinder or air saw.
Cut about a ⅛ inch below your measured line so you can sand it down to your exact measurement.
When getting near the fender there are black plastic pieces that hold the top portion of your bumper below the headlights. You will end up cutting these so that the top portion of your bumper stays mounted properly.
We fully cut them after the bumper was removed and then removed the two screws holding the cut half.
Lift the corner of the bumper when getting close to the fender so the fender does not get scratched. Be careful and have fun!
Step 6. Remove Bumper

Unhinge near wheel well by pulling the bumper corners outward with some force.
Bumper should then come off pretty smoothly.
Step 7. Remove Bumper Reinforcement Bar/Bash Bar
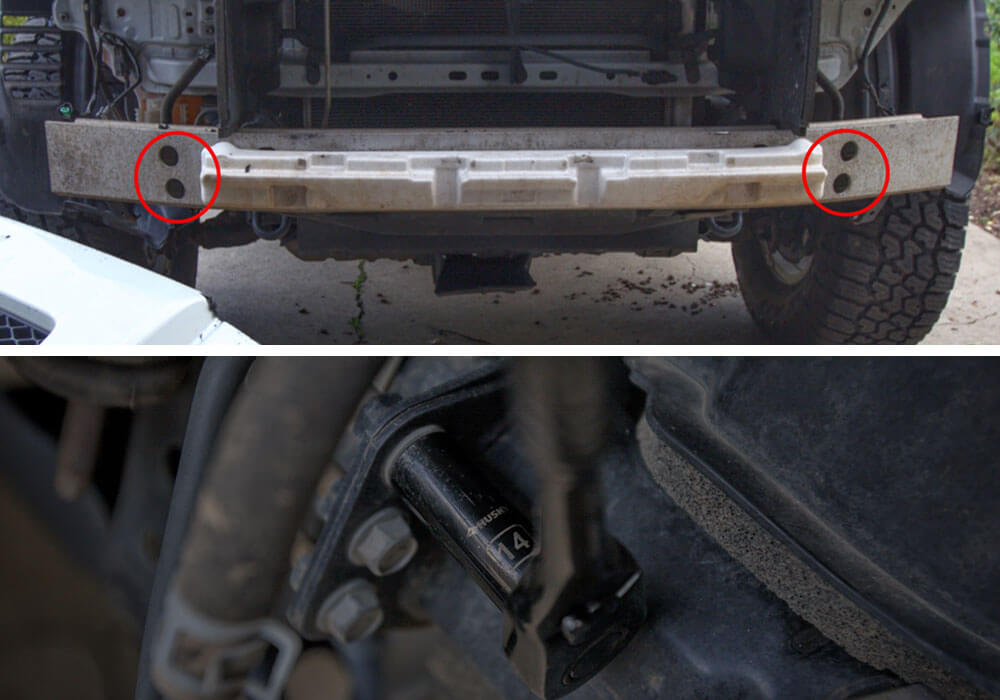
First, remove the bar by removing the 4 14mm nuts.
Then remove the reinforcement bumper horns by removing the 4 14mm bolts from each horn.
Step 8. Clean Up
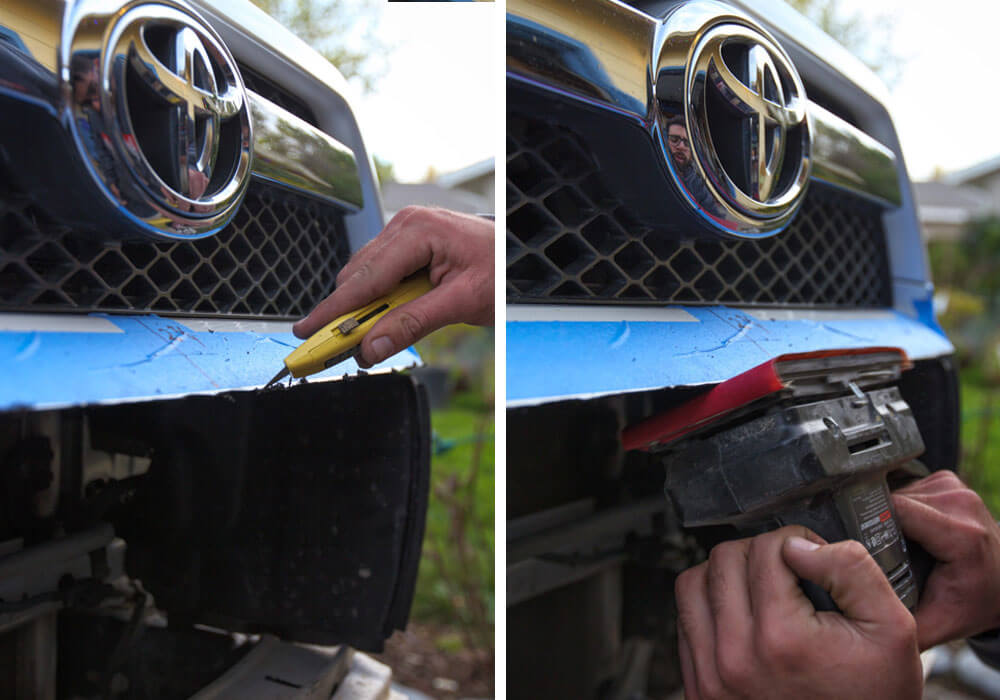
Clean up using a razor blade first later use the sander to make it nice, smooth, and even.
Step 9. Cut Mud Flaps/Wheel Well Guards
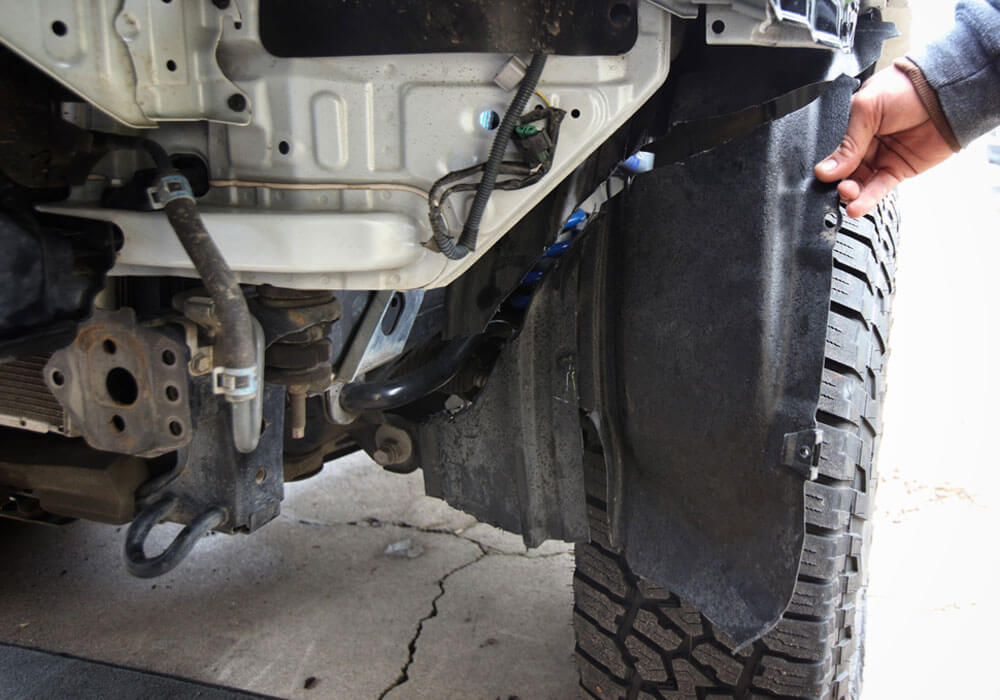
Cut the wheel well guards with the Dremel as shown.
We then drilled a few holes near the cut and zip tied it the frame of the car.
Step 10. Cut Front Radiator Wind Directors

Cut the plastic pieces in front of the radiator.
These allow air to be directed to your radiator, however, they need to be trimmed so the new bumper will fit.
We held the bumper up to see where we had to cut. We cut off a portion from the top and a portion from the bottom.
Step 11. Bend the AC line

If needed, bend the AC line so there is at least .5 inches of gap between the new bumper and the AC line.
We barely had to move ours, however, some 4Runners require more bending. You can use your hands to bend the lines carefully.
You can see the AC line in the pictures above in the bash bar removal step.
Step 12. Spray Paint

Spray paint with black paint any exposed areas if you have a light colored 4Runner like ours.
We just painted the sides under the fenders.
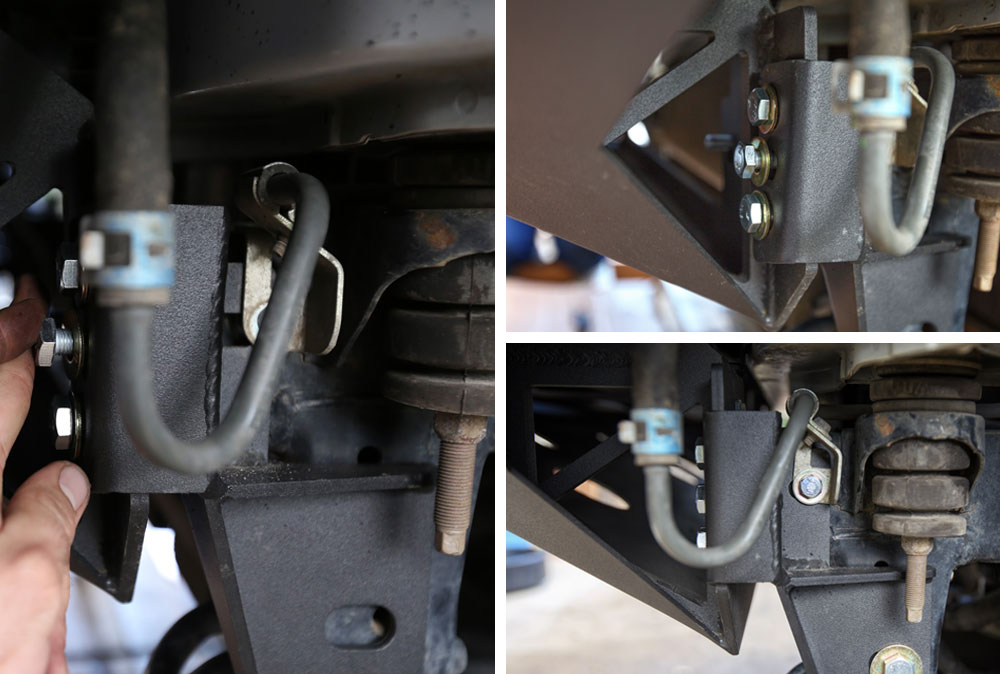
Step 13. Get Help and Install The Bumper

Have at least two more people to help hold the bumper while you install the bolts.
The bumper has slots for adjustment so you can get the bumper on with a few bolts and then move it so it is centered.
Insert two of the M10 bolts backward to help support the bumper in the correct spot. (you will remove these and reinstall them the correct way afterward).
Once the bumper is in place the side brackets can be slid over the mounting points of the vehicle and the bumper.
There are a left and a right bracket and they can only be installed one way so you cannot get it wrong (picture above shows left and right).
Mount the bumper using all the provided hardware make sure it is centered in the correct spot, and tighten.

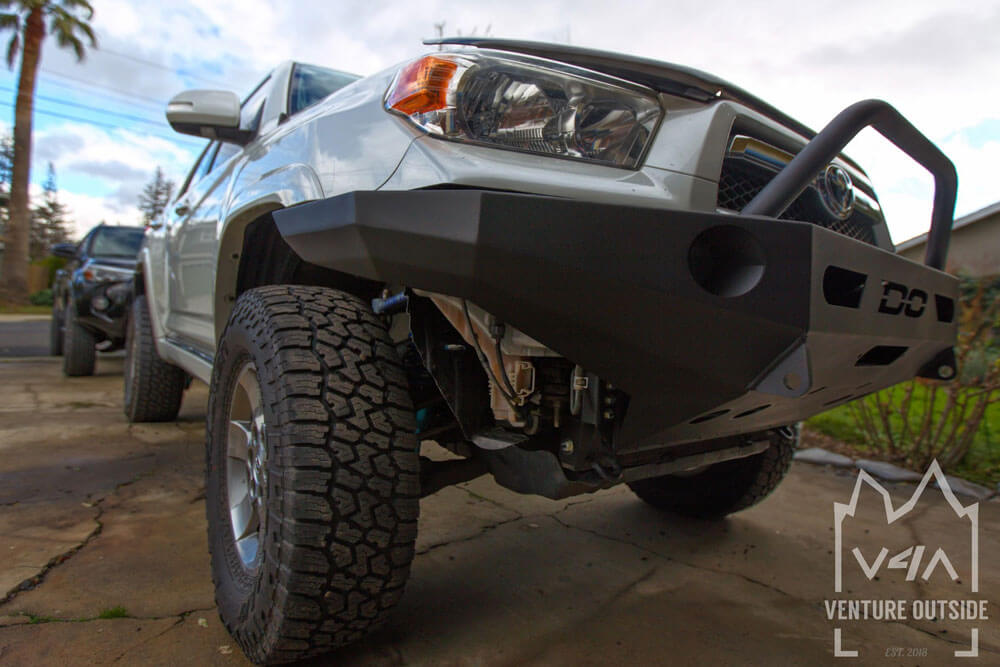
Finished Demello Install


Make sure to check out @Venture4Adventure for awesome films, pictures, projects, product reviews, journeys & destinations, and more coming soon!
I just received my aluminum Demello baja bumper and their cutting instructions (like all other fabricators) are for the 2014+.
Thanks for this write-up
Dave