Vanity Visor LED Light Upgrade 5th Gen 4Runner

Vanity Visor LED Light Swap and Upgrade (Installation Guide) on 5th Gen 4Runner
Moving forward with the next interior bulb is the vanity/visor. We recently just dropped in the courtesy door lights and the conversion was quite simple. We will be moving onto the map lights, dome light and rear hatch lights next.
The stock bulbs in the vanity/visor location are pretty weak, to say the least. If you are looking to replace or upgrade your existing bulb, LEDs are the way to go. The visor lights are pretty simple to swap out, just pop the light cover off and swap in the new bulbs.
To prevent from scratching any surface of your headliner, it is best to use your plastic pry tools or a very small flathead screwdriver. You should be careful with a screwdriver though. If you are not gentle enough, you can damage the tabs that are holding the visor light cover on. You can also cover the tip of your flathead screwdriver with a microfiber towel, but it is easier without one.
If you do not close the mirror cover, leaving the bulb light on will be extremely hot. When you go to remove the stock bulb, just keep the mirror cover closed for at least 5 minutes. Doing this will give you the ability to actually touch the bulb in order to remove it.
Bulb Number & Quantity
- Bulb: 168 (Quantity x2)
Brand
- Recommended (x2): Check Today’s Price
Tools Needed
- Small Flathead Screwdriver
- OR Plastic Pry Tools
Step #1 – Pop Tab on Light Bulb Cover


This is really the only tricky part about swapping out your stock bulbs with LED lights. You need to remove the light cover from the housing.
To do this, you can use a small flathead or plastic pry tools. In the second picture with the arrows, you can see the tabs that you need to press in. Once you press in on these tabs, that will loosen the light cover. You have the tabs pressed, you can wiggle the light cover off.
Step #2 – Remove Light Cover

In the picture above, you can see the hole/gap on the light cover where the tabs fit into place. You want to stick your screwdriver or pry tools right here in order to free the light cover from the housing.
Step #3 – Remove OEM Bulb
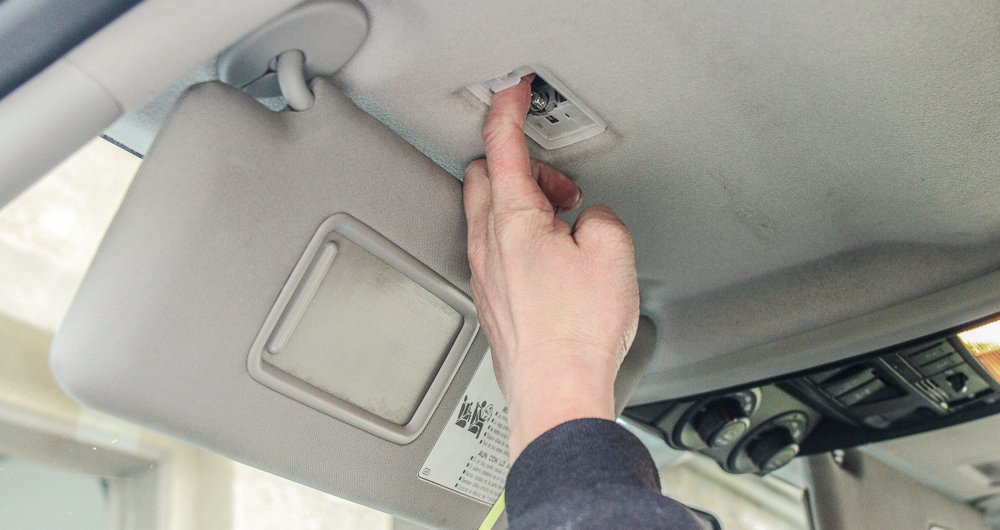
This lightbulb is VERY hot if you do not close the vanity mirror cover. Just make sure to close the vanity mirror cover before attempting to remove the OEM bulb. If you do not have this cover closed, you will burn your fingers.
To remove the bulb, try to gently wiggle the bulb with one finger. It will be tough to fit two fingers in here. Do your best to use two fingers and pull the bulb out.
You can pull the whole assembly out as well and then pull the bulb out. The plastic assembly will snap back into place.
Step #4 – LED Light Swap

These are not the cheapest bulbs out there but they are among the highest of quality.
When it comes to lighting, never buy cheap products.
New LED Light Bulb

There is a positive and negative on these lights. The red dot on these bulbs faces the rear.
Step #6 – Test Light Bulb

Always test your lights before placing the light cover back on. If you test your lights and they do not turn on, you have the bulb in backwards. Take it out and turn it around.
Step #7 – Pop Light cover Back On
That’s it! If everything lights up, snap your light cover back into place and call it a day!