
4Runners have plenty of options for customization and improvements. Having the ability to store, mount, and secure gear is crucial for anyone wanting to go on adventures and bring their equipment off the beaten path. 4Runners do have great storage capacity; however, sometimes you need to haul items too large to fit inside.
Additionally, some equipment may be better stored outside to prevent odors, dirt, and moisture inside. Things like a roof top tent, recovery boards, large storage cases, kayaks, canoes, and stand-up paddleboards (SUPs).
A roof rack is an excellent option for securing any of the items mentioned above. I’ve tried several different racks, including the factory roof rack, ARB Flat Alloy Aluminum Roof Rack, SSO Roof Rack, and now the Backwoods DRIFTR roof rack. This article will briefly present the process of installing the DRIFTR rack on a 5th Gen 4Runner and provide an overall review.
Features & Specifications:
- 1/4″ thick aluminum side panels
- Made in America
- No drilling required
- Modular design
- Sunroof compatible
- Room to install lighting front and rear
- Side rail handle cutouts
- Triple slotted aluminum extrusion
- T-nuts for accessory mounting included
- Powder coated in semi-textured black.
Find It Online:
- 5th Gen 4Runner DRIFTR Roof Rack: Check Price
Table Of Contents
Installation Overview

Installation of the DRIFTR rack was quite simple and easy, but I do recommend having someone help throughout the process. Some of the steps can be difficult alone. Currently, Backwoods only provides an installation video and offers no written instructions; however, the instructional video by Backwoods is excellent and easy to follow. We’ve linked to it at the end of this post!
I prefer having a well-produced video in comparison to an assembly manual because it is more intuitive to understand. Below are the general steps for installing the DRIFTR rack and are in essence a summary of the installation video Backwoods provides. To start, you’ll need to remove your existing roof rack, if applicable. Most 4Runners will have some sort of rack installed. This might be a different roof rack, or simply the factory cargo bars.
I previously had an ARB Flat Alloy roof rack installed, and removing this rack is quite easy (as are most roof racks on newer 4Runners).
I do recommend having a partner assist you in both the removal of your existing roof rack (if applicable) and the installation of the DRIFTR rack.
Step 1. Prep & Install (4) Rear Mounts

Once your existing roof rack is removed you will clean and prepare for the installation of the DRIFTR rack, notably the mounts for the rack.
The existing mounting locations (that will also be utilized for the new mounts) may have old silicone, dust, and grime. I used a clean shop rag with glass cleaner to clean up any debris.

There are six total mounting blocks provided. Four rigid blocks for the back four mounting locations (factory mounting locations) and two flexible rubber mounts for supporting the very front portion of the DRIFTR rack.
This is a design feature that you don’t see on too many roof racks. There are a lot of racks that only mount on the four factory mounting locations or require drilling.

Apply a liberal amount of silicone around each of the mounting holes and on the threads of the mounting bolts.
Next, place the rigid mounting blocks over the mounting holes, place a bracket on the mounting block, and then loosely secure with the provided bolts. You will tighten the bolts later in the installation process.
Step 2. Assemble Front Mounts

Pre-assemble the front mounts by using the flexible rubber mounts, bracket, and supplied bolts and washers. Please note that the rubber mounts are counter-sunk for the bolt head, and the bolt head will face downwards (towards the roof of your 4Runner) once installed.
Once you have the bolts through the rubber mount and the bracket through the bolts you can place a flat washer, lock washer, and nut on the ends of the bolts.
You can secure the nut on the bolt by using a 5/32” Allen wrench and a 7/16” socket. Once finished, you will have two pre-assembled front mounts that resemble the picture below.
Step 3. Install Side Rails & Front Mounts

Gather the two side rails, 1/4″-20 x 1” black bolts, flat washers, lock washers, and nuts. I recommend having a partner assist you at this point to avoid scratching your roof.
It is possible to install the rails yourself, but it can be challenging. Work smarter – not harder!

The rails are placed on the outsides of the brackets and will be secured to each of the back four brackets with two 1/4”-20 x 1” bolts, a flat washer, lock washer, and a nut.
Now install the pre-assembled front mounts.

There are slots towards the front of each rail which will be used to attach the front mounts. The same hardware that was utilized for the back four mounts will also be used for the front two mounts. Be sure to loosely secure the front mounts at this point, as you will need them loose enough to adjust towards the end of the installation.
You are now ready to start installing the front wind fairing and crossbars for the roof rack. Before installing the front fairing, you will need to install a crossbar (extrusion) on the back to provide structural support. This impressed me, as some roof racks do not provide this support – way to go Backwoods!
Step 4. Mount Front Wind Fairing & Crossbars

Take eight extrusion slide nuts and install them in the slots of the crossbars at the same spacing as the holes in the wind fairing.
You can measure, eyeball, or do a little of both to align everything. I found it easiest to set both the crossbar and wind fairing in my lap and install the extrusion slide nuts this way.
After the slide nuts are installed, use the supplied 1/4″-20 x 1/2” bolts and supplied red Loctite to secure the wind fairing and crossbar. Once again, great job Backwoods for supplying Loctite. Many manufacturers wouldn’t include this in the kit.
Step 5. Add Wind Fairing Edge Trim

Before installing the wind fairing, you will also need to place the supplied edge trim on the leading edge of the fairing.
This will protect your roof from scratches and provide a good seal between the fairing and your roof to prevent wind from slipping through.
Step 6. Cut Excess Trim

You will likely have some excess trim. Cut it off with large wire cutters.
Step 7. Install Fairing
Install the wind fairing with a helper. The fairing is secured to the side rails with 1/4”-20 x 1” black bolts with a flat washer.
Leave the six bolts that secure the wind fairing loose – do not tighten these until later.
Step 8. Remaining Crossbars

Now install the remaining seven crossbars on the side rails. The DRIFTR rack has seven sets of holes for the crossbars in addition to slots which can be utilized to position the crossbars.
I chose the symmetrically placed holes. The crossbars are secured just like the front wind fairing with 1/4”-20 x 1” black bolts with a flat washer.
Step 9. Rear Fairing

The last piece of the rack to be installed is the rear fairing. Secure the fairing to the side rails with 1/4”-20 x 1” bolts and a flat washer on the outside, and a flat washer, lock washer, and nut on the inside of the side rails.
You can tighten the bolts and nuts for the rear fairing with a 5/32” Allen and 7/16” socket or wrench on the nut.
Step 10. Loosely Tighten All Bars

Make sure all the crossbars and the rear fairing are tightened. You do not tighten the front wind fairing until the end. After verifying everything except for the front fairing is tightened, you will align and tighten the mounts.
Measure and center the rack left to right before tightening the four rear mounts. Once satisfied with the rack’s alignment, tighten the bolts into your 4Runner’s roof. Do not tighten the bolts attaching the side rails to the back four mounts yet.
Tighten the middle mounts to the side rail and measure the distance from the bottom of the side rail to the top of your 4Runner’s roof. Then adjust the height of the side rails at the very back to match. Tighten the back four mounts to the side rails once you have equal measurements.
With a partner helping, have one person pull up on the front of the side rails while the other person pushes the front mounts down towards the roof of your 4Runner. Tighten the bolts to secure the mounting location. Repeat the same process on the other front mount and be sure to match the gap between the bottom of the side rail and the top of the roof.
Slide the front fairing all the way down and tighten the six bolts to secure.
Enjoy your DRIFTR rack!!
First Impressions & Review

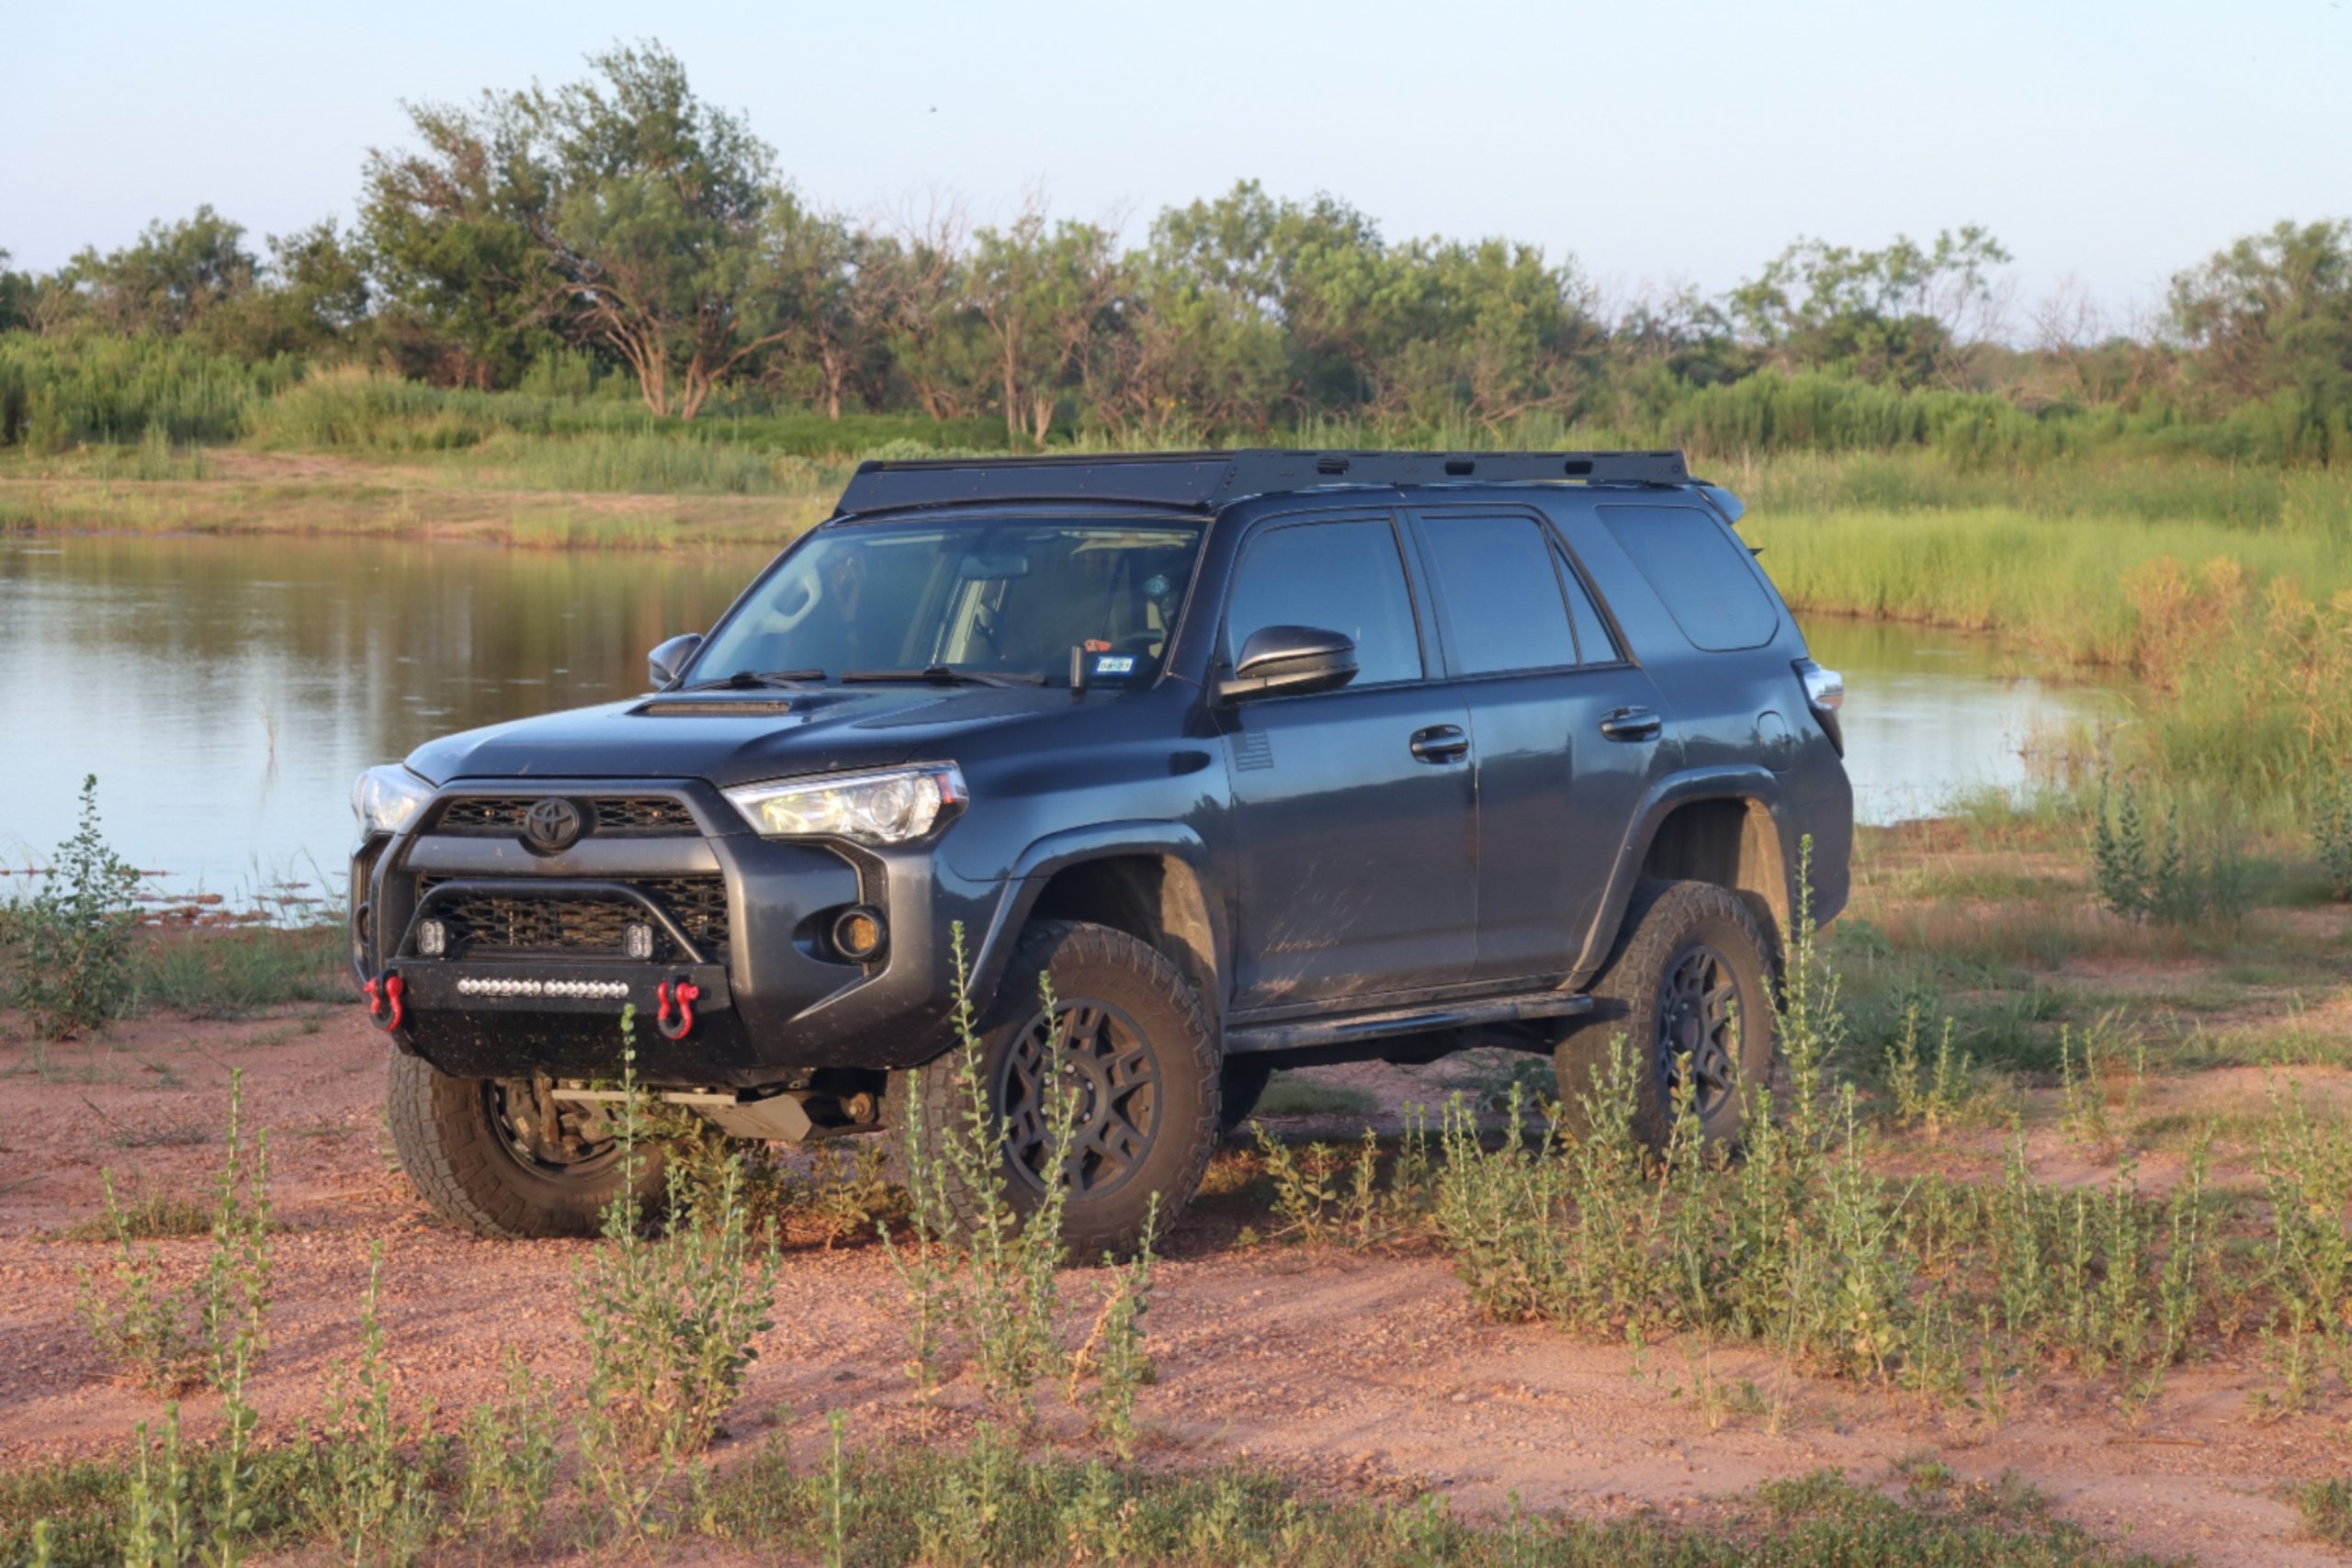
The DRIFTR rack looks awesome on my 4Runner. I previously had an ARB Flat Alloy roof rack, which I used tremendously and liked the look of, but I prefer the look of the DRIFTR rack for a few reasons.
The DRIFTR rack is a full-length roof rack. Proportionally, I think this looks better than the ARB rack I had, but this is of course subjective. Next, the rack is very low profile and appears to be streamlined to the roof. Last, the rack comes with a supplied front and rear fairing, which the ARB rack did not. This is a big benefit.
If you want to install roof-mounted lighting, the DRIFTR rack is already prepared to take on a front light bar with factory slots on the front fairing. Rear chase lighting is also one step away with factory cutouts on the rear fairing which have small tabs securing a filler plate if you do not want to install chase lights.
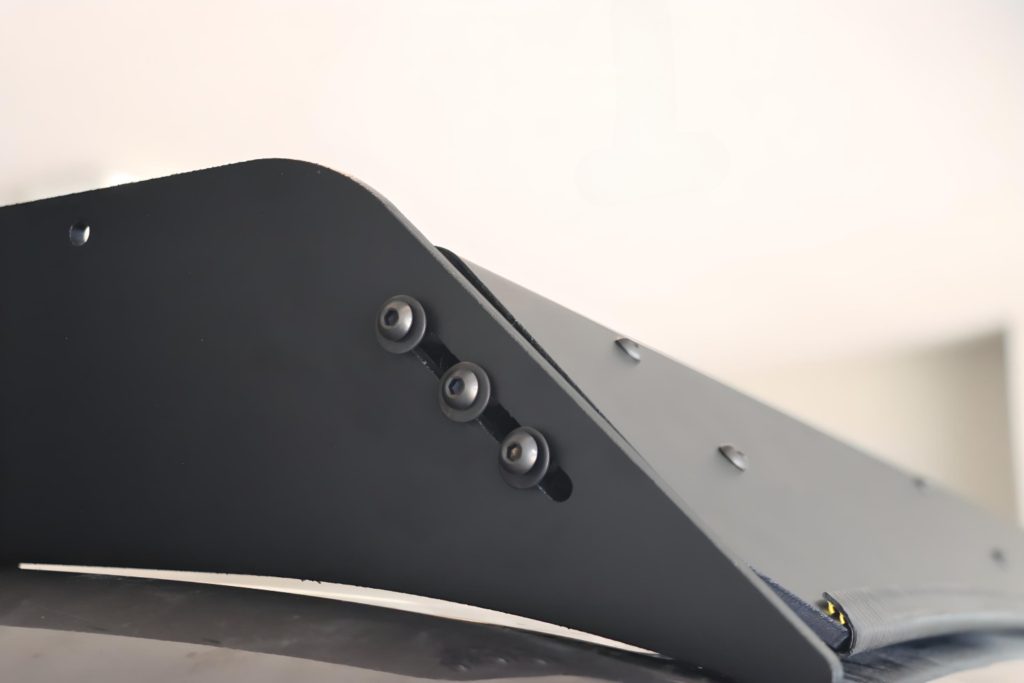
Rear Cutouts
The cutouts for the rear chase lights are designed to fit Baja Designs S1 and S2 lights, but I’m sure many chase lights could be used besides Baja Design offerings.
Cutouts on the side rails for Agency 6 grab handles are in place. This is beneficial for loading gear on your rack, but also as a potential tie-down location for your straps and bungees.
Included Triple T-Slots
The crossbars include triple t-slots and t-slot hardware is provided in the kit by Backwoods so you can start mounting gear to your rack.
Aluminum Design
The DRIFTR rack is made of aluminum, so it is naturally corrosion-resistant and lightweight. Backwoods also powder coat the aluminum black to give it a sleek look and better match your 4Runner.
Modular Design
I really like the modular design, sleek layout of slots and pre-drilled holes and slots, and provisions for lighting. Backwoods did an amazing job at providing all these features but going about it in a way that allows someone to mount as much as they want, or as little as they want. It just depends on your preferences and needs.
Final Thoughts

To date, I have used the rack on three fishing trips of which I mounted SUPs to the rack, and it performed great. I’ve also hauled lumber from the hardware store, a dog kennel, and other miscellaneous gear.
I plan on setting up mounting locations for my traction recovery boards and a solar panel in the future. This should be quite easy based on how much adjustability and customization Backwoods incorporated into the DRIFTR rack.
The only complaint I have about the DRIFTR rack is a small amount of noticeable wind noise. Almost all full-length roof racks will have wind noise. The noise from the DRIFTR rack is relatively low though, but if you are particular about having minimum noise in the cabin you may want to consider a simple crossbar design rack from Yakima or Thule – but again, you would never achieve a full-length rack, or the utility, with one of those racks.
Other than this, the DRIFTR rack is phenomenal. The quality is very high and most importantly the design is unlike any other full-length CNC roof rack on the mark. In addition to all that, the modularity of the rack is top-notch. Not to mention that the DRIFTR rack is under $1,000, with all necessary equipment, hardware, and eight crossbars included in the kit.
Great job Backwoods – you made an awesome rack!