
I previously wrote an article about the CarTrimHome TRD Pro-style Grille and raptor lights. Since then, I installed their illuminated liftgate valance and I hope after reading this, you will like it as much as I do.
If you are not familiar with CarTrimHome, they carry a wide assortment of OEM replica parts and other aftermarket products such as their T10 head unit. They are popular largely due to their value proposition. For example, their TRD Pro front skid plate replica costs significantly less than the OEM variant, while still having decent quality.
Find It Online:
- CarTrimHome Illuminated Liftgate Valance: Check Price
Table Of Contents
Why Replace The Liftgate Valance Panel?
After installing the TRD Pro-style grille, I thought it would be nice to black out the rear as well. Sure, I could have purchased an overlay kit (which would have been way, way easier, but much less cool). However, I saw this kit on CarTrimHome and thought it looked pretty cool.
There was very limited information on their website at the time of purchase. Because of that, I really didn’t know what it would look like once installed but figured I would give it a chance.
What’s Included?
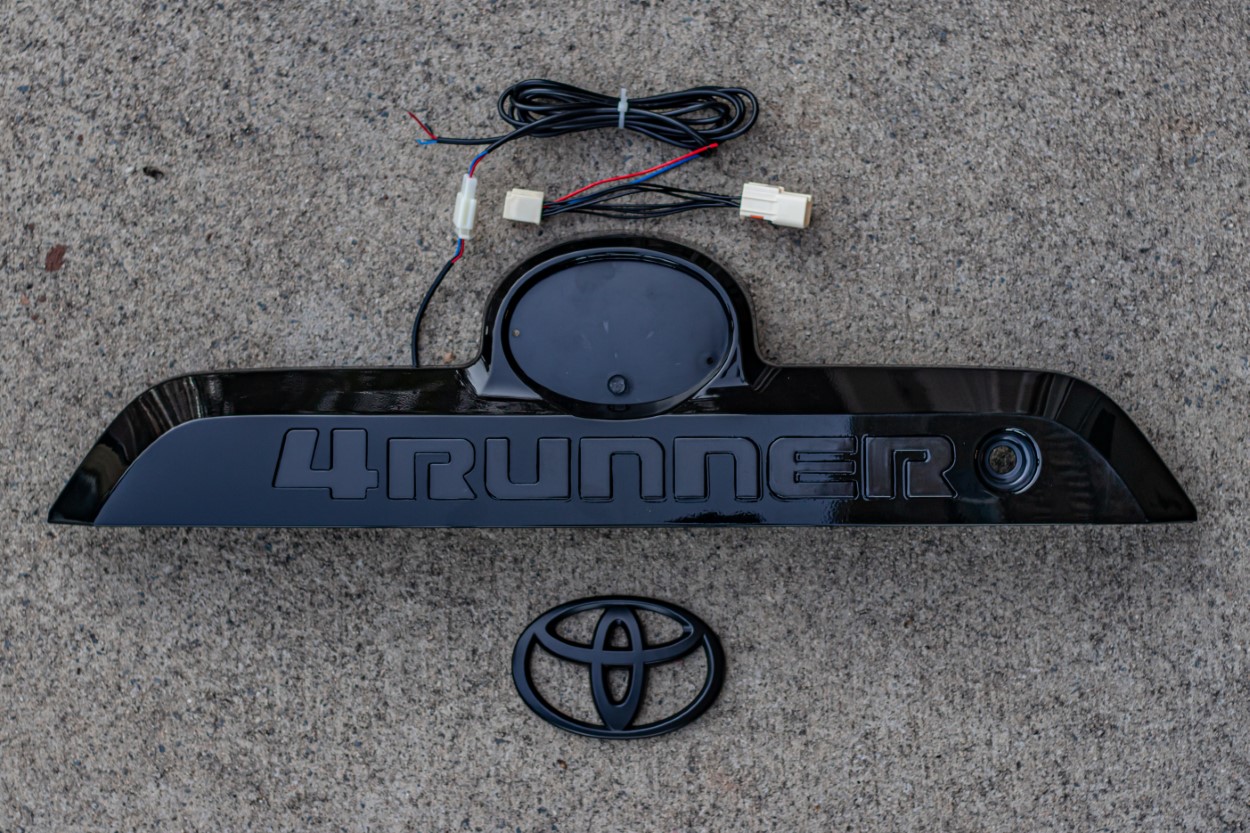
The kit includes the rear illuminated liftgate valance/trim panel that is pre-wired with a wire harness. It’s made of injection molded plastic with the “4Runner” lettering set flush in the valance panel. The harness connects the factory liftgate harness and the tail-light assembly. A cast metal Toyota emblem is also included but is not pre-installed. The 3M adhesive tape is pre-installed, however. The finish on the trim panel is a uniform gloss black.
Step 1. Prep The Valance Panel (Optional)
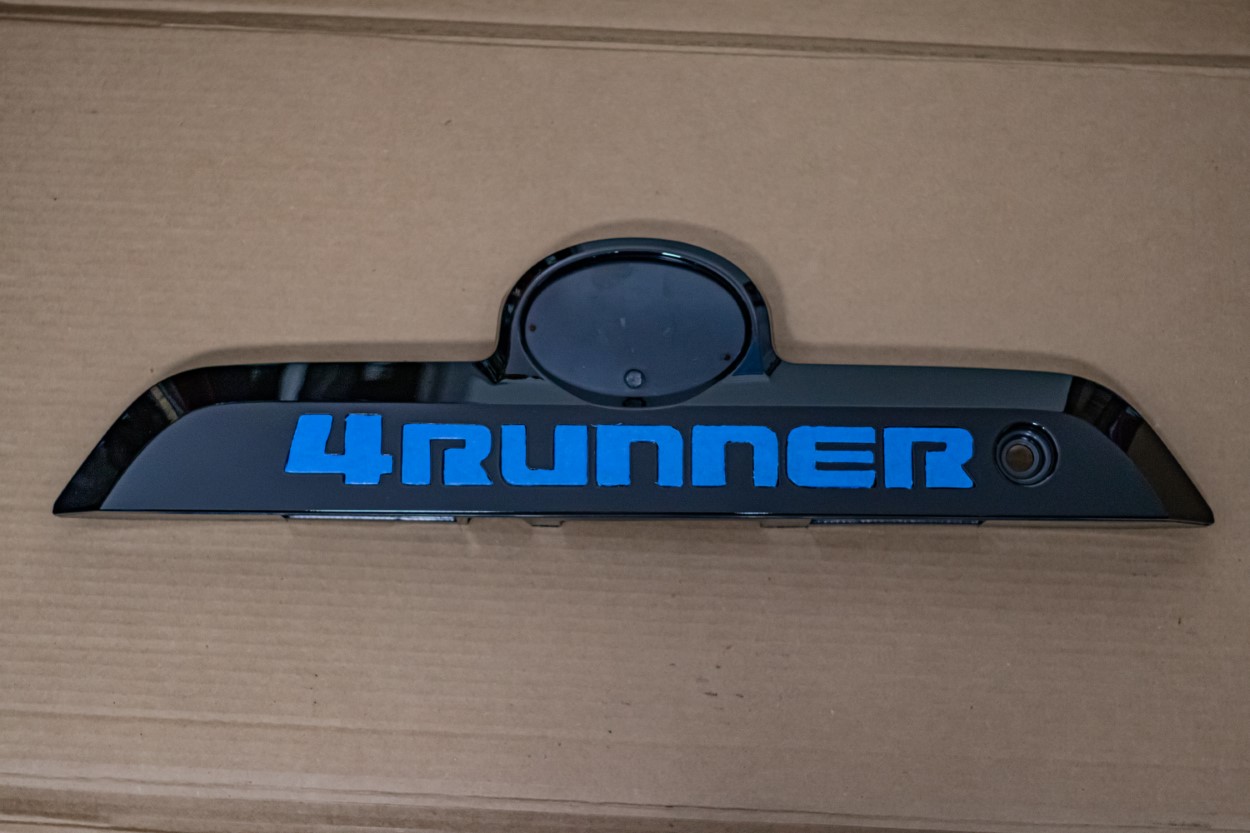
As I mentioned before, the trim panel is shipped in a gloss black. Since I drive a 2011 Trail Edition, all of my black trim has a matte finish. I decided that I would paint the panel with matte clear to try to match it to the rest of my trim.
The first step before paint was to tape off the lettering as it already had more of a matte finish. I first ran a piece of 2” wide blue painter’s tape across all of the letterings. Then, I carefully cut around the edge of each letter with an X-Acto knife. This was pretty easy since there is a groove around all of the letters that you can follow when cutting. However, you still have to be careful as it is very easy to scratch the plastic finish with the knife.
After wiping down the surface with isopropyl (rubbing) alcohol, I was ready to paint.

I wanted a durable finish, so I did about four coats of the matte clear and it turned out perfect. After it dried, it was an almost perfect match for the rest of the trim. I don’t think it would have looked right if I had left it with the gloss finish.
Step 2. Remove Trim Panels

At this point, I was ready to remove the factory trim panel. I started by removing the interior plastic trim panel which is held in by plastic clips. These are pretty easy to remove with a trim removal tool.

Once you have the interior trim removed, peel away the plastic vapor barrier for access to remove the nuts holding the factory emblem in place. Two of the nuts are behind pop-out plastic plugs with the remainder accessed by peeling back the vapor barrier.
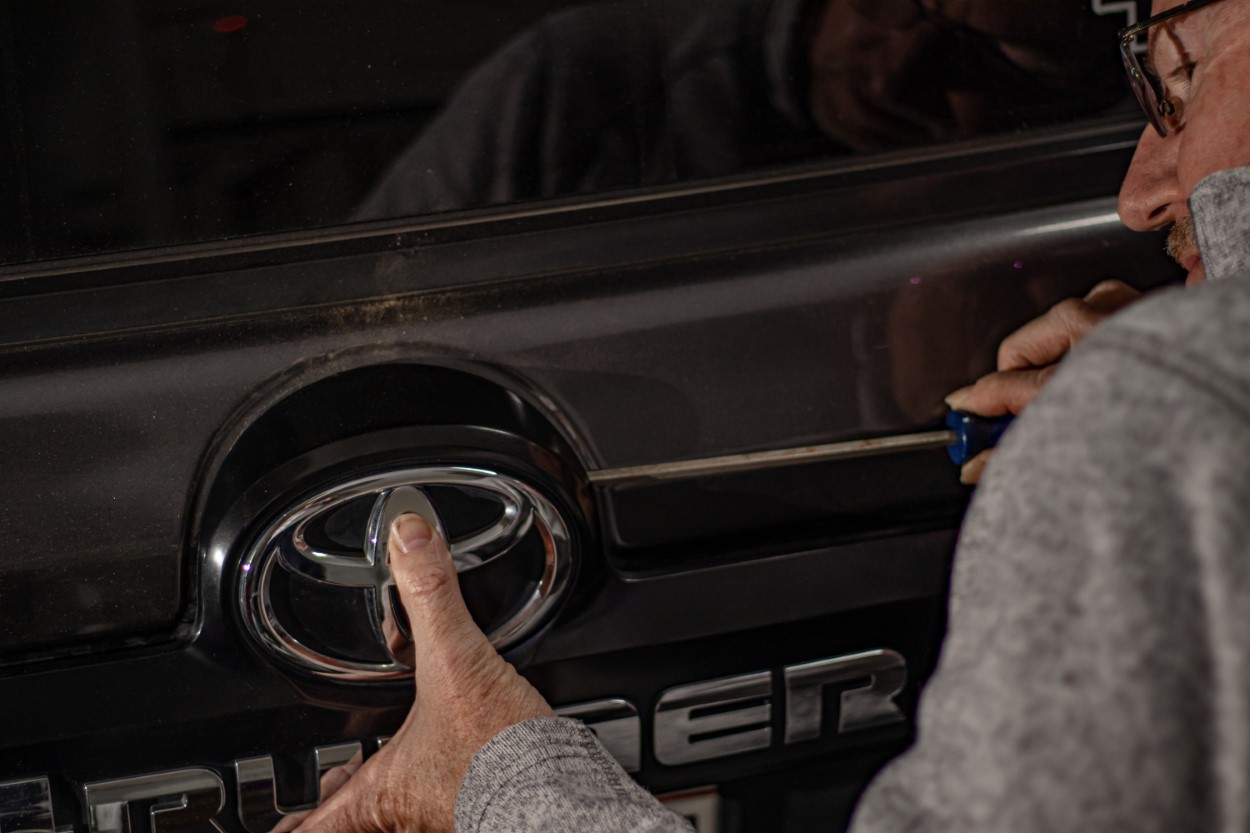
There is a push clip directly behind the factory Toyota badge that needs to be popped out. I used a long, thin flat-bladed screwdriver to do this. I pushed on one side of the clip to pop it out of the hole in the tailgate.

As you can imagine, the tailgate needed some cleaning. I started by brushing as much dirt away as I could before wiping the area down with a damp cloth.
Step 3. Prep The New Valance Panel

The next step is to remove and transfer the plastic clips and metal brackets to the new valence panel. This is pretty easy but take your time so you don’t break anything.
I did each clip and bracket one at a time so I could keep track of exactly where it went on the new panel. If you look closely, you can see that there is a factory rubber strip running along the edge of the valance panel. I don’t think this is a seal but is likely there to prevent rubbing. This is not a reusable part, so I purchased a new seal from my nearest Toyota parts department.
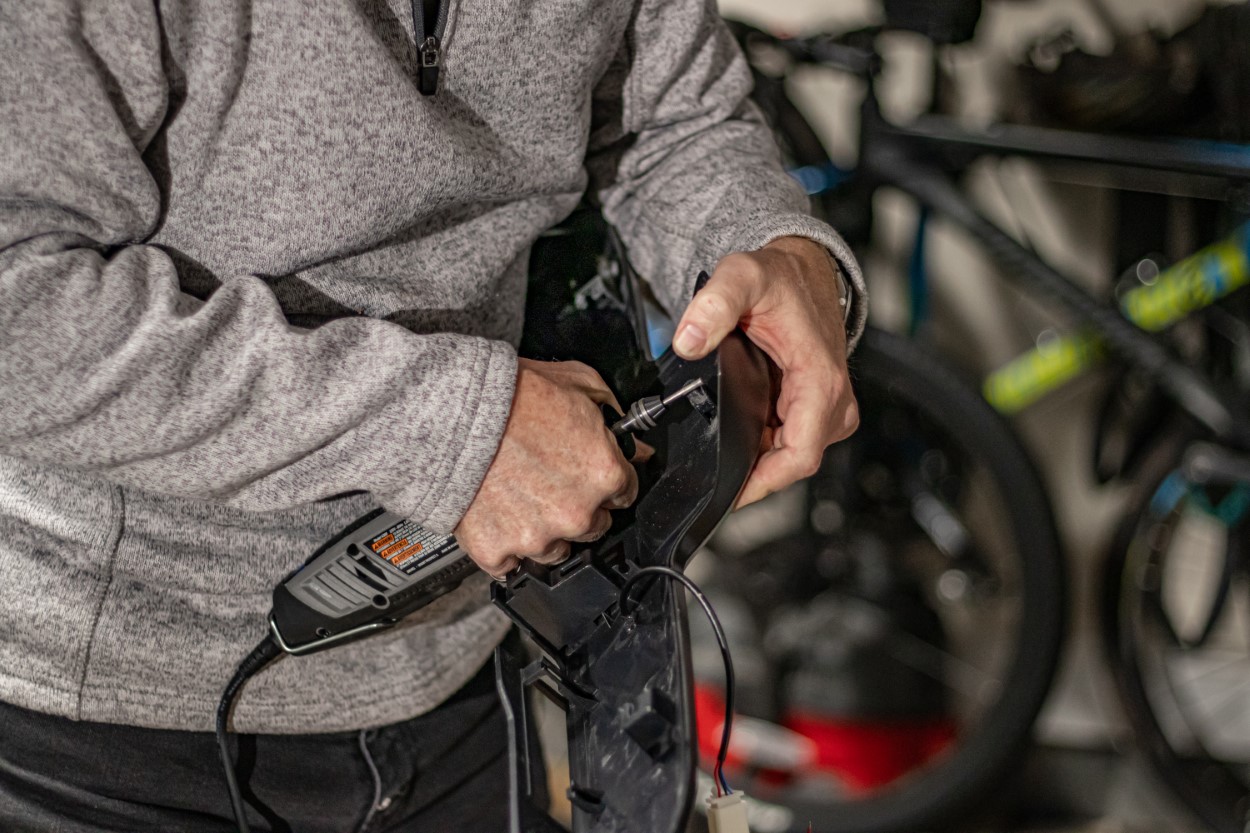
On the CarTrimHome panel, the plastic tab that holds the small white clip was wider than on the factory panel. It appeared to spread the white clip out enough that it would not push into the hole in the tailgate. I used a Dremel to narrow the tab so the white clip would be able to flex and fit through the hole. I would not recommend doing this step unless it’s necessary.
Step 4. Install The New Valance Panel

I chose to make a small hole in the side of the factory rubber grommet to route the wiring for the CarTrimHome panel, Then, I used small zip ties to attach the new wire to the factory wiring loom.

Once the wiring is routed through the grommet, attach the new panel to the tailgate. For me, the most difficult part was getting the upper clip behind the emblem to snap in place. Once you have it lined up, don’t be afraid to push on it.

Once you have the new valance panel snapped in place, open the tailgate, install the nuts, and tighten down the panel (do not overtighten).
Step 5. Apply The Toyota Emblem

First, I thoroughly cleaned the emblem area with rubbing alcohol.

Next, I carefully peeled off the red backing on the pre-installed adhesive foam strip.

I carefully lined up the emblem, allowed the adhesive to contact at the top, and re-checked the alignment before pressing the emblem into place.
Step 6. Wiring

Since the new panel did not come with any instructions, I had to resort to YouTube. I found a video for another product that mentioned the illuminated liftgate valance, so I reached out to the person who posted it. He replied and told me that he ran the wiring up the driver’s side of the tailgate hatch.
I used a fiberglass fish tape from Harbor Freight and ran it from the bottom to the top along the driver’s side of the window. With that, I was able to grab the end through the hole where the factory wiring loom entered the door. Once I had the fish tape out, I taped a spare wire to it and pulled it down into the door. Then, I used that wire to pull the power wire from the valance panel up through the doorframe.

Next, I ran the fish tape through the rubber harness cover at the top of the liftgate and pulled the valance panel wire through the harness cover.
Pro tip: A little Vaseline on the wire made a huge difference here.

Pull the power wire through the rubber harness from the liftgate side to the body side and then re-attach the grommet to the liftgate.

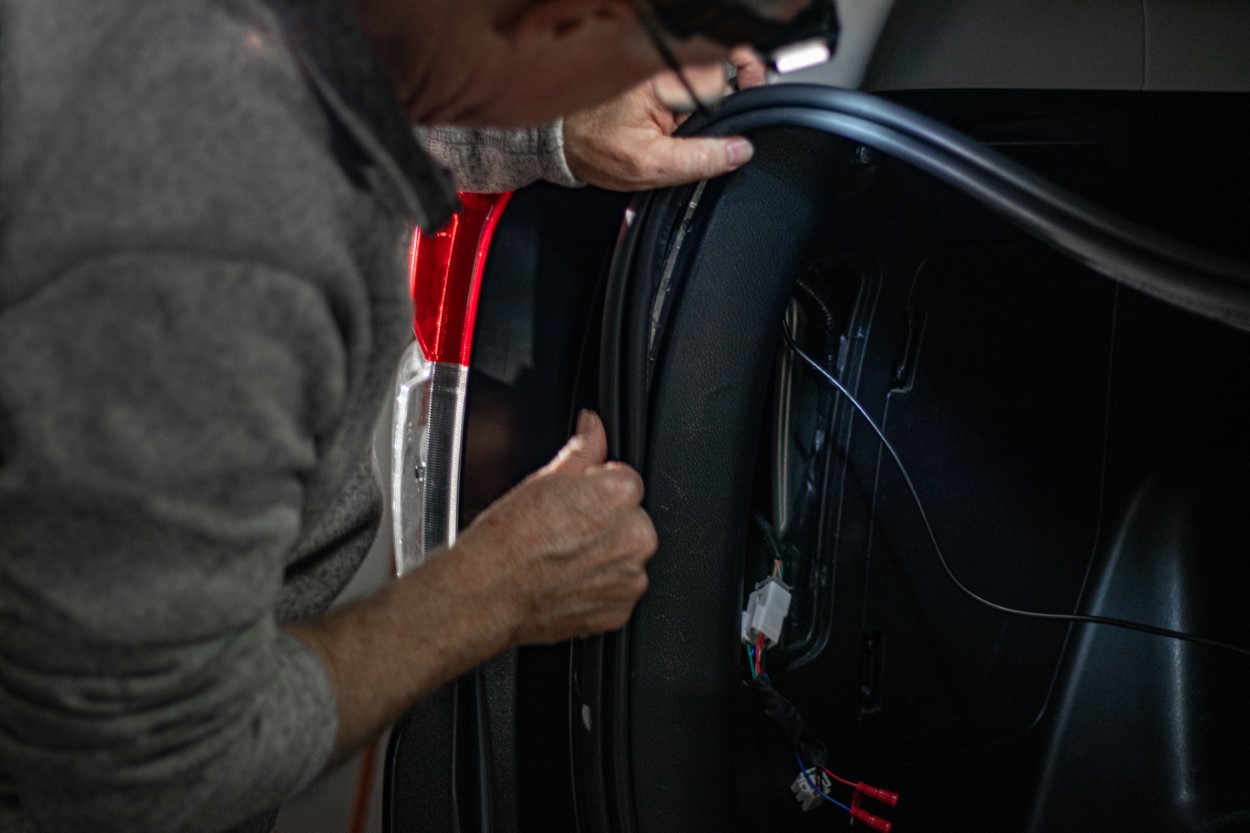
Once you pull the power wires through the harness, pull away the weatherstripping around the rear hatch to expose the gap between the body and the interior panels (you only have to remove the weatherstripping on the top left and left side).
Next, run the new wires from the harness down through the hole into the area above the headliner. Pull the headliner down slightly, just enough to grab the wire and pull it out through the gap. Be careful you don’t pull so far that it bends and forms a crease in the liner. This wire will then be tucked into the area behind the headliner and interior panels as you route it down to the left rear taillight assembly.

Carefully pull the interior panel away from the body, just enough to tuck the wire behind it. I was able to do all of this without removing the interior panel. Otherwise, this would have made it a much bigger job.
Run the wiring all the way down to just above the driver-side taillight assembly and then tuck the wiring inside the panel to pop out in the access area for the taillight bulb connections.
Reattach the weatherstripping just to get it out of the way. I found it best to start at the top right and reattach the whole top portion so the final piece on the left side would be hanging vertically and be easier to manage. Once this is complete, you can finish the wiring.

The rear valance kit included two harnesses (one white and one yellow) and I assume that this was to adapt for different model years. The white one worked for my 2011 4Runner and it was plug-and-play. This harness runs between the factory liftgate harness and the taillight assembly.
Once that was complete, I installed the connectors, making sure to install an exposed connector as the ground and insulated connectors on each of the power wires so there was no possibility of an accidental short.

Once you have attached matching connectors to the wires coming from the valance panel, tuck everything back in behind the access panel and close everything up. Congratulations, you are done.
Final Thoughts

Nearly all of my modifications so far have been focused on utility or off-road performance. This one, however, is solely for looks. There aren’t nearly as many cosmetic or performance upgrades compatible with the early (2010-2013) 5th Gen 4Runners. So, I am really glad that this one works with my 2011 model.
I really like the new look and I haven’t seen another 4Runner on the road with this modification. I have been running this illuminated liftgate valance for over a year now and haven’t had a single problem with it. The lights still work perfectly and I get a lot of compliments.

Although I knew that the letters light up red, I was concerned that they would look red when they are off. Thankfully, they just look blacked out.
Whenever I press the brake pedal, however, the 4Runner letters act as a 4th brake light and are very bright. As an added bonus, the letters illuminate when the lights are on and have a cool startup sequence.
Below is a short video of the startup sequence and the brake light function.
https://www.youtube.com/watch?v=tEbcH7NQvL0
I also placed a short video of the startup sequence and the brake light function on my Instagram page at @shadow4runner or at the following link.
https://www.instagram.com/p/CrrTlt0Agnh/
Thank you CarTrimHome for making a cool product that fits the OG 2010-2013 4Runner as well as the more recent model years.
Very cool
Why connect the wire to the brake light in the frame and not the brake light over the back window?
What in the rice rocket. Who buys this crap?
I imagine it is many of the same people who buy other modifications that are profiled on this site. If you are not a fan of Japanese vehicles, why are you on this site anyway? Also, the term you used implies that the 4Runner is fast and it most definitely is not – it is more of a turtle than a rocket. Slow and steady wins the race.
I’ve seen others on Ebay (way cheaper). Could you describe a little further on running the wire. I really wanna do this, but running the wire up left side seems to be an ongoing issue of sorta with any install from cartrimhome. TIA!
I used a fiberglass wire fish tape that I got from Harbor Freight. I first tried running it down from the top and could not get it to pop out where I could grab it inside the door frame (I fought with it for a long time). Then I tried it the other way and went up from the bottom and was able to get the end of the tape to be visible on the first try. I pulled it out, attached a piece of wire to it and pulled it back down into the lower part of the door and then attached the valance panel wiring to that wire and pulled it back up to the top. Once there I ran the fish tape through the rubber wire loom tube at the top of the door (vaseline helped here) and then was able to pull the wire through the tube. Once it was inside the headliner, it was pretty easy to route it back down the left side to the rear brake light assembly for the connection. I did have to solder on an extension as the wire harness supplied was not quite long enough.
You know, I was thinking about getting this until I saw another customer two days ago with their setup.Two of the LEDs burned out or were defective.
Cartrimhome is hit or miss on their products…
I am sorry to see that, but I installed mine in December of 2021 and it has worked flawlessly since then. The article would have been published much earlier, but my mom had a stroke and passed away in early 2022 and my priorities changed quite a lot in the next twelve months. Mine has been through tons of rain, two summers of heat, and may pressure washes and is still going strong after 20 months. Was CarTrimHome unwilling to help?