As we all continue to lift, increase tire size, and add more weight to our rigs, beefing up stock components can be smart if not necessary. Two of the largest benefits to the Dobinsons suspension line-up are the build quality and customizability. Here we’ll cover tips for adjusting Dobinsons suspension components for the 5th Gen 4Runner.
The increase in the diameter of each of these components is quite incredible and checks the heavy-duty box rather easily. However, understanding all the suspension geometry can be a bit daunting if you are accustomed to just swapping out springs in a rear solid axle SUV suspension setup.
I am fairly new to this, and these are some tips I wish I had known when working through the installation and adjustment of these components.
Find It Online:
- Rear Upper Control Arms: Check Price
- Rear Lower Control Arms: Check Price
- Extended Rear Sway Bar End Links: Check Price
- Rear Heavy Duty Panhard Bar: Check Price
- Klein Electronic Magnetic Angle Measurement Tool: Check Price
Table Of Contents
Rear Sway Bar End Links

I’ve been able to get away with the angle that the sway bar is connected to my frame with the factory end links. It wasn’t ideal, but I am in a better place now with the new adjustable rear end links.
Removing these can be challenging because the shaft on the bolt that connects to the end link rotates inside the boot. Pray that the Allen keyhole is good enough to hold while you unscrew the nut on the inside. If not, you may need to cut it off as I did.
Adjusting the New Rear End Link Based on Stock Length

The washer with a beveled lip will seat inside the frame mount for the end link. I measured the total distance from this lip to the middle of the shaft of the end link. Dobinson’s guidance states that the new end links need to be half the lift height plus the stock length.
For example:
- 3″ Lift and end link that is 6″ (not sure if this is stock length): New Length = (3″ Lift)*0.5 + 6″ = 7.5″
Note: If you planned ahead on spring weight ratings, know that you may need a longer end link adjustment.
For example:
- You have 600-800 lb. springs for a current rear load of 400lbs, you may have a 4″ rear lift (not 3″ yet). Therefore, might need to adjust your calculation. This will also slightly change as the new suspension settles.
Just to be safe, I used blue Loctite on these because I did not want to torque them too aggressively.
Upper & Lower Control Arms

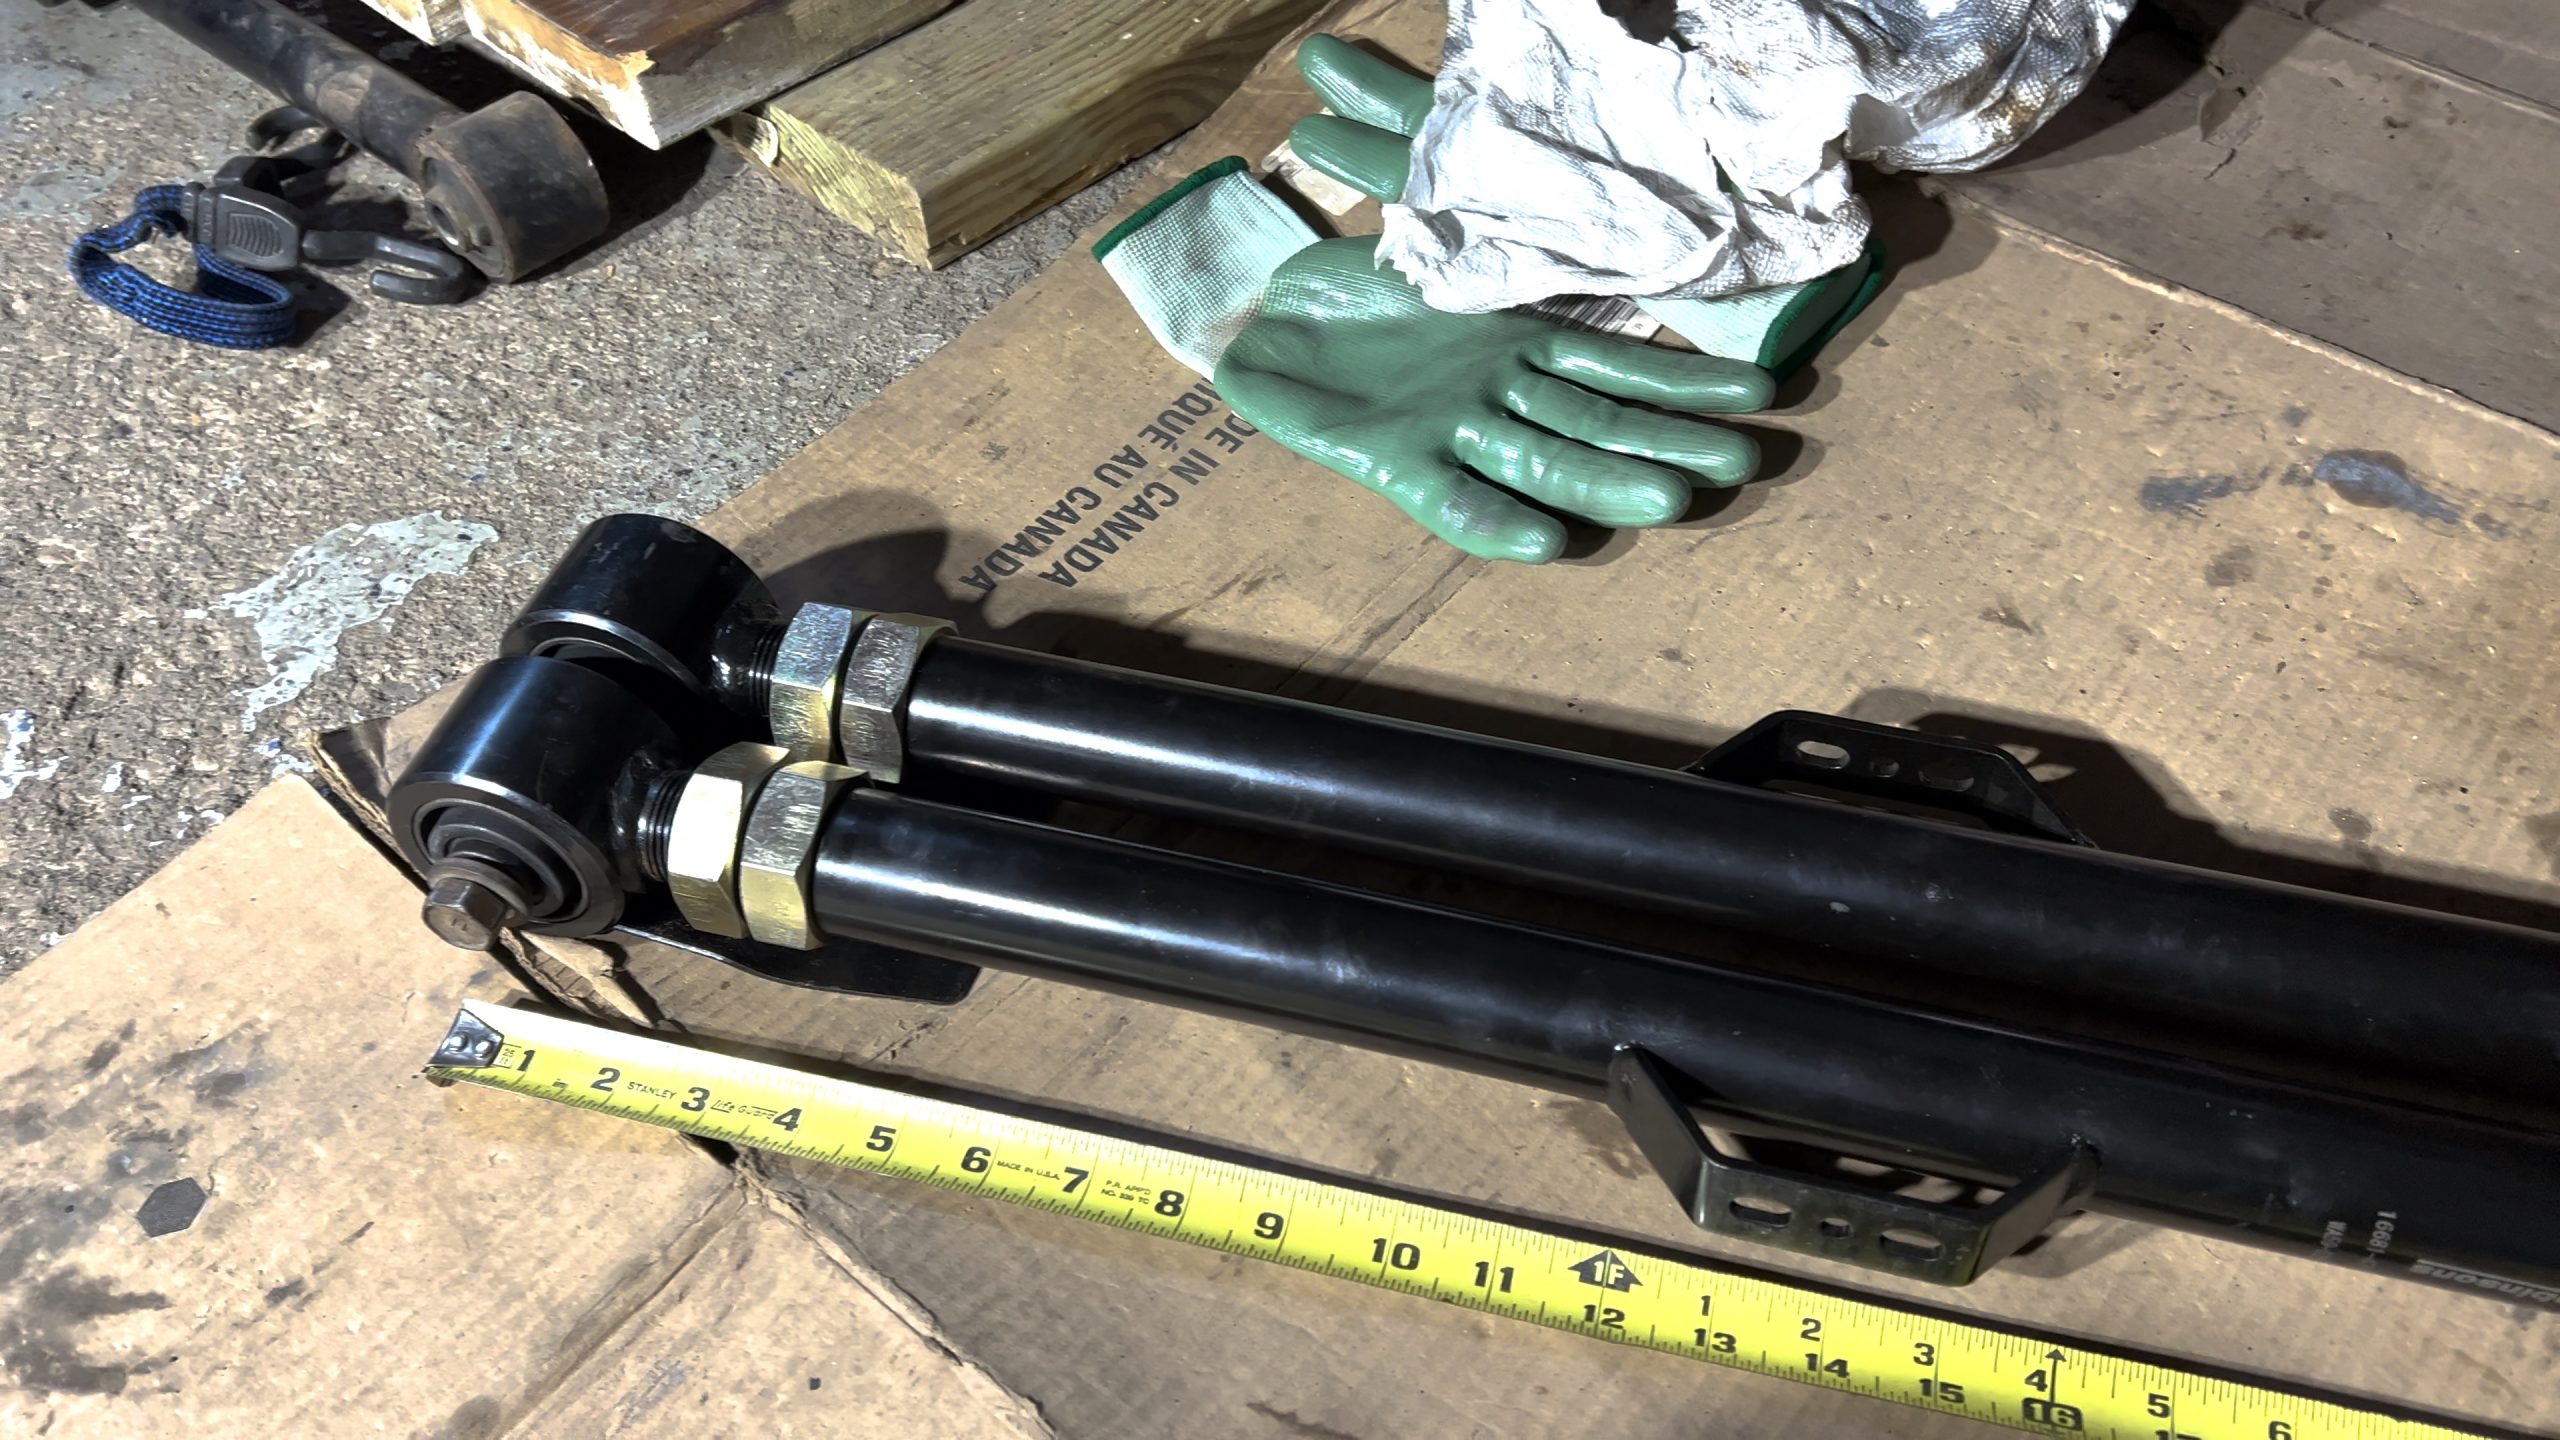
Remove the stock upper and lower control arms and take their measurements from the center of the bolt hole to the top of the arm.
The stock component lengths are hard to run down. Measuring from the center can be tricky, but here are the rough numbers that I started off with:
- Rear Upper Arms: 12.5-12.6″
- Rear Lower Arms: ~27″
Orienting Lower Control Arms Correctly

Set the length of these control arms as close to stock as you can. I found that I could not get mine quite as short as the stock arms.
The orientation of the arms is important, as pictured above. I am happy to be corrected, but this has to be the right way. In the photo above, the little tabs are to protect and prevent those nuts from breaking loose or grabbing a branch or rock.

In the photo above, the curve needs to point down (like looking at a bowl where the two sides are higher than the middle). This curve needs to be oriented this way so that under large articulation, this bar won’t contact the axle casing above the bolt point. Lastly, make sure the brake line brackets face outward for the little angle brackets.
Now, you may be wondering, why do these need to be adjustable? I’m glad you asked. The lower rear control arms help to position your wheel inside your wheel well. For this reason, some people may choose to move their wheel depending on size, articulation, wheel stuffing, etc.
I started mine at around 27.75″ and did not really move it much afterward. If I upgrade to 34″ or 35″ tires, then I will revisit the length. If you find that it is hard to adjust, the threads may need a little love from a wire brush. Dobinsons recommends adjusting in 0.5″ increments.
NOTE: Going too long can start to impact the length of the driveshaft, so adjust within reason unless you plan to run an aftermarket driveshaft. Many recommend the wheel be closer to the front of the vehicle at normal ride spring compression, so that under the compression, the axle centers out. Ultimately, it’s up to you and how you want them adjusted.
Connect the Adjustable Lower Control Arms First

These lower control arms are off-vehicle adjustable, so make sure they are the length you want before attaching them to the vehicle. I waited until the end to tighten all of these gold nuts.
Adjust The Upper Control Arms Before Putting on the Vehicle

Orienting these in the correct position is important as well. One side connects in the middle, and one side connects towards the top (at least in this picture). I oriented these so that the top-mounted end was facing forward and up on the vehicle. This way, there was a large gap below the front mounting point for articulation down to clear the gas tank on the driver’s side, especially.
Setting this length is less important than the lower control arms. I found setting them to stock length was a good starting point, and then they could be adjusted from there. These work like turnbuckles; the middle spins somewhat freely, so make sure the exposed threads are fairly even on both sides.
Inserting the Upper Control Arms Could be More Difficult

It can be difficult to find the sweet spot for tension so that putting the bolts through is effortless. To do this, I used a mini-jack to lift ever so slightly on the drive shaft connected to the rear differential. This essentially rotates your differential slightly so that you can find the sweet spot for the length of the rear upper control arm you are starting with.
Fine-Tune Upper Control Arm Lengths

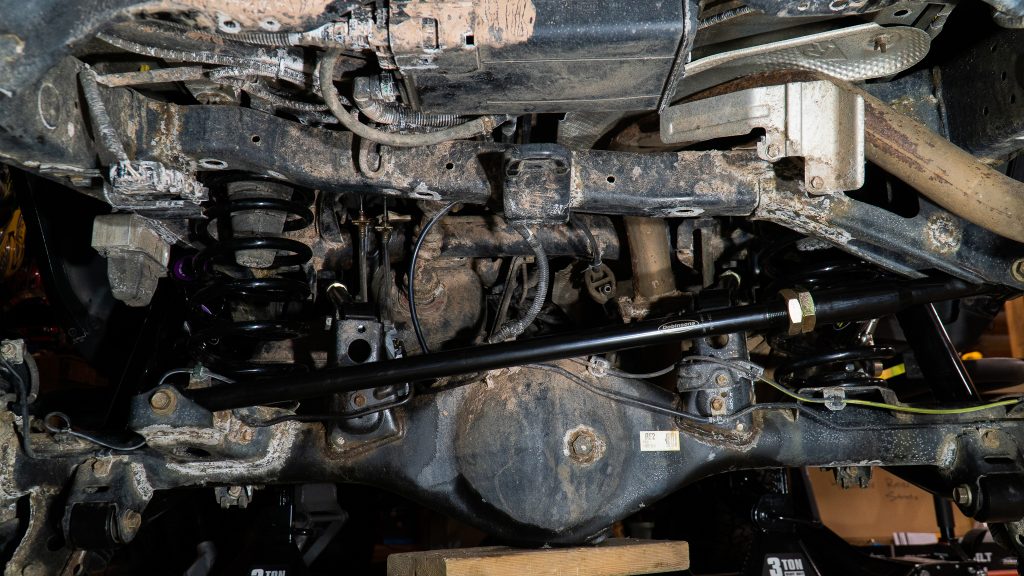
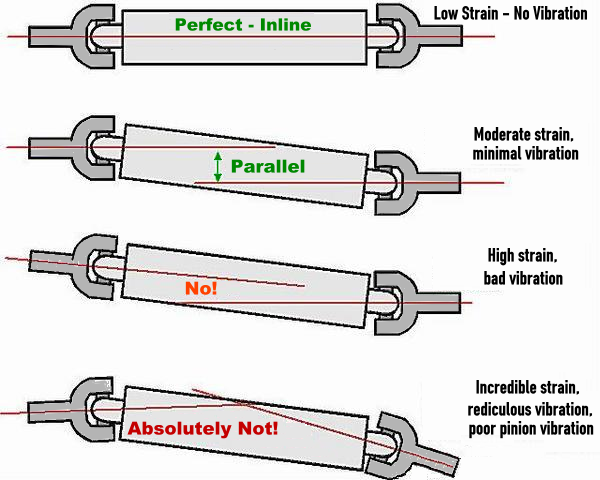
The upper control arm length really depends on proper differential and transfer case angles. Setting them to stock length is nice, but that will need to change. To reduce strain and vibration, the differential and transfer case angles need to be parallel. In the case shown above, my differential is leaning back 2.1 degrees. My transfer case should be at the exact same angle if the upper control arms are set to the right length.
Scenario: The front angle is leaning 1 degree backward (towards the trunk), and the differential is at 2 degrees. This means that my upper control arms are too long. If it’s tipping toward the back an extra degree, we need to slightly pull the top of the differential toward the front of the vehicle. This should reduce the lean toward the trunk from two degrees to one degree. Make sure you adjust both sides evenly, keeping track of full turns or half turns, however you want to do it.
NOTE: This angle will likely change as the suspension settles, so be sure to double-check this after a little while to make sure the angles are still parallel.
To learn more about this, check out therangerstation.com for a more in-depth explanation!
Panhard Bar
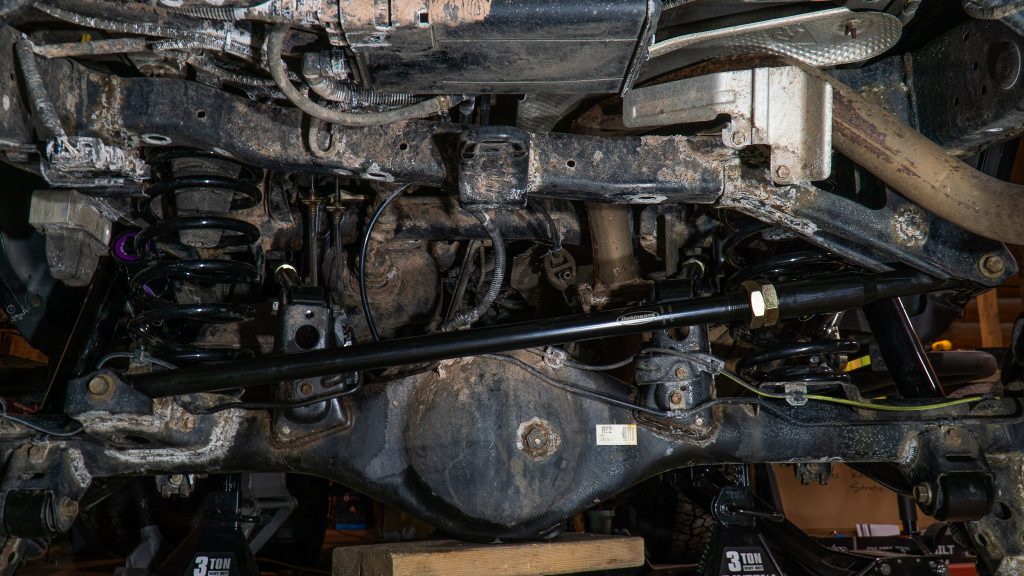
Adjusting the panhard bar seems to be the easiest, but that may depend on your setup. The panhard bar helps to correct the articulation arc of your entire rear axle. What does that mean? Well, think of one end of the pan hard bar as the center of a circle.
When your rear end drops, it swings around the circle, not straight down. The distance the axle travels around that circle is not significant. However, it plays an important part in setting the vehicle to track correctly at normal driving loads.
Now, when lifting a vehicle, say 3″ in the rear, typically the tires are pulled by the passenger or the body is pulled by the driver. So, the axle is not centered on the rear of the vehicle. Many people also say that setting the panhard bar as level as possible is ideal. This is probably true, but it’s not going to change much to the naked eye.
Most people do this by measuring a point from the frame to a place on their tires. Assuming your tires are the same width, there should be an equal distance from the edge of each tire to the frame.
When the rear suspension was all dialed in, I set the vehicle on the ground under normal load and measured it. Luckily, mine seemed to be almost perfectly centered. So, I just installed the panhard bar with the vehicle off the jacks and tightened it down.
Let’s say you aren’t as lucky. If you have 1″ extra overhang on the driver’s side, you want a 1/2″ spacer added to the panhard bar mount to push the body back to the center.
Bonus Tip: Check Your Rear Bump Stops

It is important to double-check your axle arc of travel and bump stop alignment by stuffing one tire. Do the bump stops hit correctly on your rear axle? If you dramatically change the length of your lower control arm, it may be time for a rear bump stop extension or relocation.
TIGHTEN EVERYTHING DOWN!
I installed everything fairly loosely at first and then went back to tighten everything on the vehicle. The bolts seem massive, so I didn’t use blue Loctite and just cranked them on. If you prefer Loctite, I think either approach should be good. It is recommended to double-check the bolts after driving 25 miles.
Final Thoughts

These are the tips that I have for adjusting Dobinsons suspension components after doing it myself.
Hopefully, you found this helpful! I spent almost an entire day reviewing all this information and felt that those who are like me would appreciate it if it were all consolidated in a single article. These are all things that I wish I had known beforehand. I am not a licensed Dobinsons tech and did not know any of this prior to the installation.
On that note, if something seems wrong, please comment below!
What suspension set up do you have in the photo of your black 4runner?
Thanks for all the work documenting your installation process. It helped me. I have the lower arms installed and will have the uppers finished in the coming days. I originally tried Metal Tech’s arms but was disappointed with them. The bushings are so fat it makes for a brutal install. You’ll need an air hammer and a lot of patience. Glad I switched to the Dobbies!
2004 GX470
Great article!!!! I have this entire suspension on my rig. Although, it was installed by my local shop. I did hang out and watch them do the installation, and it was great to see the time in care they used to make sure everything was not only installed properly but adjusted properly as well. I’ve had this suspension for about six months and I couldn’t be happier watching one of your original YouTube videos definitely inspired me to go with Dobinsons!!! 🤙🏾