
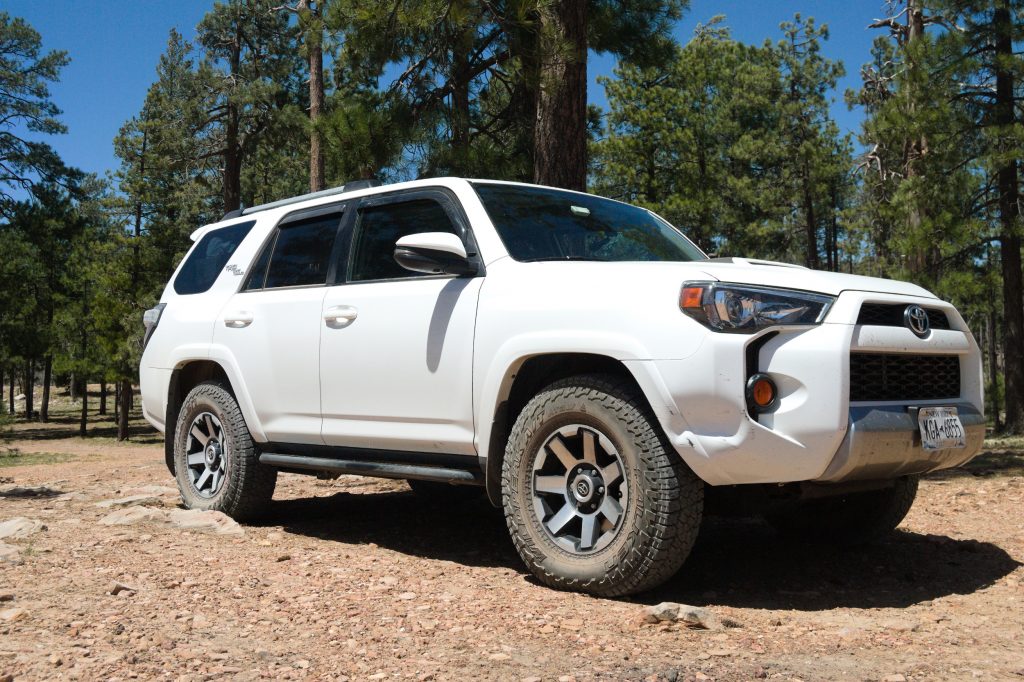
Rock sliders are among the top recommendations every time a new 4Runner owner asks what their first mods should be. It’s solid advice since they combine both utility and aesthetics in one bolt-on package. However, how do you pick which brand to go with?
There are a lot of rock sliders out there, and most of them have pretty good reviews. After installing and testing the White Knuckle Off-Road Rock Sliders for the 5th Gen Toyota 4Runner, however, we’ve got our favorite.
Find it Online
- White Knuckle Off-Road Rock Sliders for 5th Gen 4Runner: Check Price
Table Of Contents
How I Ordered My Sliders

White Knuckle Off-Road offers several configuration options when ordering. For example, my 4Runner is a 2017 TRD Off-Road, without KDSS. I also don’t have a body lift and selected as such in the drop-down.
From there, you have several options to customize your order. Here is the configuration that I chose:
- Tube Steel Type: I opted for drawn-over mandrel tubing (DOM) over hot rolled electric welded (HREW) for maximum strength.
- Finish: I chose bare metal since I planned to paint them myself in order to simplify future maintenance.
- Outer Round Tube Angle: I selected the 11° angle option. I wanted the vehicle to slide off and away from any obstacle that it might get hung up on. Buyers with children or spouses who rely on the rock slider as a step to enter the vehicle may want to go for the flat option here. The “size” of the step remains similar, but the flat surface will provide a more secure footing, especially when paired with the full top plate.
- Top Plate: I opted for the top plate primarily because I want my sliders to provide a bit of protection against rock chips, road grime, and salt while driving on-road.
Installation

White Knuckle Off-Road offers in-house powder coating. You could either opt for that and skip this step completely or paint them yourself. I chose the ladder, a decision that I am not entirely sure I would make again.
However, painting them myself will make it easier down the road to touch up after trail damage. So, I followed Cory’s method for Prepping and Painting Rock Sliders. I used four cans of Rustoleum self-etching primer and then topped everything off with eight cans of Rustoleum Professional Semi-Gloss Black.
If I had to do it again, though, I would probably let White Knuckle Off-Road powder coat them. They only charge $180 (at the time of publication) for the service. Factoring in my materials cost and time spent (a full day of prepping and spraying the sliders and fill plates), I’m not sure I came out ahead financially.
Tools For Installation
- Ratchet (11mm, 12mm, and 19mm sockets)
- Hex Keys
- 19mm Combination Wrench
- Jack Stands
- Floor Jack (optional, recommended)
Before you begin: Remove Running Boards (if applicable)
If your 4Runner has running boards or tube steps, you’ll need to remove them first. For my OEM running boards, it was as simple as removing six 12mm bolts on either side of the body and then taking them off.
If you have a pre-facelift 5th Gen (2010-2014), you may need to do some trimming around the front mud flaps and near the rear wheel well. With mine being 2017, this didn’t apply to me.
Step 1. Separate hardware

Before getting too far, it’s important to understand some of the different hardware that White Knuckle Off Road provides. This is so you don’t use the wrong hardware in the wrong spot. If you opted for a full top plate, there will be a bag of standard grey hex bolts, washers, and 11mm nylon locknuts. Set those aside for Step 2.
The yellowish tint of the remaining hardware indicates its Grade 8 rating. This type of hardware is seriously strong and is exactly what you want when you’re bolting something onto your frame and expecting it to be able to support the full weight of your vehicle.
The Grade 8 hardware will consist of:
- x5 U-bolts
- x1 Modified U-bolt
- x12 Twelve Washers
- x10 Lock Washers
- x10 Standard 19mm Nuts
- x2 19mm Nylon Locknuts.
The modified U-bolt will be labeled (as pictured above) for mounting the rear support of the driver’s side rock slider. White Knuckle Off Road took one of their standard U-bolts and trimmed about a half-inch off either leg. This makes it easier to install between the frame and the gas tank and its skid in Step 9.
This is also when you’ll use the provided 3M double-stick riser, which, for us, looked like a piece of hard black plastic with red plastic film on either side.
The other hardware to pay attention to here is the two 19mm nylon locknuts. They’re for use on the upper leg of the front U-bolt. We’ll get into why they need to be there in Step 4.
Step 2. Attach Top Plate (If Applicable)

I opted for full-length diamond top plates on my rock sliders. I actually like the stealth factor, making these look more like regular running boards than rock sliders. My main motivation was to provide body protection from rock chips while driving on gravel roads, especially during the northeast winters when road salt and grime come.
(Note: since this installation, White Knuckle Off-Road has switched to a dimpled-style fill plate; see their site for details.)
If you opt for a top plate, full or kick out-only, it’s easier to attach them before installing the sliders on the vehicle. You’ll need an 11mm socket on your ratchet, an 11mm wrench, and a hex key to affix the top plate to the integrated mounting points using the included hex bolts and nylon locknuts.
Step 3. Position Passenger Slider

Using jack stands is the easiest and safest way to hold the sliders in position while you’re working under the vehicle. Working with a partner, you want to position the sliders with the mounting plates touching the frame. Then, carefully slide the rear mounting plate under the brake line running on the outside of the frame (more on that later).
You will also remove the “kickstand” and set it, along with the associated hardware, to the side.
For overall placement, there should be about an inch of clearance from all major body panels. This will give the rock sliders plenty of space to absorb impact and protect the body of your 4Runner.
Step 4. Install Passenger U-bolt

Warning for Western readers, this article will contain what we in the Northeast call a “low rust frame”.
The first real challenge of this installation is also the first mounting point. You want to place the front U-bolt ahead of the frame cross member, with the legs facing outward towards the rock sliders. However, the floor pan dips down in this area, reducing clearance for the hardware and installation.
This is why White Knuckle Off Road includes those 19mm lock nuts. They’re thinner than the stacked height of the standard nuts and lock washers used elsewhere on the slider. This leaves you just enough room to install.
However, it’s still a tight fit, which is why it’s important to do this U-bolt first. Having the rest of the slider “loose” allows you to wiggle the slider and U-bolt into place. This makes the task much easier than if the slider were already fixed in place.
With that in mind, once you get the U-bolt, nylon, and regular nuts in place, only tighten them by hand, for now. This will allow for an easier adjustment for the two remaining supports. For the nylon lock nut, use a 19mm wrench to start threading.
Step 5. Install the Middle Passenger U-bolt

Remember to only make hardware finger-tight at this point.
Behind the frame cross member, install the U-bolt for mounting the middle support. With plenty of room around this one, it’s much easier and much quicker. Once again, only make things finger tight.
Step 6. Install Rear Passenger U-bolt

Before installing the rear passenger U-bolt, reinstall the “kickstand” and route it over the brake line. This little trick by White Knuckle Off Road makes for a much simpler install. It also strengthens the rear support at the same time; talk about a total win-win!
With the kickstand in place, slide the U-bolt around the frame, just ahead of the bracket for the rear axle’s trailing arm. One more time, only make everything finger-tight.
Step 7. Check Positioning, then tighten into place

Finally, before you really lock everything down, get out from underneath the 4Runner and take a look at the spacing and positioning of everything.
As mentioned previously, you want about an inch of space between the slider and the body of the vehicle at all points. On our 2017 TRD Off-Road, we found that the angled tip of the slider’s inner rail lined up well with the rocker trim just outside either wheel well. This helps the slider look “right” by working with existing body lines.
Once you’re happy with the position, hop back underneath and tighten all six nuts. White Knuckle Off-Road doesn’t provide a recommended torque, but considering the fact that you’re working with heavy steel, the frame of your 4Runner, and Grade 8 hardware, it’s safe to say you can make it as tight as you can.
Repeat Steps 2 through 5 on the driver-side
The front two driver-side U-bolts are practically identical to the passenger side, so there should be no surprises here. Just remember to use the other 19mm nylon lock nut on the upper front leg. Take comfort in the fact that, having done it already, working in that narrow space is slightly easier this time around.
Step 8. Remove ABS hardline bracket

This is the only really hard part of the installation, and more so because it takes time to figure out what you’re doing.
There is no easy way to see what you’re working on, and since completely removing the body from the frame isn’t an option, there’s no good visual aid to help you here. So, feel around and you should be able to figure it out.
This support calls for the special modified U-bolt mentioned in Step 1. In order to install it, you need to overcome two obstacles. First, and most importantly, are the hard brake lines running on the top of your frame. They are part of your Anti-Lock Brake System.
If you feel along the top of the frame, just ahead of where the passenger side U-bolt is attached in Step 6, you’ll feel two hard lines held to the frame with a plastic clip. They’re visible between the frame and the gas tank in the above picture. You need to pull this clip out of the frame and eventually re-attach it in step 10.
We found the easiest way to do this was by reaching in from the outside of the frame and lifting the clip up and out with a pair of pliers. Whatever method feels right should work, so long as you’re careful not to damage the ABS lines.
Step 9. Install the rear driver U-bolt

This is when you’ll realize why they had to modify the U-bolt that we talked about in Step 1. The space between the frame and the gas tank is very tight. There is just enough clearance to snake the U-bolt up before pivoting it into place. Of course, if you removed the gas tank, this would simplify things significantly. However, odds are you are not, which is why White Knuckle Off Road supplies this modified U-bolt.
With the legs of the U-bolt facing forward, slip the body of the U-bolt between the frame and gas tank. The objective here is going to be to have the “shaft” of the U-bolt as close to its final location as possible. This is also roughly the same spot on the passenger side. Conveniently. There is also a point where the gas tank skid folds up and away from the frame, offering you a bit better access than other areas.
Once you have the top leg of the U-bolt above the top of the frame, rotate the legs back and around the top of the frame. This will not be easy, as the U-bolt is only slightly taller than the frame. You’ll also have to be mindful that you slip the top leg under the ABS hardlines you loosened in Step 9.
Once you get the U-bolt mostly perpendicular to the frame, reinstall the kickstand as you did in Step 6.
Step 10. Check final positioning and tighten

Trail damaged front bumper not included.
Just like in Step 7, check the final positioning of the rock slider, making sure you maintain the one-inch space between the body and the slider. Once you’re happy with how it looks, hop back underneath to tighten everything down.
For the most part, tightening the six nuts is the same as it was before; however, take extra precaution around the rear U-bolt. Make sure you didn’t snare the ABS hardlines at any point, tighten the rear U-bolt, then grab the 3M riser.
Remove the film protecting the double-stick adhesive sides and use the riser to lift the hardlines up and above the U-bolt. This will ensure the lines don’t rub up against the U-bolt while driving, gradually wearing through the line and compromising your Anti-Lock Braking System.
After that’s done, the only installation note I have is that this could be when you want the floor jack. After installing the driver’s side rock slider, the weight of the sliders had “lowered” my 4Runner enough that I could no longer remove the jack stands that had been holding up the sliders while I worked on them. There’s no better way to check if you installed your sliders correctly than by using them as a jack point, right?
Review
It’s hard to overstate how much confidence a good set of rock sliders gives you off-road. Shortly after installing the White Knuckle Off-Road Rock Sliders, I went on a lengthy road trip. We went to Utah and Arizona, wheeling in Moab, Canyonlands, Sedona, Tonto National Forest, and visited Coconino National Forest along the way.
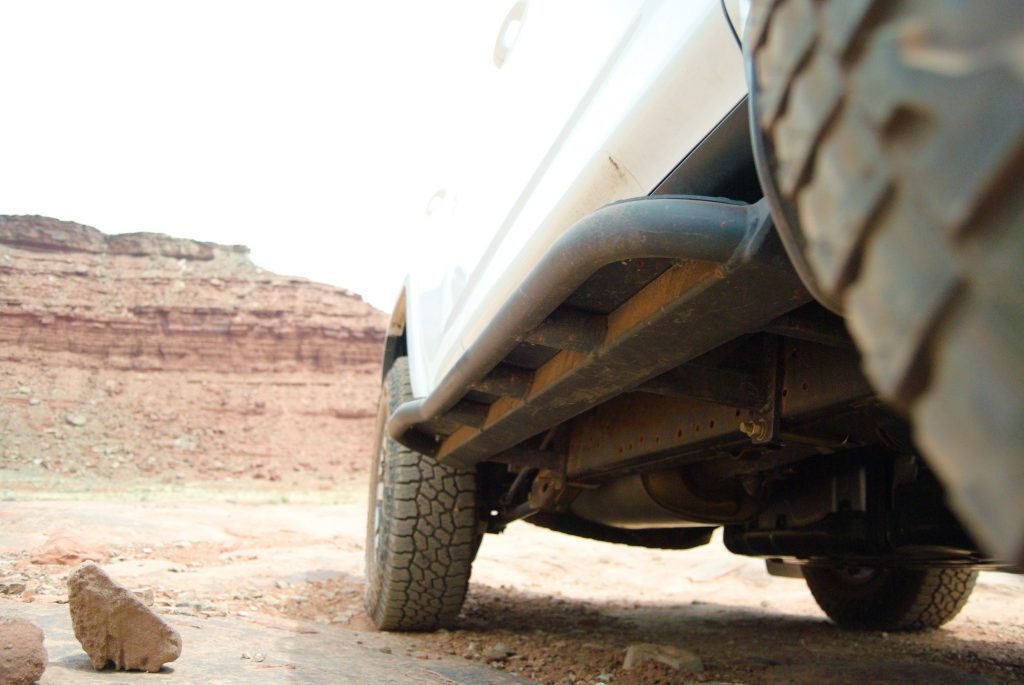
At stock height (though on 33″ tires), removing the running boards added a lot of practical clearance. Even more, the knowledge that I really couldn’t hurt my sliders made what would have been anxious rock gardens or off-camber break-overs pretty much stress-free.
Let’s talk about what makes the White Knuckle Off-Road Rock Sliders special.

They use a rectangular tube for the inner rail, a choice that is not only stronger but also provides more effective coverage for your rocker panels. Simply put, there’s more metal between your 4Runner and the rock. For the outer rail, they use a single piece of 1-3/4″ tubing. Unlike other designs that use one piece for the rail and one piece for the kick-out, White Knuckle Off Road uses a single piece.
Amount of stepping space on the White Knuckle Off-Road Rock Sliders, men’s size 10.5 hiking boot, for scale.
Not only is this a harder manufacturing process, requiring multiple-precision bends and multiple weld points, but it also makes the slider actually slide off obstacles better. With no extra junctions and welds, you get one continuous shape that you’re less likely to get hung up on.
Like many manufacturers, White Knuckle Off Road gives you a choice between hot-rolled electric-welded (HREW) or drawn-over-mandrel (DOM) tubing. The ladder is stronger, though many will tell you that HREW is strong enough for most people. White Knuckle Off Road makes the upgrade to DOM easy, as it only increases the price by $70. Taken in the context of the overall cost of a pair of sliders, or the overall cost of your 4Runner, $70 is cheap insurance.
What really sets these White Knuckle Off-Road Rock Sliders apart from all others on the market is the mounting system. Using U-bolts isn’t the easiest way to do things, as evidenced by Steps 9 and 10. However, it allows these rock sliders to do several things that other rock sliders cannot.
For one, they’re easily inspected. All twelve nuts are easily visible from under the 4Runner. If one were to go missing, it would be quickly noticed the next time I’m underneath my vehicle. Contrast that with other designs, which rely on nuts inside the frame itself. Good luck seeing those once you’ve got your sliders installed.
That ease of inspection also translates into ease of service. If at any point a nut does somehow come loose despite the lock washers, a 19mm wrench will have them quickly secured again and be more than capable of finishing any trail.

We should also consider how the structure of the U-bolt itself adds strength. The frame of a 4Runner is not a single piece; it’s multiple pieces welded together. Northeast winters have made these welds extremely visible in the above photos. Even with my surface rust issues, these welds are plenty strong. But they still prevent the frame from responding uniformly to stresses.
By wrapping around the frame, essentially bridging the welds, the U-bolts eliminate the problem. When your White Knuckle Off-Road Rock Sliders are under stress, the U-bolts distribute that stress across the whole cross-section of your frame, not just a single mounting point.

Lastly, the U-bolts also make rust less concerning, should I ever want to remove my sliders. Grade 8 hardware is not rustproof, so a rusted-on bolt is completely possible. If that were to happen to a slider that bolts into the frame, they’re essentially permanently bonded to the frame now.
However, if it were to happen to my White Knuckle Off-Road Rock Sliders, I could cut the U-bolt off. It would be a hassle, but possible. It may even be possible to reinstall the sliders with new U-bolts afterward, assuming the rust didn’t get to them as well, of course.
Final Thoughts

As discussed, rock sliders are an obvious upgrade from running boards, nerf bars, and certainly nothing at all. The protection they give your vehicle, and the peace of mind that comes from that protection, are well worth what they cost.
Even among the various brands of rock sliders, the offering from White Knuckle Off Road stands out. The value, be it the powder coating that I probably should have opted for, or the reasonable DOM upcharge, makes a compelling case. Its design and execution really put them in a class all their own.
The U-bolt mounting system isn’t the easiest, but that doesn’t mean it’s hard. I installed mine in a little under three hours, and that included stopping for pictures. Any Trail4Runner contributor will tell you that photos significantly extend the time it takes to do these installs. There are no specialty tools or knowledge required for installation. Essentially, if you’ve ever played with an Erector Set, you have the skills to install these rock sliders. In exchange for the extra effort of installing the U-bolts, you get a stronger, more serviceable rock slider than any other offering on the market.

A surprising positive about White Knuckle Off-Road is that they aren’t a Toyota-specific shop. They make sliders for 4Runner and Tacoma, but also RAM 3500 and Silverado 2500HD. Those are full-size heavy-duty trucks, with wheelbases requiring sliders that are 120″ long. That means these materials, this design, and the same basic mounting system are protecting spans nearly twice as long as the 66″ length of a 4Runner’s. Plus, they weigh a whole lot more than even a fully loaded overland-built 4Runner.
Simply put, the White Knuckle Off-Road Rock Sliders for 5th Gen 4Runners are ten pounds of protection in a five-pound bag. If you’re looking for the style, they’ll go toe-to-toe with any nerf bar you care to name. When you want something that’ll stay between your vehicle and trail hazards, something that actually does the work a rock slider needs to do, it’s hard to imagine any alternative doing a better job.
I have White Knuckle DOM rock rails on my 06 4Runner. Easy to install, and haven’t been able to damage them in ten years of Colorado rock. Big thumbs up.
I put the DOM version on my 2016 4Runner back in January 2017. Love them. Super strong and I didn’t get the top, step plate but I did get the powder coating. I can’t recommend them enough. A plus; I haven’t had a single door ding to date. LOL
Super write up!
I have the 0 degree with kickout on my ORP w/KDSS. Love them, but that driver side rear is a PITA!
Excellent article. You make a compelling case for White Knuckle OR’s design, and it just happens that a pair of running board replacing sliders are in my future…