
Off-road radios come in all types, sizes, and frequencies. While some require a license or special tuning, GMRS radios are easy to use off-road and deliver plenty of power to keep you connected to the other vehicles in your party.
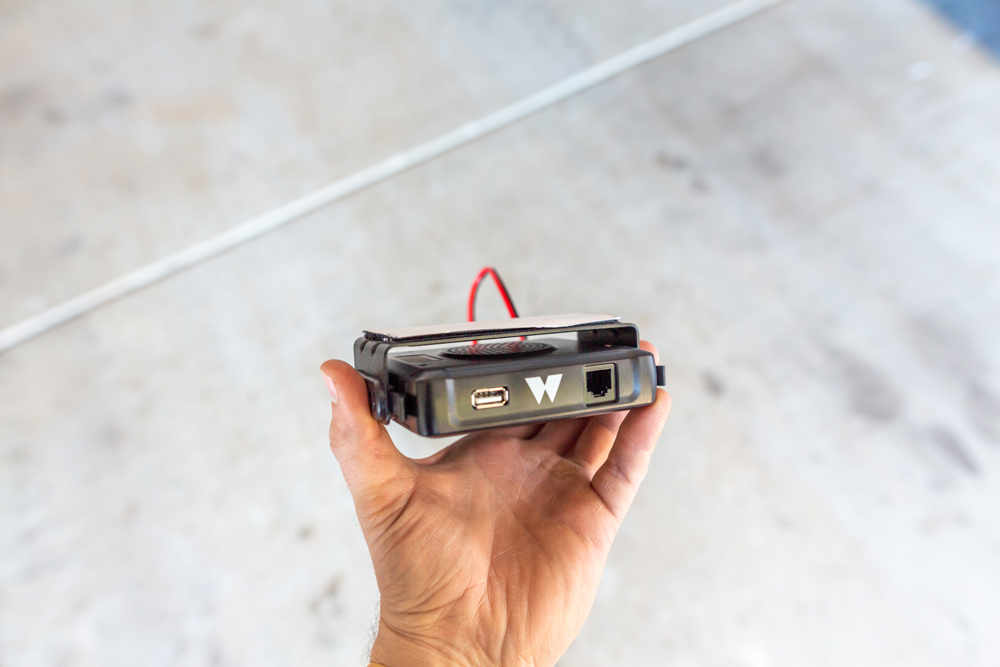
The Midland Micromobile series makes it easy to fit a radio almost anywhere in the vehicle. And with the feature of having all the program buttons and the LCD screen on the handheld, you can stash the main unit in the smallest nooks and crannies of the vehicle.
Find it Online
- Midland MXT275: Check Price
- MicroMobile MXTA25 3dB Gain Ghost Antenna: Check Price
- MicroMobile MXTA24 Low Profile Antenna Cable: Check Price
- MicroMobile MXTA22 Ditch Light Extension Bracket: Check Price
- MicroMobile MXTA31 Microphone Extension Cable: Check Price
- Amazon Extension Cable: Check Price
Roof Rack:
- Prinsu Roof Racks: Check Price
- Shop all Prinsu Accessories: Check Price
Features
- 15 Watt Power
- NOAA Radio
- Scan Feature
- 50 Mile unobstructed Range
- USB Power Port
You do need a GMRS license to operate this type of radio; however, obtaining one is very easy. For more info, please refer to Why Do I Need a GMRS License & How Do I Get It.
Table Of Contents
Installation Overview

This installation time will take anywhere from 1 to 2 hours (based on your experience level), and this installation type will be geared toward the beginner who prefers a simple, minimalist addition of the unit that is easily reversible or transferable to another vehicle.
Tools and Materials
- Panel Tools
- Phillips Screwdriver
- 10mm Socket Wrench
Step 1. Remove Center Tunnel Cover

Gripping the sides of the center tunnel cover, pull it upwards to remove it. You will need to remove the centerpiece fully; two wiring harness connections attach it. Unclip both connections to remove the tunnel cover fully.
Pro Tip: This is a great time to clean or wipe down your interior while most of it is disassembled.
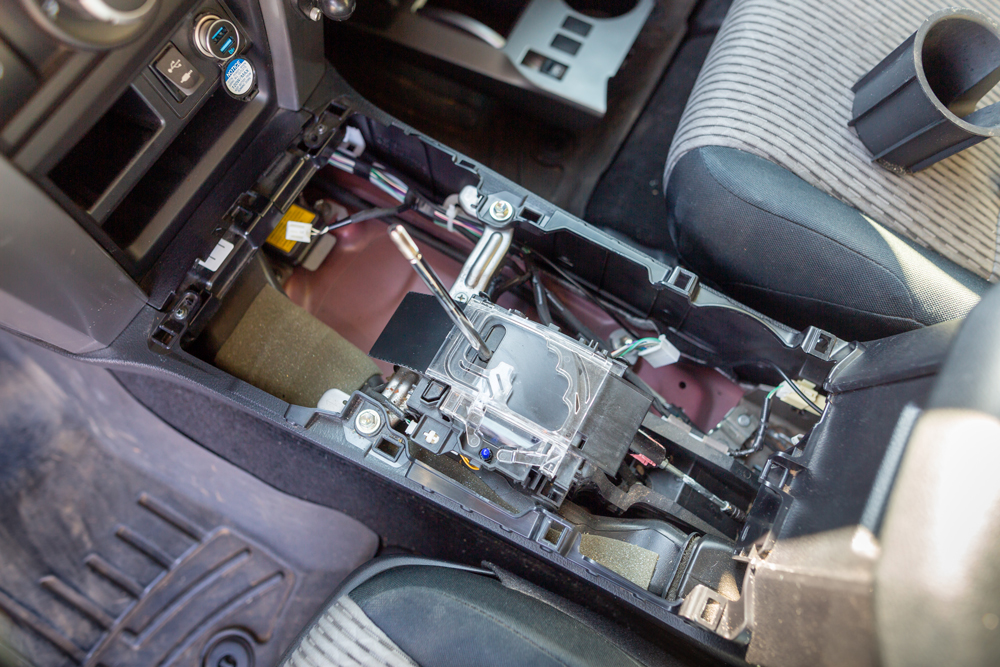
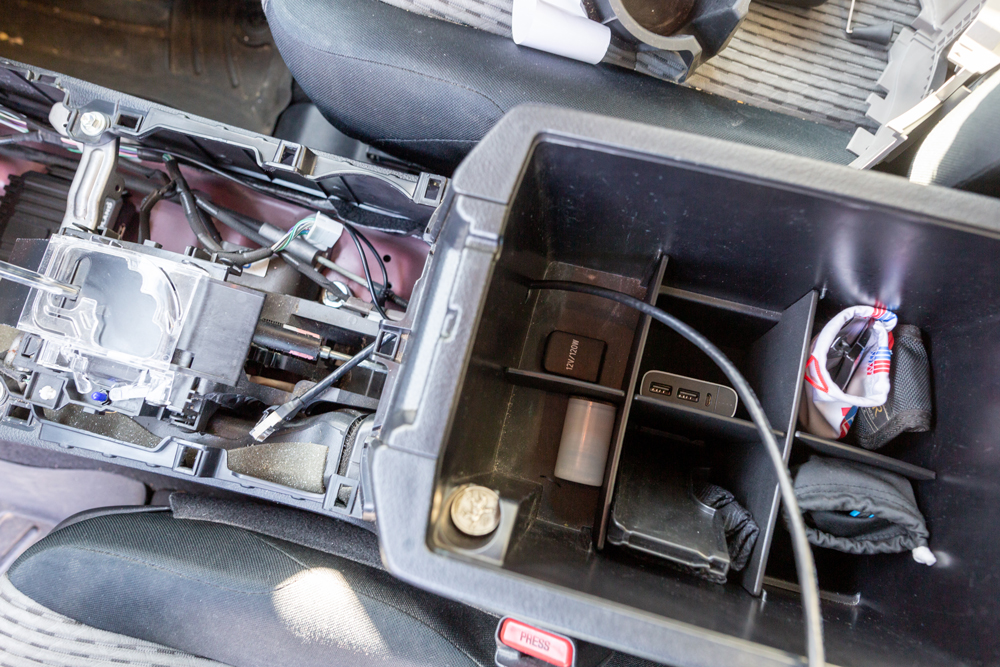
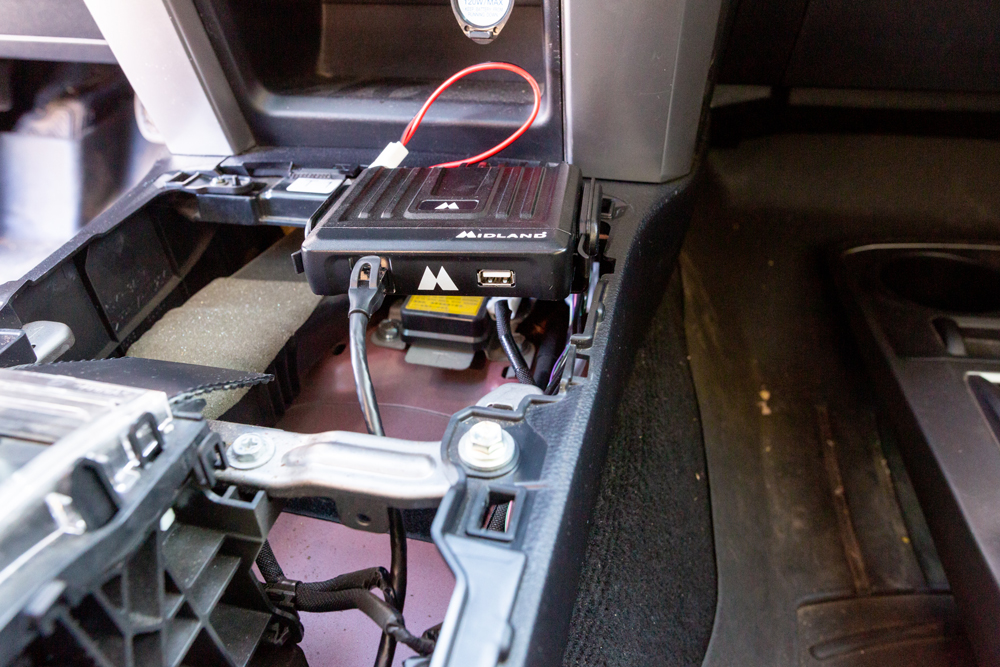
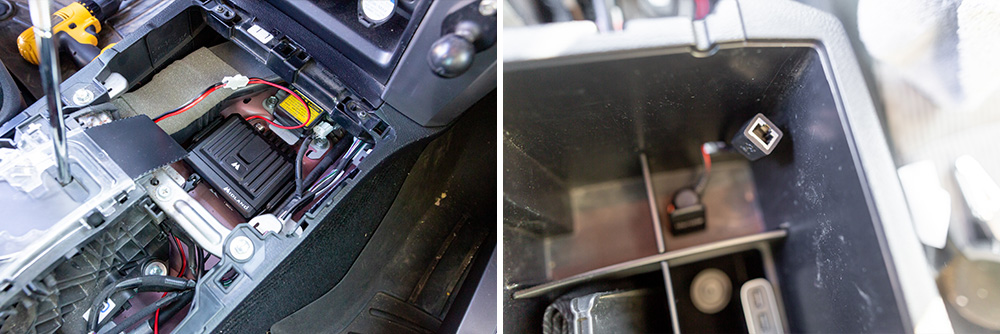
Step 2. Mount Main Unit
To help keep the main unit from sliding around in the tunnel, I used Velcro cut to fit the full surface area of the unit’s bottom. (I might swap this out for a heavier duty 3M adhesive velcro eventually…)
Step 3. Run Power Wire
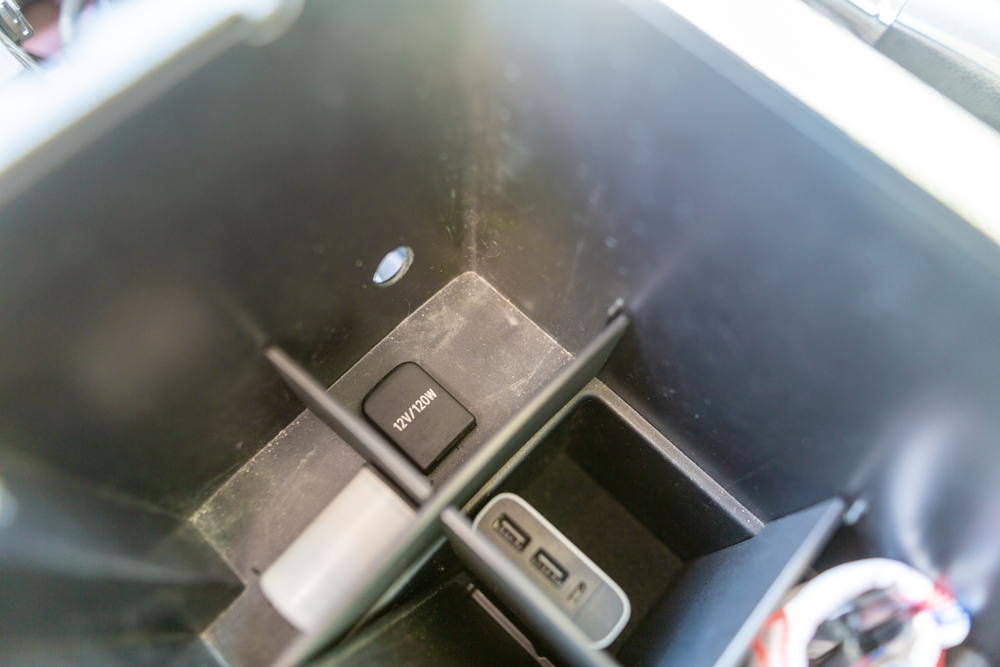
Mark the location of the pilot hole with a pen. Then use a small drill bit to make a pilot hole for the step bit. Using a step bit, slowly drill out a hole large enough to run the end of the power cable and the Ethernet extension through. Connect the power cable to the 12-volt port within the center console. Remember to vacuum out plastic shavings before proceeding.
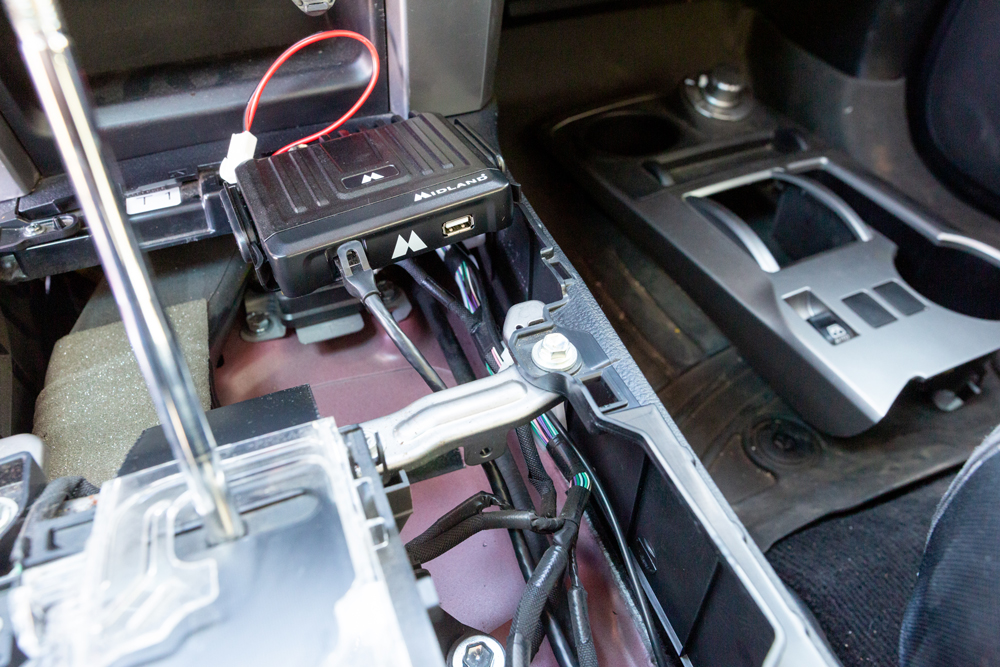
Note: Drilling is optional. I chose this route because the hole is virtually hidden and can be very functional if you need to run a wired connection to the power port on the console, keeping everything concealed. There are various ways to connect your unit to power. Please choose the method that best suits your installation and how comfortable you are with drilling into your vehicle.
Step 3. Remove Passenger Trim Pieces

In the passenger footwell, remove the footwell trim by pulling the plastic cover down towards the floor. Pull the passenger-side trim out by gripping the sides and pulling it toward you. Lastly, remove the kick panel by unthreading the plastic nut and pulling it towards the rear of the vehicle. You should now have full access to the passenger footwell area.
Step 4. Antenna Placement

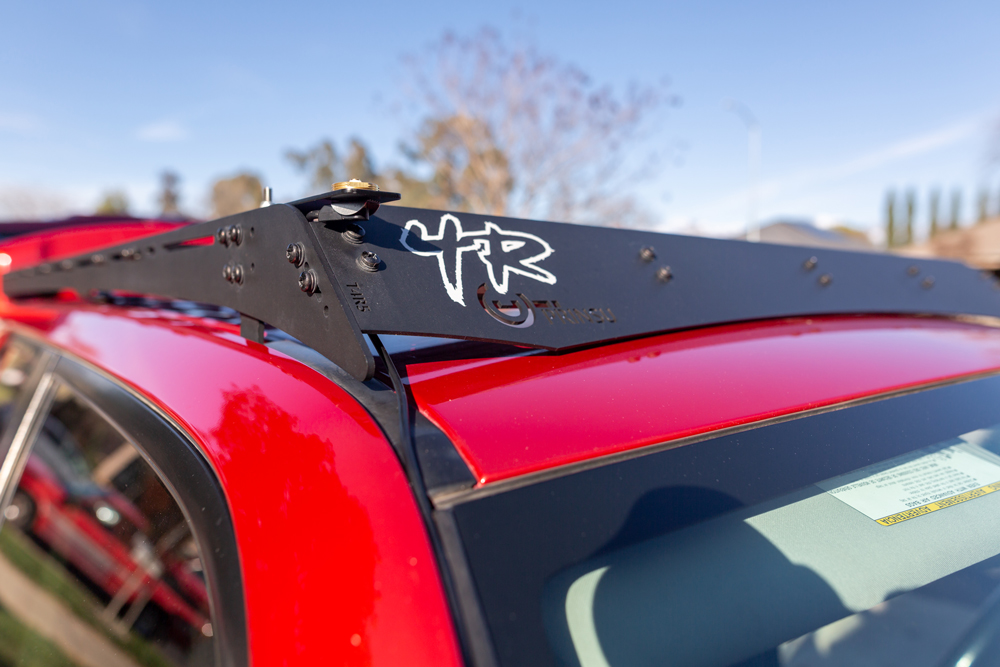
In this installation, I chose to mount this antenna to the front of my Prinsu rack. This location works well for me. I used the included ditch light bracket extension. The wire then tucks neatly around and behind, and is just about the right thickness to squeeze into the window channel.
The kit includes this mount, a magnetic surface mount, and a hood mount.
With the variety of options, there are endless possibilities as to where or even how temporary or permanent you can mount your antenna.
Step 5. Remove Cowl Cover & Run Wire Into Bay

Run the wire behind the cowl cover; it will tuck neatly behind the cowl when reinstalling.
Pro Tip: I would also recommend using the KC Wire Hider
Keep in mind that whichever side you choose, or your placement type, try not to run the antenna wire along any power wires, as that could interfere with your signal.
On the passenger side of the vehicle, there is a rubber grommet in the firewall. Using a sharp knife, make a small incision on the exterior. You will then run your antenna wire through this hole. You may use a zip tie, a coat hanger, or a wire fishing tool to help you run the wire through the firewall. Pull the antenna wire through the cabin.
Step 6. Replace All Trim Pieces

Finish by replacing all trim pieces in reverse order of removal.
Step 7. Connect Handheld
Connect the handheld unit to the Ethernet extension and power on your unit. Dial in your channel and start your adventure!
Final Thoughts

Before this installation, I was using a portable handheld HAM radio. While using a HAM radio is great, I could never find a good spot in the car to keep it. I found myself hanging it from the visor; it was jerry-rigged in there, falling often or getting in the way.
Moving to a smaller handheld keeps the radio at arm’s reach without worrying about antenna reception, dropping, or keeping the unit charged.
One of the highlight features is the USB port on the front of the unit, while you do lose a 12-volt port with the unit plugged in, it’s great that you can still plug and charge a phone or GPS device directly into the unit.
I enjoy how simple the Midland MXT275 is, with its large buttons and LCD screen, which make it really easy to use and operate while driving. It even matches the 4Runners’ stock blue switch lights!
Overall, this installation was very easy. Adding a communication system to your vehicle like this adds a lot of simplicity off-road. The unit fits perfectly in the tunnel; it’s there when I want it, and out of the way (without taking up space) when I don’t. I enjoyed how “plug-and-play” this system was. This new MXT275 is going to be my go-to off-road radio for future coms on my trips in the 4Runner.
Hey Frank, great write up. Two questions for you- you mentioned using the KC wire hider, but in the photos the antenna cable is just tucked into the gap in the rain channel on the windshield. That’s where my cable is currently; did you have issues with that location that prompted a switch? Second, since installing this under the plastics, have you needed to do any maintenance on the receiver base? I can’t imagine there’s a lot but I don’t want to be taking those plastics off every couple months haha. Thanks!