
Rhino Rack 270 Degree Batwing Awning Install and Review – Mounted on Gobi Roof Rack For the 5th Gen 4Runner
The Rhino-Rack Batwing Awning is the perfect solution for an escape from the sun (and rain) while enjoying the outdoors.
If you are like me, this past year has created a lot of opportunities to explore the outdoors by driving trails and camping. Whether I am in the woods or at a tailgate, having some shade to provide an escape is important. That’s why I chose the Rhino-Rack 270 degree Batwing Awning. Unlike conventional awnings, the Rhino-Rack Batwing Awning wraps around the back of the vehicle to provide 270 degrees of coverage, approximately 11m².
Each install will be unique depending on the rack system you have on your 4Runner. I have a Gobi Stealth Rack on my 5th Gen 4Runner and I was able to use the provided brackets from Rhino-Rack to fit the awning on my rack.
Note: This may not be applicable to all rack variants. I purchased a “left mount” awning (driver’s side) and this install will be for that mount.
Find It Online
- Rhino-Rack Batwing Awning: Check Price
Tools & Materials
- ½” Wrench
- 10mm Wrench
- Allen Wrench (included)
- Ladder or Scaffolding (recommended)
- Helping hand (recommended)
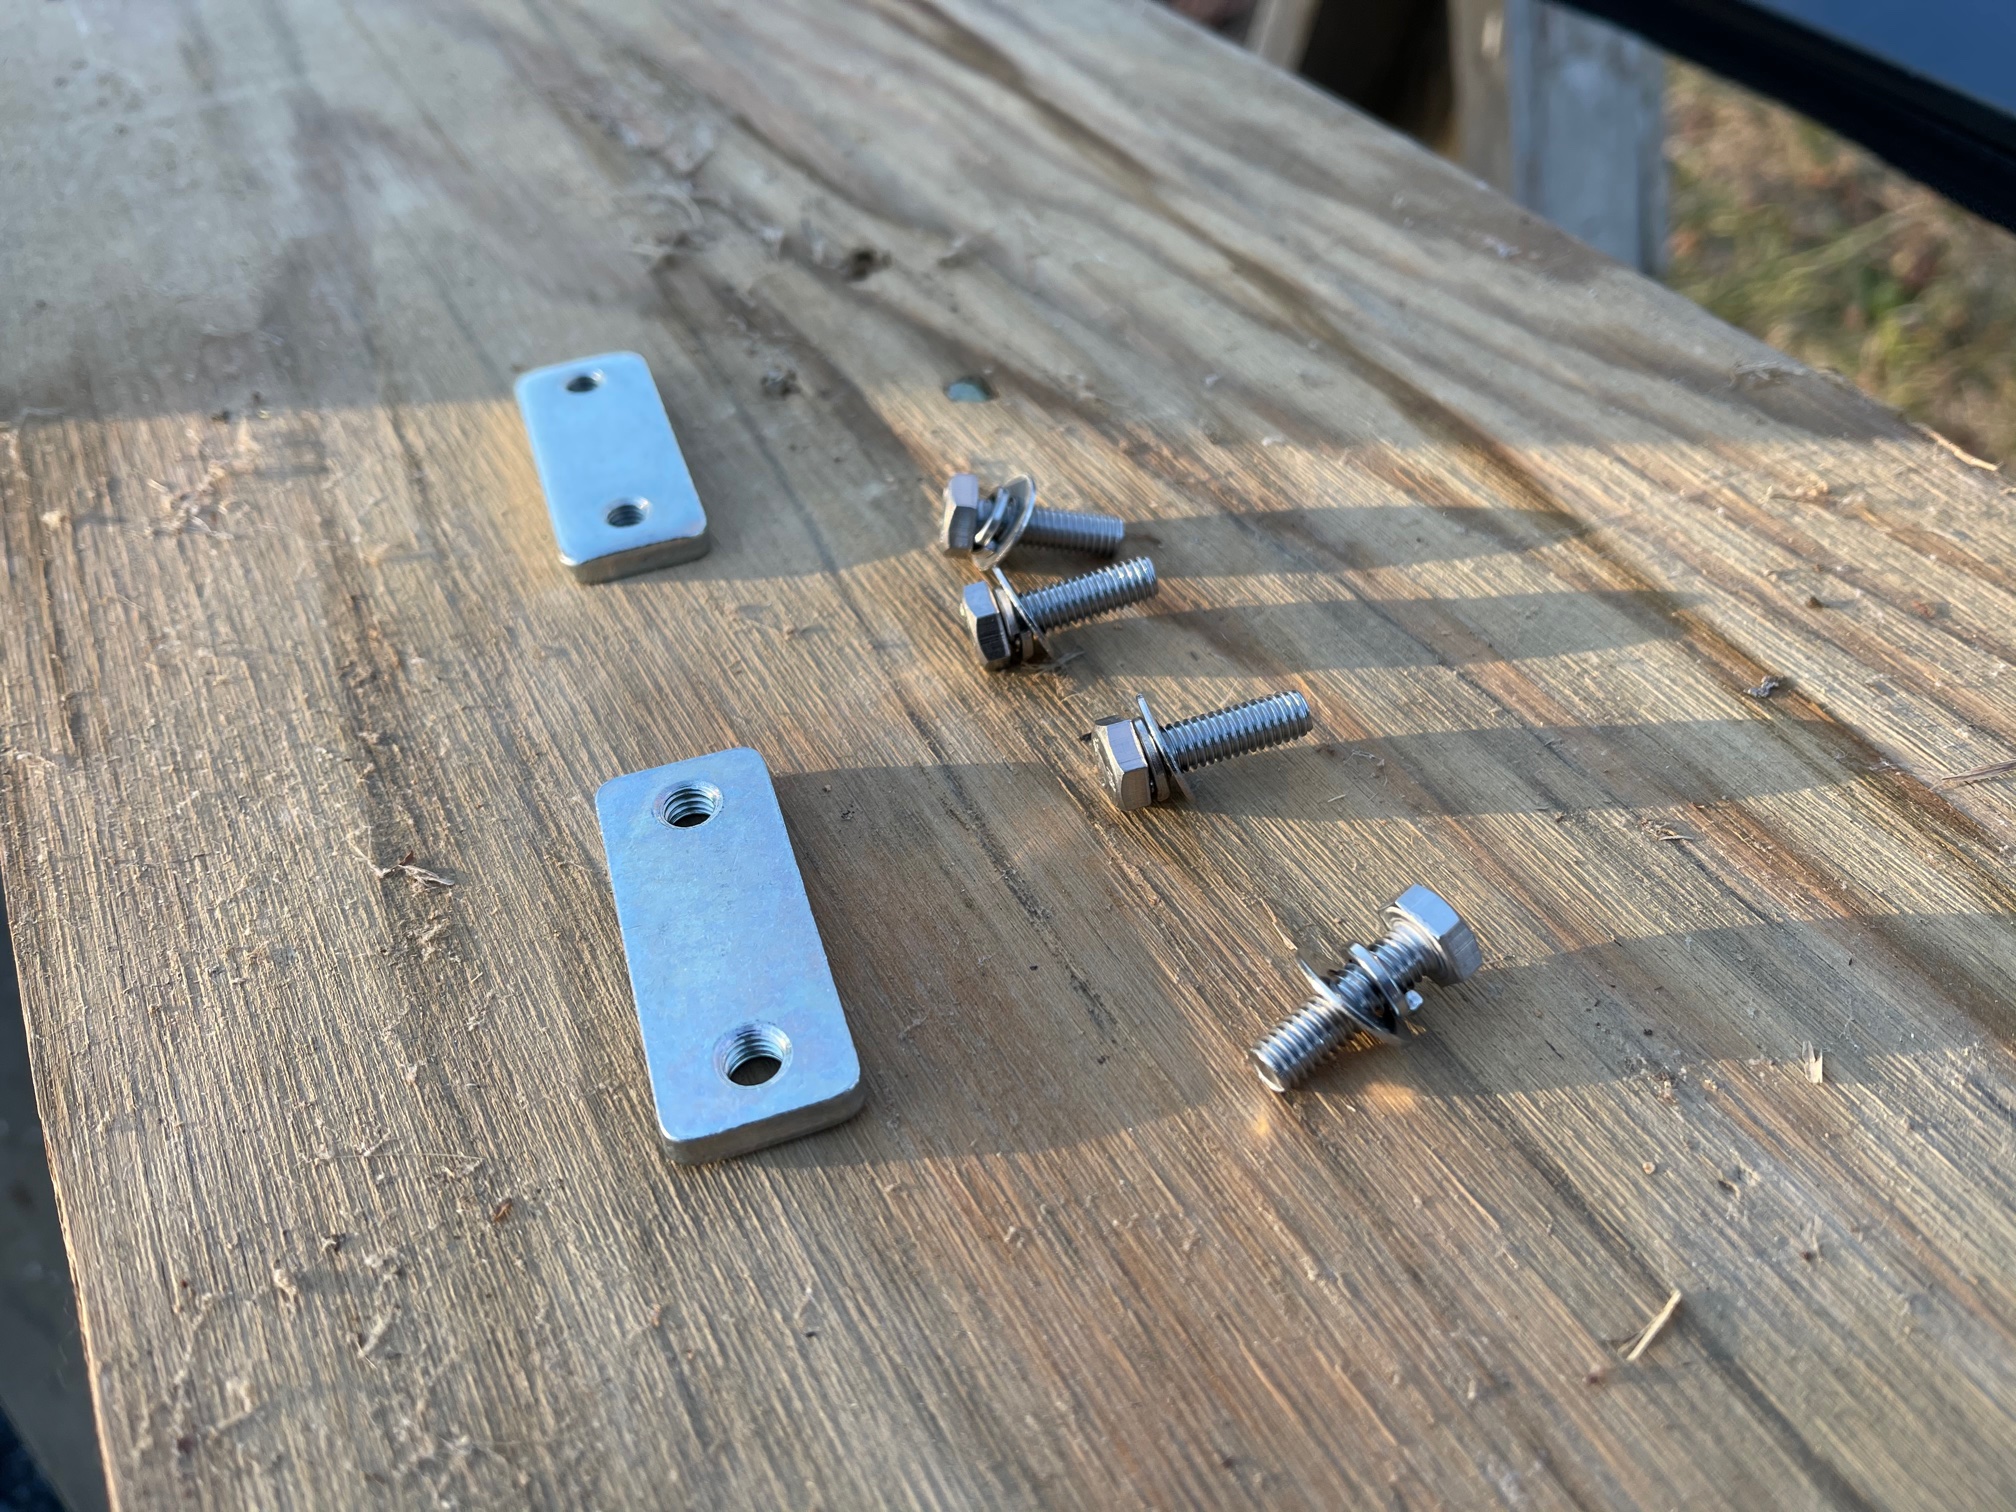
Step 1. Add Brackets To Awning

Collect the four (x4) provided T-bolts.
The back of the Rhino-Rack 270 degree Batwing awning is a solid composite material with adjustment rails. The T-bolt is fitted to slip into the machined slot and adjust to the rack/vehicle for best fitment. There are four bolts; place two (2) on the top and bottom rail.
Step 2. Place Bracket

Place the provided bracket onto the T-bolts.
Once the bracket is aligned, place the washer over the T-bolt followed by the provided locking nut. Prior to completely tightening the nuts down, make sure the brackets are in the best/final location for mounting on your rack. Ensure the bottom nut is completely tightened prior to putting it on the rack as you will not be able to access it once mounted.
Step 3. Prepare To Mount Rack
Gather the needed mounting parts for mounting on to the rack.
Make sure you do a test thread of the plate nut (included) to orient the proper threading direction when installing on the rack. Each hex bolt gets a spring nut, followed by a flat washer (all included).

Find a partner… the awning is heavy and long. Be sure to have proper support and height for install.
I made scaffolding with sawhorses and a 2×10 board but a ladder would work as well. This was to provide support for partner 1 holding the awning in place while partner 2 was on the rack tightening the mounting brackets to the plate nuts on the rack.
Step 4. Complete Mounting on Rack
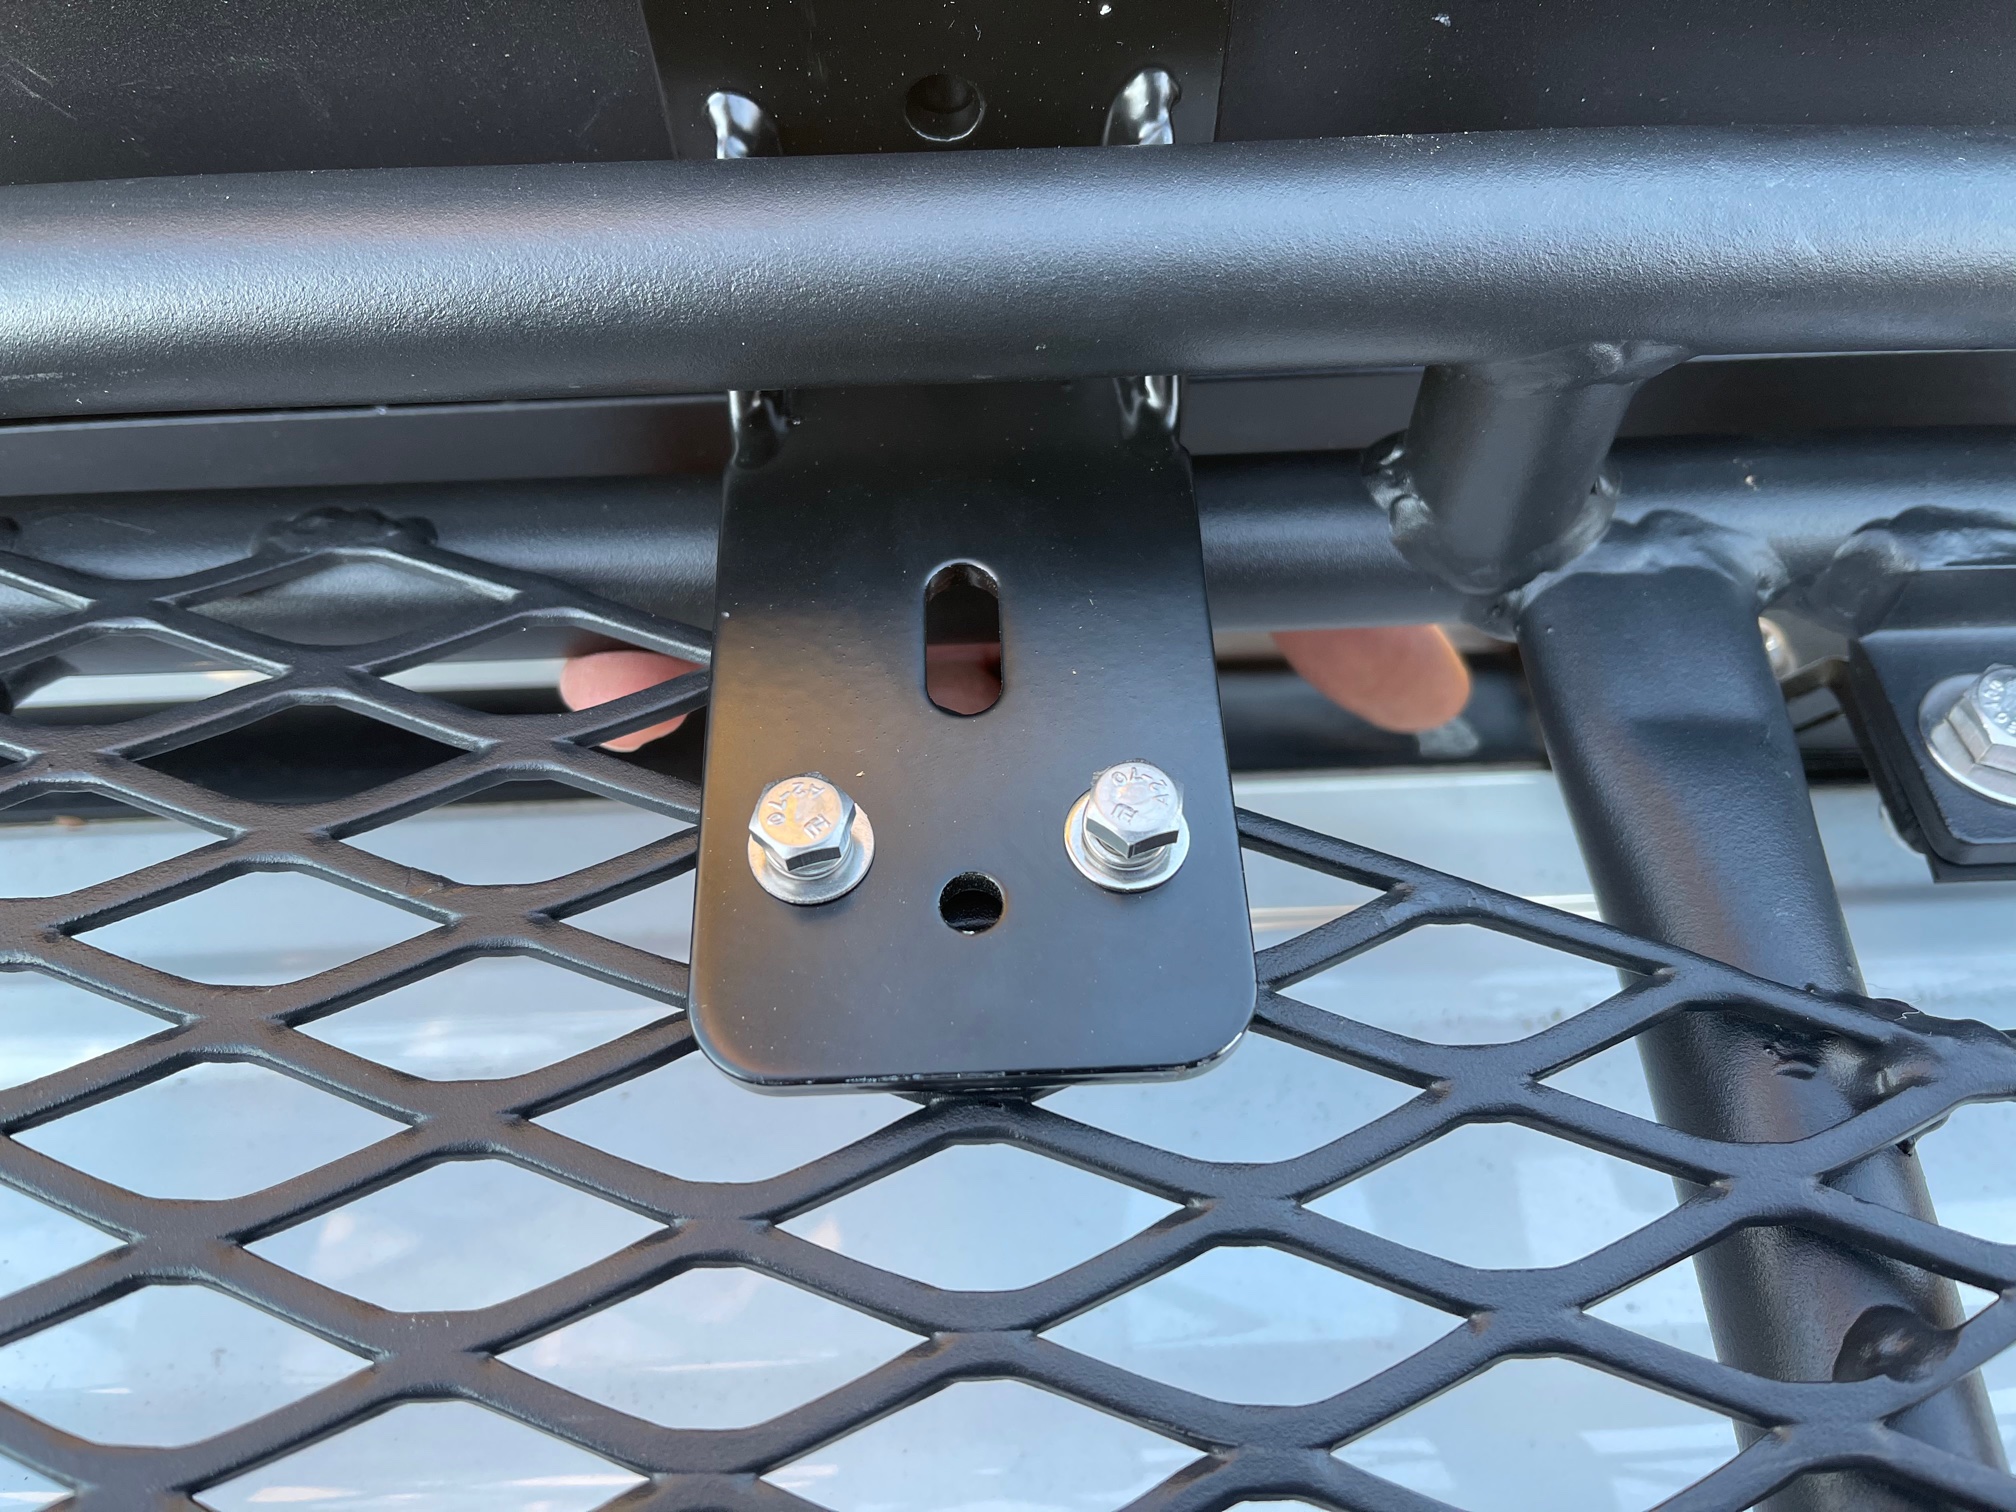
Tighten the mounting brackets to the roof rack using the provided plate nuts.
I made sure to mount the brackets with the widest stance possible offered by the lattice of the roof rack. This took two hands to make sure the bolts were feeding properly into the plate nut.
Step 5. Ensure Proper Placement

I found the awning can be installed further forward on the 4Runner.
This is because when open, you want the awning to be close to the tailgate to provide full coverage. If you are not happy with the placement, remove mounts from the rack and adjust off of the vehicle (remember you can’t reach the bottom bolt of the bracket while on the rack).
Step 6. Install Pickup Molding
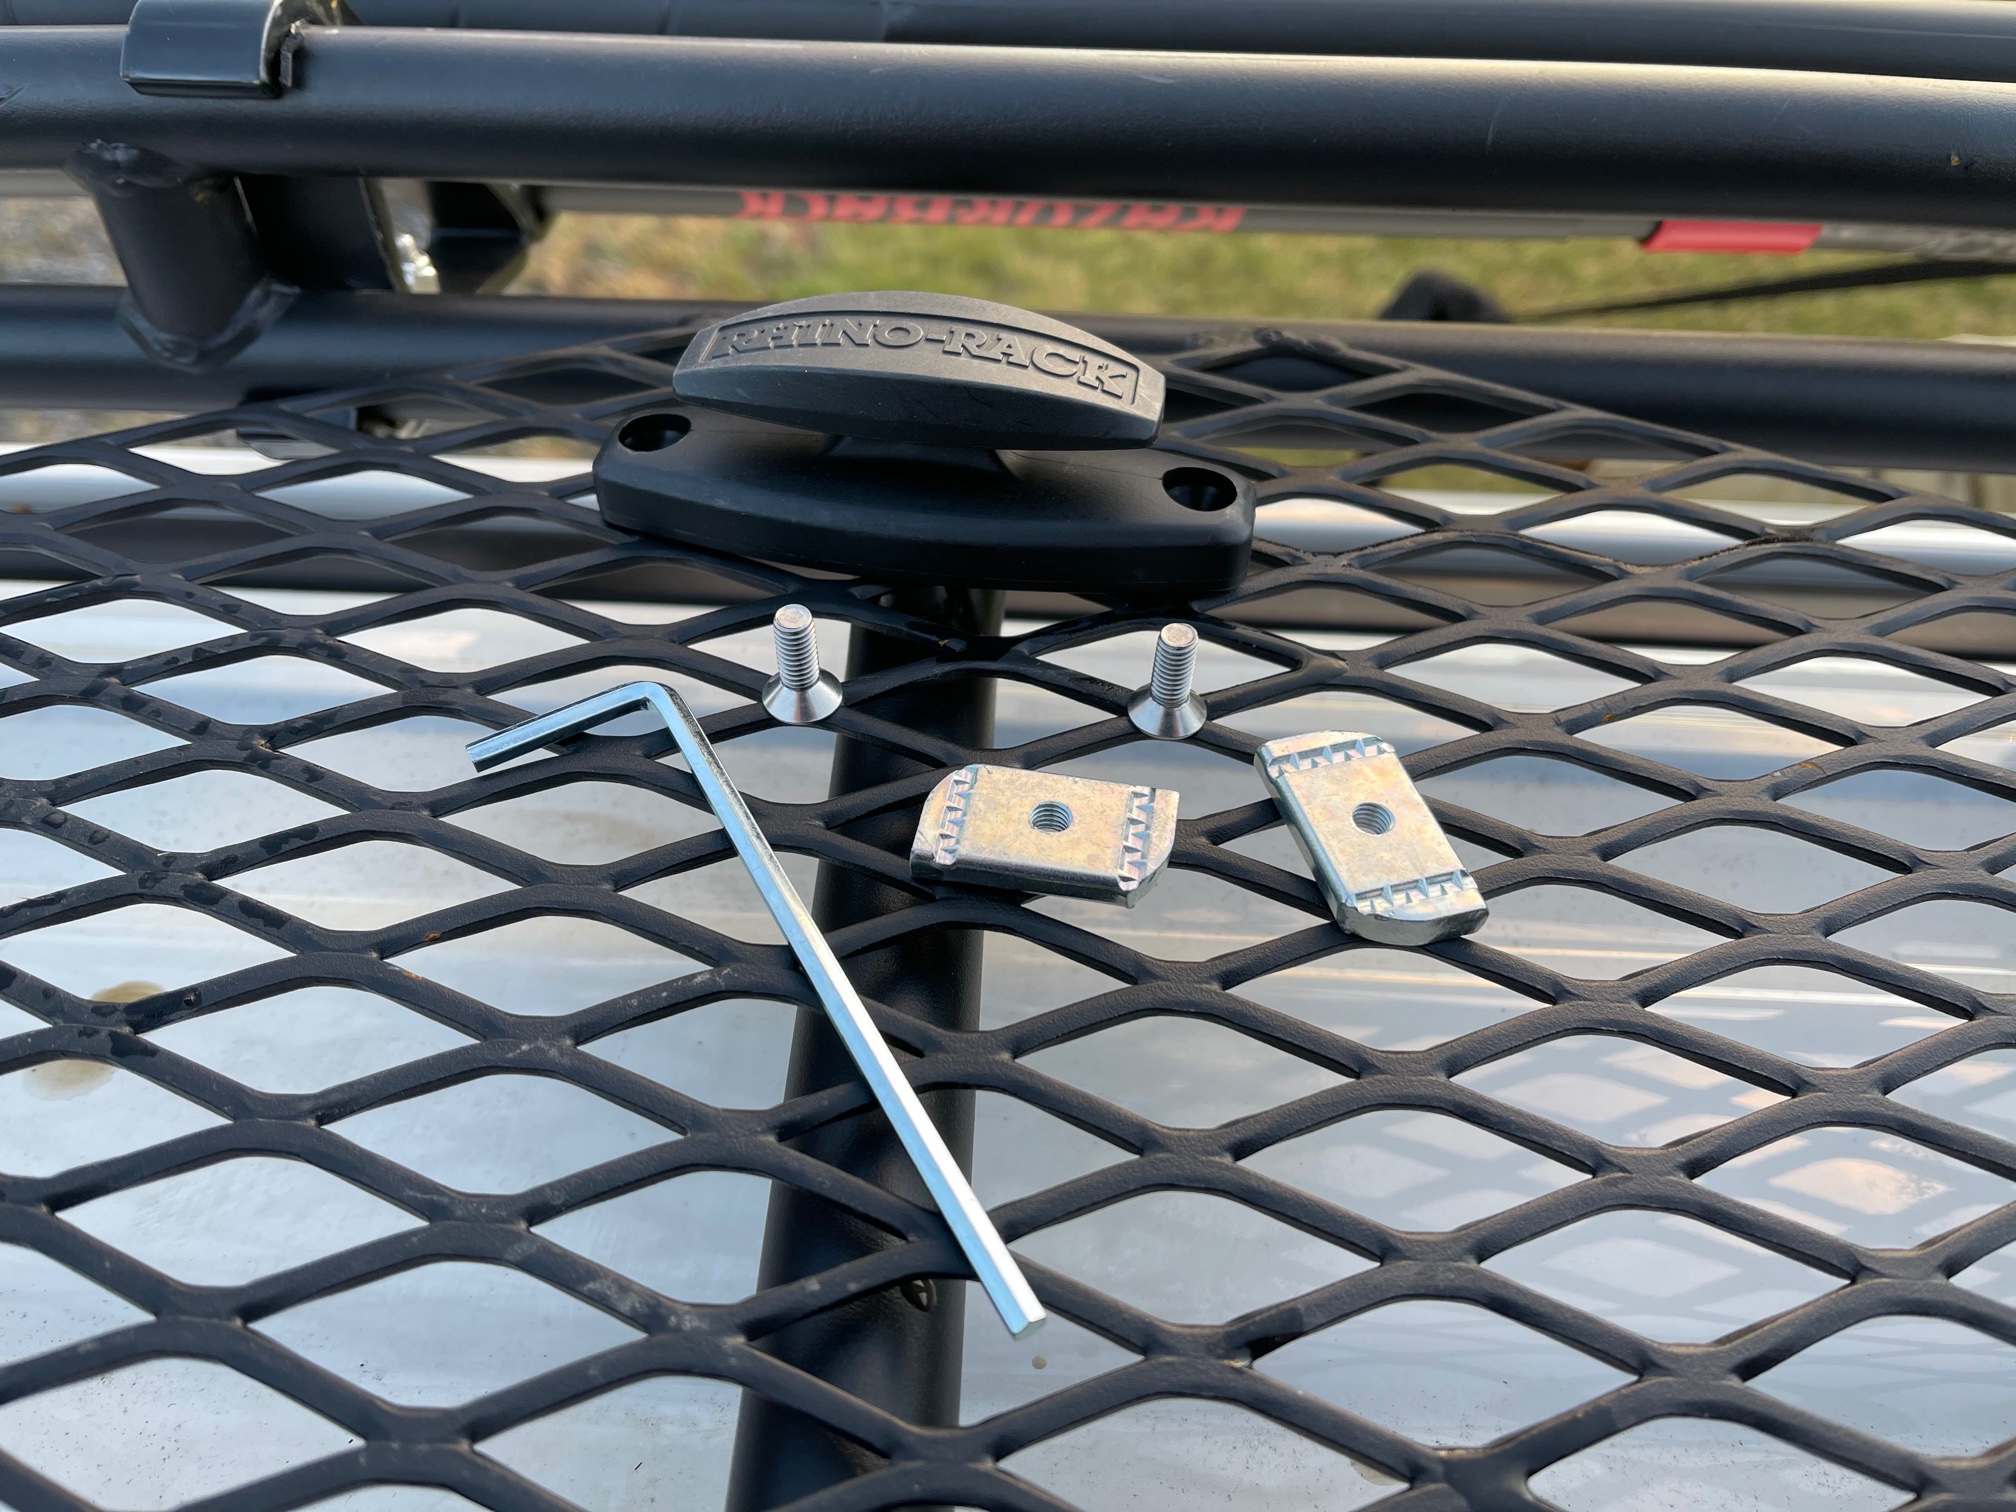
Pickup molding is used to fasten the guy rope of the awning to allow the awning to be taught and hold shape while open.
Install along the edge of the roof rack opposite the awning (all parts provided). Install based on looks and functionality for the user. The guy rope is plenty long to reach wherever mounted.
Step 7. Opening Awning

After unzipping the weatherproof cover, remove the stake/tie-down bag.
Conveniently packaged into a pull-string bag, the tie-downs and stakes need to be removed prior to unfolding the awning. Use as you feel necessary depending on the weather and landscape conditions.
Step 8. Unfolding Batwing Awning

Starting at the front of the vehicle, begin to unfold the Batwing awning.
One person can easily do this part. As you unfold each section, lower the leg by popping it out of the fasteners under the awning canvas. Each leg is adjustable to level the awning based on terrain. The supports are strong enough to hold the weight while unfolding without lowering legs but be careful not to add extra downward torque.
Step 9. Lowering Legs & Tightening Canvas

Once all legs are down, adjust each to the desired height.
Each leg can double in height as desired. Be sure the guy rope is attached to your Pickup molding and tightened. Then place stakes and tie-downs as needed.
Final Thoughts

I am definitely impressed by the quality of the Rhino-Rack 270 degree Batwing.
Mounted, the awning has a quiet ride and does not impact your view while driving. The installation was straight forward and took approximately 30 minutes to install with two people. One person can easily open the awning as there are magnets that hold each segment in place and the legs easily snap in and out of place. All stakes and tie-downs are provided and easily nestle into a pull string pouch that gets stored in the weatherproof cover.
My 4Runner has a 3-inch lift and I’m 6’1” and could easily walk under the awning when open without concern of hitting my head. The only downside is when the awning is open, the liftgate cannot be opened. Not a huge problem as anything in the back can be accessed through the rear window.
Is this the larger 8’ Batwing or the shorter 6.5’ awning? So if you open the hatch it hits the awning? That sucks ,I have a 8’ Rhino Rack 270 and was hoping to use it but still want to open my rear deck at the beach
Not being able to get through the back hatch has been the killer for me. It’s much more logical to go with a 180 awning and allow the back hatch to supply the little fraction of shade the awning might provide. If anyone is considering this awning, I’d recommend going with something else. Just imagine being on an extended trip and not having full access to the area where everything you need is stored. I’ve spent hours trying to organize so I can’t get through my back hatch for an extra 3-4 feet of shade the awning provides. And there is no option to have it open less than 100%.
That said… if anyone wants to chance it, contact me. I’ll sell it on the cheap.
Sell it on the cheap ?
Hey Aaron, still wanna sell it?
Do you have an aftermarket rack ontop?
Mars_volta_matt@yahoo
still have it? Would it mount to pickup truck rack?
Thanks for the review, I’m in the process of researching an awning and I was undecided if a 270 would be a better choice or not. My concern was the tailgate, personally for me is a huge downside. I might look at a 180 degree next.
Yeah the tailgate is hit or miss for folks depending on their needs. Glad I was able to provide the review for your decision. Someone on Instagram asked if it were possible to open the batwing up just to 180. I haven’t tried that yet, but when I get it back on the rig I will try it out and let you all know if it works.
Nice write up! One thing to watch out for is the straps that hold the weight of the awning are attached to the bag and not the support bar. After a year of use the bag ripped onlong the top, where all the weight hangs. It would be an easy fix for them.
Thanks for the feedback, I’ll definitely keep that in mind when in use. Hasn’t been on the rig in a while but I’ll check it out next time I throw it back on.