
Stop & Go Tire Plugger Kit Review and How To Use It To Repair Tire Leaks
Getting a flat tire while on the road or trail is never fun. Our 4Runners have a spare tire to account for those situations, but it is a good idea to be prepared with a “Plan B”, especially for long trips and/or ones to remote areas.
Traditional tubeless tire repair kits like the Safety Seal tire repair kit involve using a coated piece of cordage that is sort of doubled over and then inserted into a hole in the tire to “plug” it.
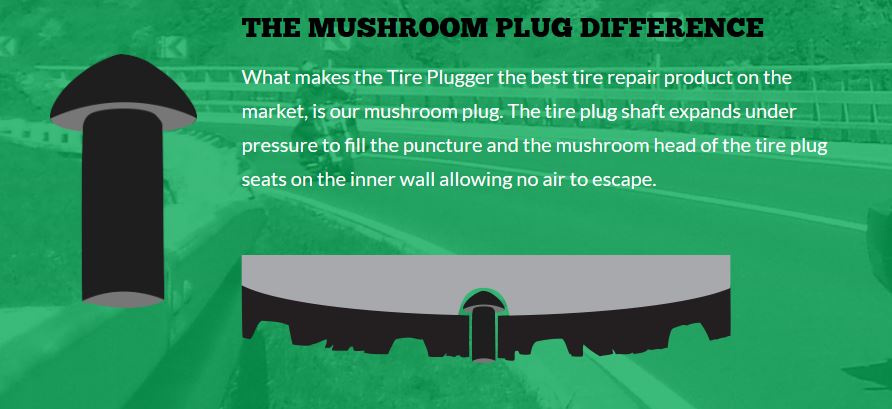
The Stop & Go Tire Plugger kit offers a different take on this, where a special tool is used to insert rubber plugs with mushroom-shaped heads into the tire. Under pressure, the shaft of the plug expands to fill the puncture, and the mushroom head seats on the inner wall, preventing air from escaping.
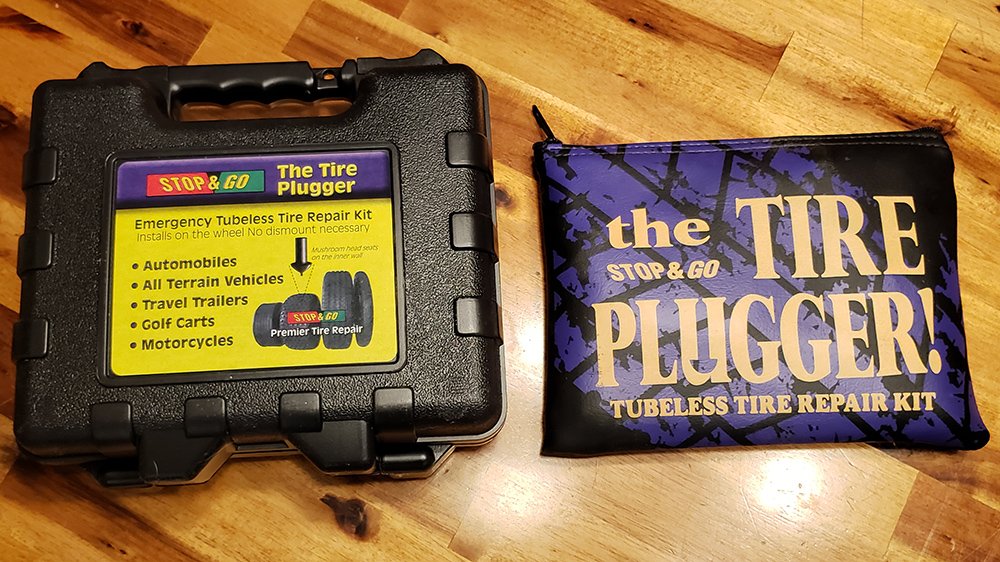
The standard Tire Plugger kit comes packed in a zippered vinyl pouch that is approximately 9″ long, 6.5″ wide, and 1″ thick.
The kit includes the following:
- Tire rasp
- Probe tool
- Nozzle
- 25 plugs
- The Tire Plugger gun
- Folding razor blade
The deluxe kit is similar, but packed in a hard-sided case, and includes a heavy-duty T-handle rasp.

Options/What to Buy:
- Standard Model Tire Plugger (#1075)
- Deluxe Model Tire Plugger (#1085)
- Larger Mushroom Plugs, Probe & Nozzle (#1080)
- Bag of (20) Larger Mushroom Plugs 1″ x 7/16″ (#6075)
- Larger Nozzle for Tire Pluggers (#SN02W)
- Larger Probe Tool (#PP707)
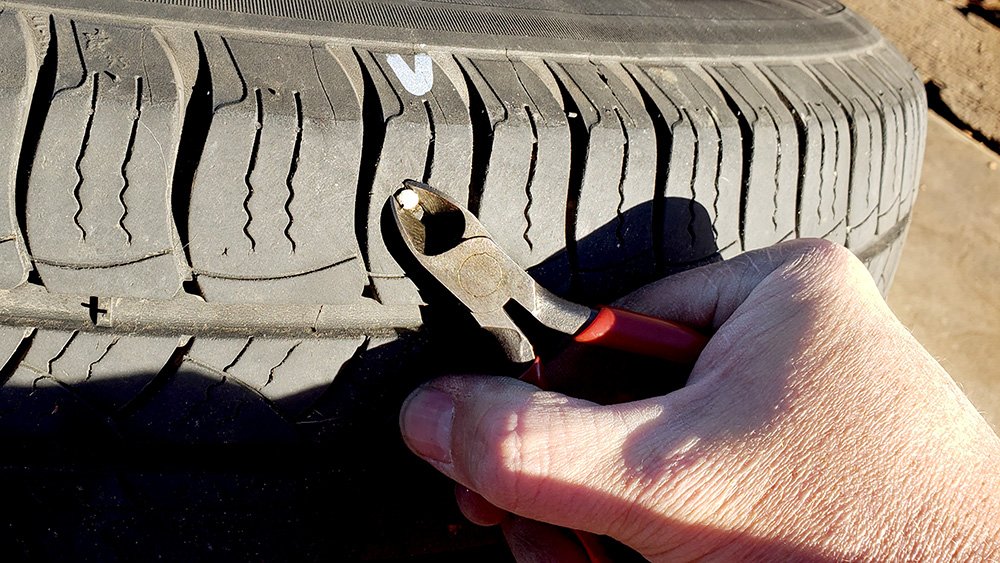
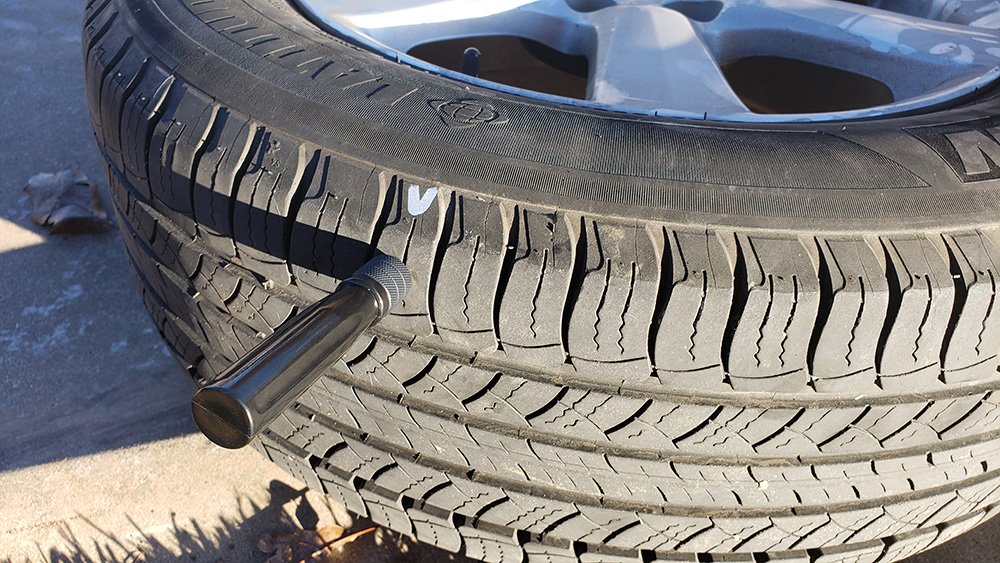
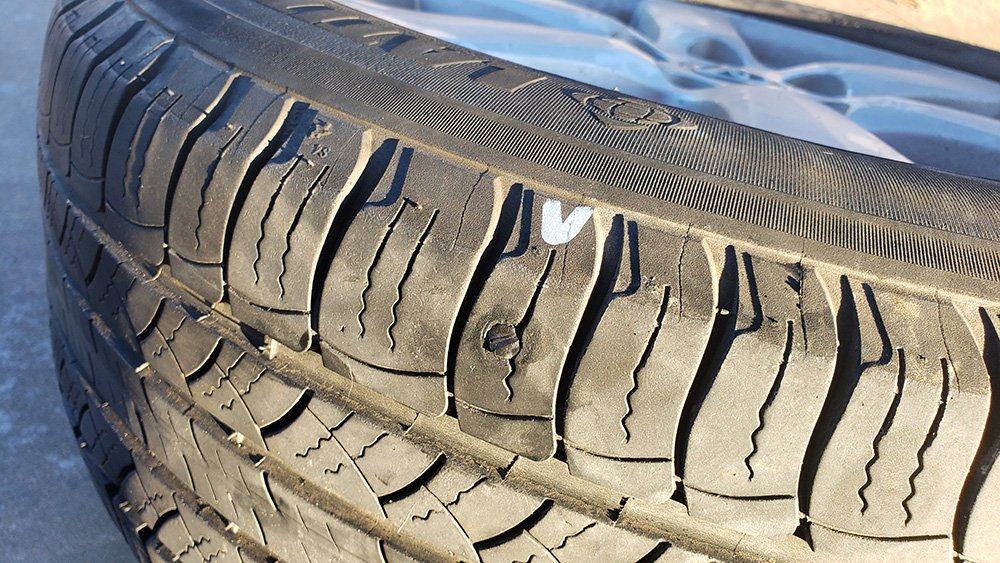
Step 1 – Find the Leak and Remove the Item that Caused It
You’ll know that there is an issue with one or more of your tires when the TPMS (Tire Pressure Monitoring System) light comes on, or if a visual check shows that a tire is obviously low.
In some cases, it is easy to find the cause of the issue by inspecting the tire and seeing an obvious suspect, like a nail or screw.
In that scenario, a pair of pliers or side cutters can be used to pull the offending object out of the tire. Once that’s done, put some soapy water on that spot, and check for bubbles that indicate an air leak.
If you’re lucky, the nail or screw will not have penetrated the inside of the tire, and the tire is low for another reason (i.e., a change of seasons and cooler temps). Inflate the tire to the desired pressure, and you’re good to go.
If there isn’t something obvious that is causing the leak, use a larger water source to check for leaks. A water trough, swimming pool, or even a bathtub can make this an easy task – immerse the tire, and look for bubbles.
Once the offending object is removed, if the tire is leaking, read on…
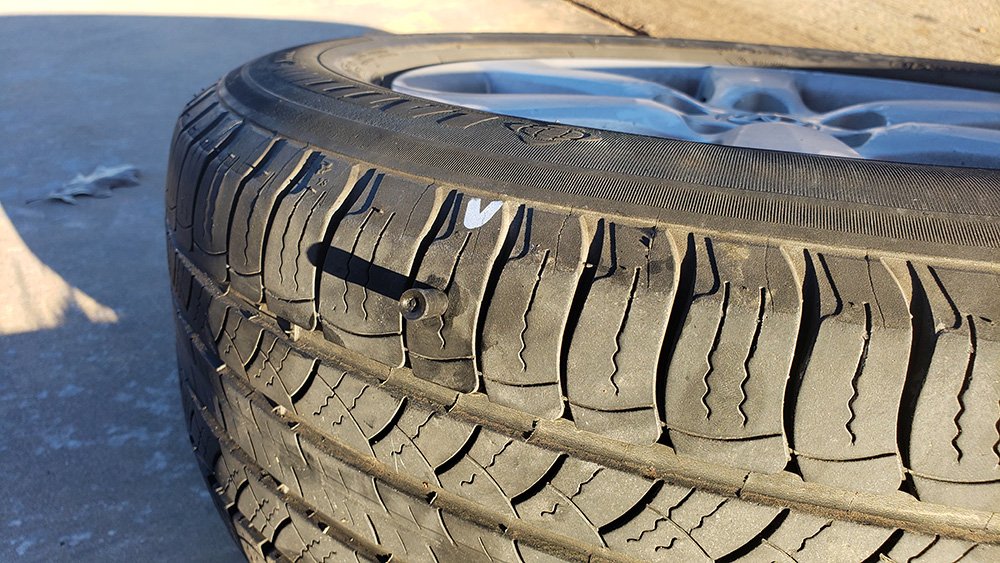
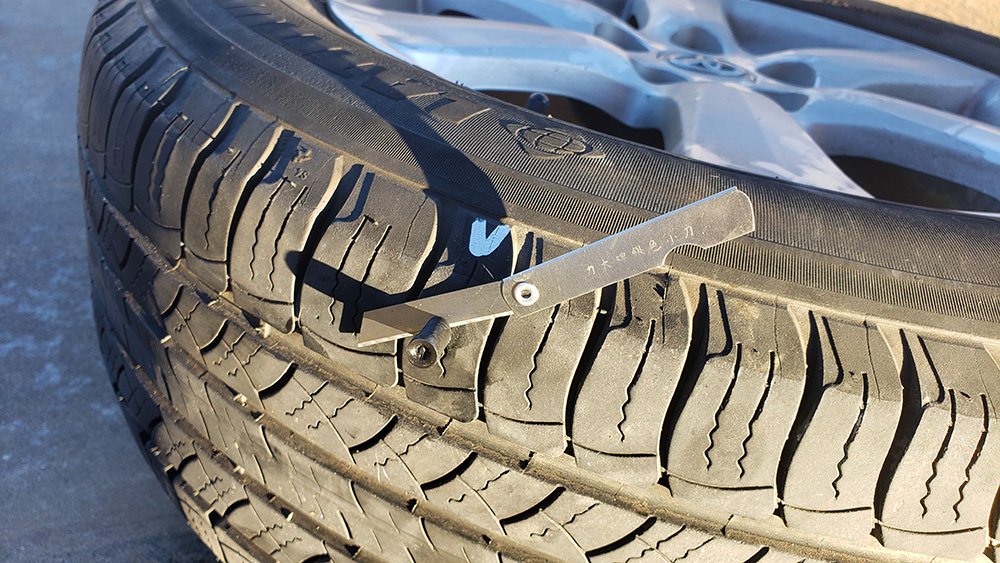
Step 2 – Use the Rasp Tool to Open Up the Puncture
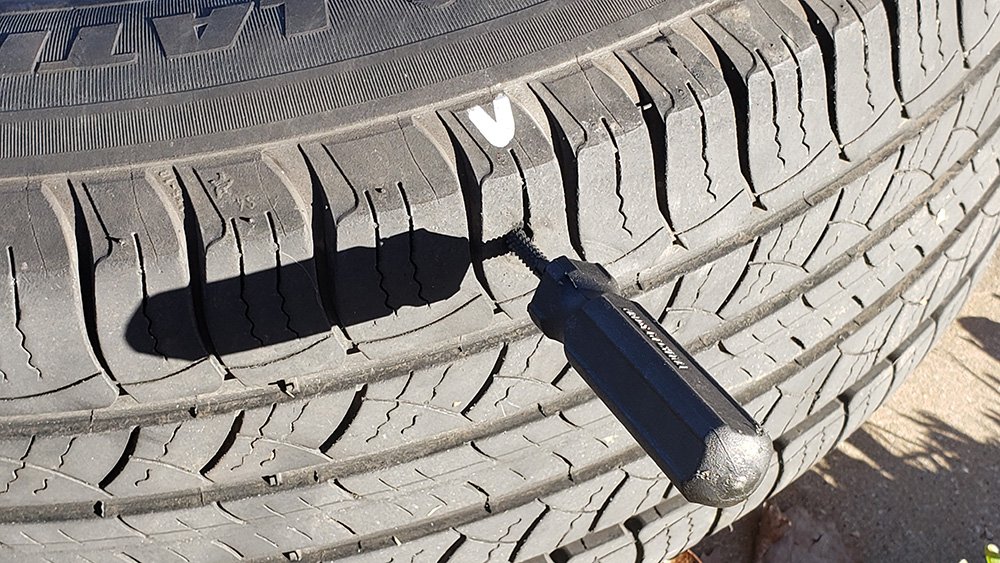
Insert the rasp tool into the puncture, and use it to open up the hole. It may be initially difficult to insert the rasp tool, but once it is through the tire, move it up and down repeatedly to ream the puncture hole, which will allow later inserting the probe tool and plug.
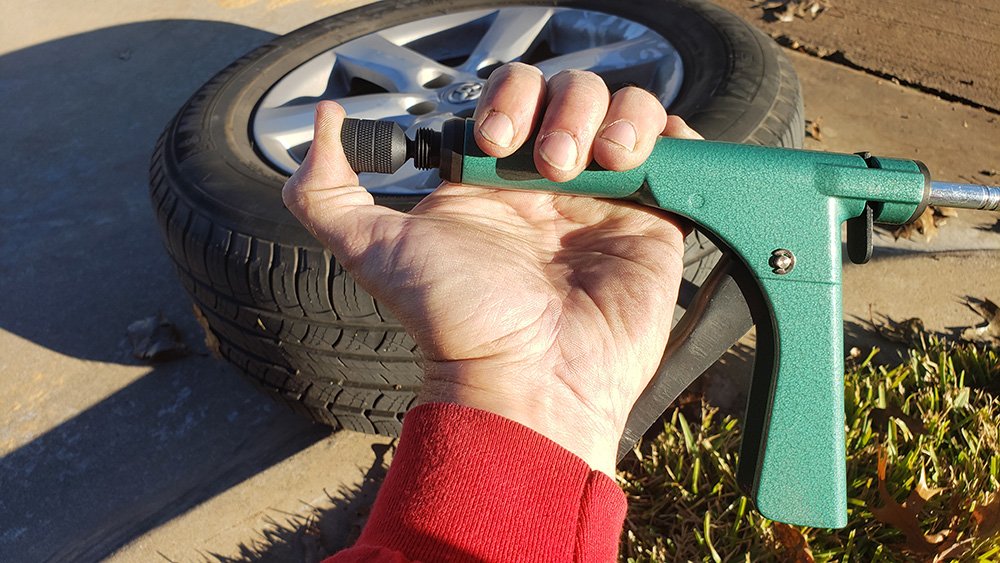
Step 3 – Load the Plug Into the Plugging Tool

The standard and deluxe Tire Plugger kit includes twenty-five 1″ long plugs with 5/16″ diameter mushroom heads. These can be used to repair most punctures, but larger plugs with 7/16″ diameter heads are also available. The larger plugs can be used to repair larger holes and sidewall punctures.
Push the lever at the rear of the Plugger gun to release the spring loaded push rod.
The plugs are inserted into the open end of the Plugger gun, with the stem side going in first. The small end of the nozzle is then used to push the plug as far into the Plugger gun as possible.


Step 4 – Insert the Probe and Nozzle Into the Tire
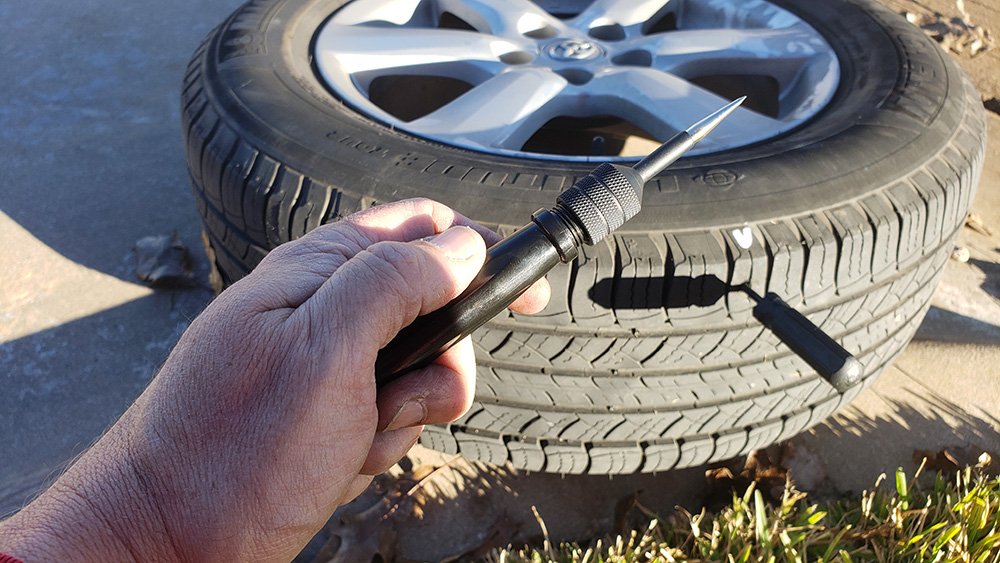
Screw the nozzle onto the probe tool, and insert the sharp end of the probe into the tire.
Push the probe and nozzle as far into the tire as possible. The nozzle will bottom out once the widest part of it contacts the tire.
Unscrew the probe tool from the nozzle and remove it from the tire, leaving the nozzle in the tire.

Step 5 – Plug the Puncture


Screw the Plugger gun onto the nozzle, and squeeze the handle of the Plugger to start the process of plugging the tire.
Continue squeezing the handle until the push rod is almost all the way into the Plugger gun. That requires a good amount of hand pressure, so move your hand towards the end of the handle for increased leverage, and keep squeezing until the push-rod moves no further.
Push the lever at the rear of the Plugger gun to release the spring-loaded push-rod.
Grasp the nozzle at the tire, and slowly pull back on it to remove the nozzle and Plugger gun from the tire. The stem of the plug should protrude from the tire.
Using a pair of pliers, grasp the stem of the plug, pull it, and stretch it ~2 inches.
Step 6 – Trim the Plug and Test for Leaks

Inflate the tire to the desired pressure.
Use the blade included with the Tire Plugger kit to trim the plug end, even with the tread.
Put some soapy water on the plug, and check for bubbles (air leakage). If no bubbles exist, the repair was a success. Put the wheel and tire back on the vehicle, and hit the trail!
NOTICE: The accepted industry standard recommended by the RMA (Rubber Manufacturers Association of America) requires that an injured tire be demounted, the interior inspected, the injury drilled out, and a plug and repair unit installed by a trained professional.
Comparisons and Options

The Deluxe Model Tire Plugger differs from the Standard Model in that it includes a T-handle reamer, and the contents are packed in a hard-side, the foam-lined case that is approximately 9″x8.5″x3″.
This case is larger than the zipper pouch, which allows for storing some additional items (like larger plugs, nozzle, and reamer), while also providing some protection to the tools.

All models of the Stop & Go Tire Pluggers include a standard size probe tool, nozzle, and mushroom plugs with a stem that is 3/4″ long and has a 5/16″ diameter head.
Stop & Go also offers larger plugs, for patching more serious punctures.
These plugs have a stem that is 1″ long and 7/16″ in diameter, with a head that is 13/16″ wide. A larger probe tool and the nozzle are required to use the larger plugs.
Final Thoughts and Suggestions
I used the Stop & Go Tire Plugger to fix a leak in a tire on my daughter’s RAV4, after discovering a screw in the tire on a Sunday afternoon, when my usual tire stores were closed. Not wanting to send her on a 4 hour trip with a questionable spare tire, I was glad to have, and give the Tire Plugger a try.
The plugging process was pretty easy, thanks to the straight forward instructions (with photos) that were included with the Tire Plugger Kit. It took me a couple attempts to get the plug forced all the way through the Plugger gun, and the mushroom head seated in the tire.
After doing a little research online, I read some comments from users who recommended adding some addition lubrication to the plugs, to help them slide through nozzle. Although the plugs are pre-lubricated, I found that a light shot of oil sprayed on the plug and inside the nozzle was the ticket. I’ve since added a couple shots of spray lubricant to the plugs. The small zipper bag that the plugs ship in will keep the oil inside.
When I later read a Stop & Go card that was included with the larger plugs, I discovered some helpful tips that I wished I’d have known earlier… 🙂
- Do not touch the mushroom head so that it remains shiny
- Recess the mushroom head into the barrel just below the threads.
- Pull on the stem then re-inflate tire before trimming.
- Do not pull on the stem when trimming.
Questions or comments? Leave them below!