
Condensation and Moisture in 5th Gen 4Runner Headlight Housing after installing new Headlights (LEDs or HIDs)
We have installed a few sets of headlights on our 4Runners. Since then, most headlight housings started to collect moisture.
If you are planning on aftermarket headlights, and they require drilling into your dust caps, this is something to be mindful of. If you don’t want to deal with moisture in your housing, you can either find lights that don’t require drilling or just drill them right the first time. Most high-quality HID and LED bulbs typically require drilling your dust caps.
If you have moisture in your headlights, don’t worry, we have a fix for this problem.
Actually, we have a couple of solutions for this problem but there is one solution that will really fix the issue.
5 Ways to Remove Moisture in Headlights
- Order new dust caps and drill again (Permanent Fix)
- New Bulb Seals (Possible Fix)
- Removing Headlight and Trouble Shooting (Permanent Fix)
- Silica Packets (Temporary)
- Parking in Sun & Using High Beams (Temporary)
#1 – New dust caps and drill again
One of the most common reasons for our 5th Gen 4Runner headlights obtaining moisture is through our dust caps. If you have recently installed a set of HID headlights or LED headlights, you likely had to drill a 1″ hole in your dust caps.
If you did drill and your housing is full of moisture and condensation, then you may have drilled a little too wide at 1″. Even though most instructions call for 1″, you may want a smaller ID (inside diameter).
Reach down and feel the grommet on where you drilled your dust caps. Do you feel any gaps? Does it feel loose? If you answered yes to one of these, then you may want to buy new caps and drill another hole in your caps. This time, drill a small ID (Inside Diameter) hole.
I would be wary of anything too close to an inch; 63/64 drill bit (0.98″) or 31/32 (0.968″). The problem here is that you may run into the same issue, air pockets in the grommet seal.
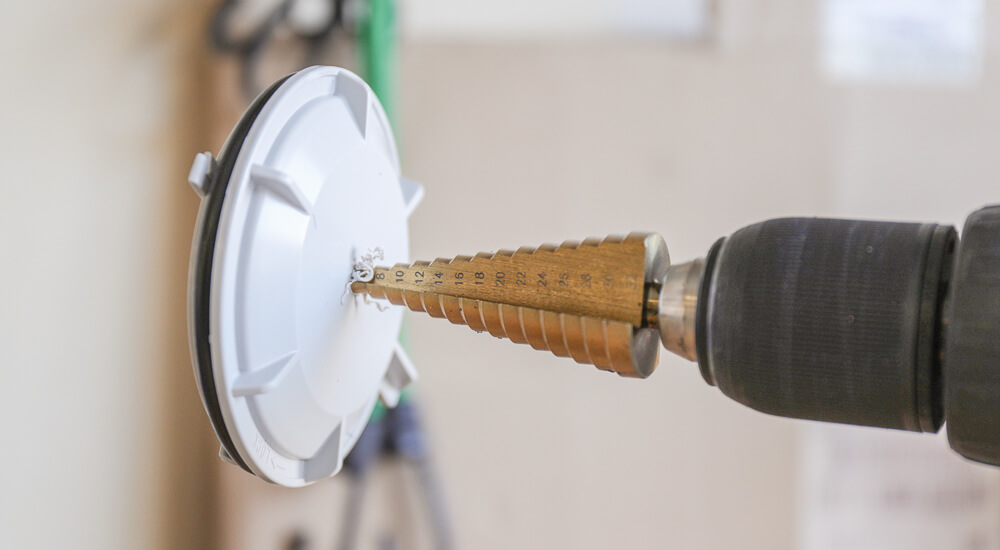
Instead of buying a specific size drill bit, use a step bit at 7/8″ (0.875) or a 1/16″ larger, until you can fit the harness through.
Ordering a new set of dust caps is a good option if you want to keep your headlights from fogging up again, but its not the only one.
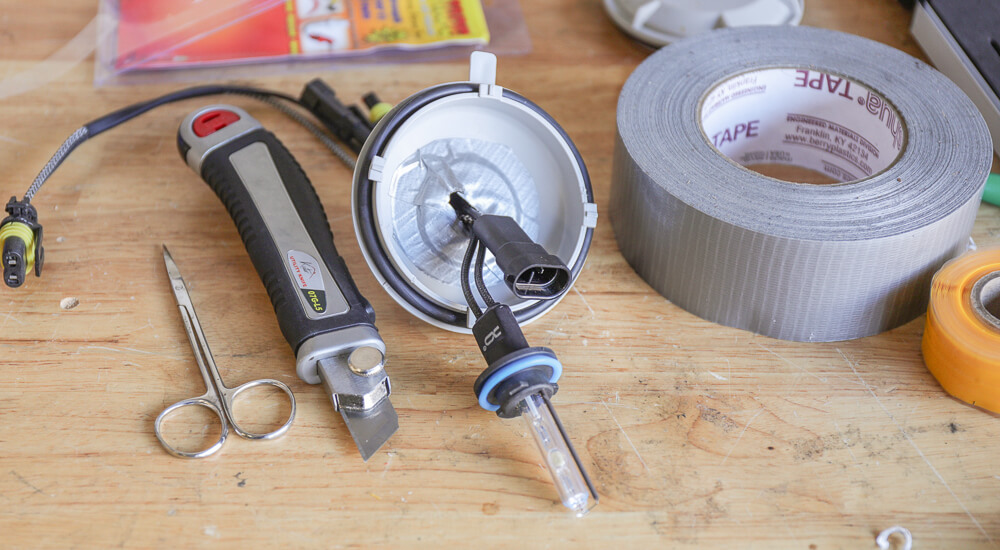
What you need:
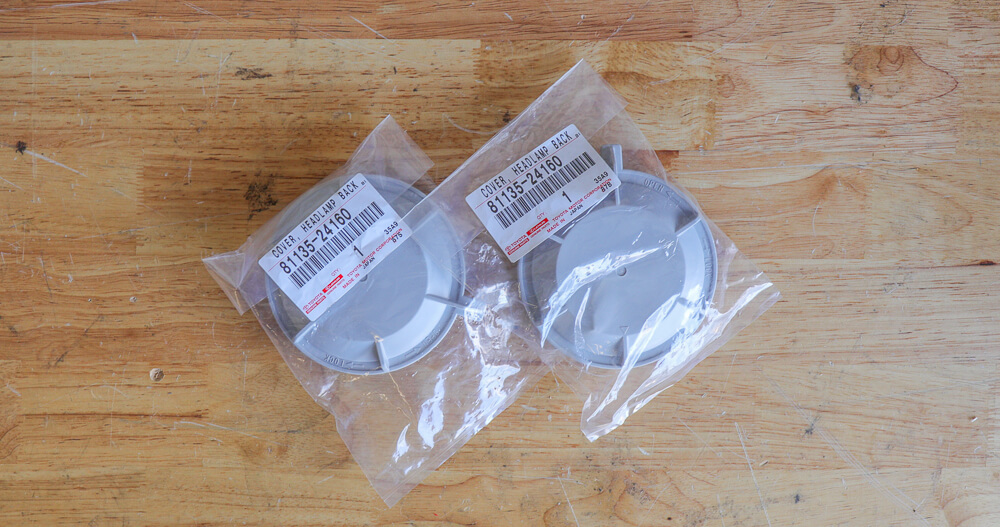
- New Dustcaps: Check Price
- Step Bits: Check Price
- Duct Tape
- Utility Knife
- Surgical Scissors: Check Price
If money is not an issue, I would buy a set of these step bits, but they are not needed for this job.
Use a step bit at 7/8″
Duct Tape harness grommet
#2 – New Bulb Seals (That Red Ring is your Bulb Seal)

If you have swapped your bulbs to LEDs or HIDs the seal’s that came with the kit (the little rubber rings around the actual bulb) may not properly be sealing which would cause moisture to form. A new seal is cheap so if your not sure where the moisture is coming from, it might be worth replacing.
A faulty seal is one of the most common reasons a headlight will start to have moisture forming especially when aftermarket products are installed.
Keep in mind, this tends to be the case if you have older aftermarket headlights or an older vehicle in general and may not work on newer model 4Runners.
Dielectric Grease on Bulb Seal
If a seal is not properly seated and there are no leaks between the lens and the back of the housing, you can use automotive, waterproof dielectric grease.
You can apply dielectric grease to the seal and the surrounding area where the bulb is seated. The grease will prevent moisture from going past the seal if there is a leak the seal won’t stop.
The grease act’s like the silicone it seals off any small leaks you might not see. This is also a method that can get messy if you attempt to apply the grease a few times.
Take this method with a grain of salt but it may work for you.
#3 – Remove Headlight Housing and Troubleshoot
If there is something other than your dust caps causing the issue, then you might need to remove your headlight and perform general troubleshooting. If your 4Runner starts to age a little bit and sits out in the sun for 5-10 years, the seals might become old and then they will crack. Once your seals crack, they open up and that is how moisture will enter your assembly.
There are a few common methods for general troubleshooting on headlights. You can remove your headlights, fill them with water, find the leak and then fix the leak. It sounds a little strange but this is a pretty industry standard method.
After you find the leak, you can seal up your headlights and then let them dry out. Clear silicone can be used to go around the headlight housing where the lens itself and the actual housing connect. A thin bead of silicone will protect it from any air coming in if the leak is existent. Then reinstall your headlight housing and you should be good to go.
The Hair Dryer Method
The hair dryer method is another easy method to remove moisture from your housing. The only tool you need for this method is a basic hairdryer. To remove moisture using this method, you need a cardboard box, a hairdryer and some type of cardboard filter. I personally feel this method is a joke but some owners swear by it.
- Drop your headlight housing into a cardboard box (on one side)
- Cut an opening in the cardboard box (for the hair dryer on the other side)
- Stick the hair dryer tip into the opening with the whole unit on the outside of the box
- Place a flat piece of cardboard in between the headlight housing and the opening
- Let the hair dryer run for 5 minutes and watch it close so your box doesn’t catch on fire
Don’t believe me, watch this video.
The heat from the hair dryer will dry the moisture out of the housing.
#4 – Silica Gel Packets

The cheap, very effective, yet temporary fix to this problem.
One of the easiest solutions to fix moisture in your headlight housings is to use silica gel packets. Yes, the packets you see in food packages. If you’re not familiar with what they do, they absorb moisture.
So to do this, all you have to do is open your 4Runner dust caps so the housing is exposed. Place a couple packets inside.
Then seal up your dust caps. After sitting for a few days inside the housing with it fully enclosed, the moisture will absorb into the packets.
The last step is to remove your bulb cover again and remove the packets. If you moisture returns, then you will need to keep throwing Silica Gel Packets into your housing.
We have had both headlight housings in our 4Runners starting to obtain moisture, and this has absolutely worked as a temporary fix. The process is pretty simple and serves as a very quick fix to having moisture build up in your headlight housing.
#5 – Hi-beams and parking in the sun… seriously, people do this?
These have to be the worst methods I can think of when it comes to removing moisture from your headlight housing. For one, they really don’t fix the problem and second, they really don’t work.
High Beams: This method requires no bulb removal or anything advanced. Some people say that by simply turning on your high beams for a small period of time, this will heat the inside of the assembly enough to bake it out.
There are a few posts in a couple different forums about using your high beams to dry out the moisture, but this process is not going to solve any of your problems as a permanent fix.
Parking in the Sun: Parking in the sun will have the same effect if you don’t want to use your high beam lights. The sun will theoretically heat the housing hot enough inside to “bake” out any moisture. If the moisture returns (which it likely will) you will want to use other methods to dry your housing out.
Questions, Comments or Good Ideas? Comment Below!
hi everyone. was looking to pick some brains. I have a 2016 4runner trail. and am having a problem with my driver side foglight. it keeps getting moisture in it and partially filling. almost 3/8-1/2″ of water and I can’t figure out what’s up. replaced the seal on the bulb and greased it up. and it still fills with water. I’ve drained it multiple times and even took the light housing out to check for cracks and can’t find anything. and sorry I should’ve mentioned earlier. that they are led bulbs. if anyone has any ideas I would be grateful. thanks for the help.
I replaced the H-16 fog bulbs with aftermarket LEDs. These came from Alla lighting on Amazon. They fit well and had a good silicone seal. Shortly after installing the bulbs, they got moisture inside. Turns out the bulb itself was not sealed. The leak was where the metal connectors went through the plastic housing of the bulb. I used a hot glue gun to fix the moisture leak. Six months later one of the bulbs failed due to further poor engineering of the bulb. They looked ok on the outside and “worked”, but they were not well made
There is an easier way. Just run the hid wiring below the headlight hole that is already provided and make a custom grommet to seal up the hole with the wiring. I been condensation free since May since I installed my hids. No need to drill into the dust caps. That’s just a horrible idea. Link to the overview on hiding your HID wires.
Hey Craig, I love your solution conceptually. After reading the forum post, I’m still a little unclear on few things.
Thanks!
Craig, awesome thanks man!
I have dealt with this issue myself, and have found the necessary fix to be very simple. Drill out the caps as little as possible. My HID wiring grommets barely fit into the dust cap hole. I even have to de-pin the H11 adaptor when installing new lights, as the connector won’t fit through the hole.
No other fix is needed. New bulb seals, grease, silicone, etc won’t fix the problem. Drill the caps out correctly and be done with it. If this seal is not physically tight, without the aid of sealants, water WILL find its way into the housing.
Haven’t had to break out the ol’ Hair dryer in 6 months or so (fingers crossed)
Hey Kyle, any guidance you could provide on de-pinning would be great. I figured that would be the solution to allow a smaller hole, but not sure how to do it without breaking the plastic surround. Thanks!
Kyle, for sure. Did you go smaller than 7/8″? I stopped at 3/4″ and there was no way of getting the harness through. If 7/8″ fails, I will de-pin the connector, good call. Thanks.
Yes, I went smaller than 7/8″. I can’t remember the size though. I aimed to make the hole just as large as the middle section of the wiring grommet. I have to force the grommet into the hole little by little. De-pinning connectors is a pain, but having such a tight seal eliminated all of my moisture problems.
Drying out the headlight housing is SUCH a pain, it’s worth the extra work to avoid that again.
Did you use anything besides the hairdryer to dry it out? I have a new cap on order but have silica and use the hair dryer…moisture keeps coming back.
Ok, cool. We’ll see what happens at 7/8″. It seemed to be pretty damn tight.