
Amber Marker Lights with Pods on 5th Generation Toyota 4Runner
This is a modification that I have been considering for a couple months. There are many ways to accomplish the “Raptor” style grill lights look, some can be found here on Trail4R. Others have even done reviews on them. I happened to find these Alpena PositionPodz LED lights when I was wandering around my local AutoZone store.
I go there about once a week or so to buy one thing or another, whether it is car cleaning supplies or parts for one of our vehicles. Having an auto parts store on my way home from work is convenient, but it makes it hard to avoid impulse purchases like this.
The packaging and price got my attention, as I was able to try the lights and see that they were as bright as I wanted for this type of light (there is a battery pack in the package). The kit contained a lot of the hardware that I needed, and the store had the rest in the electrical aisle. The lights themselves were under $20.
Parts needed:
- Alpena PositionPodz
- Red and black wire
- Wire connectors
- Electrical tape
- Fuse Tap
- 10 amp fuses
- Fish tape
- Pliers/ Wire cutters/ strippers
- Alcohol wipes
- Loctite-blue
- Wire conduit- 3/8 inch
- Small flathead screwdriver
Getting Started

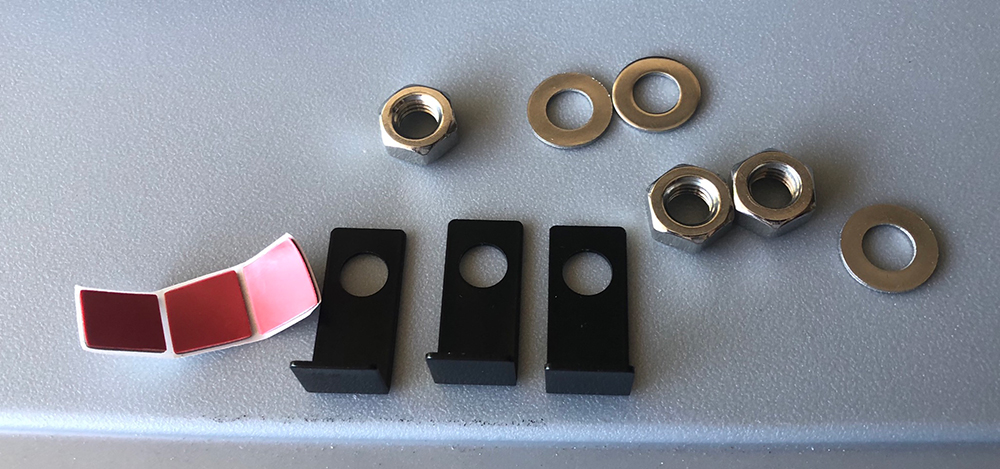
I opened the packaging to get an idea of what I needed to do, and started planning out the install. The kit came with three lights, but I only planned to use two. I still have the standard SR5 grill and one on each side seemed like plenty.
Wiring out of the package

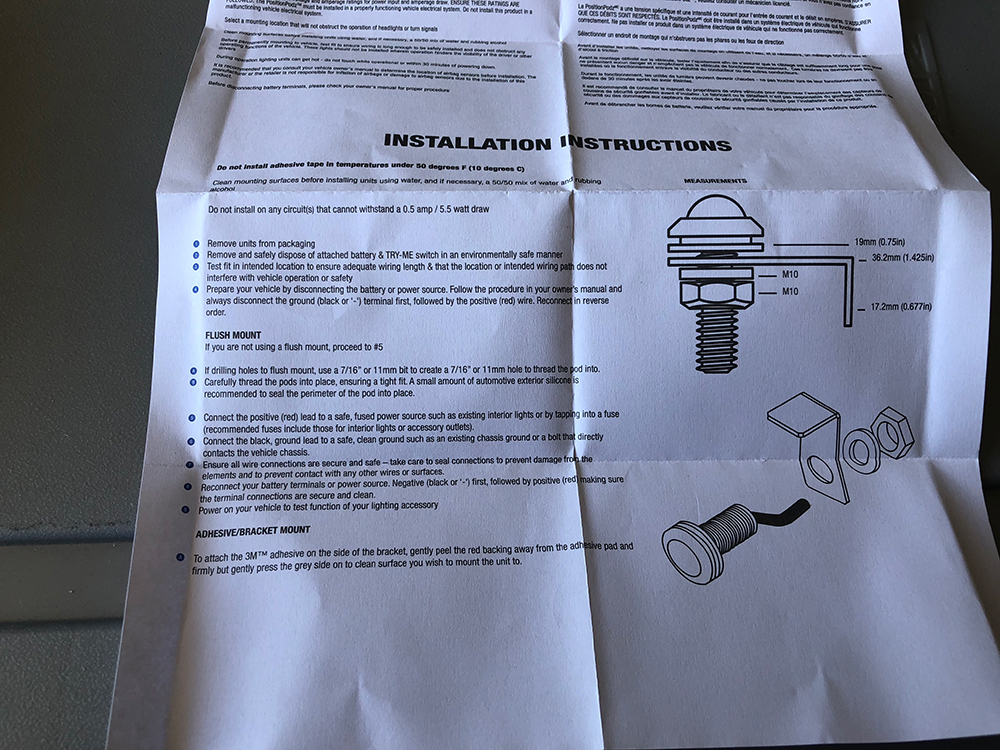
The wires were soldered to the battery pack. I cut the wires right below the solder joint and assembled lights and the brackets. The instruction that were included in the package showed an illustration, which helped me to make sure that
I put them together as intended. I threaded the wires through the bracket, washer, and the nut for each of the lights.
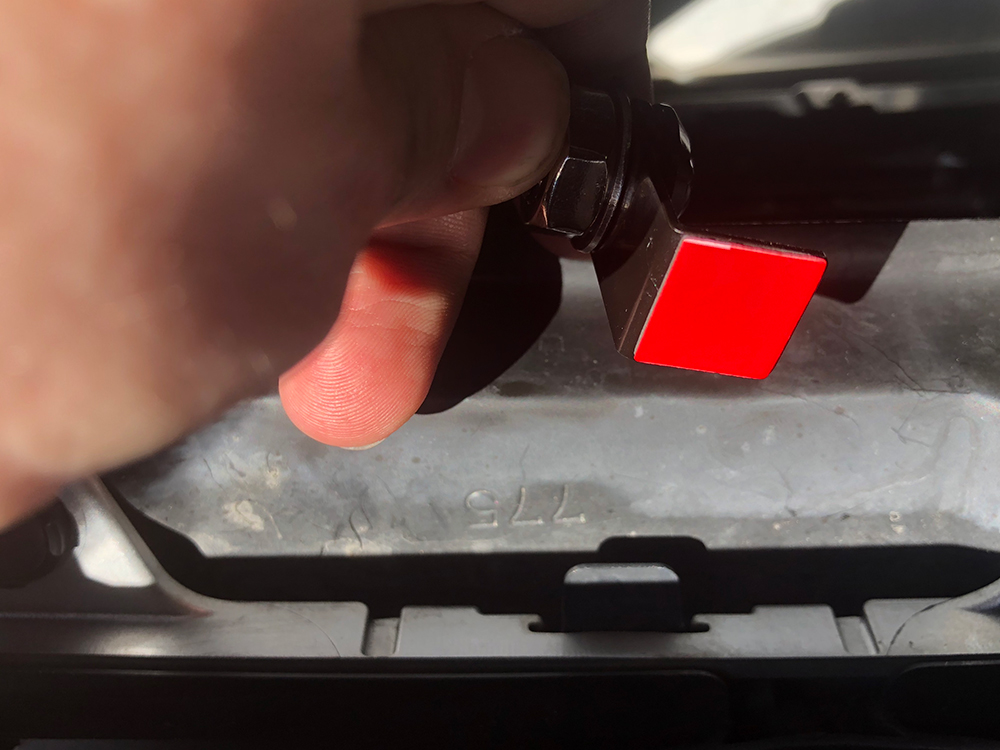
Loctite
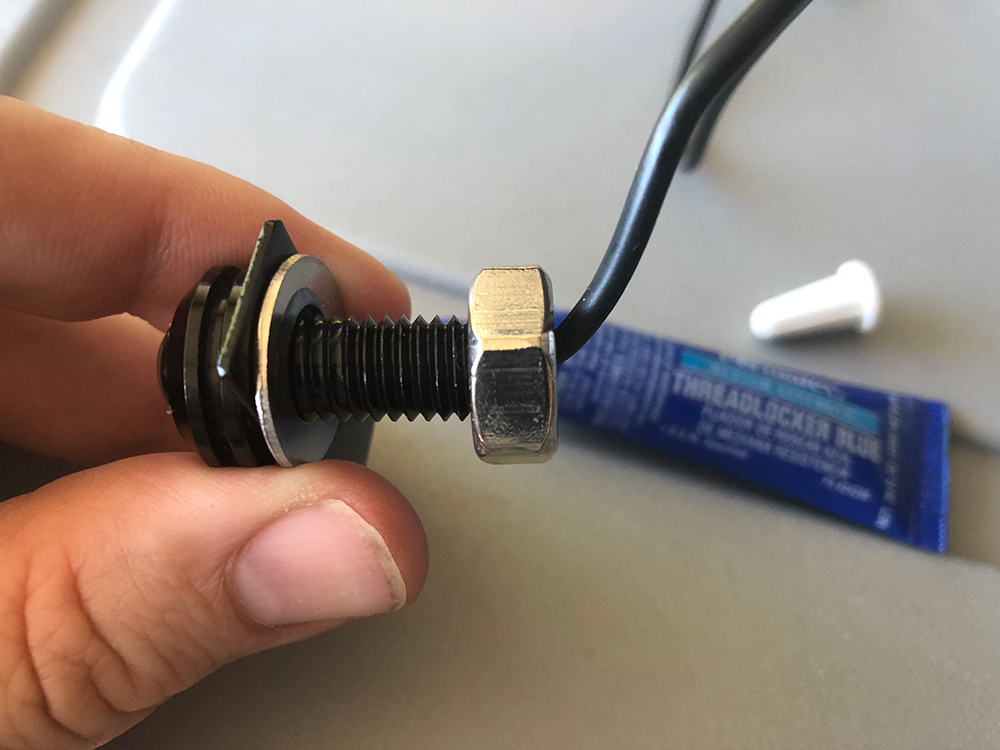
The only deviation from the instructions that I made was to apply some blue Loctite to the bolts. I did not feel confident in the supplied nuts ability to stay tight in the long run. I used the blue Loctite so that I can change or adjust the brackets down the road if I do make a change to the grill. There are four small square LEDs in each light, with a logo in the corner. It will not change the way the lights look when they are on, but I was sure to line up/ level the LED modules as I tightened them down.
Cover and Retainer Pins
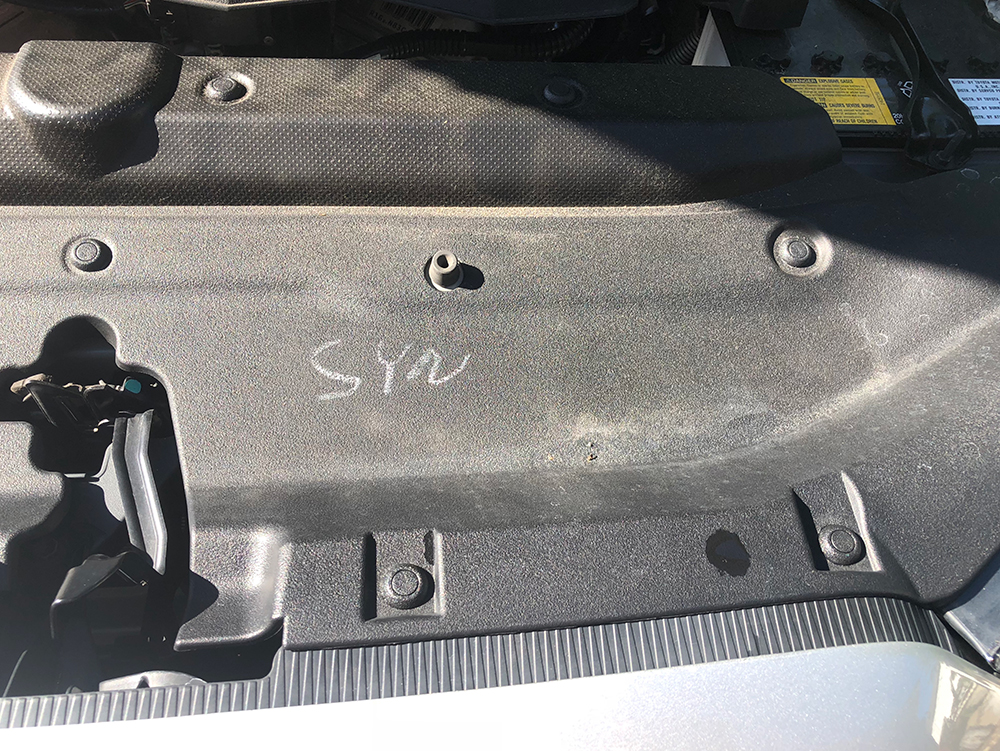
Next, I popped the hood and removed the plastic cover at the front of the engine compartment. The retainer pins are really easy to remove, simply push in on the center tab and then lift them right out. Work your way around the cover, being sure to remove all of them. Set the cover and the retainers to the side.
Test fitting the lights
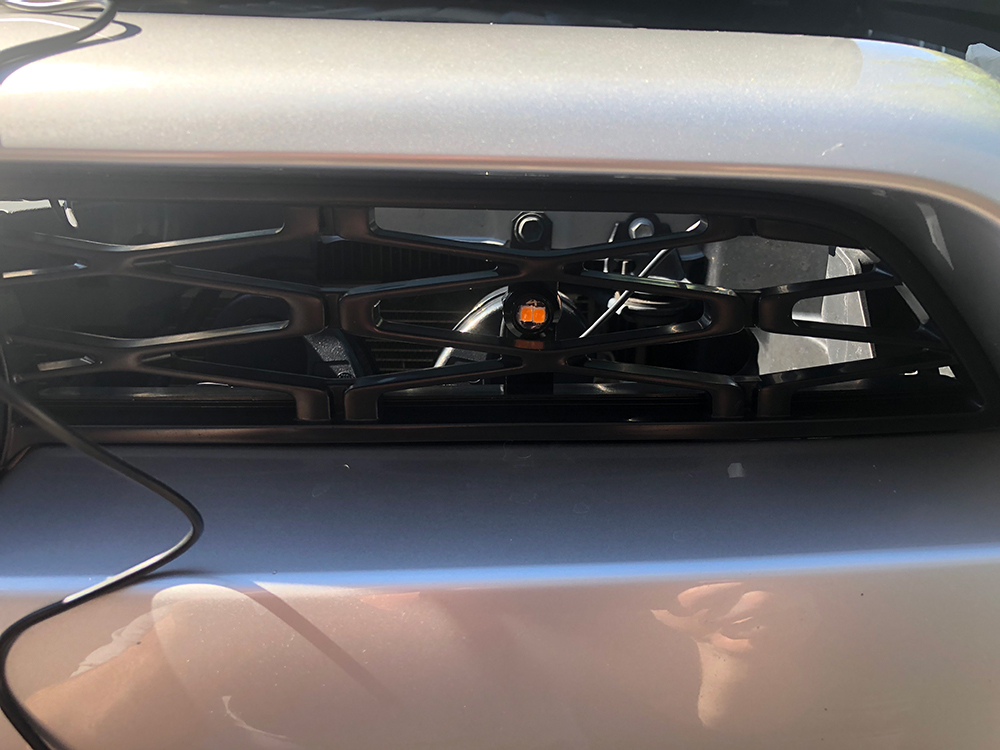
Now that I was able to access the back side of the grill, I test fit the lights. I removed the double sided 3M adhesive from the package, attaching it to the bottom side of the L brackets. I left the red backing on the other side, until I was ready for the final positioning and installation.
Through the Firewall
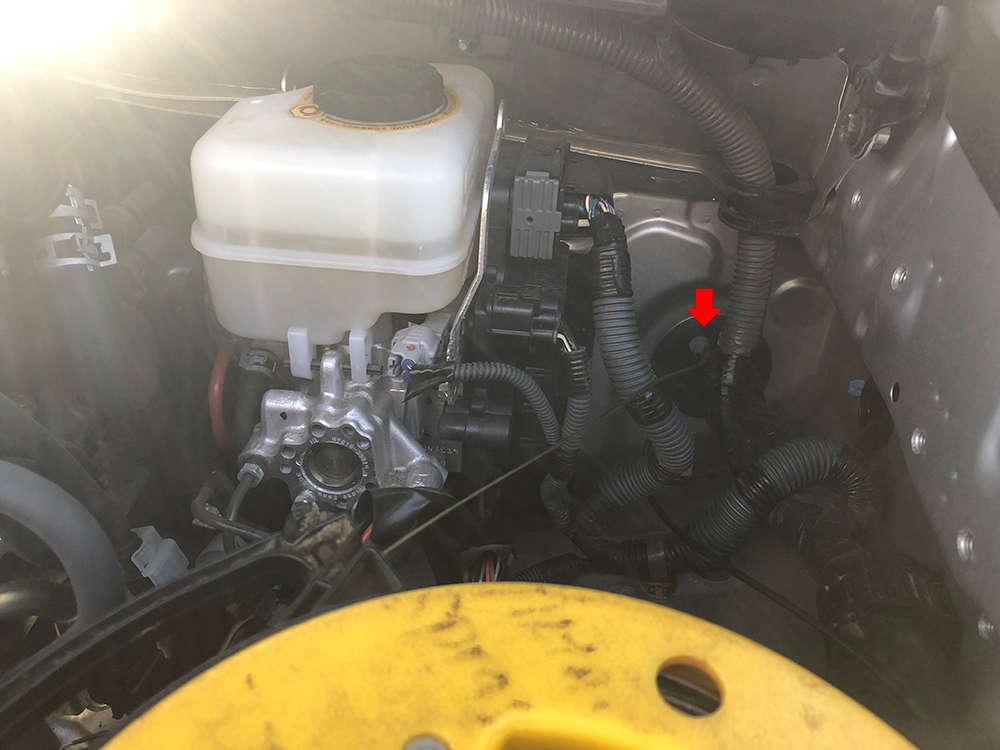
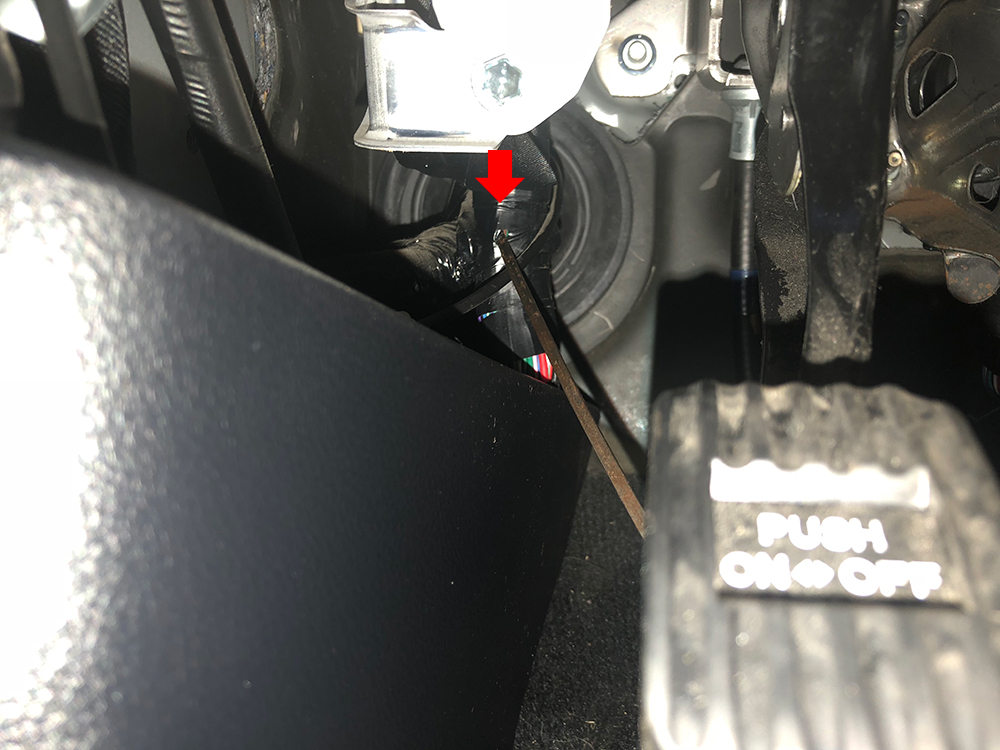
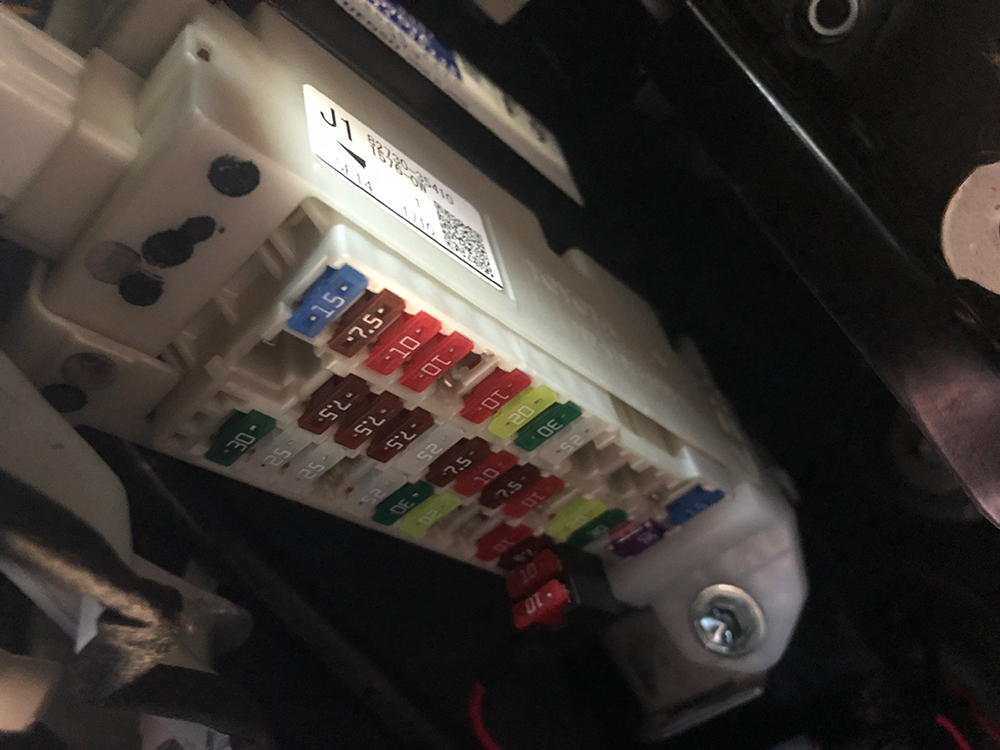
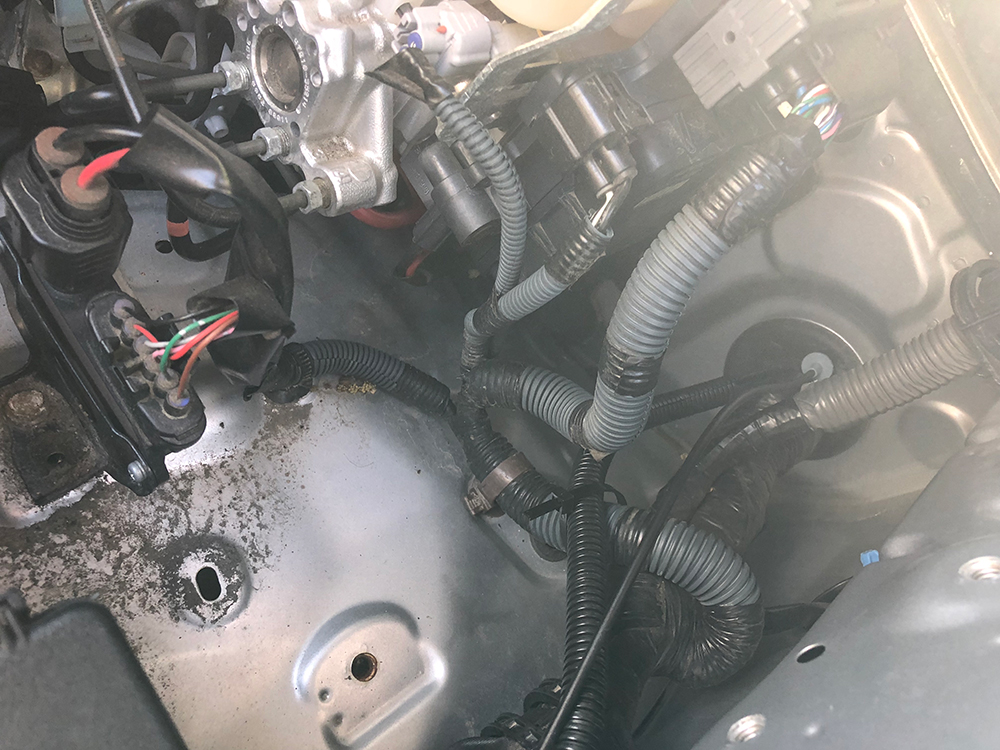
I knew that I wanted the tap into the fuse panel that is above the driver’s side kick panel. In order to get a red wire from the fuse panel, I ran a fish tape through the firewall, where the large wiring harness goes through. I did not hit any major resistance, or have any issues getting it through. I set the fish tape roll down, careful to avoid the metal tape making contact with the battery terminals, and went to the passenger area to attach the wire to the tape and pull it through.
I attached about 6 inches of wire to the fish tape and used electrical tape to secure the wire along the fish tape. There are a few of ways to make this work. If the run was a little longer, I would have attached it more securely. Moving back to the engine bay, I pulled to fish tape and wire back through the firewall. I detached the fish tape from the wire and started to plan where I wanted to wire to be located. I decided that I would run it around the edge of the fender, under the headlamps, and between the plastic trim and the grill.
This is a good time to disconnect your battery, if you have not already. Now that I had the power wire run, I needed my ground. The roll of wire that I had left over from another project had a red and black. I added a fork connector to the black wire and ran it next to the power wire. I connected one side of the black wire to the large ground next to the battery. I stripped back the wires from both the ground and power wires and attached female terminal connectors on the end closest to the lights.
Cleaning surface area

With this half of the wiring in place, I needed to mount the lights where they had been previously test fit. Any time that I use adhesive on a surface, I clean the area thoroughly. My 4Runner had been through the carwash that morning, but that is never enough to clean these areas. I have a bag of alcohol wipes in my tool box, just for this purpose. Once the area was clean, I removed the red side of the tape, carefully lifted up on the grill, and slid the L brackets under the upper portion of the grill. I pressed down on the grill to secure the tape.
Light wiring
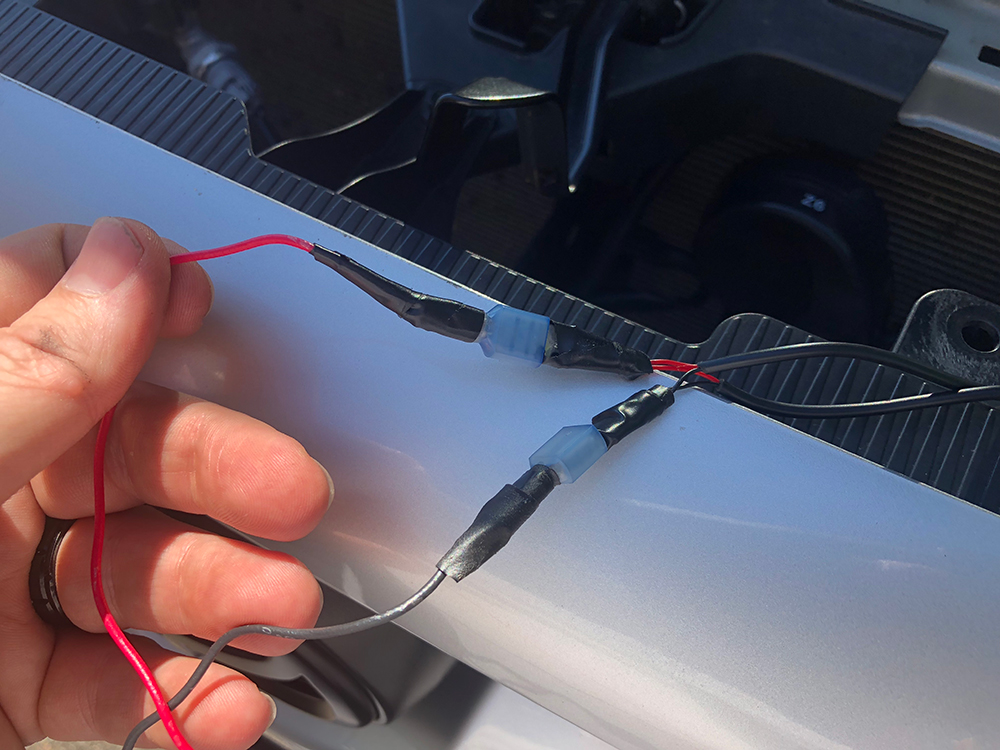
The wiring under the hood was ready to be connected. I ran the wire from both of the lights to the power and ground. I stripped back the insulation on the wires from the LEDs, and connected the two lights together. I stripped 1/2 inch of insulation from the black wire from each light and secured the two black wires with a single male connector, then did the same with the red wires.
This would allow me to have the quick disconnect capabilities that I was looking for, but also only have just one pair of connections to the power and the ground. I had considered soldering the wire connections for the power and ground wire, but I am not sure which direction I will go with my bumper and grille in the future. I may decide on the TRD pro grill, an aftermarket bumper, and fender.
Fuse Adapter and Fuse Panel
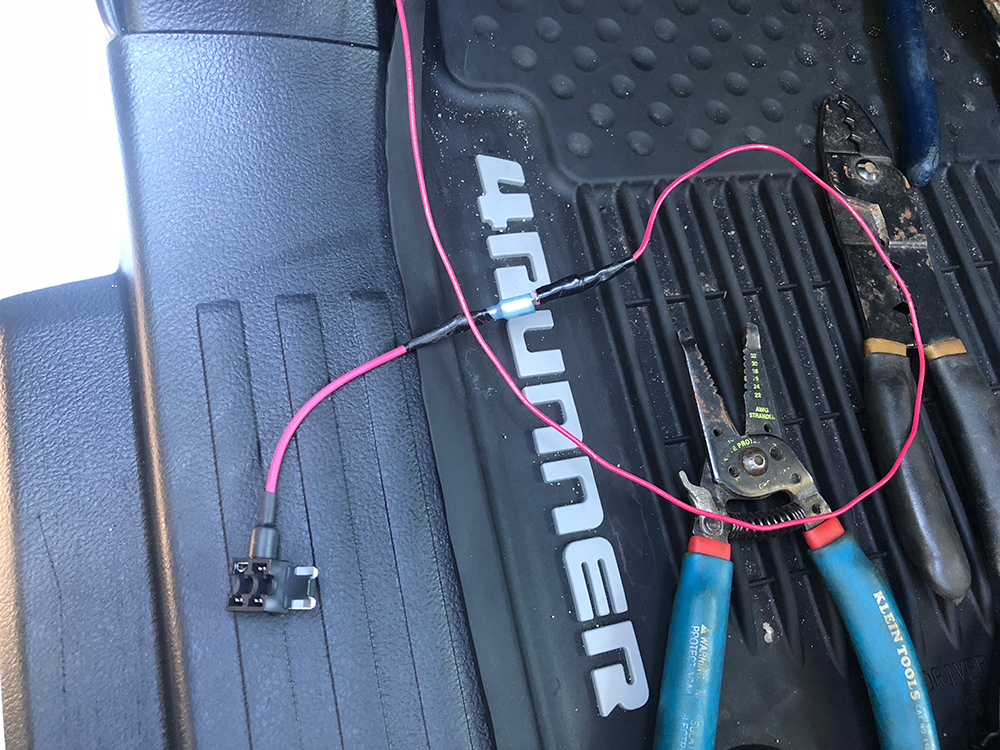
The fuse tap was one of the last pieces to tackle before I could function test the lights. The fuse tap came with a crimp style connector; I cut this off and went with a male/female connection like I used under the hood. The maximum amperage on the fuse tap was 10A, so I decided to tap into the tail lights. This would allow me to have the grill lights on when I turn on the other lights on, but not run them during the day. I reused the fuse that was in the slot and plugged in the fuse tap.
Wire Conduit and Zip Ties
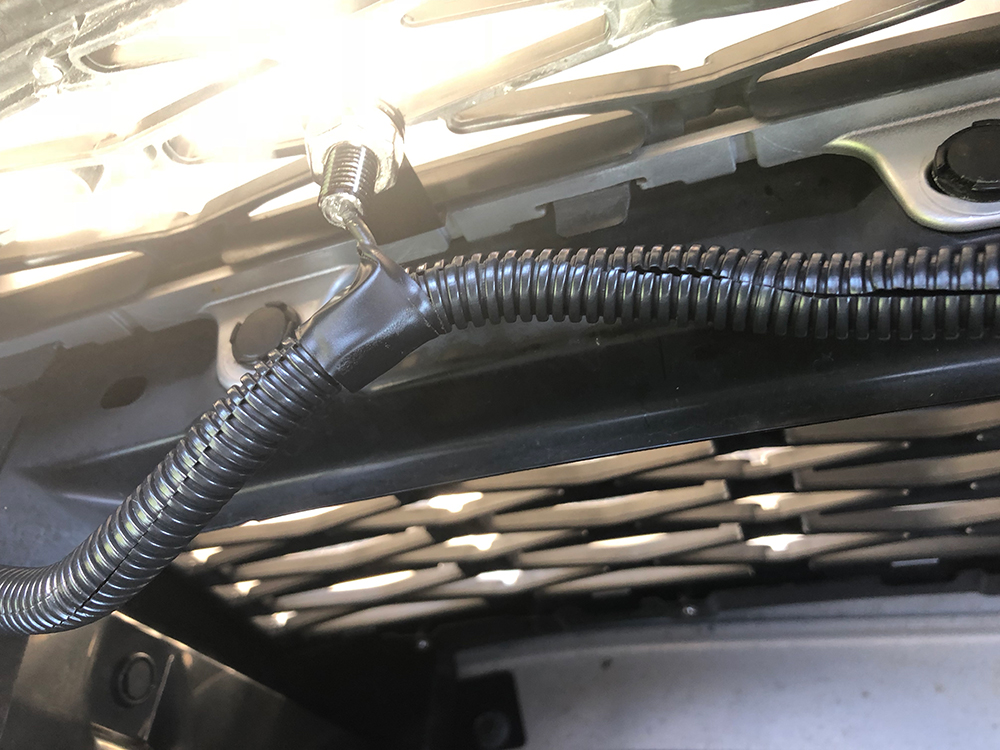
It was time to check the lights and make sure that everything works. I double checked all of the wire connections, reconnected the battery, and turned the ignition on. I turned on my headlights and walked to the front to see the new lights. Everything looked good, so I shut the 4Runner off and started the clean up process. I do not like the look of loose wires running through the engine bay, so I used some flexible wire conduit. I started the conduit on the red wire at the firewall and continued it to the ground connection, then pushing both wires into the conduit. I worked my way to the front of the vehicle, so that all of the wiring was concealed. I used on electrical tape at the back of each of the lights to keep the conduit from moving. I also used zip ties at few locations to keep the conduit from moving.
Amber Marker Light Pods – Final Result
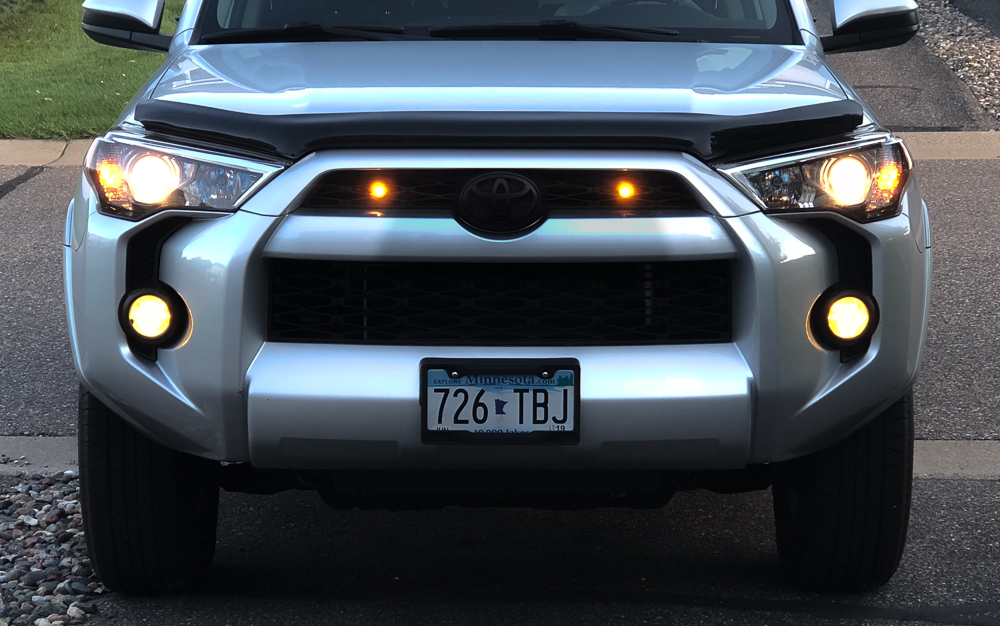
The last step is to replace the black plastic cover. All of the retainer clips have to be reset, so that they can secure the cover. I pushed them all in when they were removed, so they have to be pushed back out the other way. The three prongs on each one may need to be squeezed slightly in order to fit back in the holes. I then pushed them back to flush, locking the cover in place.
I have had the lights in for a week now. I used the touch free carwash after a trip to the cabin and have driven through the rain and some heavy winds. The adhesive tape has held up, which was my only concern in the installation process. If the adhesive fails in the future, I will likely upgrade the double-sided adhesive to something a little thicker and stronger. I may also consider drilling holes in the bottom of the L brackets and using small fastener for a more permanent solution. I will update the post if there are any issues, whether it is with the adhesive or the lights.
Looks good, I have thought about adding pods to my grill & tie into my LED fogs with a split adapter. My guess is the 15amp fuse would handle this, considering that LED replacements are lighter on the amp draw. What are your thoughts on this other than only having lite pods only when the fogs are on???