
It goes without saying a roof rack is a valuable and versatile accessory for many 4×4 vehicles. It’s a well-thought-out modification for lightweight, bulky items that are difficult to fit in the cab of the vehicle. On top of that they have the capability to adapt to your needs when it comes to mounting recovery equipment, rooftop tent, lighting, etc. – just to name a few.
Two of the most common types of roof racks are the modular aluminum extrusion bar type and the basket style. The Cali raised LED offers 2 options when it comes to modular aluminum roof racks. The Premium versions and the Economy version.
I’ll be installing and reviewing the premium roof rack in this article which has some unique design characteristics and competes well with the rest of the competition.
Basic Features
- Load Rating: 600 lbs. Static + 300 lbs. Dynamic
- Rack Dimensions: Length – 94.3″, Width – 48.5″, Height – 3.5″
- Weight: 55 lbs.
They also offer an economy version!
- Economy Rack: Check Price
Table Of Contents
Features
Let’s run through some of the highlights. Being a premium choice, you get some really neat features. Some of which are unique to Cali Raised LED. These guys are a one stop shop, so you can get everything you need to get your truck outfitted right, all in one place. From light bars to mounts and accessories.
Adjustable LED Wind Deflector (ALWD) – Open

Adjustable LED Wind Deflector (ALWD) – Closed

As opposed to the fixed wind deflector that most of the competition offers, Cali Raised has stepped it up and made an adjustable wind deflector that can be used to cover the LED light bar to protect it from debris or other environmental substances such as rain, snow, etc.
This feature also comes in very handy for those of you living in places with strict traffic laws/rules as this enables you to completely hide the rack mounted light bar and thus keeping you safe and secure from hefty traffic citations/tickets.
This design feature lets you raise and lower the wind deflector thereby cutting any wind noise which is typically caused by the front led light bar. A major feature for those concerned with noise, MPGs, and overall aesthetics.
270-Degree LED Lighting Kit/Cutouts

This roof rack comes with pre-cut holes for light pods rated at 20W on both sides, making it really easy to equip with light pods from Cali Raised LED or of your choice for all the late-night shenanigans, camping trips, or any late-night maintenance.

This is a nice feature for people who are into night trail runs or hunting a camp spot after dusk.
Fitment & Wind Noise

If you take a closer look at this roof rack, you will notice there is very small gap between the roof rack and the roof from all directions, and the roof rack hugs the roof perfectly. The wind fairing sits flush with the roof, the side rails contour well with the roof and the rear is completely boxed as well. Not only does this prevent air from getting into the rack from all directions but also reduces vibrations or rattling.

I drove the 4runner with the roof rack at highway speeds (110 kmh, ~70mph) and can confirm it was dead quiet. I didn’t notice any additional hum or wind noise whatsoever.
Additional Features
Drill Free & Bolt-On
This is a completely drill-free roof rack and is designed to bolt on 100% to OEM mounting holes.
Sunroof Functionality
Yes, the sunroof is completely functional. The way this roof rack is designed, no adjustments are required.
Made In The USA
The rack is made in the USA at the Cali Raised facility in Texas. So, you can rest assured that this is a quality product. The roof rack is primarily made of various aluminum alloys, from 6061 T6 Aircraft grade aluminum for all the structural components to 5052 Aluminum for the wind deflector. The mounting feet and pivots for the adjustable wind deflector are made from 3/16 and 1/8 steel to provide extra strength for holding heavier weight loads.
Cross Bars/Rails

The roof rack kits come with 9 extruded aluminum pieces; all pieces come powder coated in black. These cross rails are lightweight and strong at the same time. Single cross rail is rated for a 200lb load capacity for the combined 9 pieces, more than enough for any of your needs.
Each cross rail has 2 T-slot channels on the top and bottom and 1 T-slot channel on each side giving you enough options to mount accessories in the orientation of your choice. This also eliminates the need to drill into anything
Other Details
LED Options
Cali Raised also offers options for LED light bars and Light pods (20W) for this roof rack. You can choose from the following.
- 43″ DUAL-FUNCTION LED LIGHT BAR
- 42″ WHITE DUAL ROW SPOT BEAM LED LIGHT
- 42″ WHITE DUAL ROW COMBO BEAM LED LIGHT BAR
When a light bar is purchased, the wiring harness and mounting brackets are included in the light bar.
Pairing this roof rack with the lighting options from Cali Raised makes a no-brainer when it comes to value for money. This is the only roof rack on the market that supports dual-row LED bar as well.
Lead Times
Cali Raised LED comes in super clutch (especially if you are in the Texas area) and offers same-day pick up from their facility depending upon the stock and with lead times (0-1 week) they are much better than other brands like Gobi which have ridiculous lead times like 8-12 weeks.
Free Shipping
What’s not to like about free shipping?! Cali Raised LED offers free shipping on their roof racks in the USA for all lower 48 states.
Installation
The installation is very straightforward, and I would recommend an extra set of hands to fasten the process. Cali Raised LED also has a YouTube video for the installation process which is helpful.
Required Tools
- Wrench – 9/16″
- Allen keys
- Screwdriver
- Trim removal prying tool
- 13mm socket
- Cutting tools
- Silicone
- Rags
Step 1. Remove Factory Rail Caps

There are 2 end caps on each side, and they are held by 2 locking clips each. With the trim removal tool or a flathead screwdriver beneath the end caps (as shown) gently wiggle the end caps until you feel the lacking tabs break loose. Once they are loose, simply remove the caps and repeat the same process on the remaining end caps.
Step 2. Remove Factory Bolts & Rails

There are 8 bolts in total that needs to be unscrewed. Use a 13mm socket and wrench to unscrew them.
One tip will be to remove the bolts under each end cap simultaneously to prevent the bracket underneath from falling inside the roof. Take your time and repeat this for all bolts.
After removing all the bolts, the factory rails should come right off without any force.
Step 3. Prep Roof

Depending upon your usage and conditions there can be a dust build-up under the location where end caps are removed from. Clean all the dust or gunk and make sure that no water gets into the holes to avoid any leaks.
Step 4. Prepare Rack & Hardware
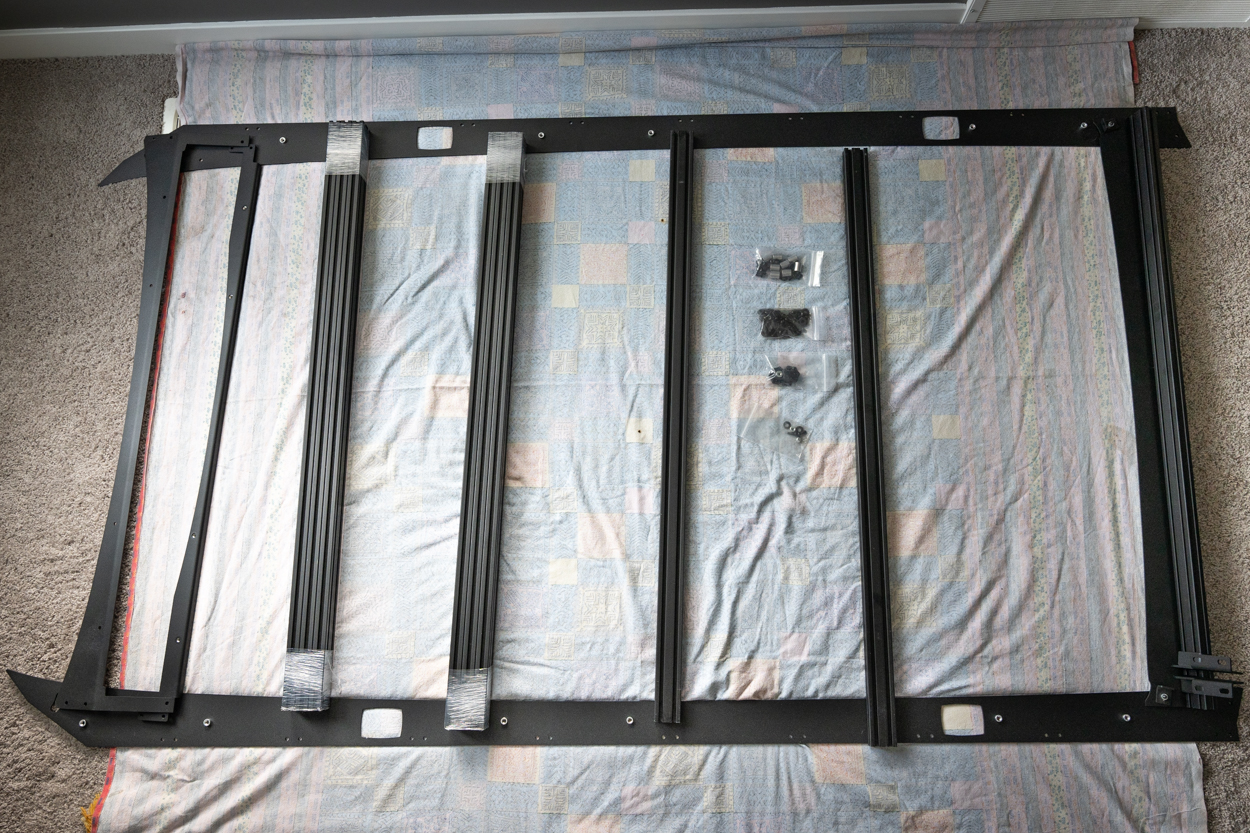
Get everything out of the box and lay everything in your working area to make sure nothing is missing and make the parts easier to find while installing.
Step 5. Assemble Front Deflector/Fairing

Above you can see the assembled deflector. Assembly instructions are found below.

- Get the 2 front mounting brackets and place them apart. Grab the adjustable LED wind deflector and put the short aluminum spacers on the studs. Next, place the stud in the slotted hole in the mounting brackets for both sides.
- Use the 3/8″ bolts, washers, and nuts and install them. Place the valence support as shown and do the same for the front valance.
- With parts sitting in place, install the 1/4″ x 5/8” long bolt with washer from the valence support and front valance into the mount on both sides first and then the center.
- Now take the 1/4″ x 3/4” long bolt with the washer and install them.
- Tighten the 3/8″ bolts and nuts for the adjustable light cover snugly, Make sure not to overtighten this. It should not fall freely or flop under its own weight and should have some resistance.
- Lastly, install the 4 rubber bumpers in the 1/4” holes as shown on the mounting brackets and install the trim piece.
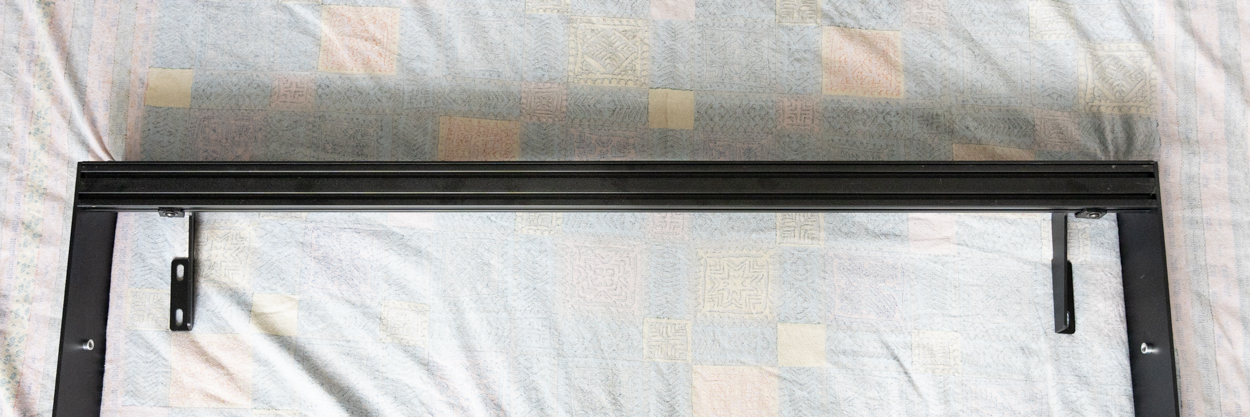
Step 6. Assemble Rear Valence/Fairing

Assembled rear valence seen above. Assembly instructions below.

- Lay the rear mounts, one extrusion, rear valance, L-brackets, and hardware.
- Put the 4 T-nuts on the back side and 2 on the front side of the extrusion as shown. Adjust the T-nuts and attach the rear valance to the extrusion as shown via 1/4″ x 1/2” long bolts and washer making sure it is bent upwards.
- Attach the L-brackets to valance using the 1/4″ x 5/8” long bolt and washers on both sides.
- Next, attach the mounting brackets using the 1/4″ x 1/2” long bolt and washers using the T-nut into the extrusion.
Step 7. Finishing Assembly

- Lay the 2 side pieces, extrusions, and hardware (1/4″ x 5/8” long bolts and washers)
- Note that the silver threaded slots are towards the inside.
- Take the bolt and washer and thread them into the extrusion bar loosely (2 on each side). Repeat the process for other extrusion pieces.
- Next, grab the assembled rear valance and attach it to the side panels as shown.

- Tight the top 4 bolts that are attached to the rear valance and rear extrusion.
- Install the 1/4″ x 3/4” long bolt through the side panel into the L-bracket.
- For extrusion #3 from the front of the rack.
- Insert 2 T-nuts into the bottom channel of the extrusion towards the rear of the rack.
- Put 2 T-nuts in the side front channel and 2 in the bottom front channel for light pod bracket installation and put in the extrusion in the rack.
- For extrusion #3 from the rear of the rack
- Put 2 T-nuts in the side front channel and 2 in the bottom front channel for light pod bracket installation and put in the extrusion in the rack.


- Install the second from the first and the second from the last extrusion in place.
- Install the LED mounting brackets in the first extrusion as shown if you ordered an LED light from Cali Raised LED.
- Now, install the front valance to the side rails as shown.
- Flip the rack upside down and get ready to install the middle mounting legs to the roof rack.
- Using the T-nuts, secure the mounting legs to the extrusion via 1/4″ x 1/2” long bolts and washer loosely as shown.
- Next, install the brackets for side LED pods as shown using 1/4” x 1/2″ long bolts and a washer.
- Install the LED using LED light hardware (M6 bolts and washers) to the first extrusion and adjust it accordingly.

Step 8. Mounting To 4Runner

- Take the metal studs that came with the hardware and place them on the factory mounting holes (you can use silicon between the metal stud and roof for proper weather sealing if required). Repeat the same for all 4 mounting positions on the roof.
- With the help of a friend, place the assembled roof rack on top of the 4runner carefully, you can align the metal studs to the mounting feet if needed.
- Use the factory bolts to fasten (hand tighten) the roof rack to the roof, you can adjust the rack from left to right or front to bottom if needed.
- Center the roof rack from the front by visually inspecting it. Do the same for the rear (the factory antenna should be in the center of the rack when centered from the rear).
- The last adjustment is the front and back. Make sure you get a good seal in the front where the front panel contours around the roof line. It should almost touch the roof line all the way around.
- Next, torque down the 8 factory bolts.
- The last step will be to tighten all the bolts for the mounting feet, 4 on each side.
- This completes the installation of the roof rack, and it is ready for action!
Final Thoughts

This roof rack packs quite a punch. Aesthetically it looks sharp, follows the body lines perfectly, is well-built, and is modular – what more can you ask for?
Comes with 9 cross rails pushing the load capacity to over 1000lbs. Mounting options are endless thanks to the T-slot channels on each side. Cali Raised LED also confirmed that they are working on releasing the billet handles, ringlet mounts, billet tie-down hooks, RTT mounts, folding antenna mounts, and many more accessories for this roof rack, which will be released soon.
Functionality-wise, it comes with 270-degree light cutouts to see your surroundings better, and don’t forget the adjustable wind fairing. Not only it protects your light bar from environmental factors but also from petty thieves by covering it completely.
The product is well-built, and you can’t go wrong with it. Definitely consider Cali Raised LED roof rack if you’re in the market for one.
Would anyone happen to have any information regarding the side pod light wiring? Most reviews only capture the roof rack assembly and install but nothing regarding wiring.
The side light pods have 2-pin Deutsch mail connectors. I’m connecting each side to 2-to-1 Y-cables so that I can control the left and right set of lights using an AuxBeam switch panel.
thank you for brilliant review – btw just bought same one yesterday 🙂
I have this rack and its really awesome. Assembly and install was straightforward as shown here. When the light bar shield is down and you get above 45mph there is some wind noise but when the shield is up it’s stock quiet.
I was sure it would have some wind noise, but the design of the fairing and the rubberized lower contact point of the fairing make it exceptionally quiet. I’m really happy with this rack and how solid and functional it is.
I’ve had this rack since 2020, when it came out. My only beef with it is that the cross bars do not have an opening on the T-channels like other brands. For this reason, whenever you want to mess with mounting something, you must remove the screws on the side to add the nuts. Yes, you can purchase the roll-in T-Nuts, but they do not work in most applications. I recommend using Loctite when installing any CNC rack since the vibrations make the screws loose with time. It’s a good rack, but it still can use some improvements.
Arsh, thanks for posting this review. Excellent info. Cali Raised is the best one yet!
Happy to help and yes, the rack is great!