
“The Brite Box” is a very fitting name for this awesome product that lights up the road in front of you. Installing this on your vehicle will allow all the lights (low beam, high beam, and fogs) to turn on when you flip on the high beams. This is something that I always wished vehicles came with, but I assume there are some DOT regulations against it. The high beams on our 4Runner are used to get the brightest light output possible for better visibility down the road. With The Brite Box, you combine this light output with the Low Beams and Fog lights!
For this install, I chose to add the “Anytime” feature. This allows you to turn your fog lights on without the need to have your lights on. You can choose this option or the “Fogster” option if this isn’t something you want or need. The install is much easier if you choose this Fogster option. Nate, another writer here for Trail4Runner.com, covered a Brite Box Review on TrailTacoma.com as well.
Find it online:
- The Brite Box Anytime with OEM switch: Check price
- Coupon Code: 20% OFF – T4RHOLIDAY (expires 12/3/21)
- Coupon Code: 10% OFF – T4R10 (all our products listed on the site)
Tools and Materials:
- 10 mm socket
- Socket wrench or drill
- Small flathead screwdriver
- Wire coat hanger
- Duct tape
- Trim kit – helps avoid scratching and breaking things – Check price
- Wire crimping tool – Check price
- Add-a-circuit – Check price
- Heat shrink tubing (check your local parts store if you don’t want to buy the full kit) – Check price
Table Of Contents
Installation
Step 1. Remove Bumper Cover Bolts

Using a 10 mm socket and wrench or drill, remove the three bolts. This kit only requires installation on the driver’s side. You will not need to repeat this step on the passenger side.
Step 2. Release Bumper Cover

On the driver’s side, gently pry the top clip over the bolt hole and pull the bumper from the lower two clips. Using the flat trim tool here helps. Once you have these out, pull the bumper towards you. The cover is snapped in place and takes a little force. You will hear a few popping noises; this is not plastic breaking.
Step 3. Unclip Fog Light Connector
For this step, you will need to reach your hand between the bumper cover and the wheel well liner. There is a black clip on the fog light connector that you will need to press and then pull down.
Connect the Brite Box to the fog light connection.
Next, you will connect the module to the fog light connection. If you haven’t already, pop the hood and run the fog light wiring from the Brite Box down behind the driver-side headlight. You will want to keep the Brite Box module (black box) up top for mounting, along with the positive and negative wires (black and red). Once you have the wires down near the fog light, connect the current connection to the Brite Box connector and then the wire labeled “Fog Light” to the actual fog light.
Step 4. Mount Brite Box Module

Using the provided zip tie, mount the box to the wire loom (this seemed to be the best place I could find). The instructions detail how you should ensure the wires are running down in the event of any water getting inside the box.
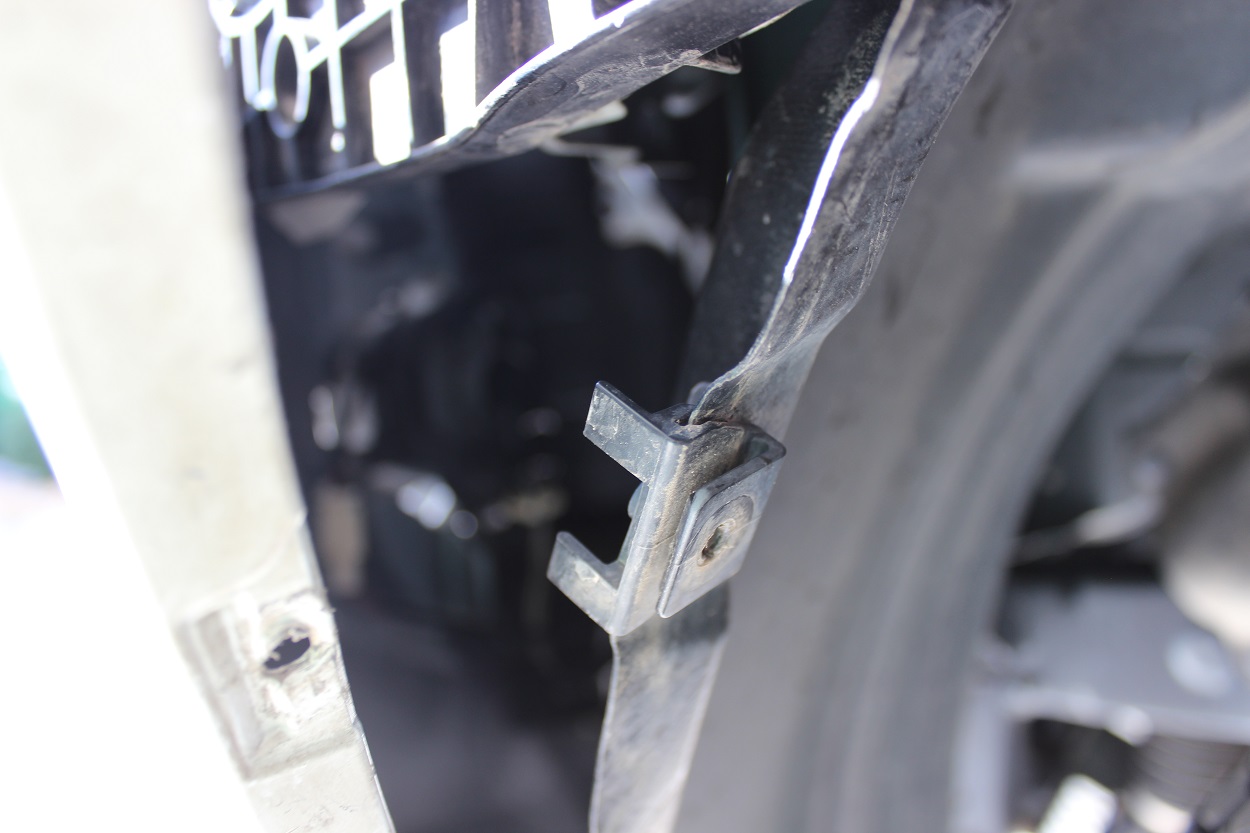
Step 5. Run the Ground Wire

Using a 10 mm socket and wrench or drill, remove the ground bolt and attach the ground wire.
NOTE: If you chose the “Fogster” option, at this point you have completed the install and can test functionality.
Step 6. Modify the Positive Wire


The step of running an add-a-circuit is optional but highly recommended. The provided instructions with the “anytime” fog light feature will have a switch that you can toggle the fog lights on and off. The problem with using the provided instructions and not following this step is that you run the risk of leaving your fog lights on and coming back to a dead battery, since this is directly wired to the battery.
Using the wire crimping tool, snip the wire to remove the black add-a-fuse that came with the Brite Box.
Place the black heat shrink over the circuit wiring
Strip the positive wire and connect it to the add-a-circuit, and using the wire stripping tool, crimp the butt splice.
Using a heat gun or lighter, heat the heat shrink, which will shrink to ensure a watertight seal.
Step 7. Connect the Add-A-Circuit

Open the engine fuse box. On the back of the box, locate the fuse labeled “INJ”. Using the white fuse puller in the fuse box, remove the 10-amp fuse. Add this fuse to the add-a-circuit, along with the extra 10 amp fuse that came with your add-a-circuit, and install it back into the “INJ” open slot. Run the wire out the back of the fuse box and add the cover back.
NOTE: At this point, if the vehicle is turned on, the wires are live. Avoid starting the vehicle until all wires are connected and ready for testing. You can leave the add-a-circuit disconnected or fuses removed and reattach when ready to test.
Step 8. Remove the Wires From the Switch Connection

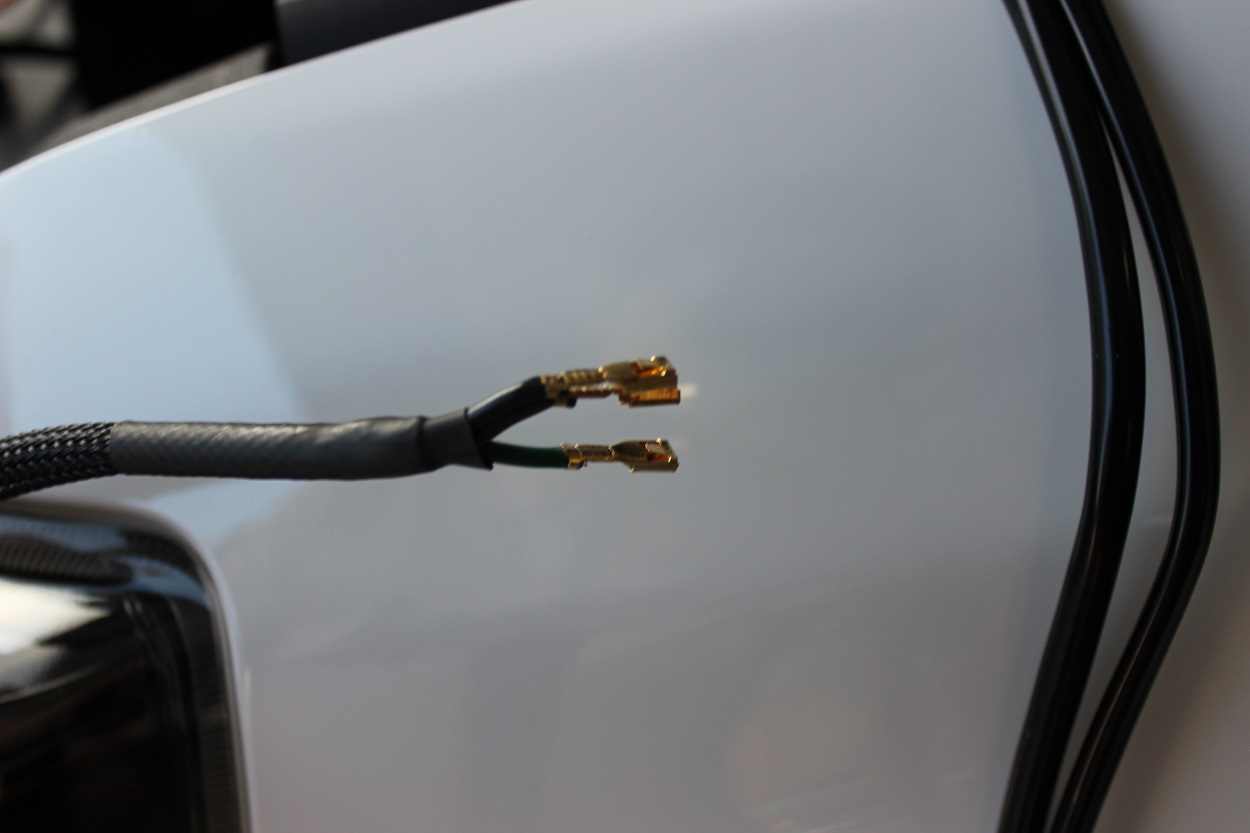
Insert a small flathead screwdriver into the open end of the switch connector. Press down on the metal connection and pull the wire out from the back. Repeat this step on the other two wires.
Step 9. Prepare Wires to Run Through the Firewall

To run the wires through the firewall, you will need something to help poke it through. There are probably some better options, but a coat hanger seemed to work well for me. Take the wire coat hanger and cut the bottom end so you only have a straight piece. Tape the wires to it using duct tape.
Step 10. Run Wires Through the Firewall

First, remove the rubber grommet that provides access to the interior cabin. You will need to cut a small hole in this grommet and run the wires through it. After this is completed, run the wires and the coat hanger through the hole in the engine bay. Using a little force, you will need to pierce through the firewall with the coat hanger. Push it through enough so you can grab it from the interior.
Step 11. Pull Wires Through the Firewall

From the interior, you will need to locate the coat hanger and wires. These will be near the brake pedal mounting bar. Pull these wires through and remove the tape and coat hanger. Be sure to reattach the rubber grommet in the engine bay.
Step 12. Reassemble the Wires to the Connector


Next, connect the wires back to the connector you disassembled to get the wires through the firewall. With the connector clip on the right side, the colors should be Top = Green, Middle = Brown, Bottom = Black. Once all the wires are back in place, attach the connector to the switch four-wire connector.
Step 13. Open Switch Panel


To wire the switch, you will need to open up the switch panel. Grab the right side of the plastic panel and pull it out and down. This will open the backside and allow for easy removal of the switch blank, and allow you to run the wires through.
Remove the blank switch.
There are two push tabs on the top and bottom of the blank switch. Push those down and then out towards you, which will pop the blank switch out.
Step 14. Run the Switch Wiring

Run the wires up from the bottom and through the switch panel opening.
Step 15. Connect the Switch and Test Functionality
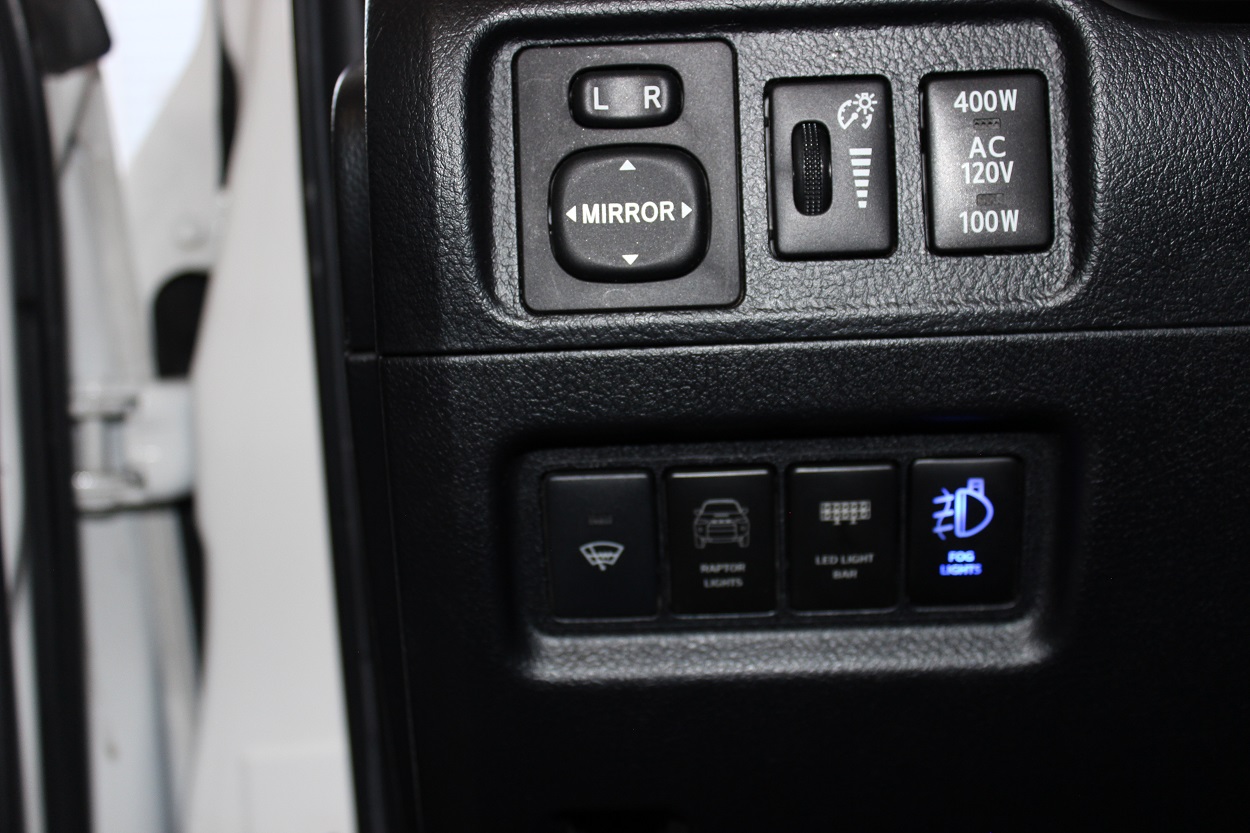
Attach the wiring connector to the switch. Turn on the 4Runner and depress the switch to test. The switch should light up along with the fog lights.
NOTE: If you disconnected the add-a-circuit or fuses on Step 9, you will need to reconnect them here.
Clean up all the wiring in the cabin and engine bay. Make sure to check that all your wiring in the cabin does not interfere with your emergency brake or brake pedal.
Final Thoughts


There’s already a write up for this and all you need is a relay, wire and butt splices.
Any differences for ’22?
Thanks
Are there other fuse locations besides “INJ” that will work properly? The 2020+models have a new fuse box and you cannot use an add a fuse in that location without modifying the cover. I’m relatively new to wiring so any input would help.
Was wondering the same thing. Why not hook it up to the FOG LIGHT fuse?? Maybe there’s a reason?? 🤷🏻♂️
I have morimoto elite foglights with amber backlight. If I do this mod even if the fog lights aren’t on will the amber backlight be on at all times? Right now when the headlights are on and my foglights are off the amber backlight is on. I’m just trying to get the drl and the amber backlight to be on at the same time. Thank you.
I meant diodedynamics elite***
Has anyone had issues with the Brite Box unit not working correctly? I completed the install today and it causes only the passenger side fog light to illuminate. Drivers side is always off. I switched the harness around incase polarity was the cause, but no luck. Reverted to the factory harness and all works normally, so the fog light itself is not the issue. I contacted the manufacturer, awaiting a response. 2020 TRD Offroad, Diode Dynamics SS3 Pro fogs.
Turned out to be a defective unit. They sent out a new unit quickly, and it works as it should now. Great customer service. They went above and beyond. Highly recommended if you want this functionality without going the Switch Pro route.
I was looking for something like this to use all lights at once. Finally, I found BriteBox , a simple install and i am pleased. I tried both models and finally permanently installed BriteBox AnyTime.
You don’t need to be an expert , any person with a little bit of knowledge of tools can install,. Honestly, the first time I have tried any kit like this. Also, I made a video about this. Please check it out .
https://www.youtube.com/watch?v=pUwK-mR03no
https://www.youtube.com/watch?v=98Gc2dB4Hlg&t=4s
Your install video was very helpful before I tackled the install myself. Thank you!
I ordered a Britebox over the Black Friday weekend and after two weeks it still has not shipped. They seem overwhelmed when I’ve made contact and always promise it is “shipping tomorrow”. I get that they are are a small business and happy for them that business is good. However, always be honest with your customers and if you are backlogged on orders be up front about it. I hope the product will be worth the wait when (or if) it ever arrives.
same with me , after one month the agent made a shipment label and email me but up to one week noting show up on USPS tracking , Good i paid via Paypal , when i opened case to get my money back via PayPal then they shopped it , i got few days ago and installed ( Fogster) issue popup that driver side DRL is not turning on .
after research i found its possible with only small hack via Company Relay pin ,connect via ignition and use switch between that connection , seems like waste of money .
i made a video and will post on youtube soon .