
LED lights and lightbars are an essential part of offroading and when out exploring. Even when off, they drastically change the profile and add an aggressive look to your rig. Boslla recently reached out to Trail4R.com and asked for a review of both their LED light package and LED light bars. I was fortunate enough to get both sets. Boslla also makes a no-drill bracket clamp holder, but unfortunately, it was not included in our package. When I realized this, I quickly purchased a pair of Victory 4×4 ditch light brackets, which you will see in the pictures below. I’ll review those separately and add a link at some point down the road.
Below, I’ll run through a quick overview. I continue to be very impressed with everything, and it has definitely enhanced the look of my rig. Everything came in a single durable cardboard box. The cables are all high quality, and the wiring harnesses are well-designed with all the right-sized terminals and connectors. The lights themselves look heavy-duty, all while remaining relatively lightweight.
Even though I have these installed and shown as ditch lights, I will eventually move them to a lower bumper area (when I get a new bumper), as they are a bit overkill for ditch lights. I just wanted to get them installed quickly to show you guys the light output and really just for myself to get a quick understanding of what they are all about. For a more realistic mounting option, I plan on dual 10″ light bars in the bumper behind the grille, on a low-profile grille, or on top of a roof rack. I would imagine 4 of these 10″ light bars on top of a Gobi or Prinsu would be pretty cool.
Regardless, there are a few other options for mounting a 10″ light bar on your rig, but ditch lights are easy to take on and off, so that’s why you see it mounted as such. And, if you want to mount these bars as ditch lights, we’re not going to judge you.
Without any more, let’s jump into it.
Specs:
- Waterproof rate: IP68
- Lumens: 4,000LM
- Power: 120W
- Color temperature: 6000K / 3500K
- Working lifespan: 50,000 Hours
- Working temperature: -22℉ to 158℉
Features:
- 3 Colors + 3 Strobe Modes
- Power-off Memory Function
- Wiring Harness Remote control
- Spot Flood Combo Beam
- Easy Plug and Play install
- Beam Pattern: Spot Flood Combo
- Warranty: 1 Year
- Easy angle modification on the fly with attached hardware mount
Table Of Contents
Unboxing

What’s included?
- 2 Light Bars with 3 colors and 6 Modes
- Plug and Play Wiring Harness (10 feet)
- Mounting Bracket Screw Set
Ditch Light Bracket

Aiming to keep this Boslla centered, but as I said, I needed something to put these bad boys on. For now, I’ll say install a standard bracket, and you should be good to go. I’m really liking these Victory 4×4 brackets I picked up, and will definitely review them separately.
Attaching The Light Bar

Add brackets to the LED bar using the attached hardware. I left it loose for future adjustment and threaded the large bolt seen here through the bracket. It’s as easy as that! This was my first step before joining up any of the wiring, as I figured it would be much easier to adjust everything once I knew where the hardware was going. So far, so good.
Wiring

Add quick-connect ends to each of the wires. This was pretty straightforward but definitely new for me.
Weatherproofing
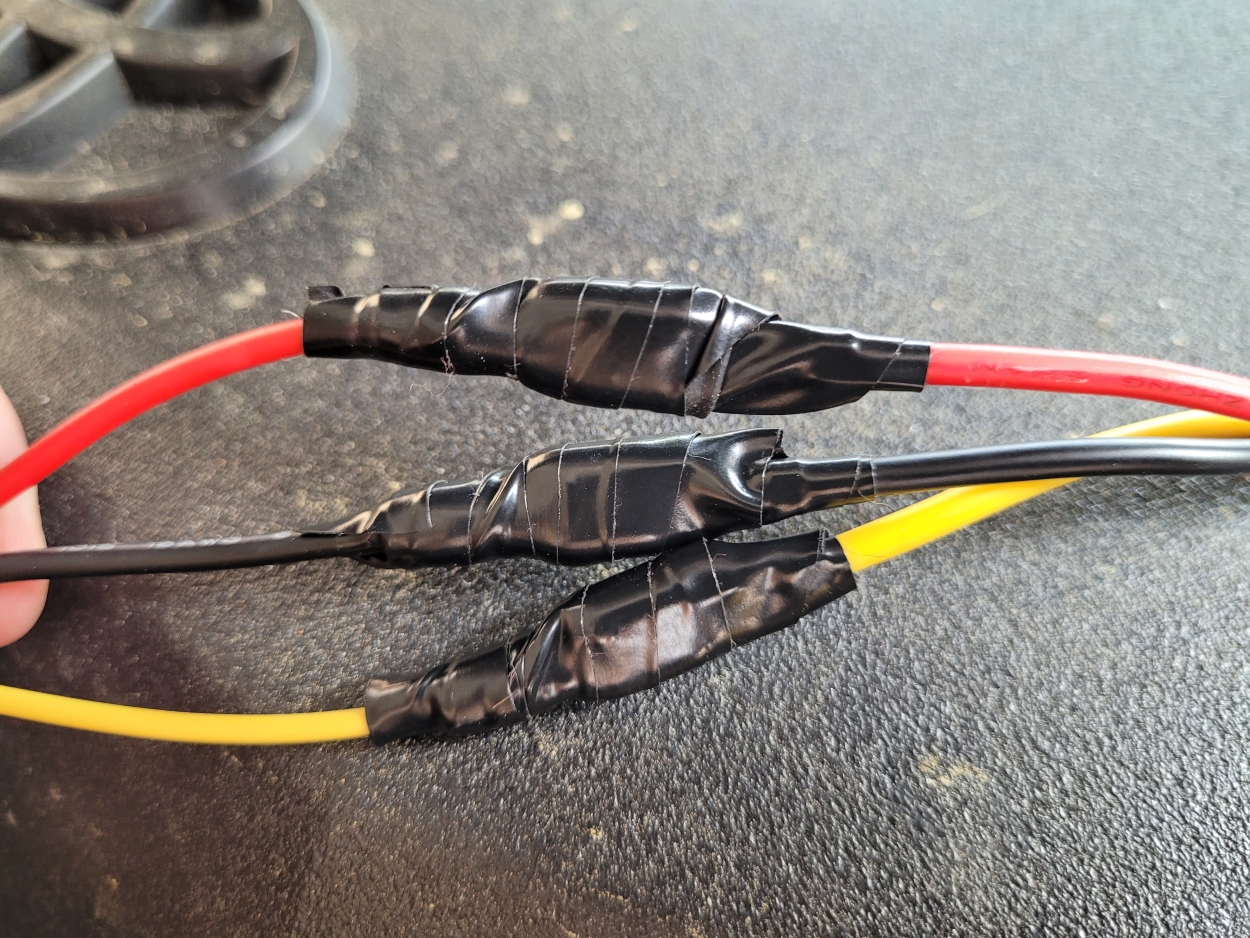
I connected everything up according to Boslla’s schematics (each light to a lengthening wire, and then directly to the wire harness. A little electrical tape around each connection and then a large piece of tape around each group as a whole made sure no rain/salt/etc. will get in. I also zip-tied everything out of the way. I figured it would be easiest to do everything before I even connected the wires to the engine for safety, and I was right. If you can, I would suggest buying some heat shrink and heat-shrinking each wire connection instead of using electrical tape. There are many other how-to guides on heat shrink all over Trail4R.com as well as YouTube.
Mounting & Grounding

Ground out the circuit and finish wiring the lights.
Final Thoughts
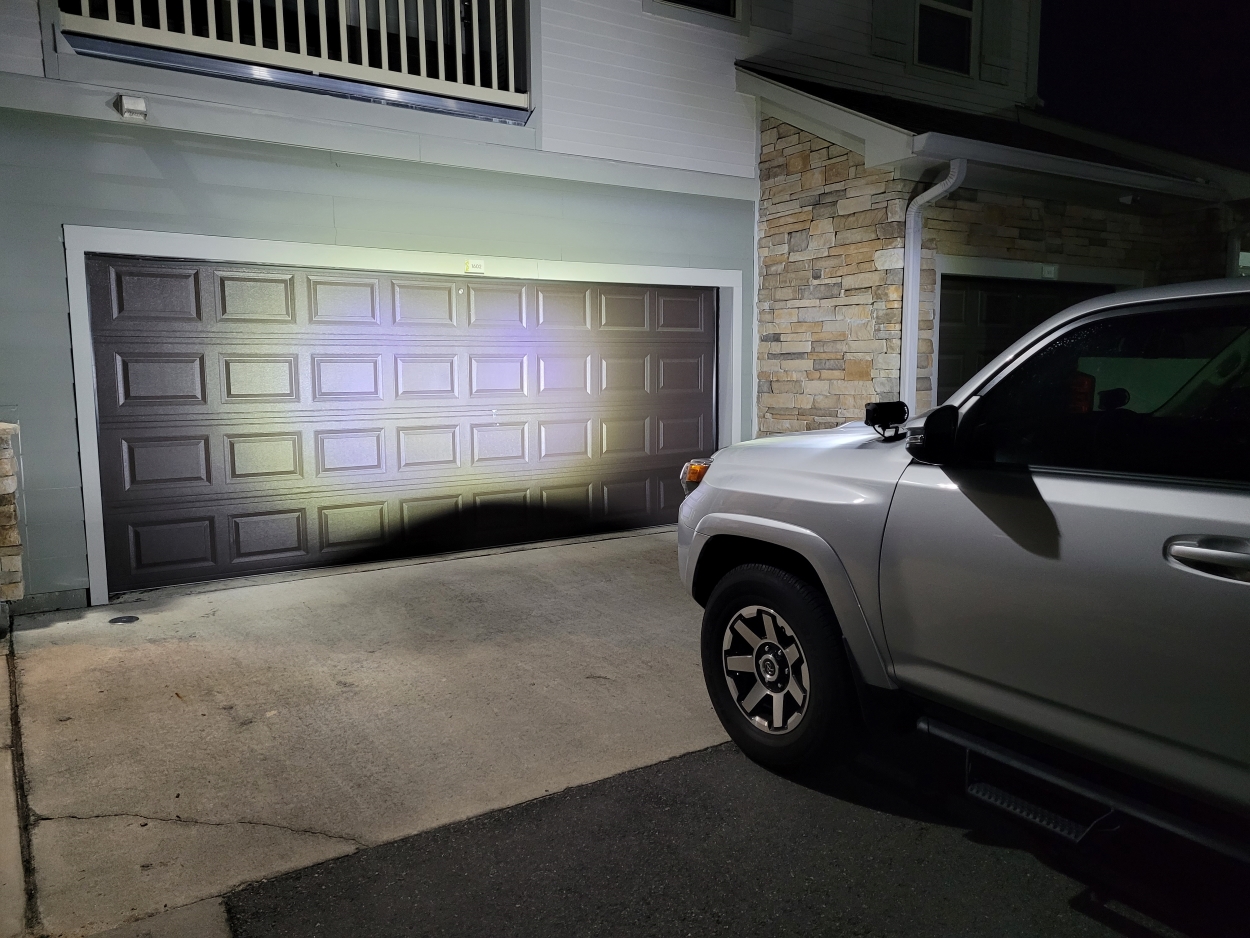
White Light

Yellow Light
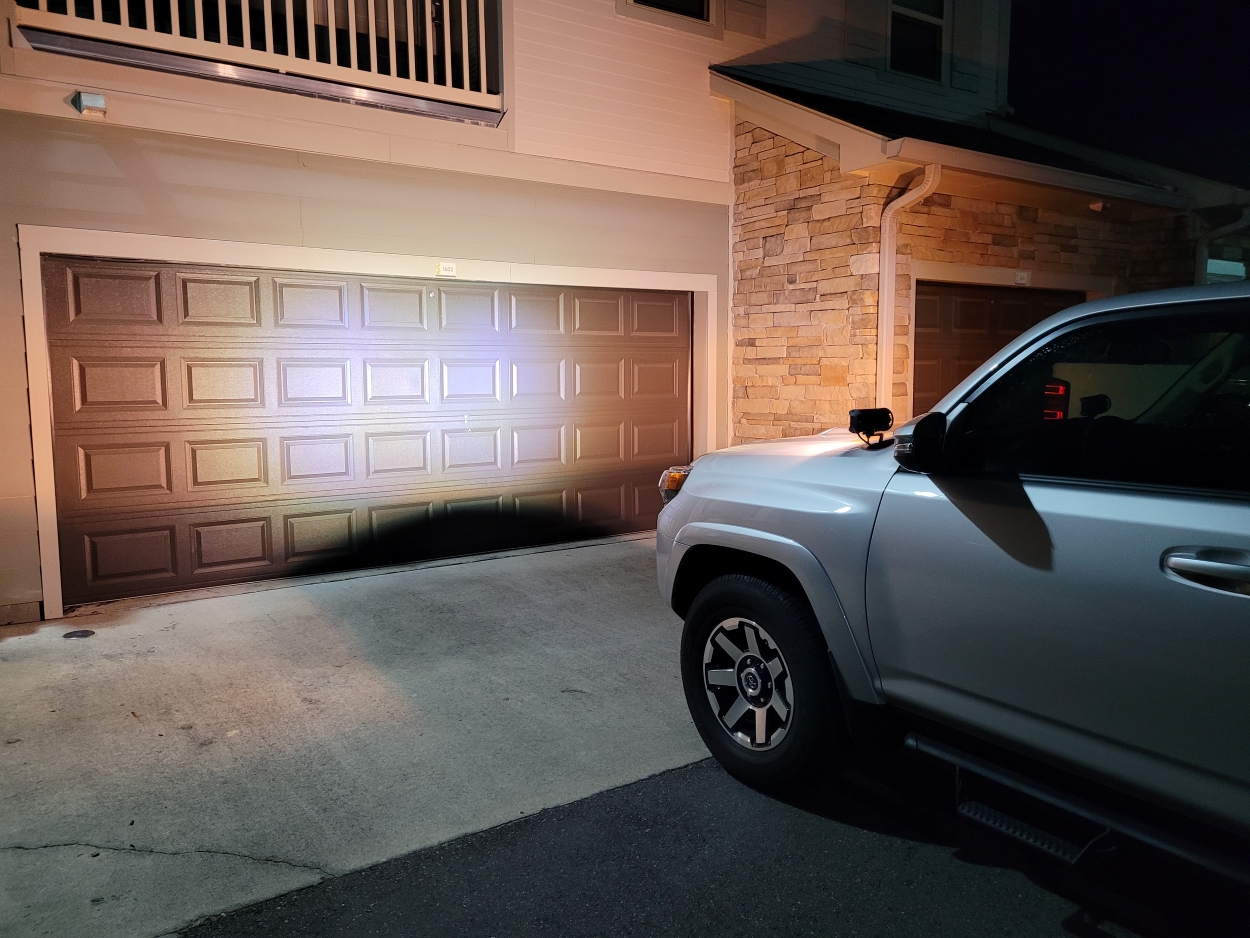
White + Yellow Light
After installing the Boslla LED light package, I had high hopes for the light bar and was not disappointed. Barring my own problems with broken bolts, the install was very easy. The lights are extremely bright, and the different color capability on the fly is something I’m pretty excited about. I can’t wait to run the control unit into my dash and install it as a button to make it extra sexy. I’ve already gotten a lot of comments on them, and I can’t wait to see how they perform in the snow/rain/impending apocalypse.
How about the routing into the cab and the switch/controller options? Thanks.
This light bar Looks pretty nice!😍😍😍