
Hidden Midland MXT 275 Complete Step-By-Step Install and Overview For the 5th Gen 4Runner
As someone that daily drives their 6500+lb “Overland” rig, I am constantly trying to find ways to easily and quickly switch between Monday-Friday commuter and weekend warrior overlander. After haunting quite a few forum posts and YouTube videos regarding trail communication, I landed on this up-and-coming technology called GMRS.
To me, GMRS is like CB on steroids, you get a much farther range on physically smaller antennas without the need for a full-blown knowledge test to get your license (yes, unfortunately, GMRS does require a license to broadcast).
If you plan on transmitting (aka, talking to your friends on your radio instead of merely listening), the only thing you must do on top of buying equipment is to get your license. The GMRS license is super easy to get and does not require a test. All you need to do is register with the FCC, pay them their $70, and start broadcasting on the airways. Oh, and that license you paid $70 for lasts for 10 years, making it relatively cheap to get into in the long run as opposed to paying for a HAM radio class.
I set off to find the ideal GMRS setup for my vehicle. Remember when I said that my vehicle serves double duty? Well, this was the exact reason I landed on the Midland MXT275 Micromobile Two-Way Radio. Not only is the MXT275 a very compact radio which could be hidden just about anywhere, but it also has all the controls on the microphone which can be removed for storage.
Find It Online
- Midland MXT275 Micromobile Two-Way Radio: Check Price
Tools & Materials
- MXT275: Check Price
- MXTA24 Antenna Cable: Check Price
- MXTA25 3dB Ghost Antenna: Check Price
- Panel Mount Male to Female Ethernet Cable: Check Price
- Antenna Mount (I 3D printed mine, but these are easily had from Amazon)
- Fuse Tap
- Small Ring Terminal
- Zip Ties
- Trim Puller (or small flathead screwdriver)
- 10mm Ratchet & Socket
- Phillips Head Screwdriver
- 8mm Wrench
- 10mm Wrench
- Electrical Crimpers
- Side Cutters (if your crimpers don’t have one)
- Dremel w/sanding drum
- Razor Knife
Hidden Midland Radio Step-By-Step Install
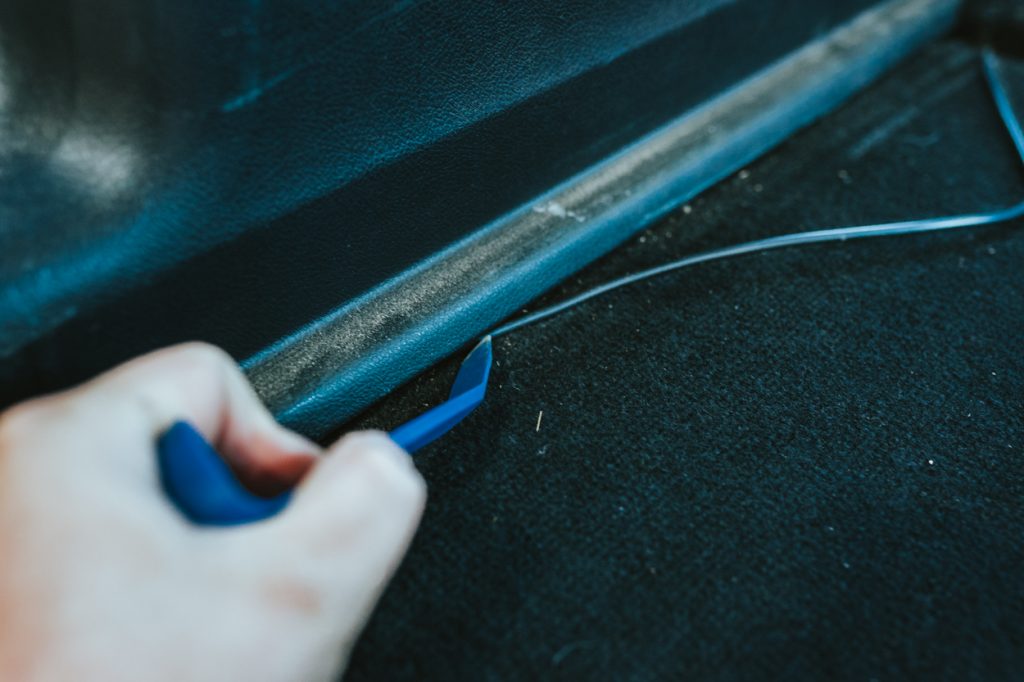
Step 1. Remove Driver’s Side Front Door Sill

To run the antenna cable, we are going to need to remove some of the trim panels along the driver’s side of the 4Runner. It is best to start with the front driver’s side door sill as it will give us the ability to move the kick panel in the next step.
To remove the door sill, you will want to grab it on either edge and then pull straight up. You need to pull upwards with firm constant force making sure not to jerk on the piece. By not jerking on the piece, it will ensure you aren’t breaking any of the clips or damaging the plastic. It may help to get your fingers under the piece by first wedging your trim tool between the sill panel and the carpet. Once you have the piece out, set it aside.
Step 2. Move Kick Panel Out of the Way

Next, we need to gain access to the lower bolt holding the dash panel in place and make room to run the antenna cable up from the floor to the base radio. Take your trim tool and insert it between the door sill and the kick panel. Once you have a grip on the door panel, gently pull it directly backward out of its clip, being careful not to break it and move it inward towards the center console a bit.
You will only need to move the panel enough like the picture above. This will give you access to the dash panel bolt and make enough room for the cable.
Note: There is a bolt holding the front edge of the kick panel that is difficult to reach and does not need to be removed. As you are moving the kick panel just slightly, pull outward so as to not break this mount on the front.
Step 3. Remove Switch Panel

Remove the switch panel between the door and steering wheel by firmly grasping the panel and pulling directly backward. The panel is only held in by clips and comes out fairly easily. Be careful here not to pull too far as the wires are still attached to the switches. Remove the wires by pinching the clips and pulling them out. Set the switch panel aside.
Step 4. Remove Drivers Side HVAC Cover

Remove the driver’s side HVAC trim cover by grasping it with your fingertips pointed away from the steering wheel and then rolling it towards the steering wheel. This is the easiest way I have found to remove this piece. It is only held in by clips but there is no easy way to grip the piece or get a trim tool under it.
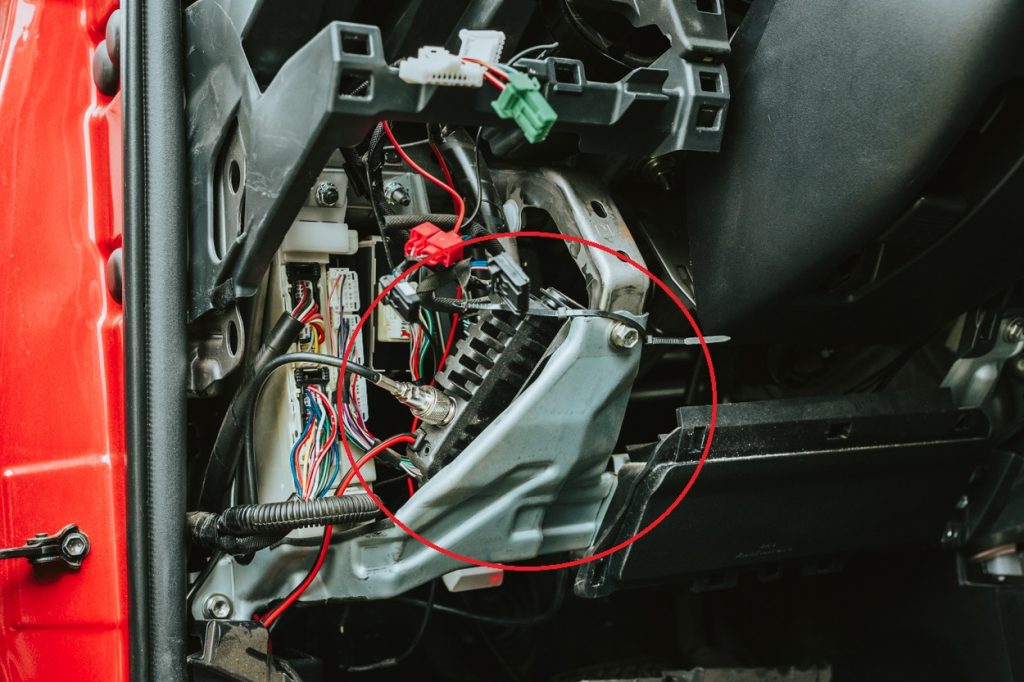
Step 5. Remove Lower Dash Panel

The lower dash panel is held in by two bolts and several clips. With the switch panel and the HVAC trim cover out of the way, you now have access to the lower dash panel. Remove the two 10mm bolts (circled in red), one is located under a flip-down cover just above the gas pedal and the other is hidden behind the kick panel (seen in the detail shot above). To access the bolt behind the kick panel, you will need to move it to the right slightly and slip a socket in to turn the bolt.
Once the two bolts are removed, it’s as simple as grabbing the lower dash panel and pulling it towards the seat. There are several clips around the edges and around the airbag that you will need to disengage. It is easiest to start from one side and work your way across. Once all the clips are disengaged, the panel will fall to the floor.
Note: The hood latch is still attached to the lower dash panel. There is no need to remove it for this install, just lay the lower dash panel down on the floor for now.
Step 6. Mount MXT275 Radio Base
To mount the MXT275, I simply zip-tied it behind the metal structure under the dash. If you angle it right, it will sit fairly flat on the metal structure where you can wrap a zip-tie around the holder and the metal support to secure it in place. I went with this method of mounting just in case I wanted to remove the radio later to replace it or move it to another vehicle. If you wanted a more permanent mounting here, you could easily drill a couple of holes through the metal structure and run a bolt and nut through securing the provided mounting plate.
Step 7. Prep Ethernet Extension Cable

To get your ethernet extension cable to fit in the knockout next to the ignition, we have to modify it. To do this, you will want to grind down the sides until it fits snugly in the knockout. I used a drum sander wheel on my Dremel. To get a rough idea of how much material to remove, I measured the width of the knockout and then marked that on my ethernet extension cable. I removed just enough material until it was a snug fit in the knockout.
Step 8. Run Ethernet Extension Cable
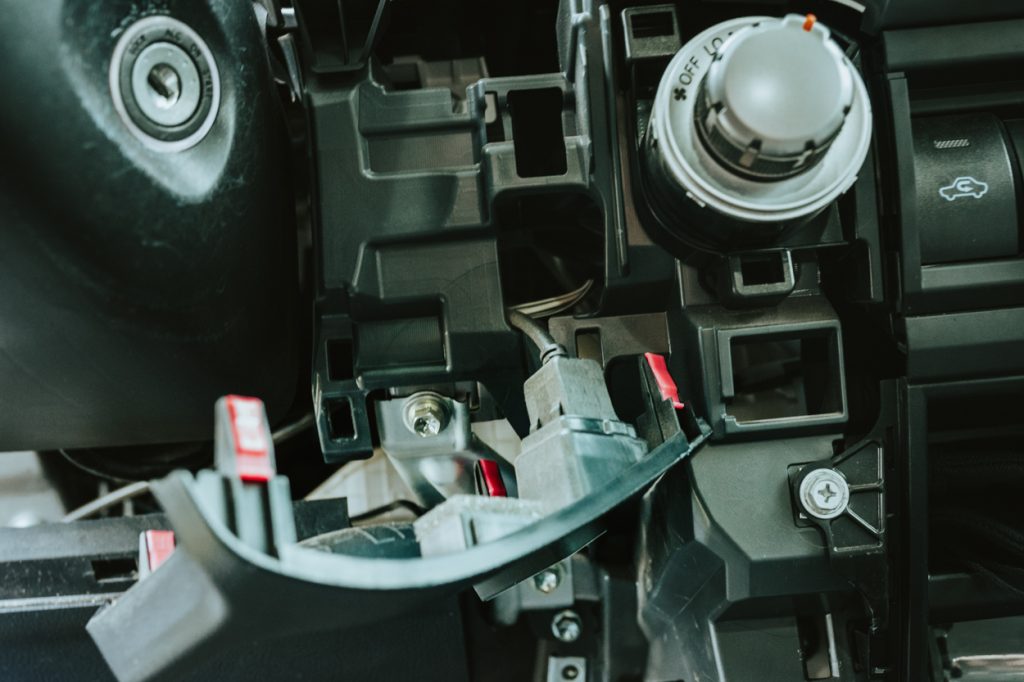
In order to run the ethernet extension cable, we need to remove the knockout panel from the dash. To do this, pull on the panel to the right of the steering wheel. It is only held in by a few clips so pull firmly and it will pop right out. Run the ethernet extension cable through the knockout and press it firmly into place. Route the ethernet cable behind the metal support and under the steering wheel making sure not to route the cable anywhere it can get pinched by the steering wheel when it is adjusted. Plug the extension cable into the MXT275 and then turn your attention to the antenna cable.
Step 9. Prep Antenna Cable

To make running the antenna cable as easy as possible from the roof to the radio, itself, you will want to take apart the connector that attaches the cable to the radio itself. Don’t worry, if you bought the Midland MXTA24 cable, the connector is designed to be taken apart specifically for this purpose. To take the connector apart, you will want to use your 8mm and 10mm box wrenches. One is on the hex section of the connector and the other is on the two flats of the connector itself. Take them apart and you are now ready to run the cable.
Step 10. Drop Headliner
Moving to the back of the 4Runner, it’s time to run the antenna cable. The reason we are running the cable from back to front is to make sure we have plenty of slack to mount the antenna where we want it.
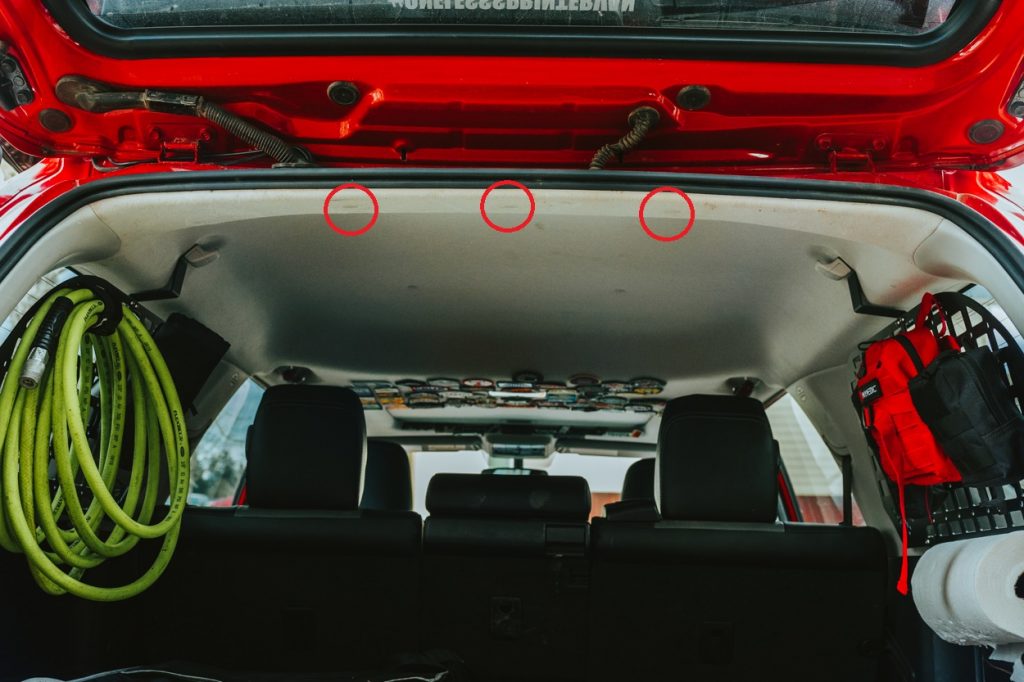
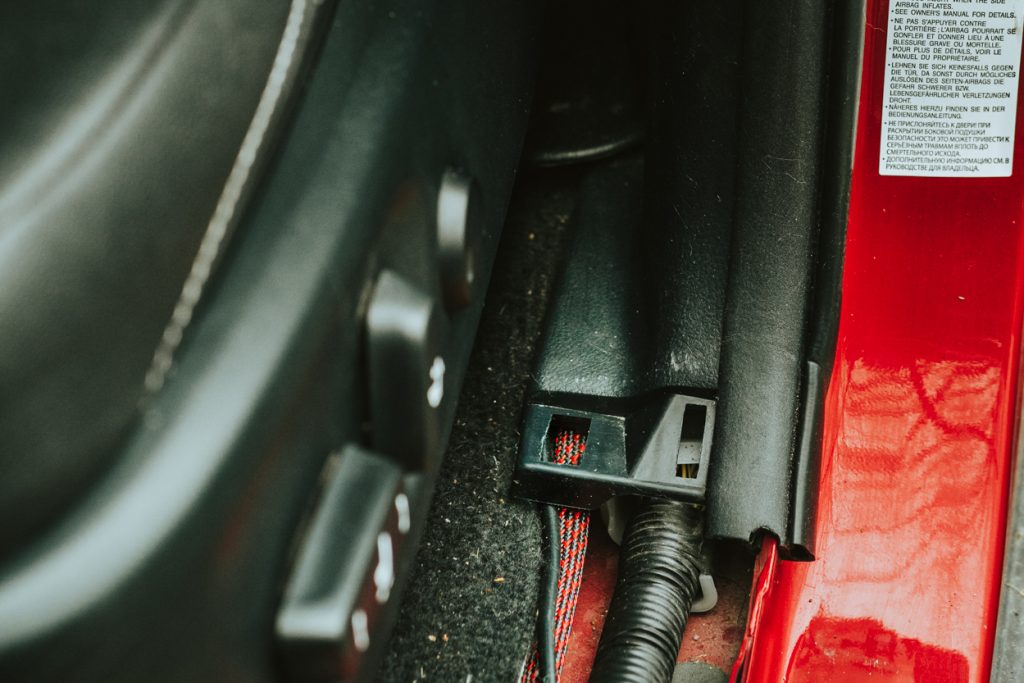
We need to drop the headliner to gain access to the cable after we run it through the rubber boot where the wires go into the hatch. To drop the headliner, first pull back the hatch seal. You will want to pull this back from the entire headliner, the driver’s side d-pillar, and about halfway across the bottom. This will give us access in order to do the next steps.
After the seal is removed, you will want to remove the three clips holding the headliner up. These are located in the center of the roof right in front of the seal you just removed (circled in red). Take your trim tool and wedge it between the clip and headliner and pry the clip out. It may take prying from multiple angles to remove the clip, but it will come out. Remove all three. Do not pull down on the headliner very far as you run the risk of creasing it, pull down just enough to get your hand in there to grab the cable when you are ready.
Step 11. Antenna Cable Through Hatch Cable Boot
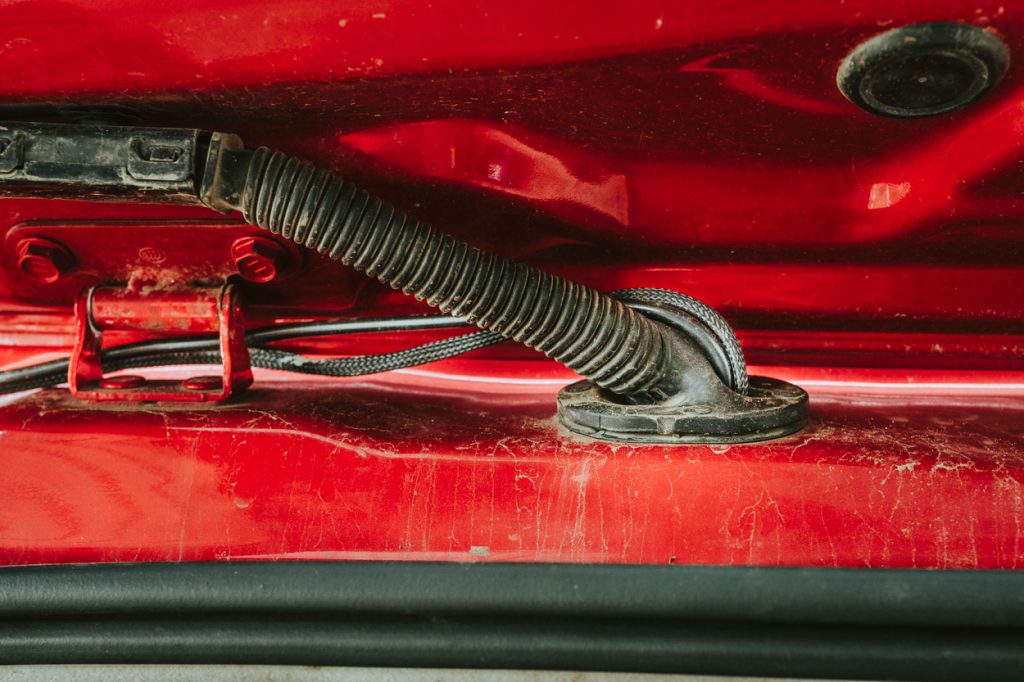
To start running the antenna cable, you will first want to determine where your antenna will be mounted on the roof. Run the cable from this spot to the upper driver’s side corner of the hatch making sure to leave ~6” of extra cable above the hatch so you have enough for if it gets caught or to provide a little wiggle room to mount the antenna. Route the cable between the hatch and the body down to the rubber boot that holds the wires running into the hatch.
Once you have the cable run down to the rubber boot, you will need to punch a very small hole in the rubber boot. I did this by barely poking my razor knife through the boot being careful not to touch any of the wires inside the boot.
You want this hole to be a bit smaller than the diameter of the antenna cable to make for a nice seal between the boot and the cable. Push the antenna connector through the boot and down into the headliner. Pull the headliner down slightly to reach in and grab the cable, pulling all the excess cable through the boot. Remember to leave a little slack above the boot so you have plenty of room to mount the antenna.
Step 12. Antenna Cable Down D-Pillar

To run the antenna cable down the D-pillar you will need to remove the bolt holding the plastic in place. Grab the cargo net hook and twist 90 degrees and it will pop out. Under this is a long Phillips Head bolt that needs to be removed. Once the bolt is removed, pull on the upper D-pillar plastic until the clips pop out of place. Repeat this for the lower D-Pillar plastic (black). Once the plastics are out of their clips, simply run the antenna cable down the D-pillar until you can see the cable inside the area where the bottle jack and tools are. This might take a couple of tries but it will drop down into this opening.
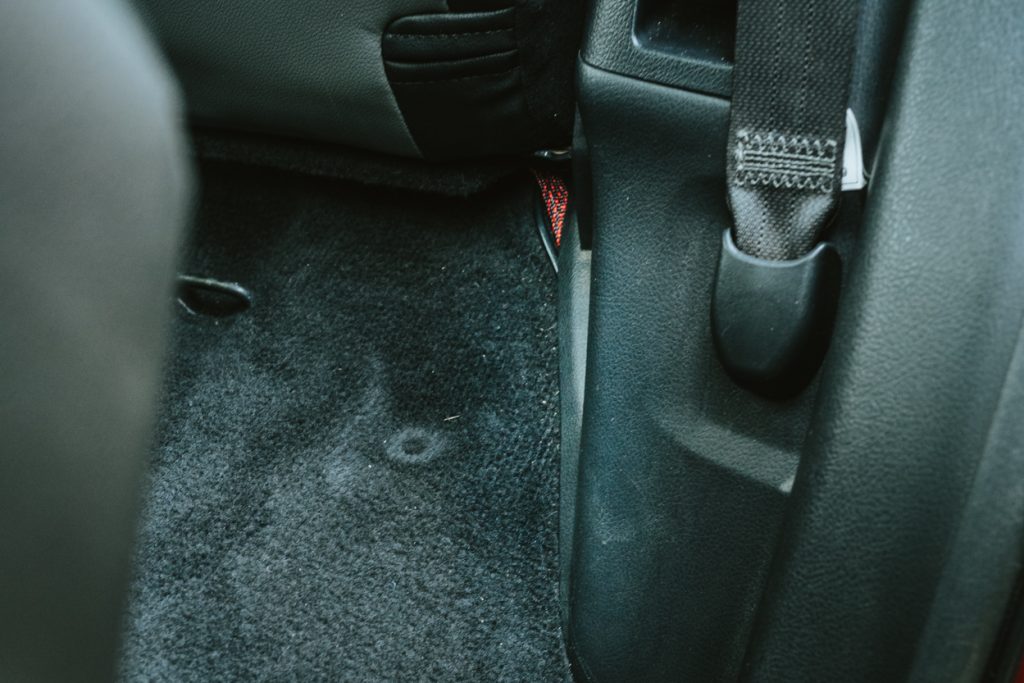
Step 13. Antenna Cable Under Rear Side Panel

Remove the rear tie-down point just below the bottle jack compartment by using your pry tool to pop the cap open on the center of the tie-down. Then remove the 10mm bolt holding it down. Next, you will need to remove about half of the clips holding the hatch sill down. Do this by grabbing the driver’s side edge of the hatch hill and pulling upward. There will be 2-3 pops and the driver’s half of the piece will pull upward about 6”.
And now the awkward part. Fish the cable down under the side panel and out to the carpet. I found this done easiest by running the cable out the back of the hatch down close to the bottom corner and then running it under the hatch sill and pushing back under the side panel. Then pulling the excess through until the cable pulls completely under the black plastic panel. You want the cable to run straight down from the tool compartment and then over to the carpet. It might take some working of the cable, but the cable will fit under this portion of the panel. This is the hardest part of this install.
Step 14. Run Antenna Cable Through Cargo Area
Now that you have the antenna cable sticking out between the black side panel and the carpet, you will want to run the cable forward to the back seat. As you are running the cable, tuck it under the black side panel as you go. Using your pry tool helps to push the cable completely under the panel. Continue this until you reach the front tie-down points.
Once you reach the front tie-down points, you will want to lift up on the angled piece that holds the tie-downs and run the cable between the angled piece and the black plastic side panel.
Step 15. Antenna Cable Under Back Seat
At this point, you will push the cable under the back seat and run it along with the black plastic panel down to the rear door sill. Make sure to tuck the cable between the carpet and the black plastic panel to hide it. You can see where the cable sticks out from under the black panel to pass under the seat. No need to worry if yours sticks out as well, as this will be hidden by the seat.
Step 16. Run Cable From Rear Door Sill To B-Pillar
To run the antenna cable under the rear door sill you will need to first remove the door sill. This is just like the front door sill in that it needs to be pulled straight upward and has three clips holding it in place. Pull upward with firm constant pressure to get the clips to detach. Do not jerk this piece upward as you can break the clips or damage the door sill. Once the sill is removed, run the cable forward in the channel next to the large cable bundle until you get to the B-Pillar.
Pass the cable between the B-Pillar and the seat frame up to the front door sill. Starting from the rear door sill, tuck the antenna cable under the B-Pillar using your trim tool.
Step 17. Antenna Cable Under Front Door Sill
Once you reach the front door sill, run the cable up the channel next to the large wire bundle until you get to the front kick panel.
Step 18. Run Cable Up to Radio
Pull the kick panel back a small bit to fit the cable behind it. Run the cable up from the door sill towards the radio making sure to route the cable behind any metal structure or panels you are going to put back on. Once you have the cable behind everything and near the radio, reassemble the connector using your two box wrenches. Connect the antenna cable to the base radio by screwing the connector all the way down until it stops.
Step 19. Wire to Ground

Now it’s time to wire the radio to power. Cut the cigarette lighter plug off the end of the cable. Separate the black and red wires ~6” (they are stuck together and you will need room to crimp the connectors).
Take the black wire and strip back about ½” of the insulation and crimp on a ring terminal. Then wire that ring terminal to the bolt holding the fuse box in place. I checked that this bolt was connected to the body, which provides the ground path back to the battery.
Step 20. Positive Wire to Fuse Block

To wire in the positive side of the cable, you will need to strip ~1/2” of the red wire insulation back. After stripping the wire, crimp the open end of your fuse tap on to the end of the red wire. Either tap into a fuse that is run off the ignition (meaning the circuit will only be live with the vehicle turned on). Or find a circuit that is always live (allows the radio to be on even if the vehicle off). Tapping into the ACC circuit in the fuse box gives you power which is controlled by the ignition. Tap into the ACC fuse by removing the ACC fuse from the fuse block and place it in the open slot of your fuse tap. Then insert the fuse tap into the ACC slot in the fuse block.
IMPORTANT: DO NOT TURN ON YOUR MXT275 UNTIL YOU HAVE CONNECTED THE ANTENNA TO THE ANTENNA CABLE. TRYING TO KEY UP THE MIC WITHOUT THE ANTENNA CAN DO SERIOUS HARM TO THE RADIO
Step 21. Reassemble Everything

With everything installed and the antenna mounted and connected, now is a good time to test your radio. Start by connecting the mic to the ethernet port we installed earlier on the lower dash panel. Press and hold the power button on top of the mic in the center. If everything works, the mic display should light up. Now that you have confirmed everything works as intended, install all of the panels you removed for the install.
Step 22. Stick Mic

The very last step of this install is to stick the mic holder somewhere. I chose to mount this on the HVAC trim panel under the fan speed knob. Just peel the liner off the back of the mount and stick it to the trim panel.
Time to step back, drink a beer, and admire your hidden handy work…
Final Thoughts

If you’ve got this far, you now have a working Midland MXT275 GMRS radio neatly stashed away under your dash and the handset stored in your center console. Whenever you need to talk to others out on your adventures, all you need to do is plug in your handset and turn the power on. I’ve had the MXT275 installed in my rig for quite some time now and I am definitely sold on GMRS. The range and clarity of GMRS are great in all aspects of my adventure. It’s made even better because when I am not out adventuring I simply unplug my handset and store it away.
Overall, this install is fairly straightforward and only required basic hand tools. I would budget 2-4 hours for this install depending on how familiar you are with wiring and disassembling your 4Runner. The most difficult part for me was getting the antenna cable down under the side trim panel.
Great post. I was wondering about water leaking in the back hatch with the cable running through the rubber hatch cable boot. Did you do anything to seal around the cable at the hole?
What a great post. Thanks for taking the time to put this together. I’m mounting my 275 in the center console, but going to do the same mic extension.
Fantastic article, and I will adopt many of the same ideas. However, I am really curious as to how you’ve mounted your iPad? Could you please share the specific mount and how you attached it? Thank you.
Has anyone else had issues with the supplied mic hanger falling off? I’m thinking about VHB tape since I really would like to avoid drilling holes, but it may be a little too permanent.
I mounted my mic in the same place you have yours, and I encountered a problem: putting my required fountain beverage in the cup holder. So, I moved it to the right side of my radio (I have an aftermarket Kenwood after my OEM had an unexpected death, so I don’t have radio knobs there) but again, a problem: driving over some excellent terrain, the angle of the mount wasn’t completely perpendicular. That created a prying effect by the weight of the mic and the cord wanting to be 90 degrees, so it actually peeled off the mount from the bezel.
Lessons: think ahead what other items you regularly have stashed in every spot, and use some more permanent mounting hardware (once you’ve used the tape to try out the spot for a dry run.)
Great write-up, though. Very well documented!
Is the Amazon link for knockout the same one that you used? It looks different.
thank you planning install this week
Thanks for this. Everything was easy as you said except i had trouble with the fuse part. Radio wouldn’t power on when tapped to ACC fuse. I then moved it to KDSS fuse instead and it worked (I have a PRO with no KDSS). Go figure.
Excellent write up! Can the cable be routed on the passenger side from the hatch as well? I think mine will end up in my glovebox and figure that it would be a straight shot on the passenger side instead of trying to route the cable behind the steering wheel, hvac, etc. Thanks!
Absolutely possible to get it out of the glovebox and down the passenger side of the vehicle. The steps are practically the same for both sides. You will need to find a good way to get the cable out of the glovebox and then down the passenger side kick panel. The rest would be the same as outlined in the article above.
Feel free to shoot me a message here or on IG if you get stuck, I’m happy to try and help!
What’s your IG handle?
Right on, thanks! I am going to use your guide and this one which covers the glovebox portion:
https://midlandusa.com/mxt275-custom-gmrs-radio-installation/
Between the two I think all the bases are covered. I still have to find a good bracket for the ghost antenna. I have a 2012 Trail Edition which is a different roof rack than the other 5th gens and I haven’t been able to figure out which bracket will work with that yet.
Just followed you on IG as well, cool shots!
I installed mine in the center console, and mounted the handheld on the lower dash (2006 4Runner). The cable length was just right.
That is also a great place to hide the main unit. I almost went that route until I found a neat spot under the dash! Hope you’re loving the new radio!
Thanks for the write-up. Love your gear shifter, where did you get it?
Thanks Dan!
The gear shifter is a custom design that I made and 3D printed!