Amber Diode Dynamics SSC2 Pro Ditch Light (Combo Light Pattern) – Review and Overview
Now that I’ve gotten some of the more important aspects of my overland build done, my next task was to figure out lighting. Since the 2021 already has pretty solid stock LEDs, I didn’t change out anything except for the interior lights. While I was waiting for my roof rack to come in (which I am going to get some scene lighting for), I figured I’d get some accessory driving lights.
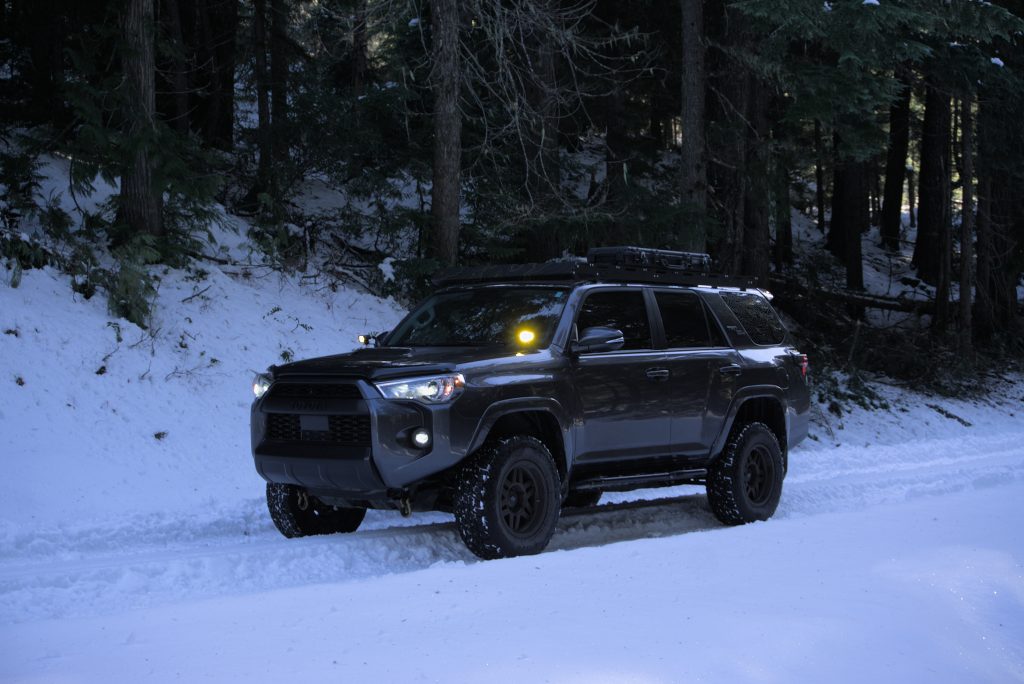
Given that I typically explore/hike all day and frequently drive into camp at night, I figured some nice ditch lights would help with pathfinding and making sure I stay safe when the sun is down. I went with the combo light pattern which combines the driving and flood light patterns. This light pattern gives you quite a bit of range while keeping the highest light output near your car to spot any tricky places on the trail.
Find it online:
SSC2 Pro Specs (Yellow Combo beam):
- Output: 780 lumens
- Color: 3000k selective yellow
- Beam intensity: 13,500 candela
- 135 lux @ 1m
- 1 lux @ 116m
- .25 lux @ 230m
Buying Experience and First Impressions

I’m a simple man. When I see a good sale, I buy.
Diode Dynamics was running a Memorial Day sale and I couldn’t resist picking up their ditch light kit. After shipping, my total came out to $300 for the whole kit. As with most manufacturers, these lights were and still are on backorder. At the time the backorder was an estimated 8-12 weeks, but now it seems like it’s down to 3-4 weeks.
During my research, I scoured the web for resources and reached out to their customer service to get more information. In addition to the plethora of videos and online resources they had, Diode Dynamics’s customer service was friendly, prompt, knowledgeable, and helpful. If you go to their website, you’ll see exactly what I mean.
Customer Service

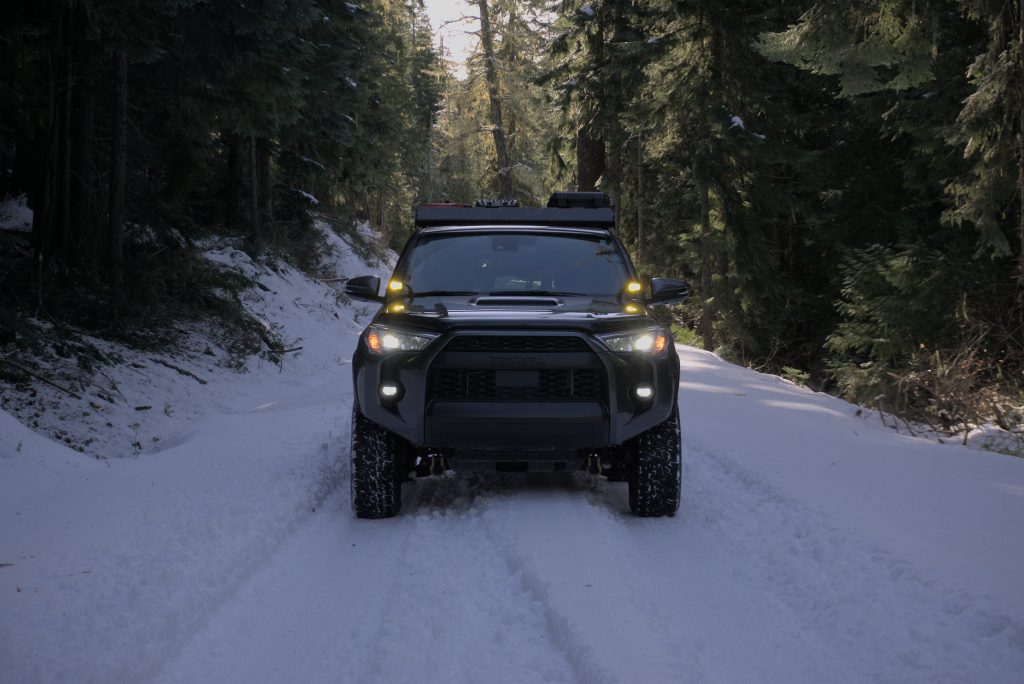
Ditch light combo pattern with no headlights on
Along with my order confirmation, the customer service team re-communicated the backorder where they clearly set expectations on an estimated shipping date. Although they did not meet the original shipping date, they were quick to reply and detailed why my order was still delayed. Despite the additional estimated 2 weeks delay, they actually got my order shipped out to me a week after I checked in.
For some reason, I’ve experienced a string of bad luck with receiving incorrect parts, and this order was no different. Instead of 4Runner brackets, Diode Dynamics sent Tacoma brackets. I didn’t fret because their customer service was responsive and rectified the issue immediately. They shipped out the proper brackets right away and included a return label to send back the wrong parts.
I always love unboxing because the packaging speaks volumes about the company’s care of the product and attention to detail. Diode Dynamics knocked this one out of the park. Their packaging is top-notch and the build of the units was quite impressive. The wiring harnesses are professionally assembled and super heavy duty.
Thoughts on Installation

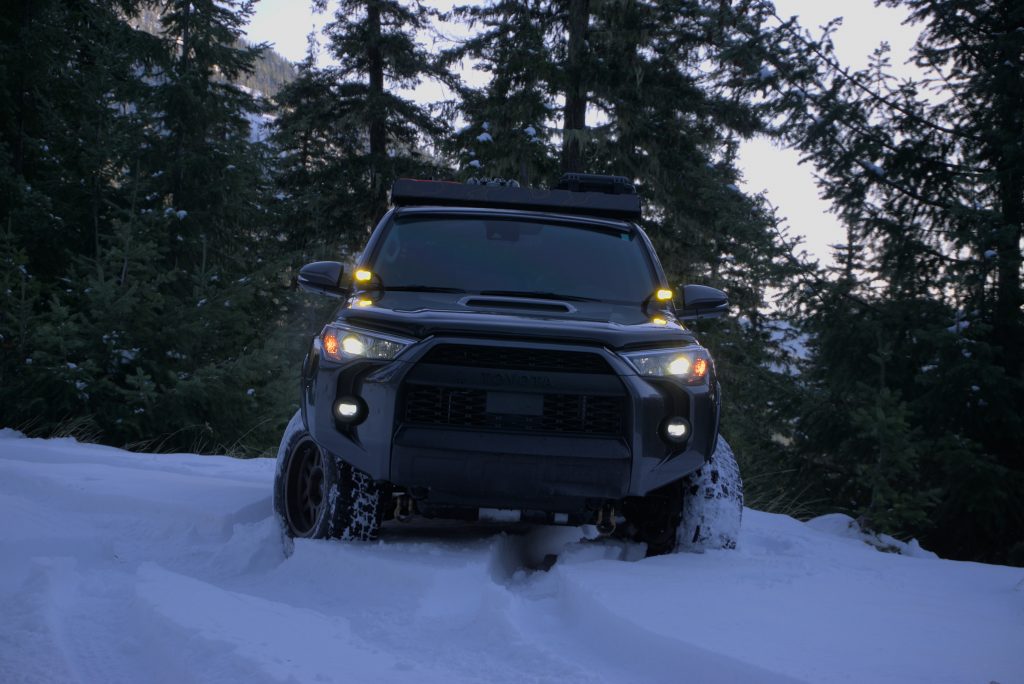
Combo beam: Wide light spread with focused beam
Overall, the installation is extremely straightforward. Diode Dynamics includes an installation guide with a wiring diagram; more bonus points on customer service. If you simply plug and play, you can complete this project in about 45 minutes. However, expect to add another hour or two (depending on your electrical abilities) to trim, splice, and properly route wires for a clean install. I used solder seal heat shrink butt adapters to make splicing a much less arduous task.
Given this kit comes with an inline relay and fuse and I haven’t gotten around to building my own fuse and relay block, I wired it directly to the battery. I used the OEM-style ditch light switch from Cali Raised LED and placed it in one of the blank spaces next to my inverter switch.
Install Tips

Pointers for the installation:
- Have a friend help with installing the brackets to the hood. Given that you need to undo the main fasteners to the hood, you can prevent any damages to your hood or windshield if someone else is holding it steady.
- Diode Dynamics includes lock washers and nylon lock nuts to secure the pods to the bracket. For added security, use tamper-proof nuts.
- This kit comes with TONS of extra wire. Unless you want a birds nest in your engine bay, be prepared to splice the cables going to the pigtail adapter for the pods and the main power cable.
- Routing – get the passenger side fish taped through the hood for a much cleaner look and to use less wiring loom.
- Minor nitpick, but the relay bracket hole is too small for a 12mm bolt, which is the factory size that would fit on the firewall. You would have to either drill out the bracket hole to make it larger, or drill a new hole and use a self-tapping screw. I was lazy so I mounted it next to the back side of the battery. This solution was not ideal, but it works for now.
- Your hood will sit a few mm higher due to the bracket — this is normal; don’t trip.
- Diode Dynamics includes a 3-way switch for their backlight function, but I didn’t like the round style switch so I used a Cali-Raised OEM style switch (linked above). The workaround for a standard on/off switch is to tap the blue wire coming out of the pod and splice it into your parking lights. This way, your parking lights are on, the ditch light backlight will be illuminated.
Field Test and Review

Overall I’m really happy with these ditch lights. The only minor things I have to pay attention to are related to clearance. Given how low profile these brackets are, I need to ensure the cable doesn’t get pinched under the hood and that the bracket doesn’t rub against the hood.
That said, these brackets are beefy. There’s virtually no rattle or wobble off-road. They stay in place and do their job.
Lastly, the light throw is impressive. I get the best of both worlds with the combo beam pattern. With the driving pattern, I get extra visibility down the trail such that I almost don’t even need my high beams. With the fog pattern, I can see everything around my front wheels clearly. Whether there’s a deer that pops out of the forest or a sketchy cliffside trail I’m trying to navigate, I have a ton of confidence driving at night. As an important note: the combo pattern is not SAE/DOT compliant so you should not try to drive down the freeway with these — it’s definitely a hazard to others.
Final thoughts
TAKE NOTE other companies — this is how you run a successful aftermarket company and get a loyal following:
- Provide plenty of resources to educate buyers and give them confidence in the product.
- Go above and beyond in customer service, set SLAs for responding to customer inquiries and stick to them.
- Deliver your product in excellent packaging with detailed installation instructions. (Stickers and free swag are a nice bonus too).
- If something goes wrong, take ownership, make it right, and do it quickly.
- Let your product speak for itself.
- Profit.
Diode Dynamics checks all the boxes here. I’m a loyal customer and fan now and will be waiting for their new elite fogs to drop!


Did you sandwich the brackets between the hood and hinge? Hood > bracket > hinge?
Seems incorrect and a huge effort to make sure your hood does not fall out of alignment and can be a nightmare to realign by yourself or even with a helper.
Try hood> hinge > bracket and you won’t have to deal with your hood sitting higher than OEM.
If the bracket doesn’t allow that, I highly recommend buying another brand that does.
Yep you’re totally correct, that’s what I did. Thank you for pointing that out! It’s been fixed and back to OEM now. Appreciate the input Dillon
How did you hook up the oem style switch to the diode dynamics harness? What wires go to what?? I have a ch4x4 switch and has green, red1, red2, black