Extreme LED RGB (Bluetooth-Controlled) Rock Light Kit Step-By-Step Install For the 5th Gen 4Runner
Why Rock Lights?
Rock lights are not just for showing off your sweet suspension at the mall. For when your off-road and hitting the trails, it can make a huge difference between making contact with a hazard and avoiding it.
However, the green does accentuate my green Ironman 4×4 springs, so I might just make that trip to the mall sometime.
Darkness is the enemy when it comes to nighttime adventures. Rock lights not only help the driver see but also your spotters identify hazards and keep the vehicle on the line.
Why RGB?

Most lights out there are going to be the straight white hue, however, there are advantages to having other colors available.
To the human eye, white light, even at the same lumen, is going to appear brighter than other colors. The downside to white light is that it destroys night vision, so having a red or yellow light will preserve your ability to operate around your vehicle or camp. A yellow under glow while camping also gives a nice area light without attracting bugs.
RGB Rock Light Kit Options:
- Extreme LED: Check Price
- MICTUNING: Check Price
- Baja Designs: Check Price
- KC Amber Rock Lights: Check Price
Why Extreme LED?
There are a lot of choices when it comes to rock lights.
Other rock lights, we have covered on Trail 4Runner:
So far, the Baja and KC rock lights seem to be of the highest quality on the market. I recommend looking at the Cyclone LED Rock Kit 6-Light System in Amber.
I chose Extreme LED because it seemed to have good reviews and I had really good luck with their 20” light bar that I installed on my front bumper. However (spoiler alert!), I have not had the same experience with these rock lights as I had with my light bar. Please read this whole review before buying the Extreme LED rock light kit.
What’s in the Box?

The Extreme LED Rock Lights have a pretty simple setup as there are only three parts:
- Control Unit
- Rock Lights (x8)
- Mounting Hardware
The connectors are mated up to the control unit. The only wiring that needs to be done is connecting to your power or switch source. The mounting hardware includes 2 rubber mounting bases and bolts. One flat and one curved for use on roll bars. In my case, the flat bases are only used.

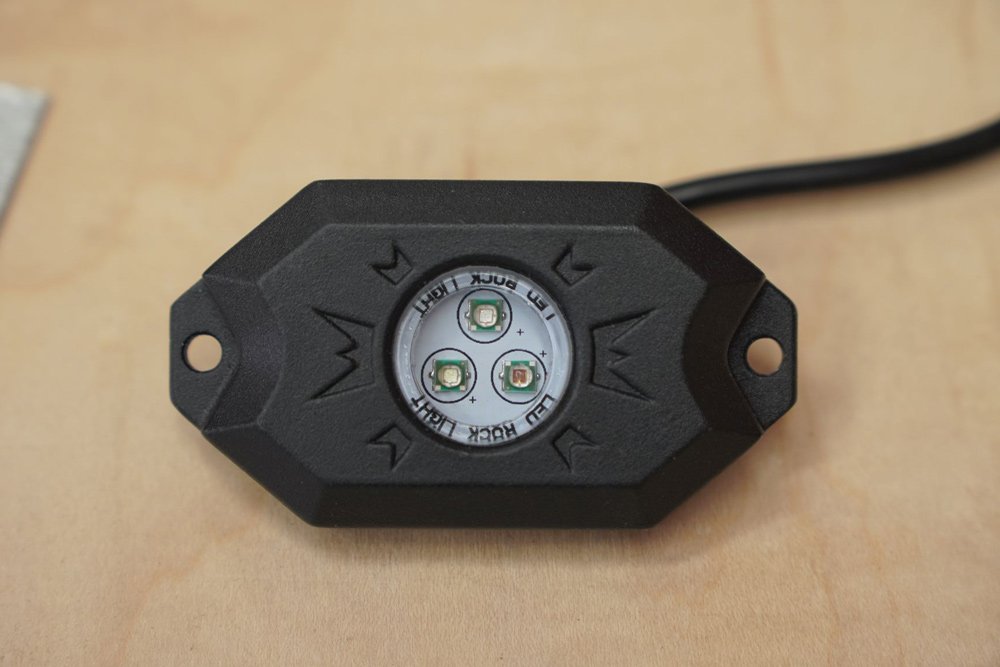
Each rock light has (x3) 3-watt CREE LEDs. The body is constructed of aluminum.

All eight of the lights and the control module in the kit are pre-wired with waterproof connectors.

Installation
Step 1. Find Location For Rock Lights

The first step in the install is finding the perfect location for the lights. People have different opinions on where lights should go; for me, the most important aspect was to cover the approach and departure angles. So light placement in front of the front and behind the rear tires was paramount.
Next was being able to see underneath the 4Runner to ensure the clearance of any obstacles.
There are aftermarket mounting options but they all seem extremely expensive and don’t always put it in the optimal position.
I decided to make my own mounts out of galvanized steel tie plates that you can pick up from any hardware store. They are strong enough to hold the lightweight rock lights and also soft enough to bend easily.
Step 2. Attach Pre-Wired Connections

The install is fairly straightforward with the lights pre-wired to easily connect to a control unit.
However, pre-wiring is both a blessing and a curse… Each light is on an 11’ wire lead. I started with the rear lights as that is the furthest point for the power source. Fishing the wire is a challenge since there are a lot of moving parts with the suspension and drive train.
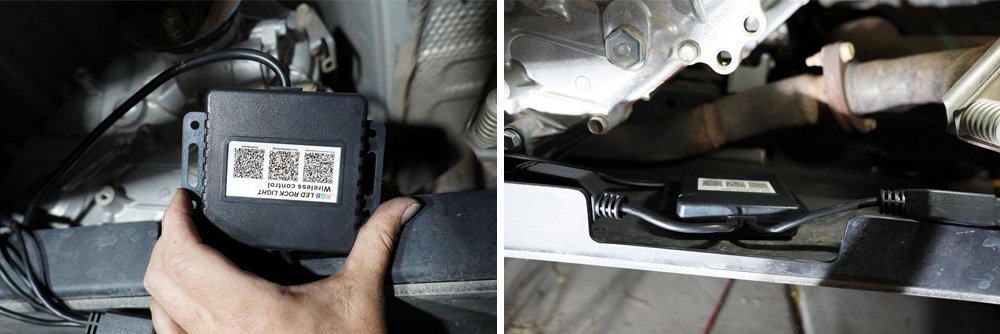
Step 3. Mount Control Module To Transfer Case Skid Plate

In this case, the rear rock lights, even on an 11’ lead, only reach ¾ of the way. So I decided to mount the control module underneath the vehicle to the transfer case skid plate.
Step 4. Connect All Wiring Before Hard Mounting

Connect all the wires before hard mounting. Also, use your phone to scan the QR code on the module to download the app to control the lights.
Note: Each connection is waterproof with an o-ring. To properly connect them, just point the two arrows towards each other and press, then twist the cover over the o-ring.
Step 5. Bundle Wiring & Zip Tie To Skid Support

The hardest part of the install is dealing with the rat nest of cable that can not be trimmed down. The best I could manage was to neatly bundle them all up and zip tie it to the skid support.
The easiest part of the install is running power from the module to the sPOD.
Step 6. Connect To App On Your Phone

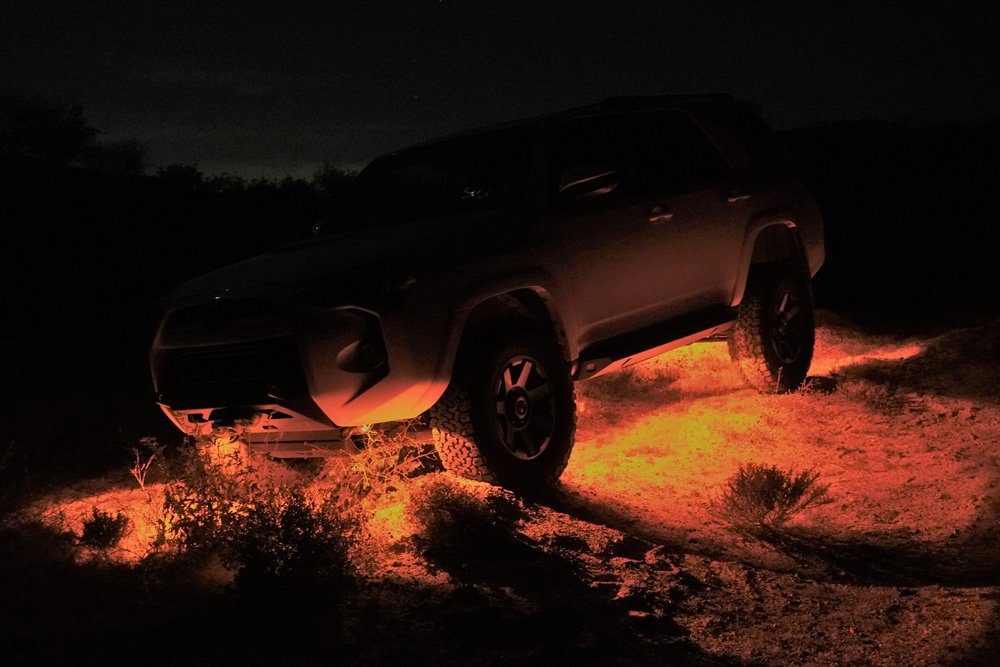
With initially turning on the lights, they were set to blue. Verifying the placement of the lights showed that they covered almost the entire underside of the 4Runner, so I was very happy with the placement.
Step 7. Test Your Color Options!

Next was to test the other colors. Changing the colors is easy using the app. And, yes, you can even set it to music so your backcountry campsite can turn into a club.
So, How Do They Look?

This is where things get interesting—and not in a good way!
When using the lights in their red, green or blue (RGB), they look really good. They are bright and vibrant in those three colors. However, if you try mixing the three to create other colors, then that’s when it all falls apart. Trying to get white was impossible no matter how much I tried to adjust the hues. The images above examples of the nearest I could get to yellow and white.
Simply said… lackluster at best and awful at worst. They kinda look cool in an artsy kind of way but not in a useful way. Also, they flicker when on the “white” light setting.
Final Thoughts
Overall, I would say that I’m unhappy with these lights. I wanted to have a true white or yellow light to keep bugs at bay, however, these don’t do that, not even close.
On a positive note, Extreme LED does have very good customer service, they were very prompt in replying and even sent a return shipping label to send them back so their techs can check them out.
On a side note, I did notice that these lights look just like a few different brands on Amazon, which are selling for a third of the price that I got them for. I can’t be sure as I haven’t done a side-by-side comparison, but from images, they look like the exact same lights, same housing, same text, etc.
You can be the judge.

Trevor, what size are those plates and where exactly did you put them up at under your 4runner? I like this idea to use those.
Trevor,
I may have misunderstood, but did you send these back or keep them? I thought I was getting something a little different based upon another review in another vlog, but alas… not what I expected either.
Negative- yes, the white/yellow are dismal and they are pretty much installed at this point.
Positive- You are spot on the red green blue and I got them for about $100 on a Labor Day sale.
Trail Safe,
JB
I definitely returned them. They gave me a credit, so ill probably pickup a light bar that works great or perhaps just get some white rock lights for engine bay lights.
Great review, and I agree with the author not to sleep on Extreme LED. I have been rocking the Extreme Led X6S bar and it has held up great! It has been through two snowy/salty/nasty winters. It still works flawlessly even after having snow/ salt caked onto the light bar for multiple days while driving at highway speeds. It is mounted in a C4 Low Pro bumper so it takes a lot of road debris as well & will clean up as if brand new.
I came across this company Lux Lighting Systems out of Colorado recently. They make what look like well thought out high quality LED lights (white only and new RGB kit). I particularly like the fact that they use a magnet for easy attachment of the LED light that also acts as the heat sink. I would be interested in seeing a review of their product or if anyone here has any experience with their product.
https://luxlightingsystems.com/
Awesome, thanks Adam for the heads up. Those lights look really cool. I will have to try them out.
So what was the final verdict? Did the buttons for white and yellow (shown above on the app. not work at all? Or?
Final verdict is Look at other options.
The app buttons work but white or yellow are not showing in the lights. The pictures above with the multi colors are white and yellow.