
Reducing tire pressure, or “airing down” before hitting the trails for improved grip and a better ride, is a common practice that is easily done with something like the Coyote deflators or ARB tire deflators.
Going the opposite direction and bringing the tires back up to pressure requires additional equipment. Although you could do the job with a bicycle tire pump, using a 12-volt air compressor is a lot less work.
A compressor is also handy to have for inflating tires with a slow leak, re-inflating after patching or plugging a tire, and filling up larger air-filled objects like air mattresses, inner tubes, and rafts.
Vehicle-mounted air compressors like the single and dual cylinder air compressors from ARB that Coy and Brenan have written about are excellent options, that provide good performance and allow for frequent use. They’re on the more expensive side, going for ~$275-$500, plus ~$100 for a mounting bracket.
Table Of Contents
VIAIR 88P

The VIAIR 88P Portable Air Compressor is a great alternative that won’t break the bank, but still offers nice features, and the ability to inflate tires up to 33 inches in diameter.
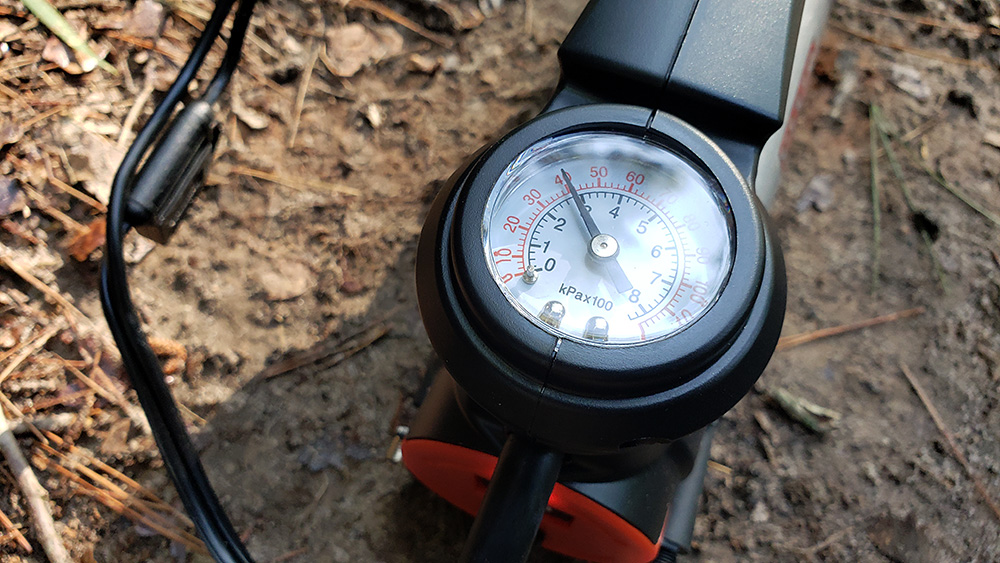
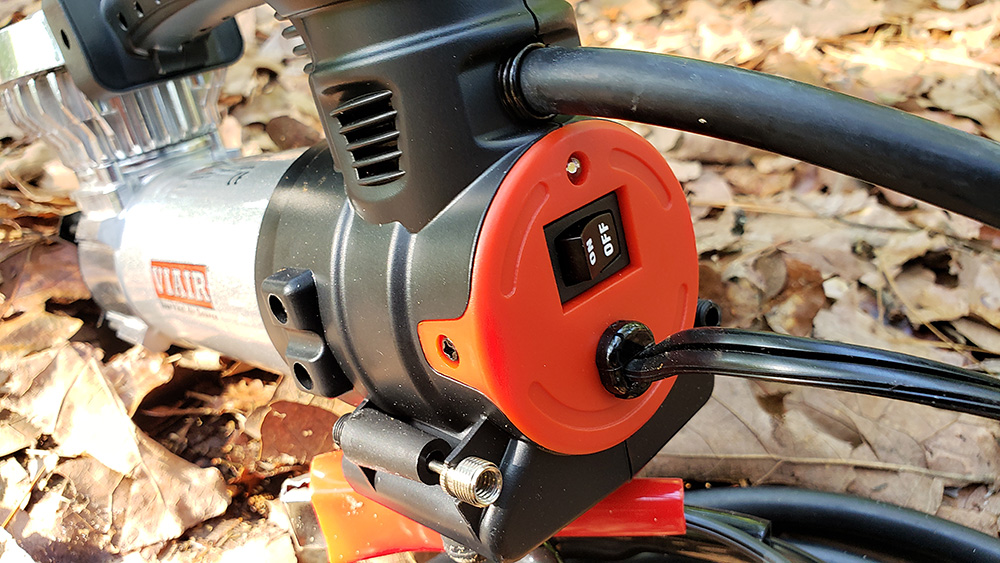
The 88P compressor has a built-in 120 PSI pressure gauge, power indicator/LED work light, on/off switch, and a ten-foot power cord with color-coded battery clamps. Air flows through a 16-foot hose, that has a solid brass, screw-on air chuck.
The compressor includes a needle for inflating items like basketballs, footballs, and soccer balls, as well as two larger inflation tips that can be used to air up items with larger air fill ports.

The specs of the VIAIR 88P are pretty impressive, given the price (less than 70 dollars), small size (9.8″L x 3.2″W x 5.6″H), and weight (4.75 lbs).
The 12-volt, permanent magnet motor provides a duty cycle of 25 minutes at 30 PSI, meaning that it can operate continuously for 25 minutes without issue.
The 88P pumps out just under 1.5 cubic feet per minute (CFM) at 0 PSI, 1.25 CFM at 30 PSI, and just under 1 CFM at 60 PSI. Flow drops off fairly dramatically at high pressures, like 0.64 CFM at 90 PSI, and 0.35 CFM at 120 PSI.
The compressor has an IP53 Ingress Protection rating, which means that its construction provides protection from limited dust ingress and water spray less than 60 degrees from vertical.
Supplies Needed (Including Modifications)
- VIAIR 88P Portable Air Compressor
- Rothco G.I. Type Mechanics Tool Bag
- Haltec H-5265 Standard Bore Lock-On Air Chuck
- 1/4″ BSPP Male x 1/4″ PUSH-LOCK Hose Barb (9920-04-04)
- Velcro One-Wrap Thin Ties | Black & Gray, 8 x 1/2-Inch
Using The Compressor
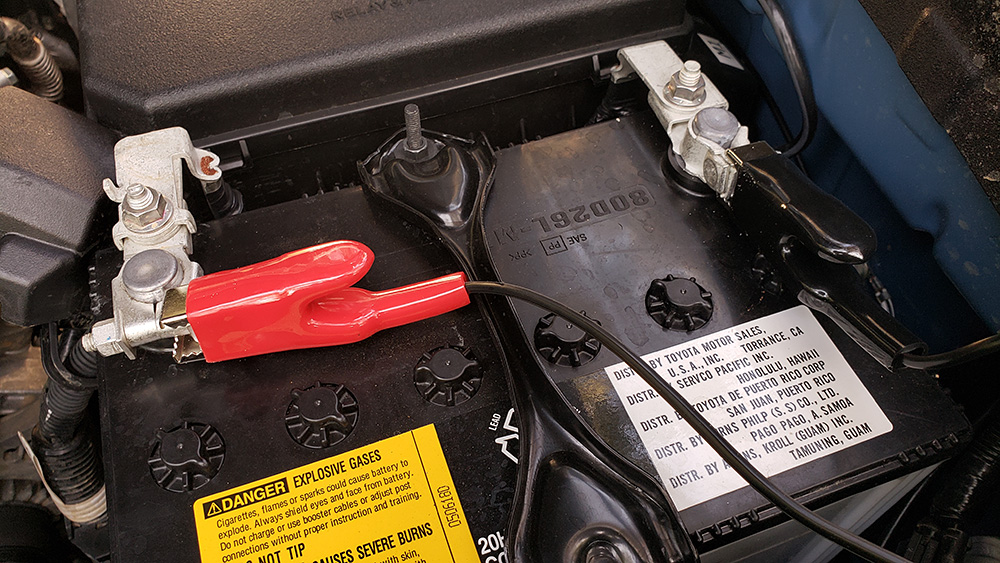
Operating the VIAIR 88P air compressor is very straightforward. Uncoil the 10-foot electrical cord, connect the red clamp to the positive battery terminal, and connect the black clamp to the negative battery terminal. Screw the air hose onto a tire valve stem or one of the included inflation tips if inflating something other than a tire, and move the power switch to the on position.
The compressor will begin to buzz and pump air through the hose. Monitor the built-in pressure gauge until the desired PSI is met, move the switch to the off position, and unscrew/remove the air hose.
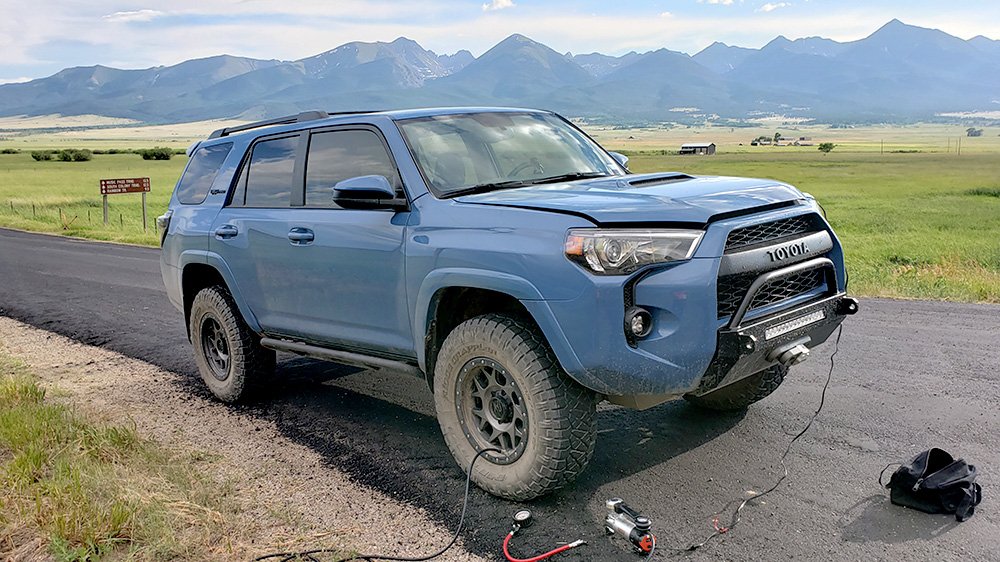
Using the 88P to air up the 285/70R17 tires on my 4Runner, I’ve found that it takes approximately 3 minutes and 30 seconds to inflate each tire from 20 PSI to 38 PSI. Rather than sitting and monitoring each tire during this process, I’ll set a timer on my phone for 3 minutes and 30 seconds, start the compressor, and wait for my phone alarm to sound. In the meantime, I’ll do something else, like check my gear, have a quick snack/drink, or talk with friends.
The compressor gets fairly hot during operation, so be sure to pick it up by the handle and steer clear of the cylinder, which is the bright aluminum piece with fins on one end of the compressor. You should also allow a little time for the compressor to cool off before putting it in a storage bag.
Modifying The Compressor

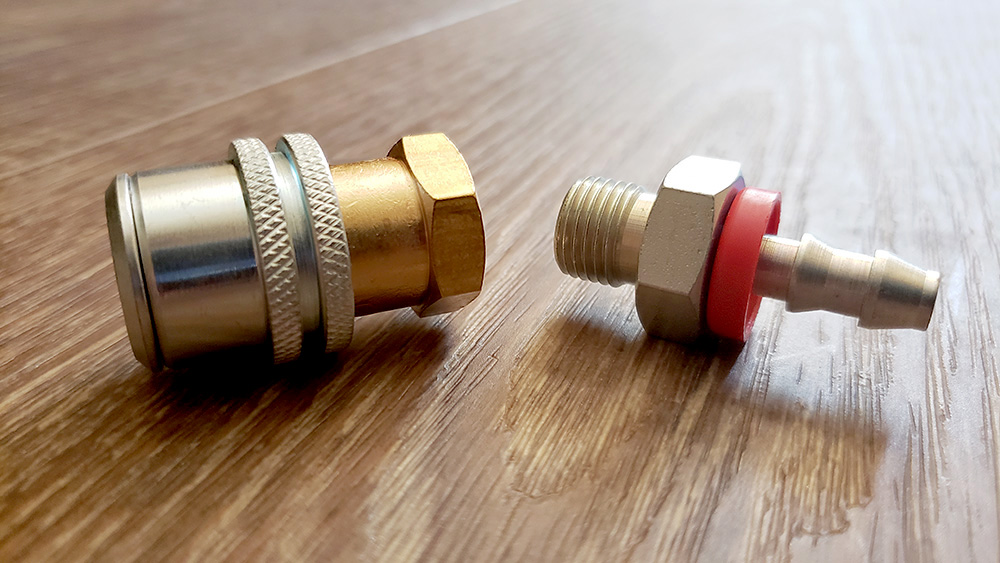
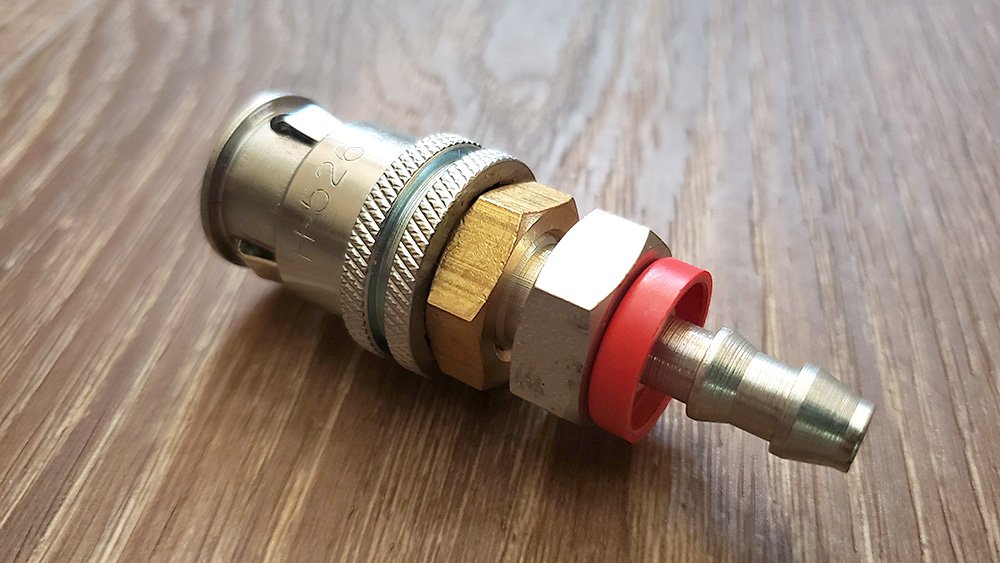
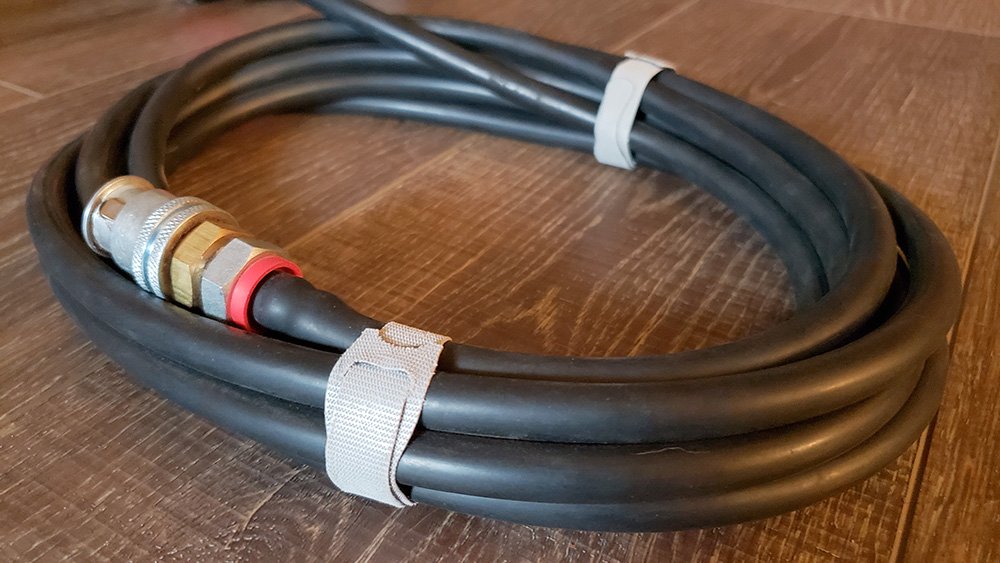
From the factory, the end of the air hose included with the VIAIR 88P has a brass, screw-on air chuck. This works fine, but to make the process of airing up a little quicker and easier, I decided to replace the screw-on air chuck with a model from Haltec. The H-5265 air chuck locks onto the cap threads of a standard valve stem when the sliding sleeve is pushed to the forward position. The chuck quickly releases when the sleeve is pulled back. Very slick! If you already have a different compressor that has a screw on air chuck, this same modification could be on it.
To mate the Haltec H-5265 air chuck to the air hose, you’ll need a 1/4″ male x 1/4″ hose barb fitting. I chose a Push-Lock style fitting for a clamp/leak-free connection.
The screw-on air chuck must be removed in order to add the Haltec. A sharp pair of heavy-duty scissors can be used to cut the air hose just before the original air chuck. I keep a pair of Wiss 812S scissors in my toolbox, and they worked well for this.

Wrap the threaded portion of the 1/4″ male x 1/4″ hose barb fitting with a short piece of thread sealing tape, screw the fitting and Haltech air chuck together, and then use two wrenches to tighten everything together.
Next, the air chuck and barbed fitting must be inserted into the end of the air hose.

The barbed fitting and air hose are a tight fit, so some type of lubrication is required to insert the barbed fitting fully. I used an old bicycle grip trick: I sprayed hairspray on the barbed fitting, then pushed it into the hose while twisting at the same time.
This takes a good amount of effort. The hairspray acts as a lubricant but later dries out, leaving everything stuck in place.
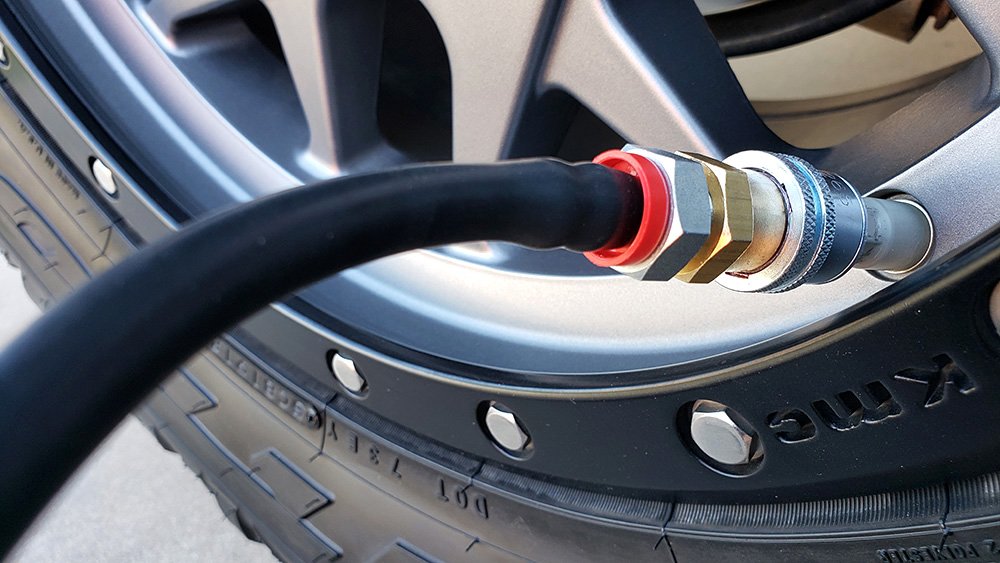
Using the Haltec air chuck couldn’t be much easier.
Grasp the knurled rings and pull towards the air hose to slide the collar back. Put the chuck over a valve stem, and push the collar down, towards the wheel.
The chuck will lock onto the valve stem. To remove the chuck, simply pull back on the collar.
Compressor Storage
For a while, I kept my VIAIR 88P compressor in the box it came in from the manufacturer. The box was made of fairly heavy cardboard, had a plastic carry handle, and wasn’t much larger than the compressor. That changed after the box got wet on one trip, rendering the cardboard no longer as strong or as shapely as it once was.
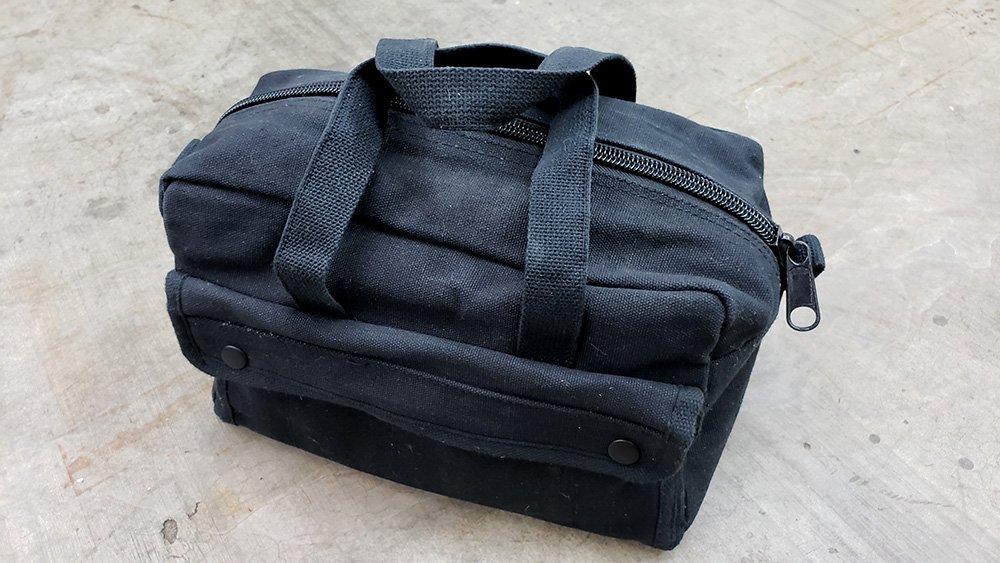
In searching for something else to store and carry the compressor, I came across the G.I. Type Mechanics Tool Bag from Rothco. It is the perfect shape for the 88P, at 11″ X 7″ X 6″. It’s made from heavy canvas and has a hard bottom to hold its shape. The bag is available in nine colors – ACU Digital Camo, Black, Coyote Brown, Grey, Navy Blue, Olive Drab, Woodland Camo, and Woodland Digital Camo.
I’ve heard that VIAIR has been including a storage bag with the 88P lately, but mine didn’t, and at the time this article was published, a related Amazon listing did not mention an included bag.
The tool bag has a stout nylon zipper that runs the full length and two exterior pockets fastened with large button snaps.
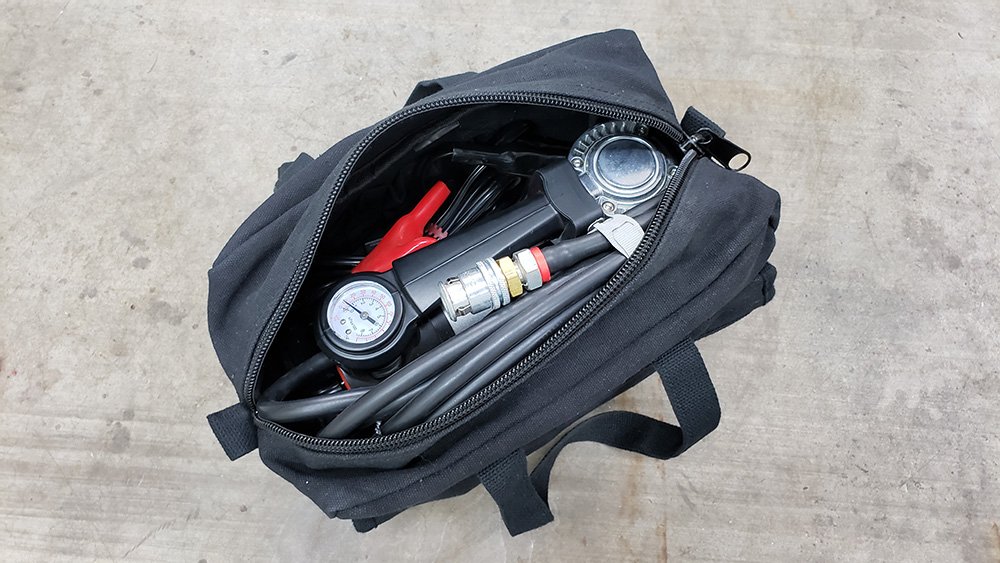
Rather than just stuffing 26 feet of electrical cord and air hose into the bag, I use Velcro One-Wrap Thin Ties to neatly coil and hold the cord and hose. At 8 inches long and 1/2 inch wide, these reusable ties can be used to secure many different items, inside your 4Runner, garage, toolbox, and more.
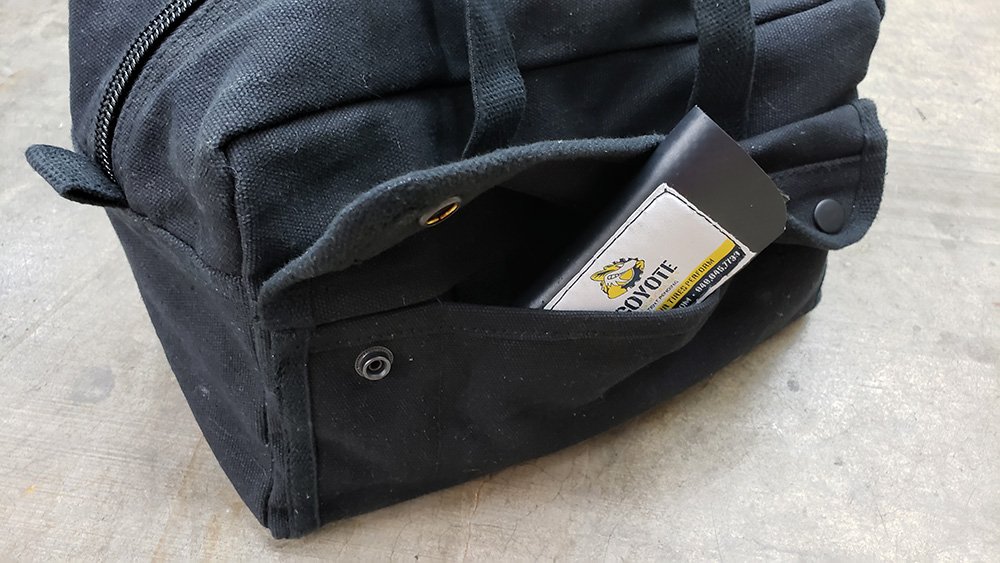
I’ve found that the exterior pockets are nice for storing my tire deflators, along with a few other tire-related items like spare valve caps and valve cores.
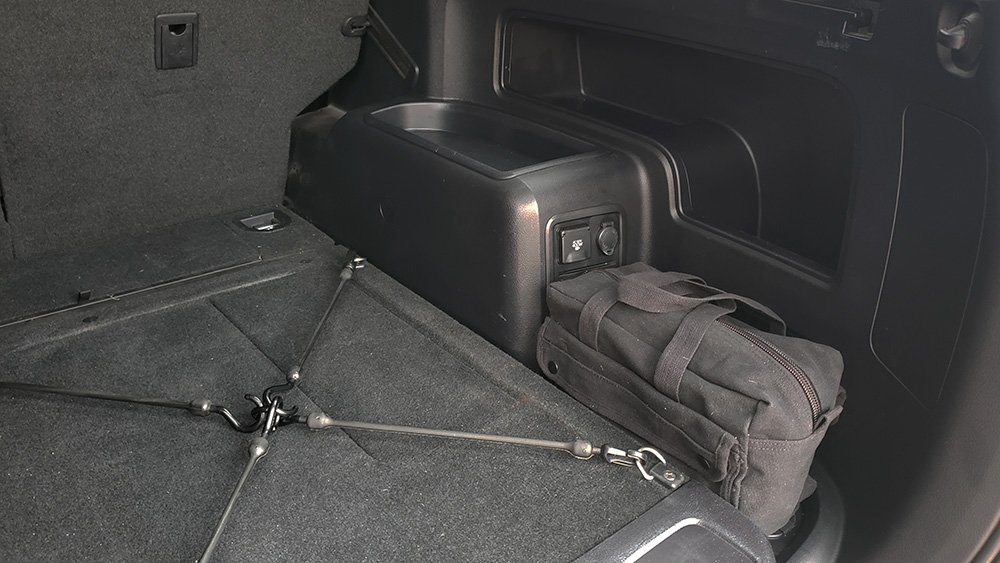
The tool bag’s smaller size allows for easy storage in many spots. One example is in the corners of the cargo area, near the rear-most factory D-rings.
Final Thoughts
With its solid construction, good performance, and small size, the VIAIR 88P is a great portable air compressor for 4Runner owners who are on a budget or don’t plan to use a compressor every weekend. In addition, the 88P is covered by a one-year warranty, under which VIAIR will repair or replace the product free of charge to the person who purchased it.
Questions or comments? Leave them below!

How well does the 88p do in very cold weather conditions (Wis.)?
This is the best solution I have seen for quick connect. https://www.sdoverland.net/collections/top-sellers/products/viar-88p-tire-valve-inflator-quick-connect-chuck-san-diego-overland
It lets you keep the screw on connector to use the other attachments to fill air beds, basketballs, etc.
Great write up. Pulled the trigger and bought all needed pieces. Viair 88p, Hal TEC air chuck, and the and the barb listed.
My issue is the female end will not receive more than 1/3 the male counterpart. (Jokes aside) I am perplexed and the only explanation I can think of is I got a bad haltec chuck.
By the looks of your post I should be able to fully connect the chuck to the barbed push connector right?
Thanks, Benjamin.
The connection between the barbed fitting and hose is quite tight.
I suggest heating up the cut end of the hose some (hair dryer or hot water), and then putting a little lubricant on the barbs of the fitting.
Push the barbed fitting into the hose, while twisting both. It’s not easy, but with some effort, they should go all the way together.
Good tip. I was talking about the male/female 1/4 inch connection. I think it will work but the haltec and 1/4 inch male piece don’t screw together much at all. Weird.
Apologies, Benjamin. I get a big fat zero for my reading comprehension grade there… 🙄
You might take the fittings to a local hardware store, and see how they fit when tried in other similar fittings. They’re tapered fittings, so they won’t fit flush, but should go together a decent amount.
I believe the link to the barbed fitting in the post is incorrect. You posted a 1/4″ BSPP thread to 1/4 barbed fitting and I think the Haltect is female NPT thread. So you would need a 1/4 Male NPT to 1/4 Barbed fitting.
This is great! Wonder if it could air up all 4 using a Morrflate system?
Hey Dan. I *think* the VIAIR 88P could do it, but it might take a while – not a lot of pressure, but a fair amount of volume.
thanks for the mod! ordered the parts on your instructions and can’t wait to get this done.
I run the 85p, basically the same model but powered via 12 volt outlet. It’s a little slower & currently approximately $20 cheaper. (60PSI / 1.26CFM for the 85p @ 15 amps vs 120PSI / 1.47CFM @ 20 amps) I’ve been running it since I had a Subaru Forester with decent results. Mine came in a small bag not much bigger than the compressor. It works for my needs.
If you don’t need an ARB on-board compressor or a power tank setup, Viair makes some good portable options that should be considered.
Good to know, Mike! It seems like the VIAIR compressors all have good bang for the buck 👍