
How to Wire a Molle Panel Light Using a Baja Designs Dome Light on Rear Window Molle Panels on a 5th Gen 4Runner
After upgrading the rear hatch bulbs to brighter LED Sylvania bulbs, we were still in need of some brighter light. The upgraded DE3175 bulbs that we bought had a better color and look but didn’t do much in the way of lighting up the cargo area.
I purchased the Baja Designs LED dome light with the switch. Looking back, I might have purchased the KC HiLiTES under hood light kit and converted that over to a rear cargo light kit.
KC HiLites Cyclone Kit
- Single: Check price
- Double kit: Check price
It comes with two Cyclone LED lights, an in-line fuse, a full wiring harness that you would need to extend, and a switch that would be pretty simple to mount on a MOLLE panel. The Cyclones pack 516 lumens with a flood pattern. You can buy single Cyclones and just build your own set-up as well.
Baja Designs Dome Light
- With switch: Check price
Baja ships their LED dome light in a little bag with one LED light (with a built-in switch), a rubber heat-tolerant backing, some hardware, and one zip tie. Baja Designs also makes the same light without a built-in switch (mainly used as rock lights). The Baja dome light is 208 lumens.
Both lights are good options. It just depends on the set-up you are looking for. Neither option is going to be plug-n-play, you will need to understand the basics of wiring.
Baja Designs LED Light w/Switch
The light arrived with about 2′ 22AWG power/ground wire attached.
This is a versatile light that can be mounted just about anywhere you can imagine. The light with the switch will get hot which is why they include a rubber heat-tolerant spacer.
Depending on where you mount your light, you may or may not need this. We are mounting ours to the Rago Fab MOLLE panel so we will not be using the spacer.
If you are mounting your light to rubber or plastic, you should consider using the spacer.
Baja Designs Dome Light Wiring
Tool Check
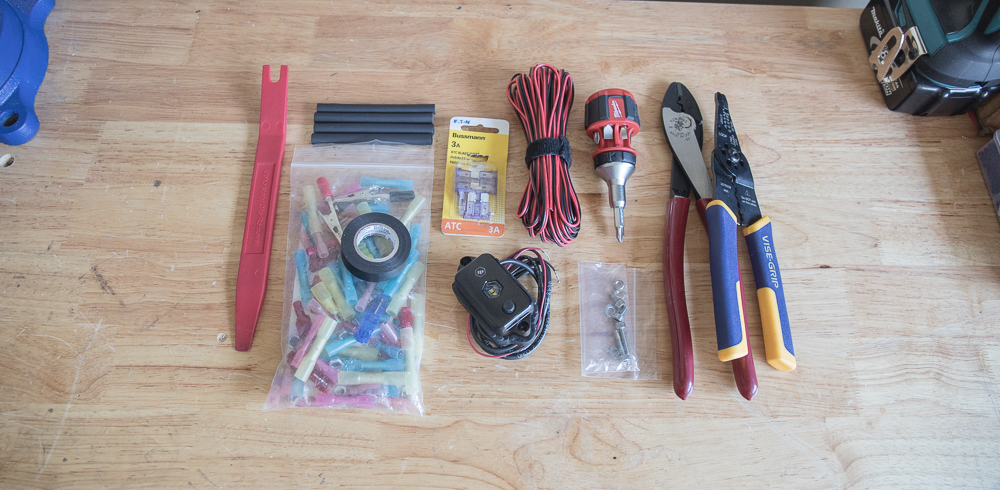
You should have the basics for wiring a harness. I used waterproof connectors throughout. You don’t need waterproof connectors for inside the cab but you should use them if your connections are exposed to the elements.
- 1amp fuse
- Optional: Inline fuse holder
- Butt splice & ring connectors
- Heat shrink
- 1/8″ Wire Loom
- Electrical Tape
- Extra Zip Ties
- Plastic Pry Tools
- Basic shop tools
- Wrenches & Sockets
- Screwdriver
- Wire Strippers/Cutters
- Wire Crimpers
- Heat Shrink Gun/ Lighter
Where to mount the light

I have an Orange Boxx panel as well as a Rago Fab panel. I wanted to mount the light on the Rago Fab panel because it has a slight kick-out closest to the hatch.
The kick-out faces into the cabin, so hopefully we won’t get blinded or get too much glare while looking into the cargo area. Mounting it to the kick-out should throw a good light pattern over the rear cargo area along with giving us quick/easy access to the switch.
Inline Fuse or Fuse Block

Baja Designs dome light: 3Watts/ .20Amps
If we didn’t have Amps, we can take (Power/Voltage) x 1.25 (125% of the normal operating current).
3 Watts (BD power) /12.9 (car battery) x 1.25 = .29Amps. Either way, we would need less than a 1amp fuse. If you are running your light to a fuse block, you can add a 1amp fuse, and connect your ground and power. If you do not have a fuse block, you want to run an in-line fuse with a 1amp. In our case, we are wiring to a Blue Sea Fuse Block on the Power Tray next to the Switch Pro.
I called Baja Designs and asked what fuse they recommended, and they said a 5Amp fuse. Then I asked why they wouldn’t use something smaller and the guy replied: “oh, I didn’t know they made smaller than a 5amp fuse”. Apparently, a 5amp fuse would be fine. We tested with a 3Amp fuse but ordered a 1Amp and will replace once it comes in. If you run two of these lights together, then maybe use a 3-5Amp fuse.
This little light is an incredibly low draw.
Step 1: Measuring Length of wire, connecting & testing
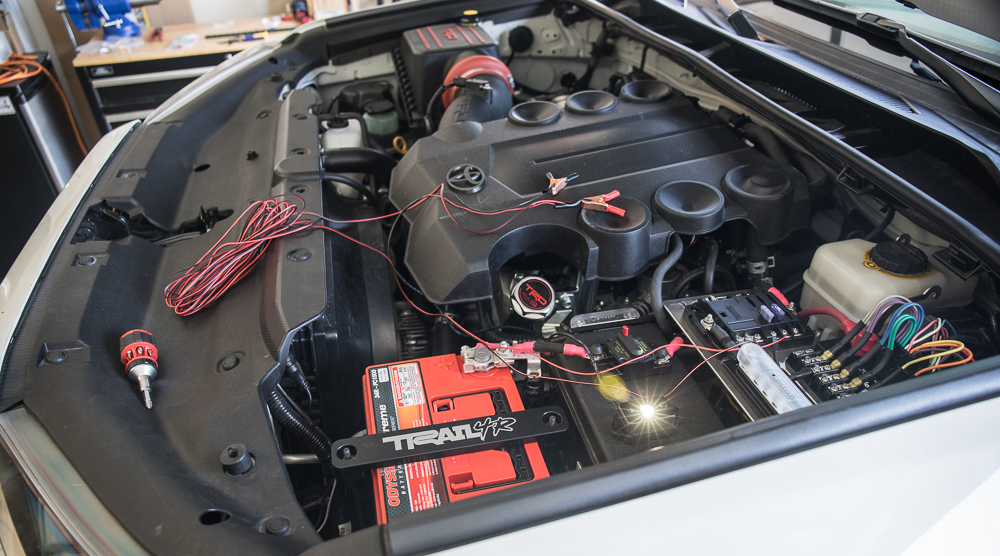
I measured about 25′ of additional 22g wire and then connected the new length of wire for testing. It never hurts to over-wire just in case. We tested the harness with a 3Amp fuse and later swapped in a 1Amp fuse after heading down to auto-zone.
Step 2: Remove floor trim plastics on the passenger side

To allow easier access to the interior firewall, removing these trim plastics will help. It is also needed for running the wire from the engine bay through the floor plastics and into the rear hatch where our light is located. Having a set of plastic pry tools should come in handy right here.
Step 3: Running wire through the firewall
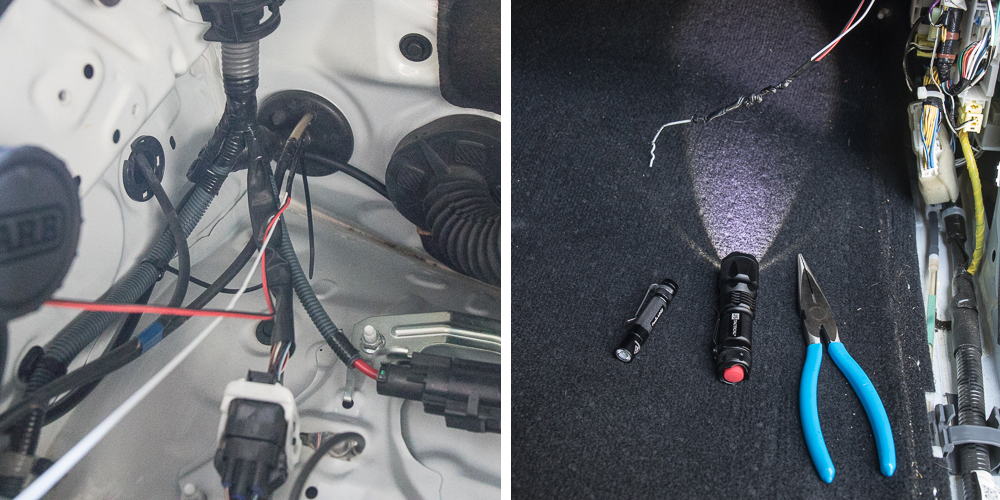
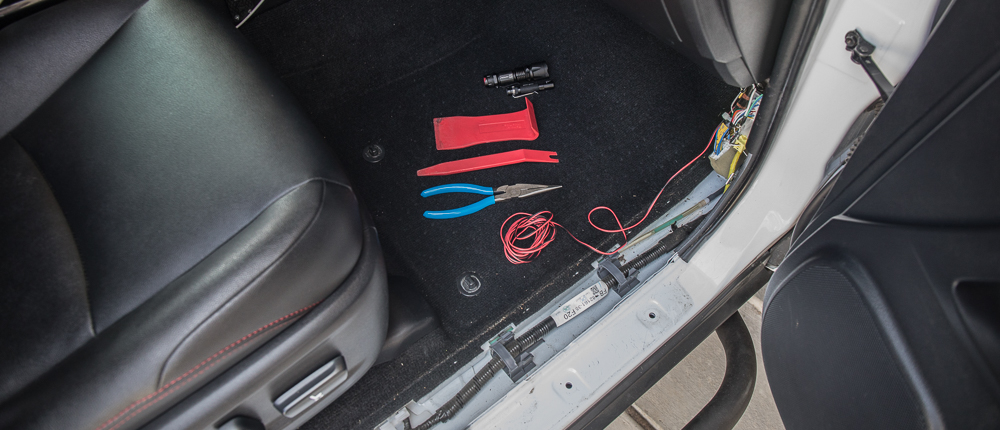
Grab a fisher wire and run the 22g through the passenger side firewall. Once you have a 4-5″ fed through the firewall, head underneath and with a pair of needle nose pliers and gently pull the fisher wire along with your power/ground cable down and out.
Step 4: Remove rear passenger side trim floor plastics
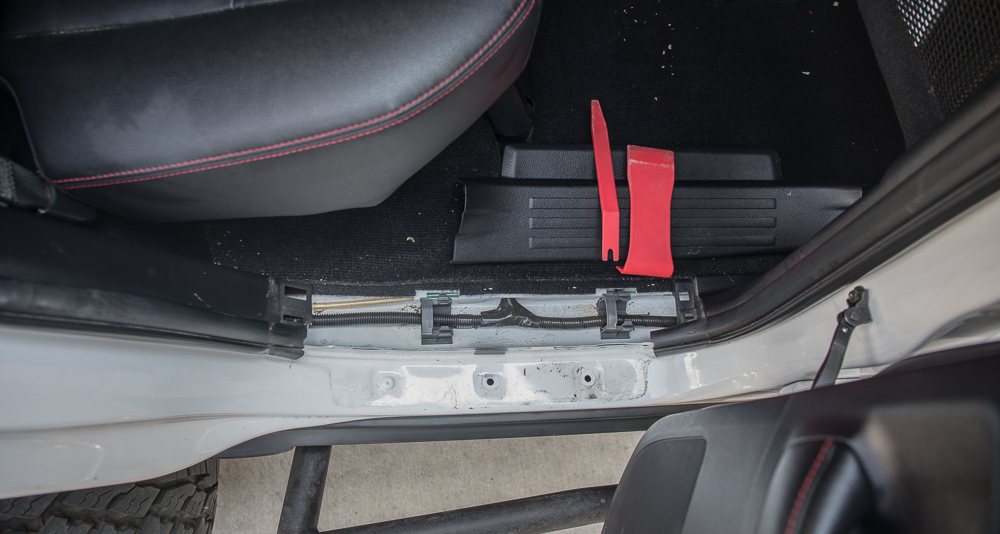
Again, using your plastic pry tools and pop the floor plastics in the backseat.
Step 5: Pull back rear door weather stripping
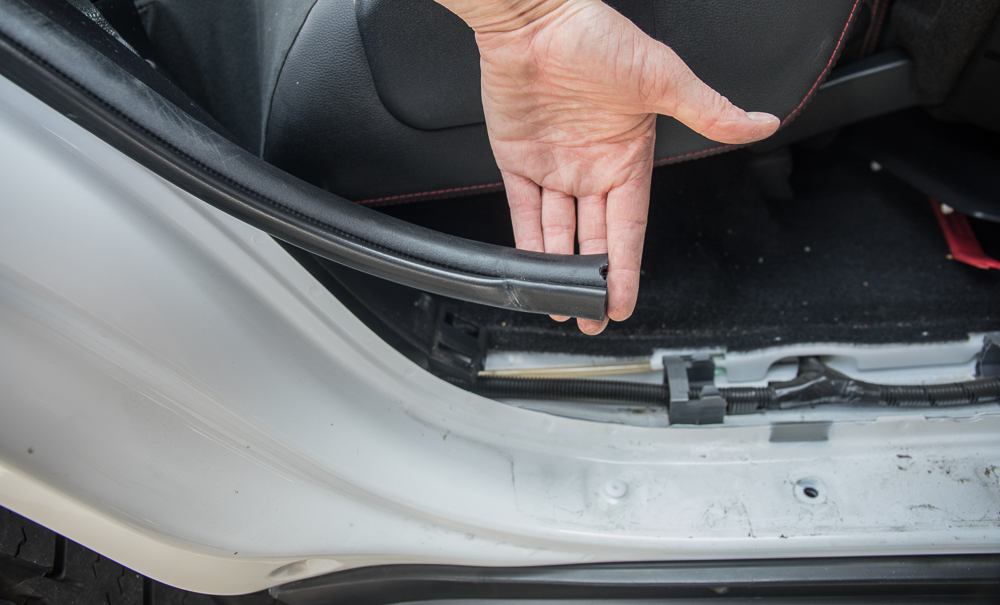
Step 6: Fisher Wire through Backseat Weather Stripping
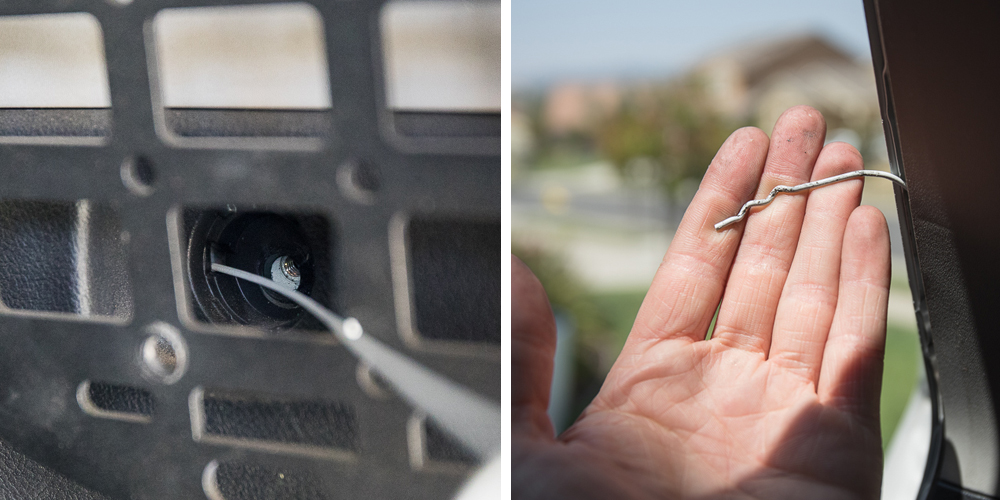
Remove the MOLLE panel spacer bolt. I found that it was easier to run my wire through the panels with the bolt removed.
Run fisher wire through the rear panels. You can remove both of these panels as well if you want. I just felt like it was quicker to run a fisher wire through.
Step 7: Pull wire through MOLLE Panel
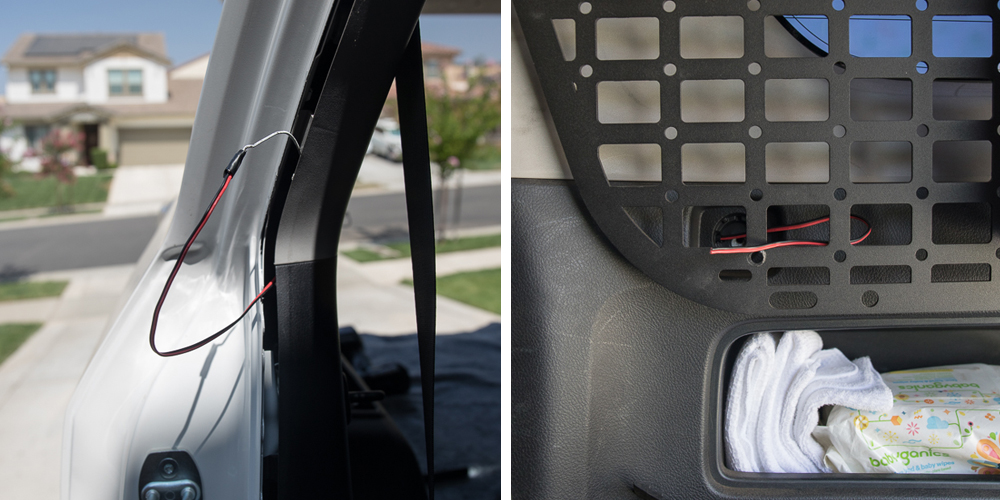
Pull your wire through and start taking out the slack. Now that your wire is running along the floor into the rear cargo area, you can start to determine how much wire you can cut off or pull through from the front.
Step 8: Wiring Baja dome light connectors
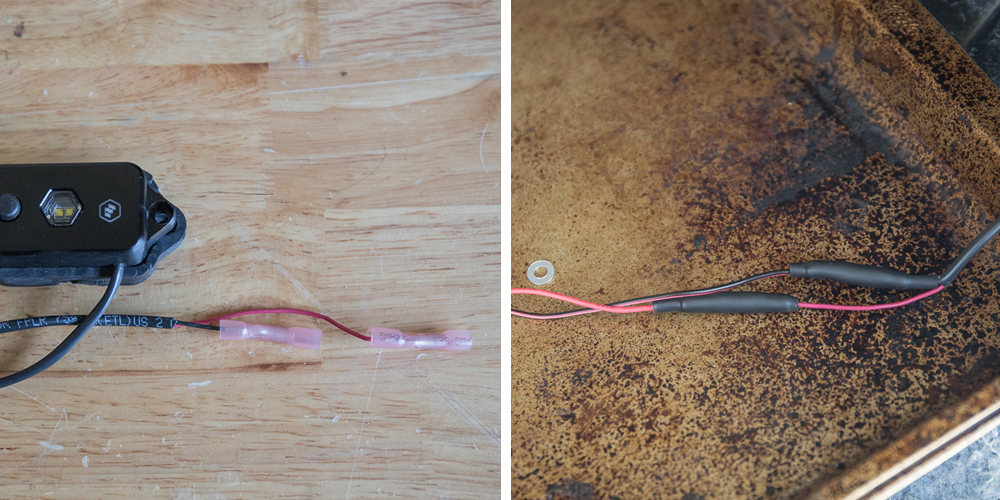
I used waterproof butt-splice connectors because that’s all I had. I tested the light again. It worked. I used heat shrink to close everything up and started to organize my wiring back up to the front.
Step 9: Wiring Loom and Measuring Length or Wire to Terminals
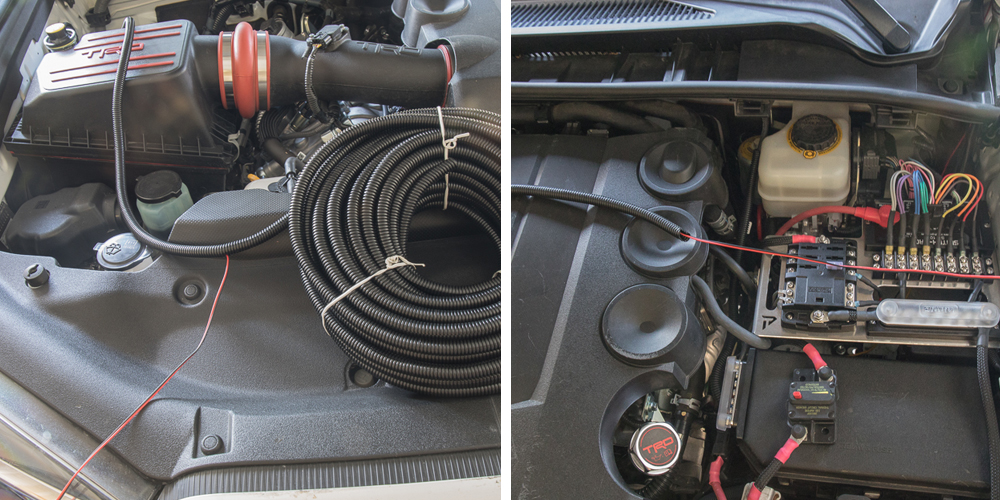
I started looming the wires up to the terminals. I measured the distance I would need to make the connections and then cut the excess off. I started to loosely zip tie everything down along the firewall. Going back, I would have used 1/8″ wiring loom or something smaller for the engine bay. All I had was 75′ roll of 1/4″ loom.
Step 10: Adding new Terminals, connecting & testing

Add 18-22g waterproof ring terminals to the end of the wiring harness. Connect your terminals and test one last time. Again, I have my terminals connected to our Blue Sea fuse block on the power tray. Your set-up may differ here.
Step 11: Final Connection
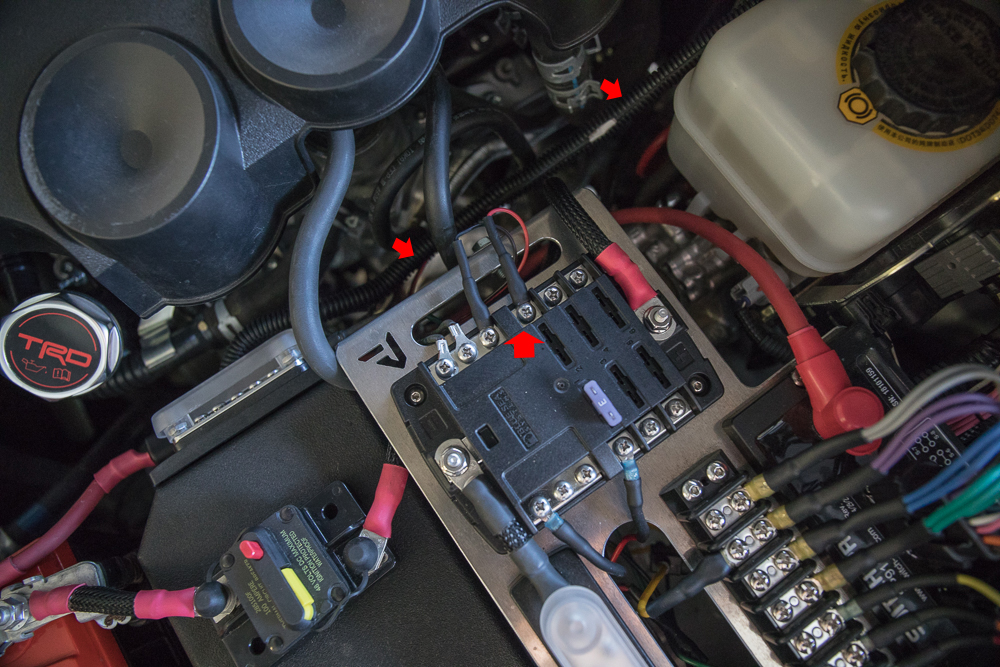
Step 12: Zip Ties and closing everything back up
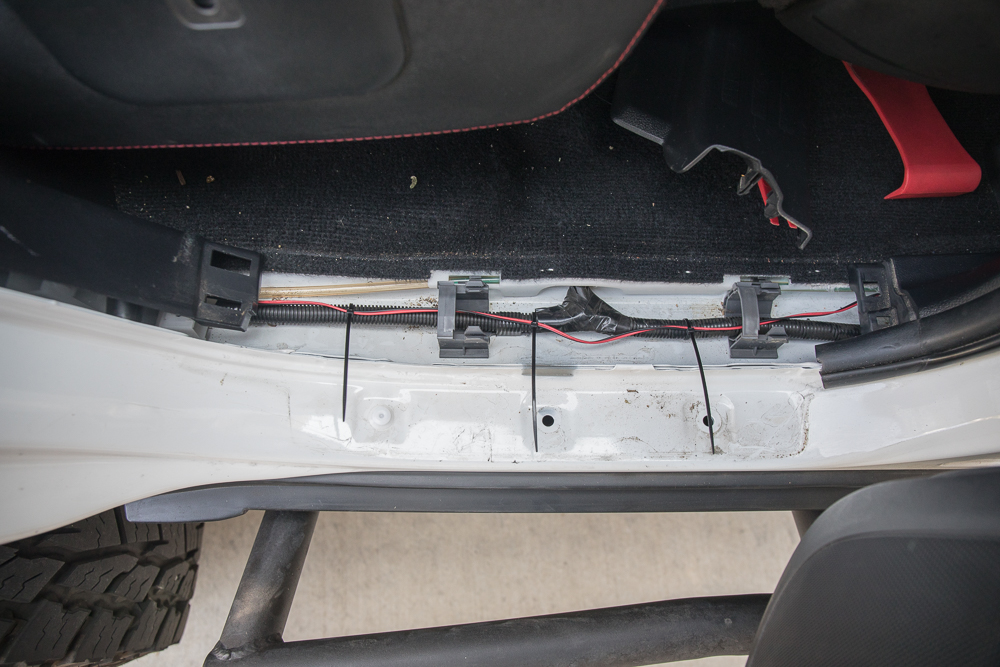
Head back through your wiring and zip tie everything down. You also need to place your weather stripping back on and then snap down your floor plastics.
That’s it. You should be all set.
Before

The rear cargo with two Sylvania DE3175 bulbs.
After

One Baja Designs dome light and two Sylvania DE3175 bulbs. Both shots have the exact same exposure, settings and camera position. I boosted the clarity and dropped the highlights just a tad.
Was it worth it?
The Baja Designs dome light is around $75 so it’s not cheap for 200 lumens. For around $120 bucks, you can get two KC Cyclones sitting at 516 lumens each.
I had an Energizer headlamp light rated at 315 lumens ($20) mounted to the MOLLE panel and it pumped out more light and featured more light modes.
The nice thing is that I never have to worry about batteries with something hardwired but $75 is quite the spend.

Looks good.
I have a lot of trust in the quality of BD’s lights.
Their website states 400 Lumens for their switched dome light…
DMT, weird, they must have upgraded their switch. If you Google “Baja Dome Light 208 Lumens” a bunch of websites displays that number as well. Good catch and thanks for the update.
I use a slim 20” led bar that I got from Amazon, the kind you might use for under cabinet lighting. It’s rechargeable, so I have it mounted to the right wheel well with a short micro usb cable running from it to a low profile USB plug in the nearby DC outlet. That outlet isn’t hot when the vehicle is off, so I don’t have to worry about leaving it plugged in all the time. But, it’s always charging while I’m driving, so it’s ready to go anytime I need it. You just touch your finger to it to turn it on and off. Lastly, it’s magnetic—the way you mount it is by sticking a metal strip to the surface that holds the magnetized light. That means I can grab it from the back and stick it under the hood when I need a light there. This thing was about $20, and it’s been a great solution.
Sounds like the Energizer headlight is the winner to me. Super low cost and super easy to mount to the rack… Also if you ever go to sell the 4Runner, you can just take it off and re-use it. So what do you think really, would you rather have the headlamp mounted back in there on a panel and you save the $70 on the Baja lights or whatever it is. Or buy the KC Cyclones? Maybe run two Cyclones on each side of the 4Runner. I have two Rago fab panels. I need something to light up the cargo space. Factory lights are garbage.
Yeah man, good question. Any of those options are good depending on your goal. The Energizer headlight was a quick fix for me but I guess could be a permanent solution. I really liked the thought of having something fixed on the MOLLE panel without needing to swap in and out batteries. But, if used only here and there, it may pay for its self over a wired/fixed install like the Baja Dome or KC Cyclones. At the end of the day, what would I rather have? Maybe just two Cyclones on the rear hatch door would be nice.