Article was written by 2017 Toyota 4Runner TRD PRO “War Runner”.
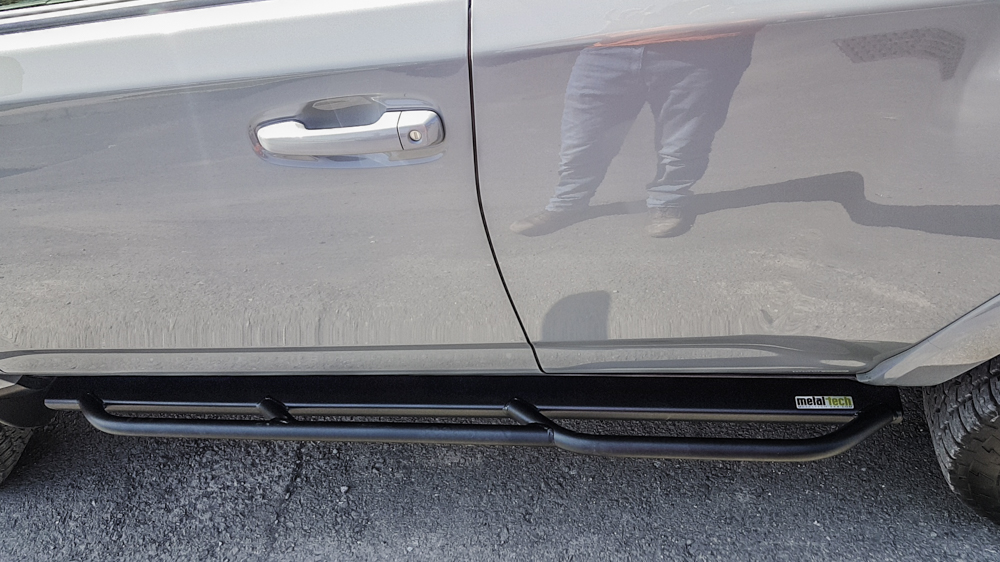
The Metal Tech 4×4 Rock Sliders are top-tier off-road equipment. Designed for extreme durability, they fit KDSS suspension, SR5, Limited (with lower body panel removal), TRD Pro, and TRD Off-Road models.
Key features include rear kick-outs to deflect rocks and debris, a two-stage rub rail for heavy abuse, and laser-cut, CNC-formed construction. Unique to Metal Tech, these sliders are powder-coated both inside and out, offering unmatched protection and longevity.
These fit the 2014-2024 models. These sliders are designed to work with the KDSS suspension, SR5, TRD Pro, TRD Offroad, and Limited. With the 4Runner Limited, removal of the lower body panel is required.
Find It Online:
- MT Sliders: Check Price
Tools Needed for Rock Slider Install:
- ½” wrench
- ½” socket, 10mm socket and ratchet
- Loctite 271 Heavy Duty Thread Locker
- Car jack or a buddy’s hand
Table Of Contents
1. Remove Plastic Mud Flaps
On the body, in front of the rear tires, remove both small plastic mud flaps using your 10mm socket and ratchet. 4 Screws total, 2 on each side. The small flaps serve no purpose, out with the old in with the new!
2. Double Check Holes and Hardware

Now that the useless flaps are off, gather all 12 alloy bolts, 12 lock washers, and 12 flat washers that come standard with the Metal Tech 4×4 sliders. Each bolt has its own lock washer and flat washer, slide the lock washer on first and flat washer on second on all 12 bolts.
Double check that the frame will accept the standard alloy bolts, and that the holes on the slider frames align with your frame. As you guessed, 6 go on each side, lay them where you can reach them when your preparation in all life scenarios is key!
Next grab a buddy, or a jack.
3. Align Sliders in Place & Apply Loctite

Now that you know these bad boys fit and your moments away from getting them on, grab your Loctite, jack and or buddy and set each slider on the correct side. If you’re using a jack, balance the jack on the center of the slider and slowly crank it up to where you can get at least one bolt in on the front and back (tightened enough to hold it in).
If you are using a buddy, both of you sit down with the slider on your lap and scoot your way under the car, lift the slider up simultaneously and put in a bolt on each side (tightened enough to hold it in).
4. Bolt & Tighten Down Sliders

Once the slider is in place, you’ll notice that the slider holes are elongated, allowing for about an inch of height adjustment. I recommend raising it to the highest position for extra clearance.
Next, apply Loctite to the next bolt, insert it, and tighten it while both you and your buddy push up on the slider. Repeat this process with the remaining bolts, then go back and tighten the first two bolts after applying Loctite.
5. Tighten Bolts in Star Pattern
Next, you will tighten each bolt in a star pattern to distribute the pressure evenly.
6. Repeat On Passenger (Possible Fuel Line Move)

Repeat on the driver’s side, you may have to move your fuel line (don’t worry, there’s plenty of slack to pull it out of the way without disconnecting it) so the slider frame could evenly mount against your frame. Repeat steps 3 – 5 and you are done.
7. Double Check Bolts

Double check your work, make sure all bolts are tight, all bolts have lock washers and flat washer and that your fuel line is not being pinched.