It’s no secret that there are many roof rack options for the 5G 4Runner. They’re easy to install, add substantial utility, and massively improve the appearance. Aftermarket companies have seen the demand for innovative solutions and have, in turn, created many fantastic options.
So, how can one possibly decide which roof rack to go with? It helps to start by defining your mission. Are you looking to mount every accessory known to man to the top of your vehicle? You’ll probably need one of the market’s beefier options. Are you simply looking for somewhere to mount your skis in the winter? A simple set of crossbars will do the trick.
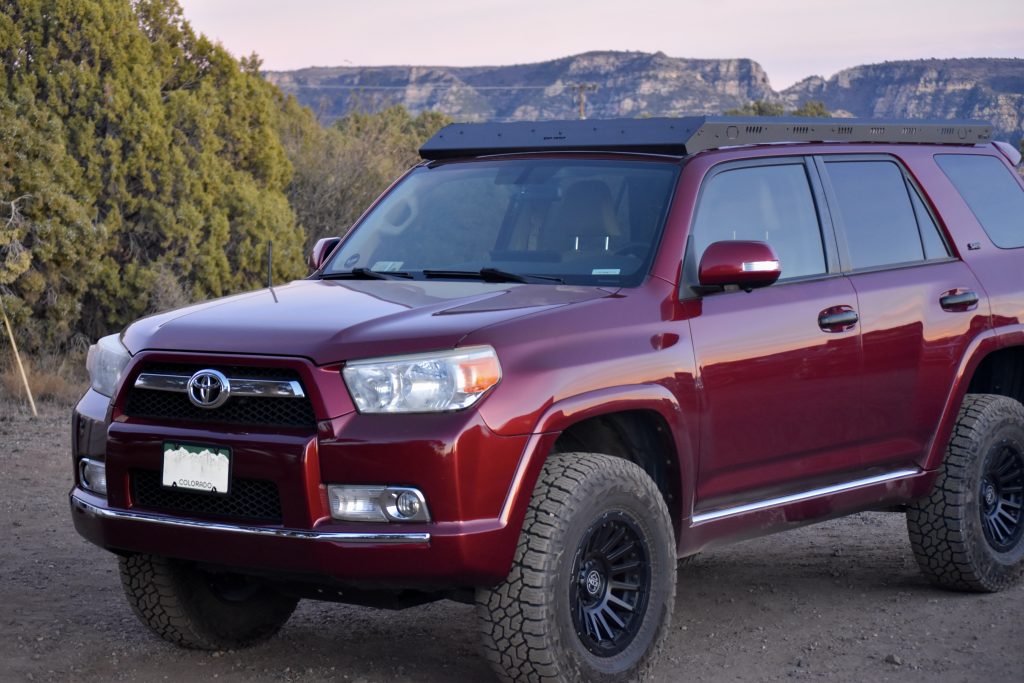
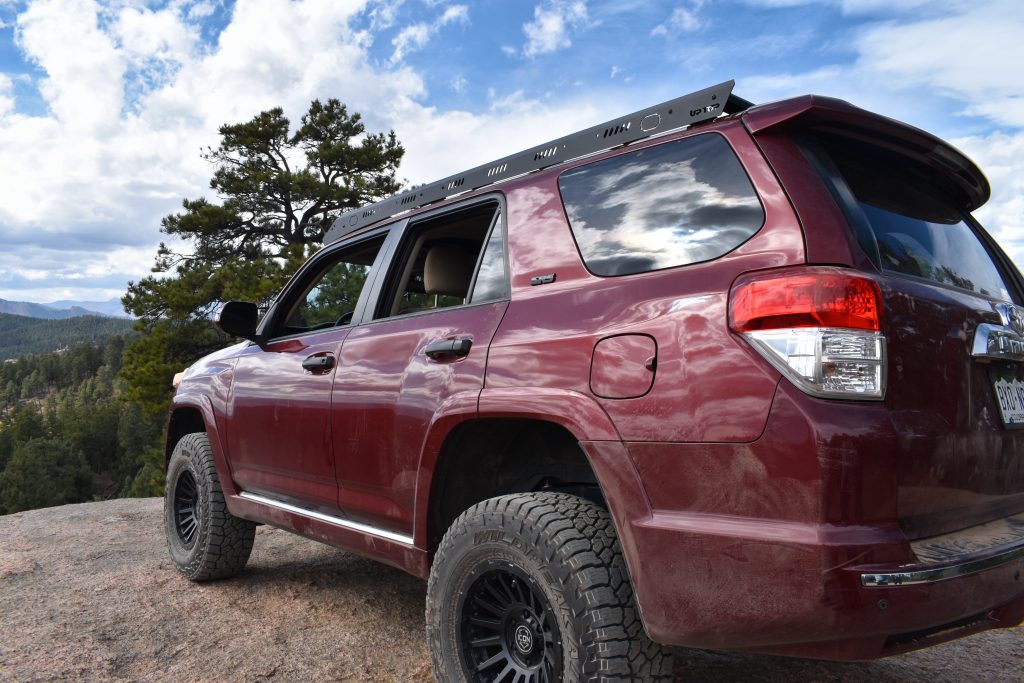
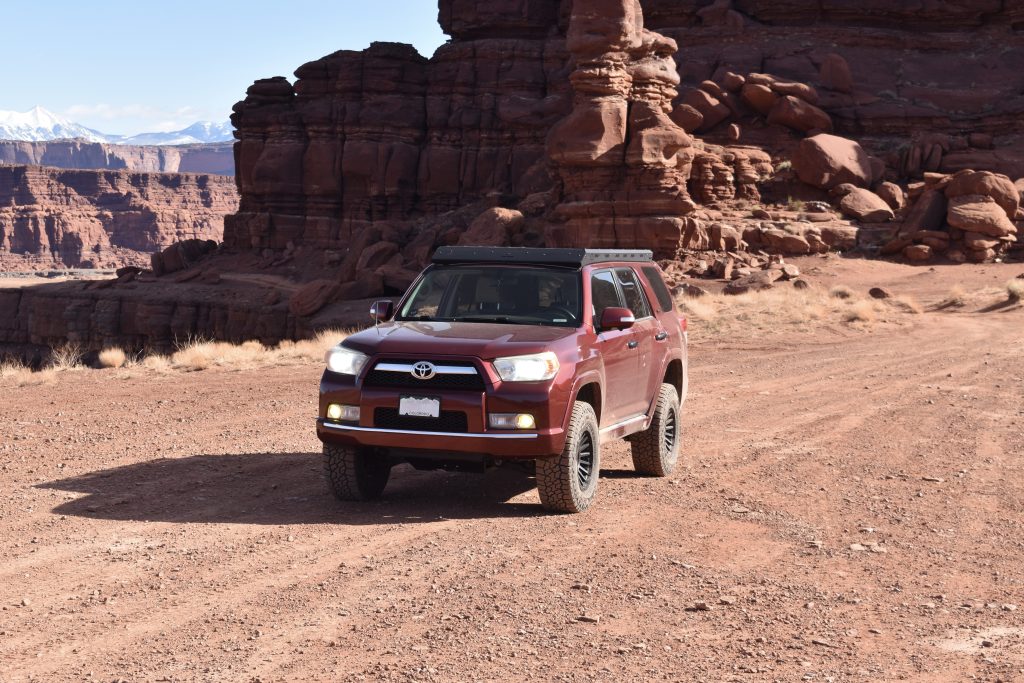
Today, we look at upTOP Overland’s Kilo Roof Rack, designed to check the box for “all of the above.” I’m convinced it’s the optimal roof rack for an overland-focused daily driver setup.
If you decide to purchase one, we’ve got a discount code! Use – TRAILCO – at checkout.
Table Of Contents
upTOP Racks
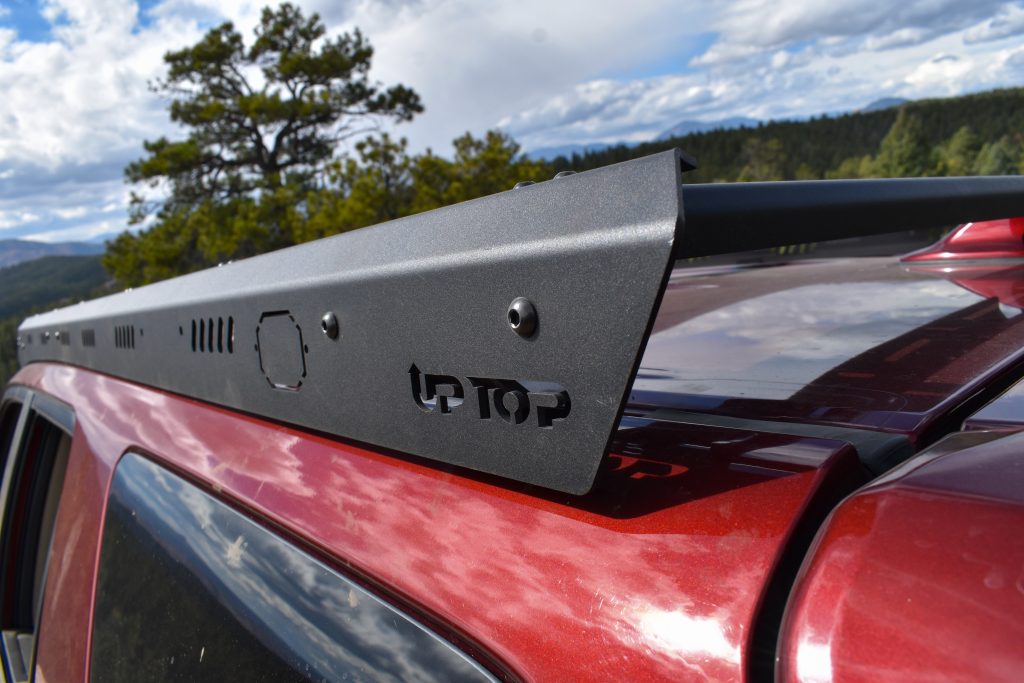
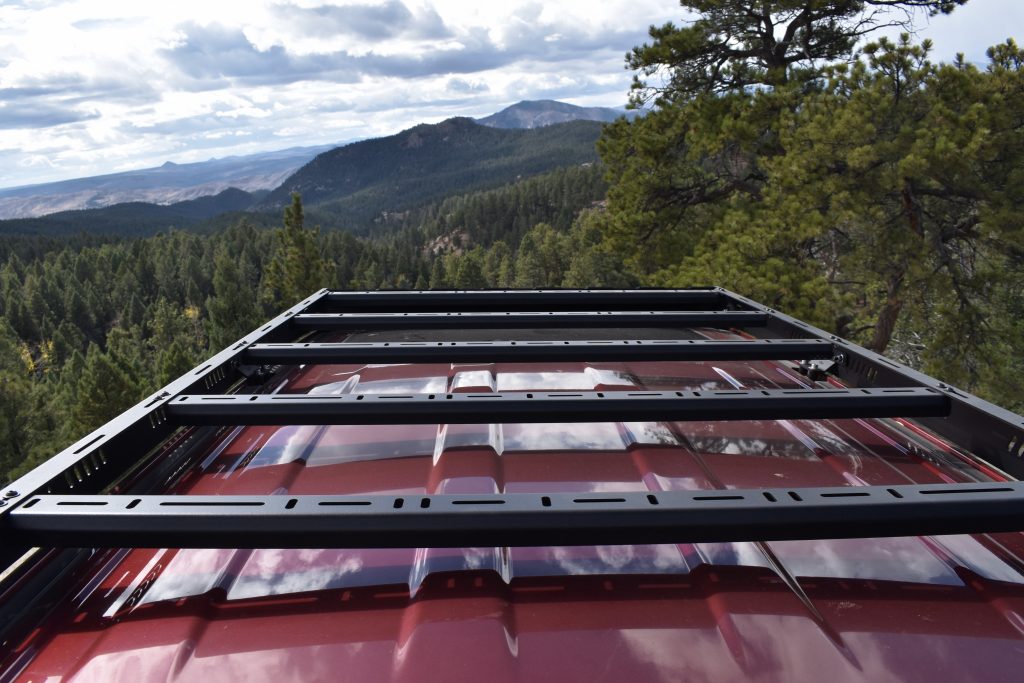
Based in Colorado, USA, upTOP Overland has taken the off-road world by storm with their attractive, modular roof racks. They used to carry several different racks, but have now moved into one flagship version, the KILO.
There was increasing demand for a low-profile, and aerodynamic roof rack. As a result, they developed the Kilo.
Through innovations like a removable lightbar cutout in the wind fairing and optional mounting feet for a non-drill installation, the Kilo is easily tailored to each user’s unique needs.
Features & Specs
- easily add light bars, scene lights, and grab handles
- 3D modeled and laser cut
- durable powder coat
- 6061 aluminum for body and wind screen
- carbon steel mounts and crossbars
- optional drilling for added strength and stability
- lifetime no hassle warranty
- 250 lb. dynamic weight capacity, 800 lb. static
- free shipping to continental US
Installation
Thanks to upTOP’s modular design, the Kilo is easily installed using basic tools in a couple of hours. Working alone and taking photos along the way, it took me about three hours to install the rack using the above video as a guide.
The only installation step where a second set of hands might have been helpful was when installing the side rails, but they’re light enough that one person can easily accomplish it if care is taken to protect the roof from scratches.
Tools Required
- Weather silicone sealant
- Caulking gun
- Rubber/nitrile gloves (highly recommended when working with silicone)
- 5/32, 3/16, 7/32″ Allen key or Allen head socket
- 9/32, 7/16, 1/2″ deep socket
- 10mm wrench
- 13mm socket wrench
- Flathead screwdriver or trim removal tool
- 1/4″ drill bit (optional)
- Rubber mallet (optional)
Step 1. Remove Factory Roof Rack
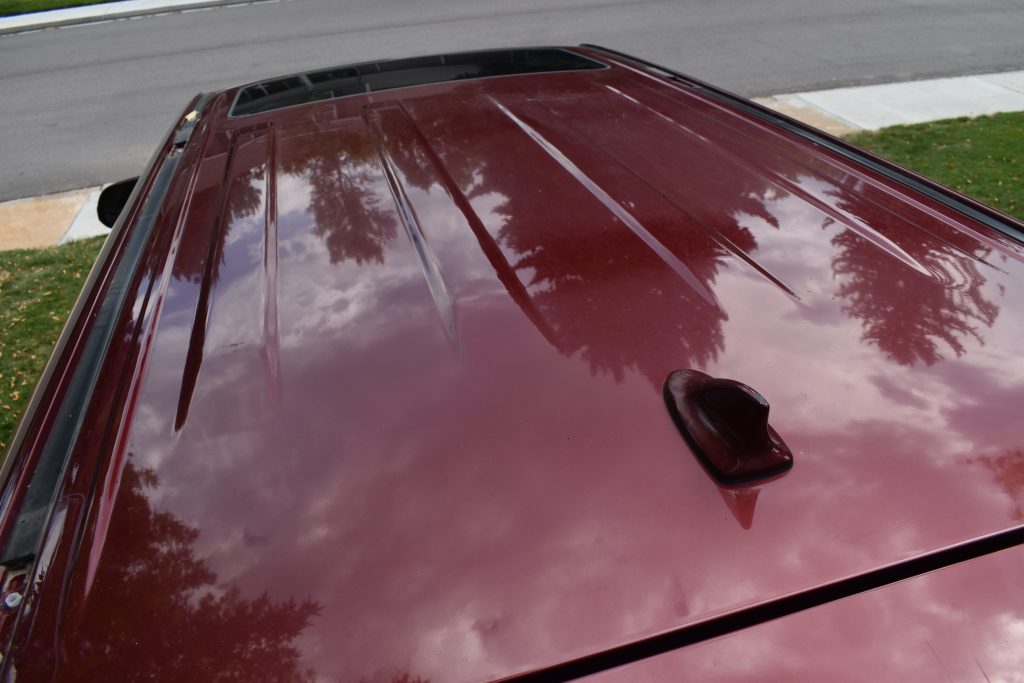
If you haven’t already done so, remove the factory roof rack. To remove the plastic cap (4 in total) at the end of each side rail, carefully place a flathead screwdriver or trim removal tool between the roof and the cap, and gently pry the clip pops loose. This shouldn’t take a lot of force. I recommend using a towel to protect the paint from scratches.
With the mounting bolts now exposed, use a 13mm socket wrench to loosen all eight bolts holding the rails in place. Carefully remove the factory roof rack and set it aside. This is a great time to clean up all the gunk that has accumulated underneath it; if you decide to do so, make sure not to allow water or soap to seep into the mounting holes.
Step 2. Unboxing
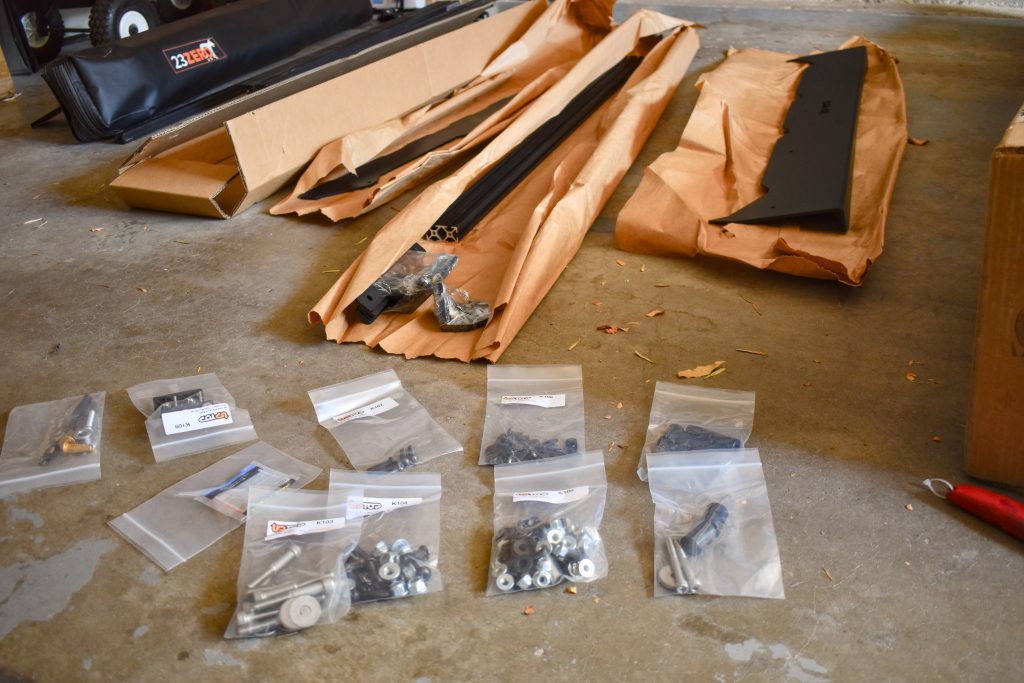
Lay out all of the included rails and hardware on a mat or large piece of cardboard. upTOP has done us the favor of placing the bolts for each step in pre-labeled bags. Keep the hardware in these bags, as I’ll refer to them throughout the installation.
Step 3. Apply Threadlocker To Wind Faring Bolts
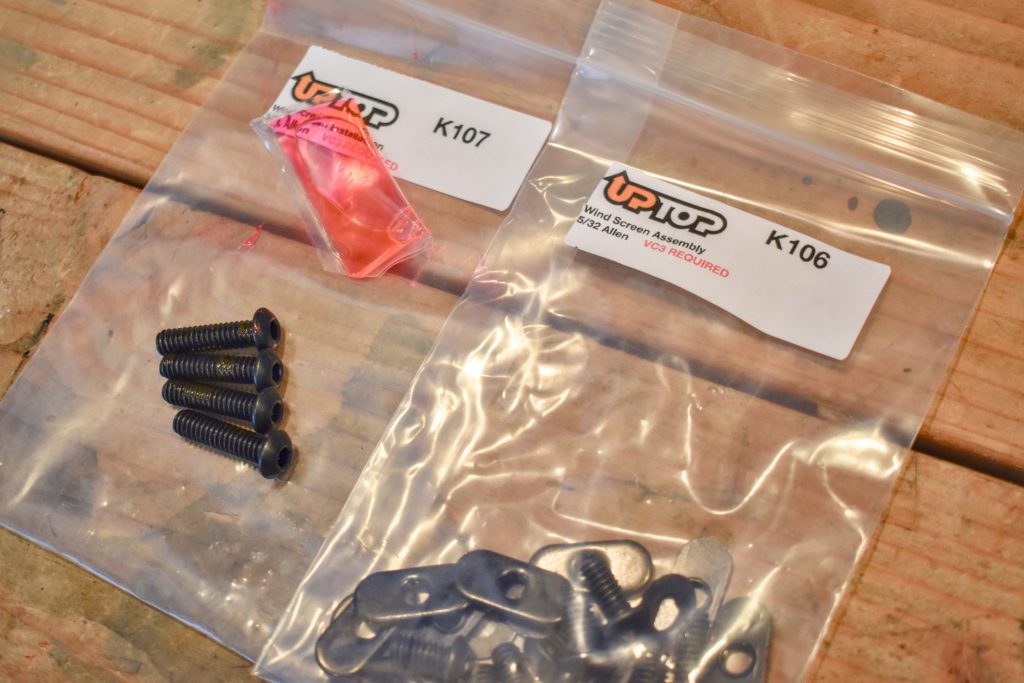
Locate the bags labeled “K106” and “K107” and the included thread locker. Cut a corner off the pouch, and apply the thread locker generously to all bolts in both bags. Set them aside to dry; we’ll come back to these later.
Prep Drill Area (optional)
If you plan on mounting substantial weight (such as a rooftop tent) to your roof rack, upTOP recommends using the provided hardware to drill a third mounting point just behind the windshield. If you opt to go this route, you’ll want to remove the rubber strip, cut out the front six inches, and reinstall the section you just cut off.
I don’t plan to mount an RTT to my rack anytime soon, so I skipped this step and used the rubber mounting feet.
Step 4. Seal Spacers With Silicone
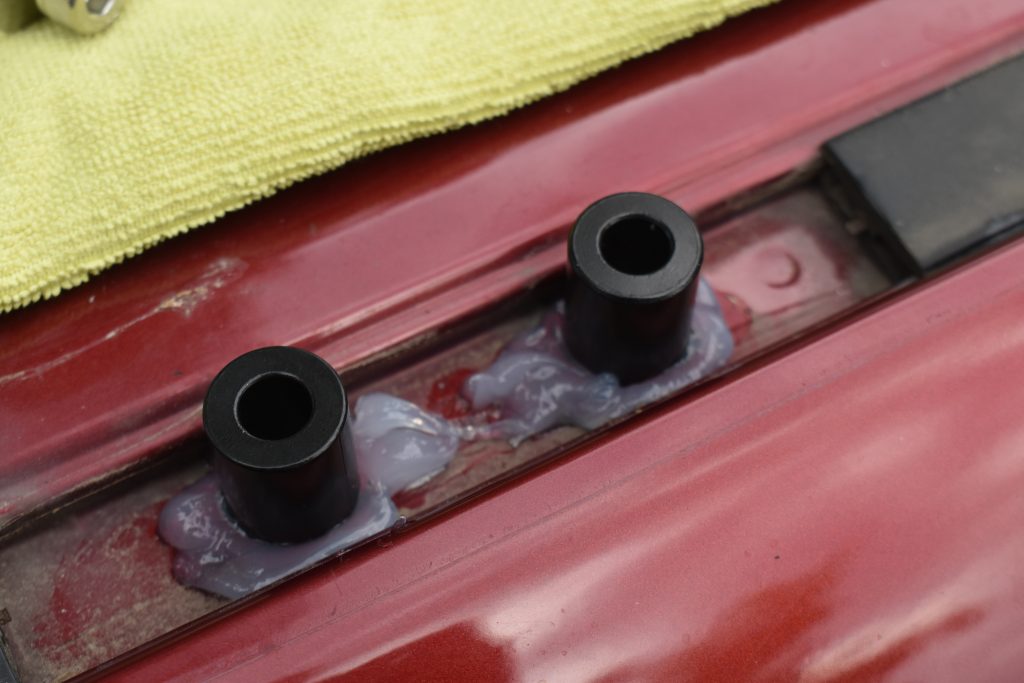
Locate the spacers in bag K101. Apply a generous amount of weather-sealant silicone to all (8) mounting holes, then place the spacers on top of the plastic pieces that protrude from the mounting holes. Ensure that each spacer is seated correctly.
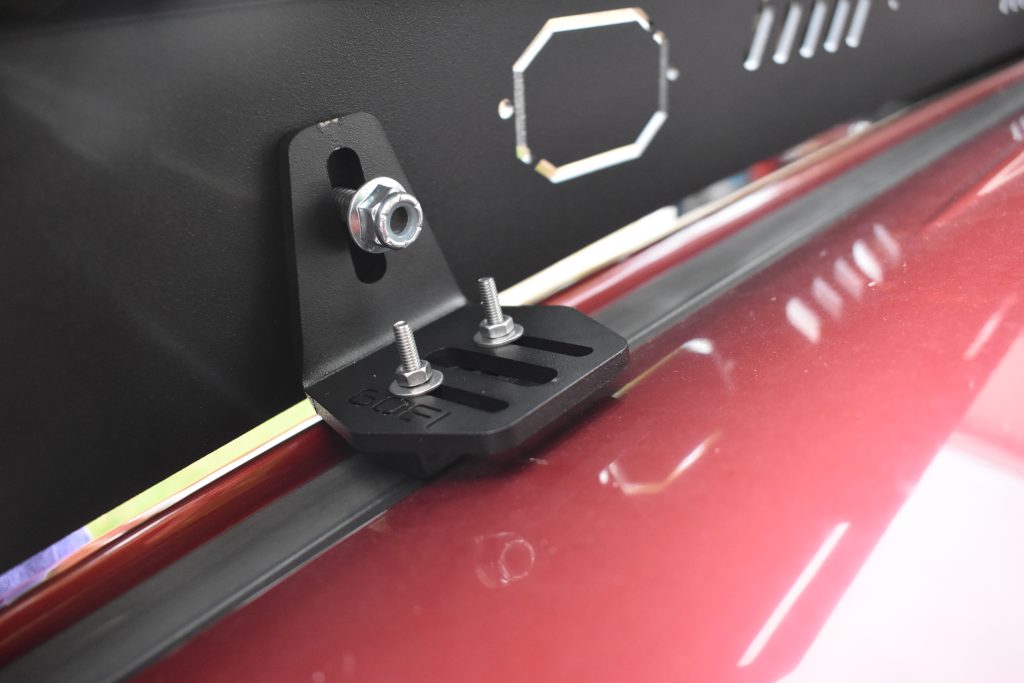
Step 5. Install Mounting Feet
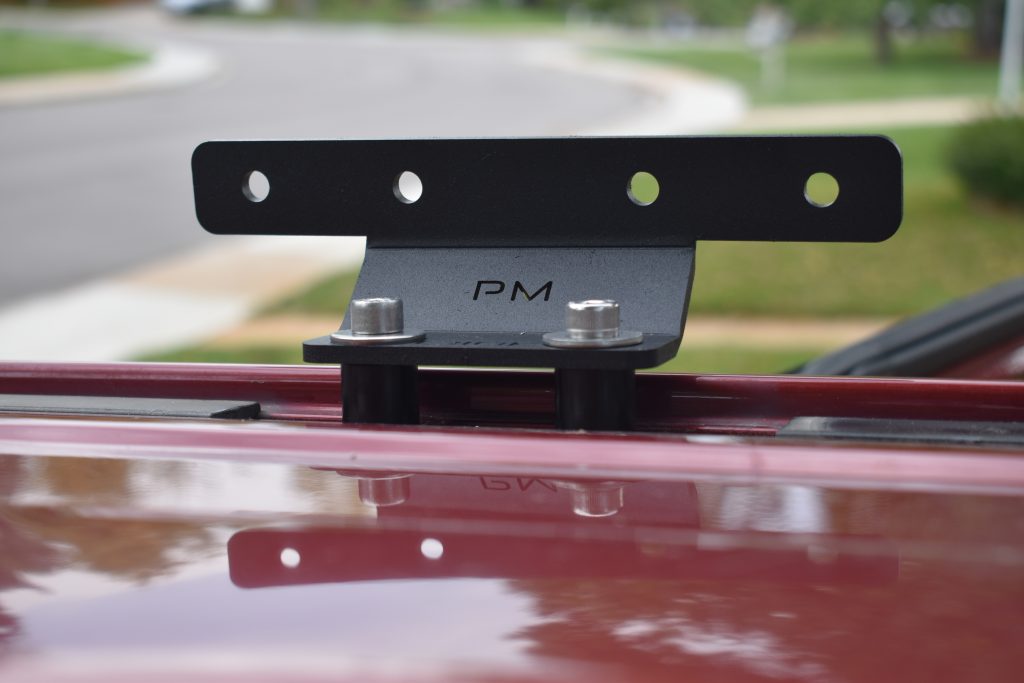
Using the mounting hardware in bag K102, install the (4) mounting feet on top of the spacers you just sealed. Each mounting foot is labeled with its location (i.e., Passenger Rear). Each bolt should be prepped with a lock washer (closest to the bolt head) and a fender washer.
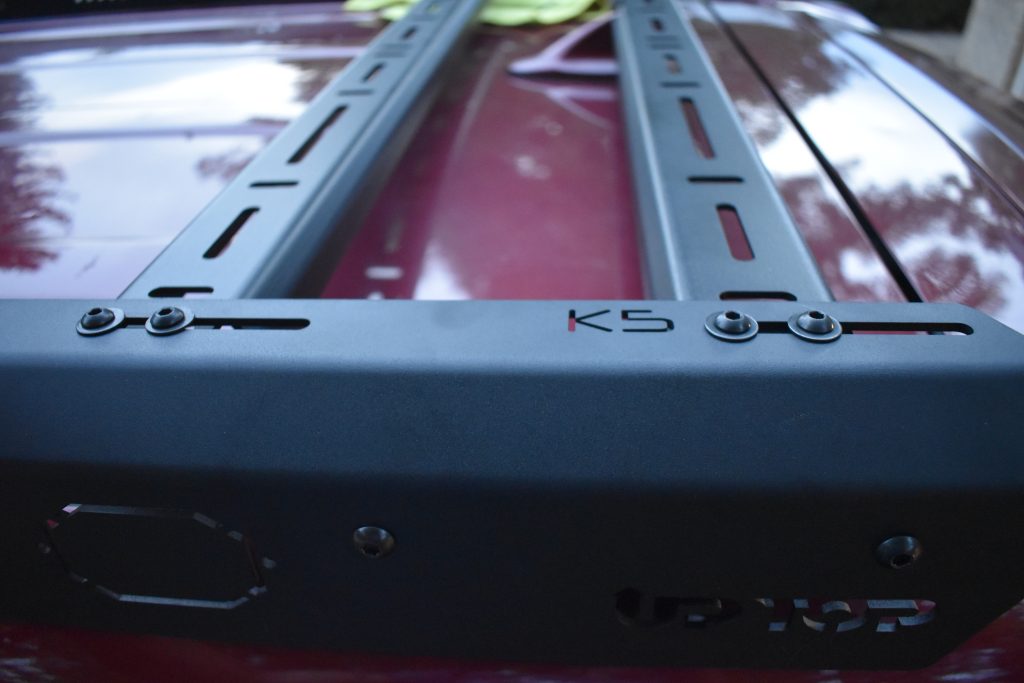
Step 6. Install Side Rails
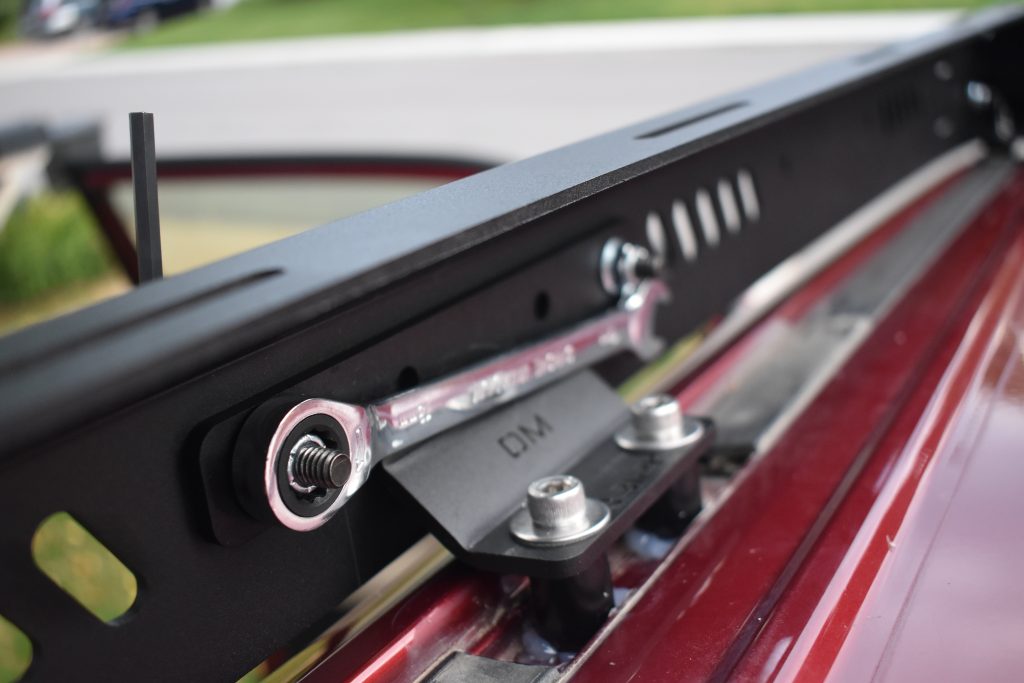
Using the hardware in bag K104, install the side rails (part numbers K6 & K5) to the mounting feet. Install the provided nuts to the backside of the eight bolts, but don’t fully tighten them yet.
I recommend covering the outside edge of the roof with masking tape beforehand in case the side rail contacts the roof. Having a second set of hands may also be helpful at this step.
Step 7. Attach Front Mounts
As discussed, there are two options for the front mounts. Locate hardware bag no. 1309 and proceed based on which of the mounting options you decided:
Drilled Mounting Option
If you plan to mount any heavy accessories in the forward third of your rack, upTOP recommends drilling your front mounts. To accomplish this, temporarily install bracket no. 1309 to the forwardmost hole in the side rails. Then, using a sharpie, mark the point at which the center slot in the bracket and the center of the drip rail meet. Uninstall the bracket.
Install the provided stop collar onto the provided drill bit 1/2″ from the tip and secure it with an Allen head key. Drill a pilot hole using a 1/4″ drill bit at the point you marked in the center of the drip rail. Repeat with the provided drill bit until the stop collar contacts the drip rail. Take the provided nut, hex-head bolt, and washers and assemble them, placing the box end of the 10mm wrench between the two washers. Insert the plus nut into the hole, seat with a rubber mallet, and tighten the hex-head bolt until the plus nut is sufficiently tight. Ensure not to overtighten.
Apply silicone to the forward mounting hole and loosely place a spacer over the front mounting hole. Take the mounting bracket with a lock washer and fender washer, align it with the spacer, and loosely install the provided bolt through the silicone. Reinstall the mounting bracket to the side rails. Finally, tighten the front mounting bolt and repeat on the other side.
Non-Drill Mounting Option
This is probably the more common installation for obvious reasons and will suffice for most applications. I opted for this method. Install the rubber pressure feet on the mounting bracket (part no. 1309) using the provided bolts, washers, and nuts. Center the rubber feet in the middle of the mounting slots, then tighten. Then, fasten the brackets to the side rails using the bolt and nut from bag K104. If the rubber pressure feet are correctly aligned, they will align with the factory weather stripping.
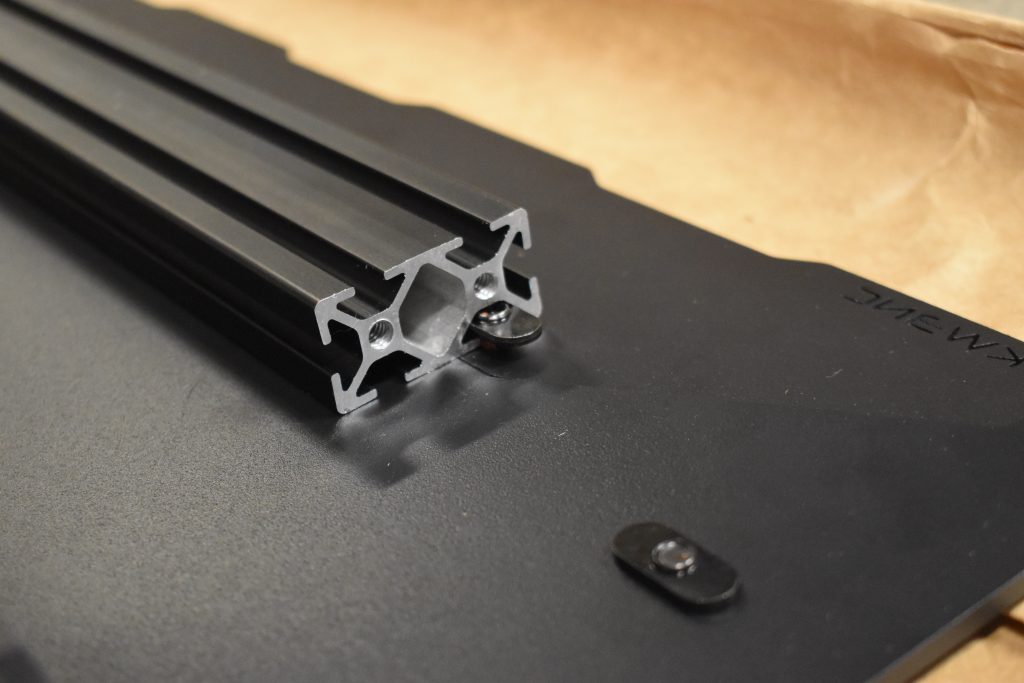
Step 8. Assemble Wind Fairing
With the hardware from bag K106, which we applied the thread locker to earlier, install a washer on each bolt, then loosely fasten to the wind fairing with a flat washer on the backside. If you aren’t installing a light bar, repeat using the remaining (4) bolts on the top section of the fairing.
Flip both sections over, exposing the t-nuts. Slide the provided aluminum extrusion load bar into the t-nuts, ensuring capture of both the upper and lower sections. Finally, flip over the assembled wind fairing and tighten the bolts.
Step 9. Install Wind Fairing
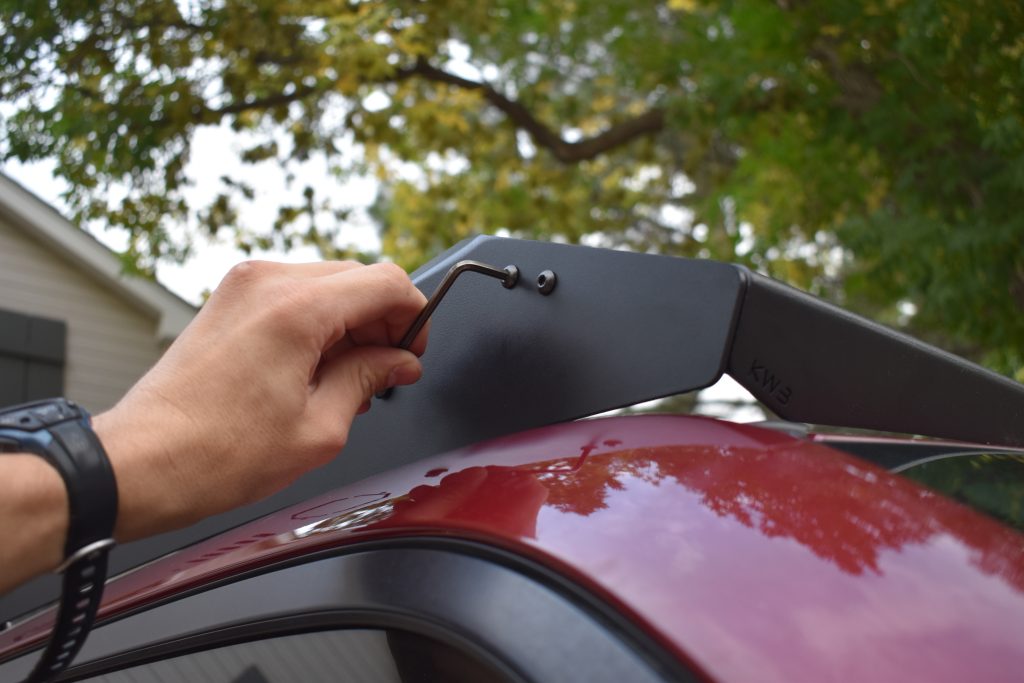
Using the hardware from bag K107, install the wind fairing on the side rails. Again, it helps to have a second set of hands for this step and towels or masking tape to prevent scratching. Once the wind fairing and side rails are perfectly even, fully tighten all (4) bolts.
Next, tighten the (8) bolts/nuts that fasten the side rails to the mounting feet.
Step 10. Install Crossbars
Using the hardware in bag K105, mount all (6) provided crossbars to the side rails. You will notice a designated crossbar for the rearmost slot with a cutout for the shark fin antenna. I found the best technique for mounting these crossbars was to loosely pre-install the nuts/bolts/washers onto the rack, then slide the crossbar into place and tighten.
You’re finished with the installation once all (6) crossbars are mounted. Take a step back and enjoy your newly installed roof rack!
Trail Impressions
This rack checks all the boxes. Hauling lumber for your DIY project? No problem. A RTT for the weekend getaway? Check. Brightening up a late-night trail with a light bar? Kilo can do it. The Kilo’s edge is that it manages to do it all in a more streamlined profile. That equates to improved gas mileage and zero wind noise on the highway.
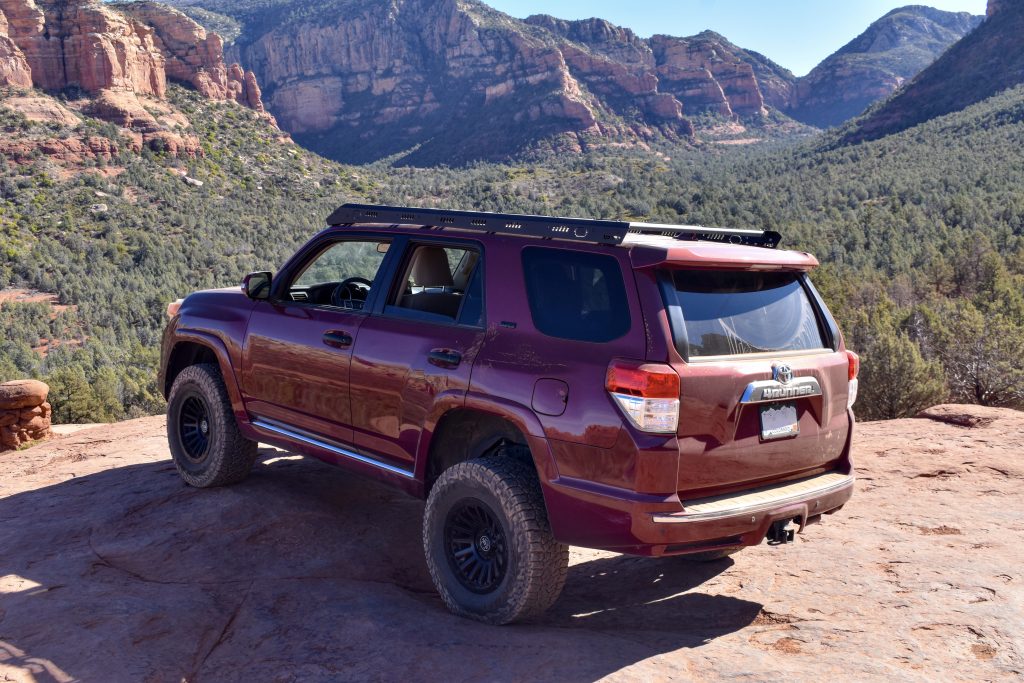 This makes the Kilo an ideal rack for daily driver setups. It’s a versatile platform that will add to your rig’s utility without diminishing its efficiency. After miles of intense off-road use, not a single bolt has rattled loose.
I look forward to seeing how the rack holds up over thousands of miles.
Final Thoughts
I chose the 4Runner for the versatility of the platform. My needs ranged from grocery runs to remote climbing trips to hauling five search and rescue team members and their gear up a steep mountain highway at 65 miles per hour.
Being on call 24/7, I’m required to always have my gear with me, so splitting these needs between two or more vehicles wasn’t an option. Very few vehicles are capable of such a mission without significant compromise. The 4Runner is one of them. I’ve optimized my rig for these tasks with several tasteful modifications. The cherry on top is a quality, versatile roof rack like the upTOP Kilo.
It’s safe to say that most 4Runner owners are in a similar position in that the vehicle they take to work is also what they take on the trail over the weekend. If this sounds like you, the upTOP Kilo Roof Rack might be an ideal choice for you, too. It’s designed to balance performance and utility, the ultimate goal of any daily-driven overland rig.
What are your thoughts on this rack? We want to hear how you’d use it, where you’ll go, and the accessories you’ll mount. Let us know in the comments below!
I have been running the upTop Bravo rack for 4 years now and its top notch. At the time of my purchase they offered several different fairings and I chose one with the dual function 38″ light bar. There are so many options out there but they all looked alike except the upTop made the front wind fairing shaped like an arrowhead which is unique and makes a statement. Additionally it really keeps wind noise at a zero even if I have my sunroof open!