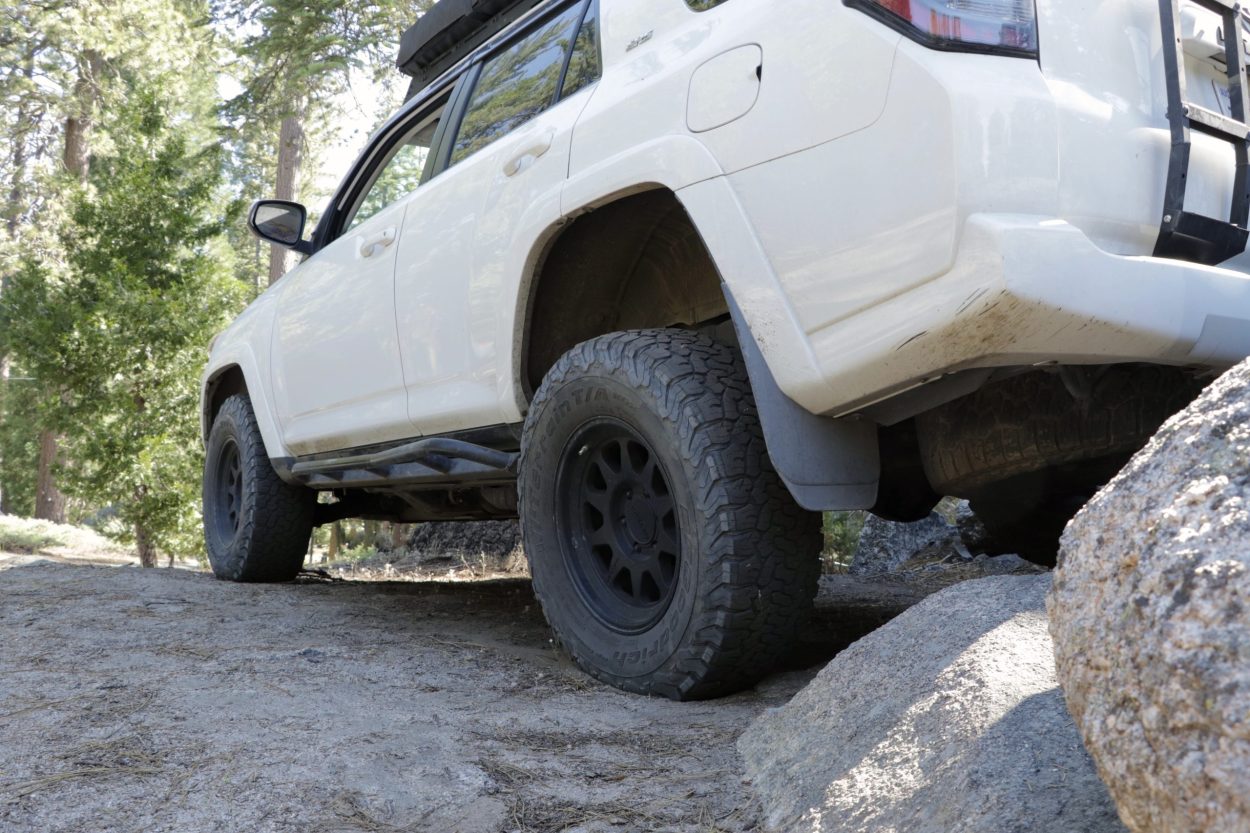
When it comes to upgrading your 4Runner’s suspension, there are endless options and discussions about the shocks and springs you can run. What I see less talked about is bump stops, which can play an equally significant role in your handling and feel when you’re on the trails crawling or sending it through the desert.
Perry Parts has garnered a reputation for pushing the boundaries of performance and innovation. Unlike traditional bumps, they utilize advanced 3D printing technology and custom tuning to deliver a product specifically engineered for each vehicle. Trail4Runner has a great article on the first generation install and review.
I’ve been looking for bump stops for a while and wanted to get a better understanding, so I called Patrick Perry himself to learn more about them. In this article, we’ll dive deeper into the unique aspects, highlighting their upgraded manufacturing process, customization, and rigorous testing that sets them apart in the market. A lot has changed in the year since that first article. The Gen 2 are out now, and they have wasted no time innovating beyond their Gen 1.
Table Of Contents
Company Beginning
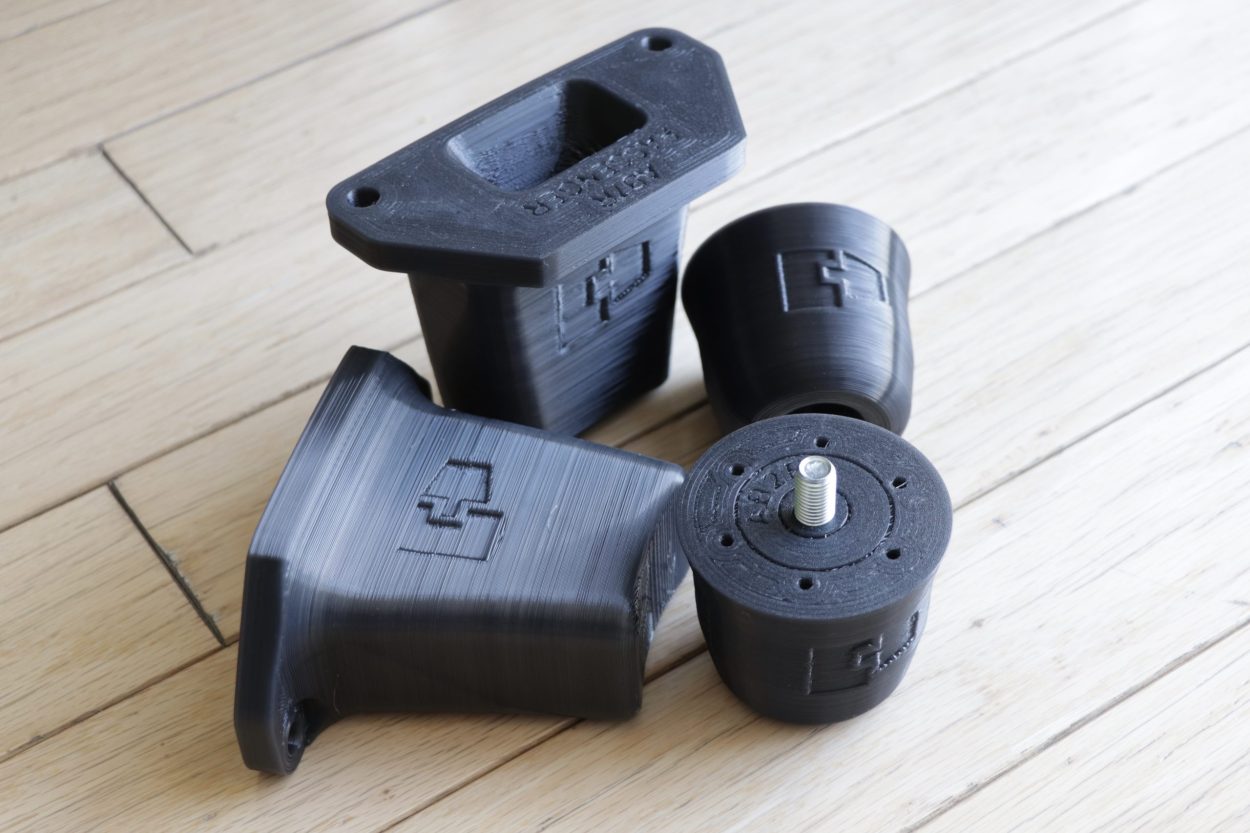
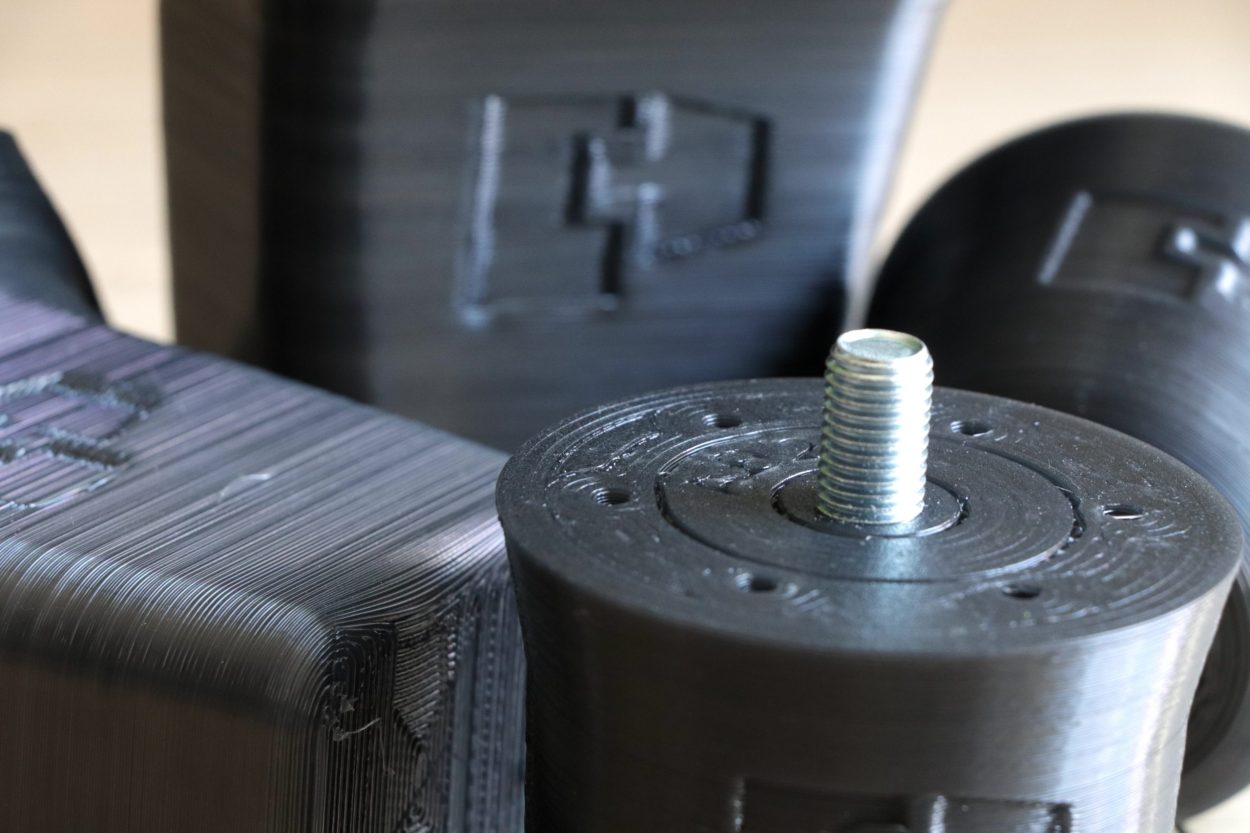
The first set of bump stops was made for Patrick’s GX470 out of necessity after feeling frustrated with the performance of other aftermarket options. 3D printed from TPU, the first set ran and performed great right off the bat, and he knew he was on to something.
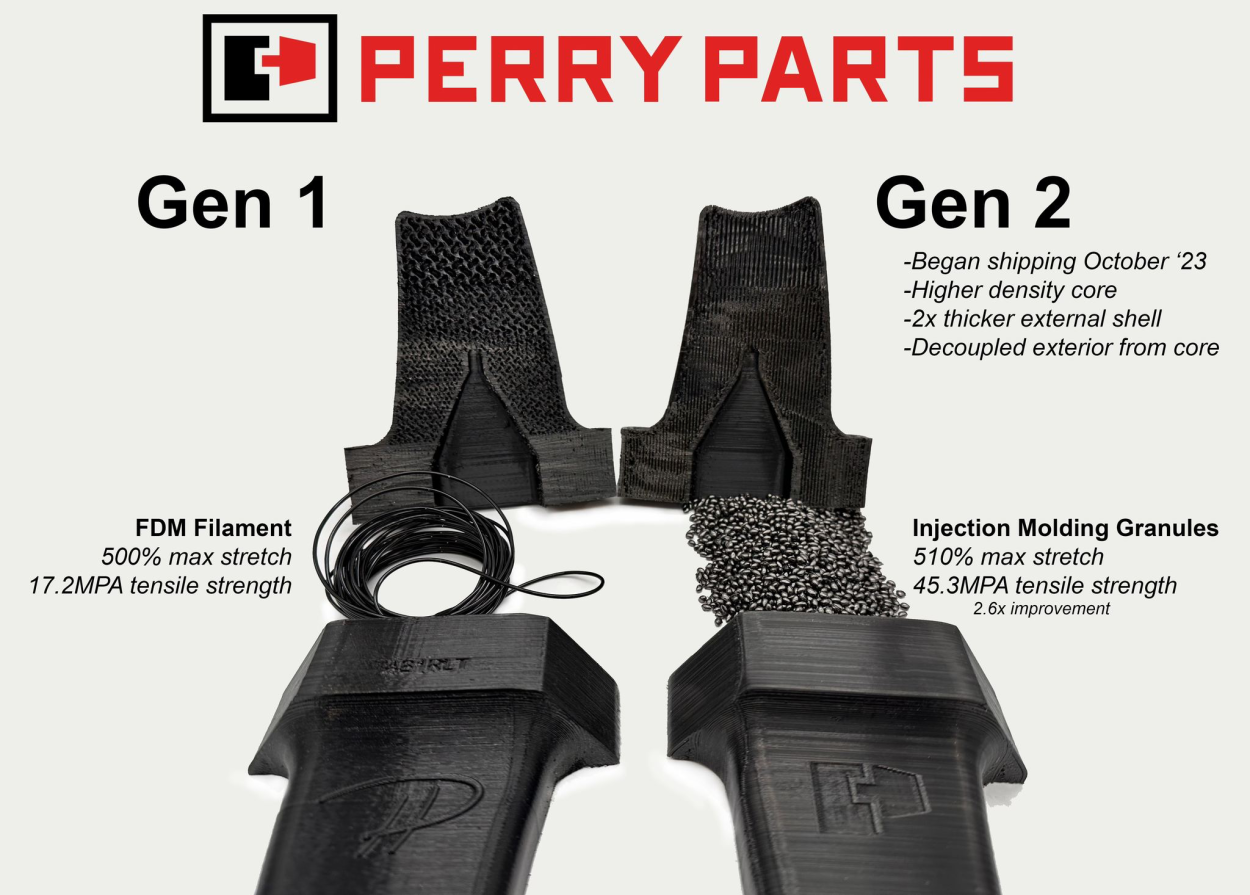
Being a 3D printed product, the flexibility to make changes in the design from print to print allowed for a no-down-time research and design process, making changes on the fly with every print based on feedback that could be felt in real time. Adjustments were made to the print density, overall size, and air vents – or compression damping ports. The Gen 1 bumps were created and pushed to market, and through customer feedback and continued testing, small tweaks were made, adjusting portions of the bump’s density in places of quick wear, tuning bumps to each specific vehicle they’re offered for, and further tuning for the front and back.
- “The front lower control arm has a 2:1 leverage ratio when compared to that of the rear axle. Meaning that we had to change or modulate the rates of damping of the bump stops not only from one vehicle to another, but also just from the front to the back.”
Pushing & Innovating Design
The Gen 1 followed a more traditional 3D printing process:
- Compounding: mixing and melting granules with colorant and then re-chopping into granules.
- Filament Extrusion: extruding the filament from those re-chopped granules, to be used in 3D printing machines.
- 3D Printing: melting down the filament layer by layer into the end product.
Quality control and quality assurance are the backbone of any product’s success. Consistency within your products allows for more valuable testing, and for the end user, a product they can expect to perform in the same way everyone else is raving about. Buying the filament for the Gen 1 bump stops meant they were buying products at stage two of the process above, having to rely on other companies to provide consistency among their products.
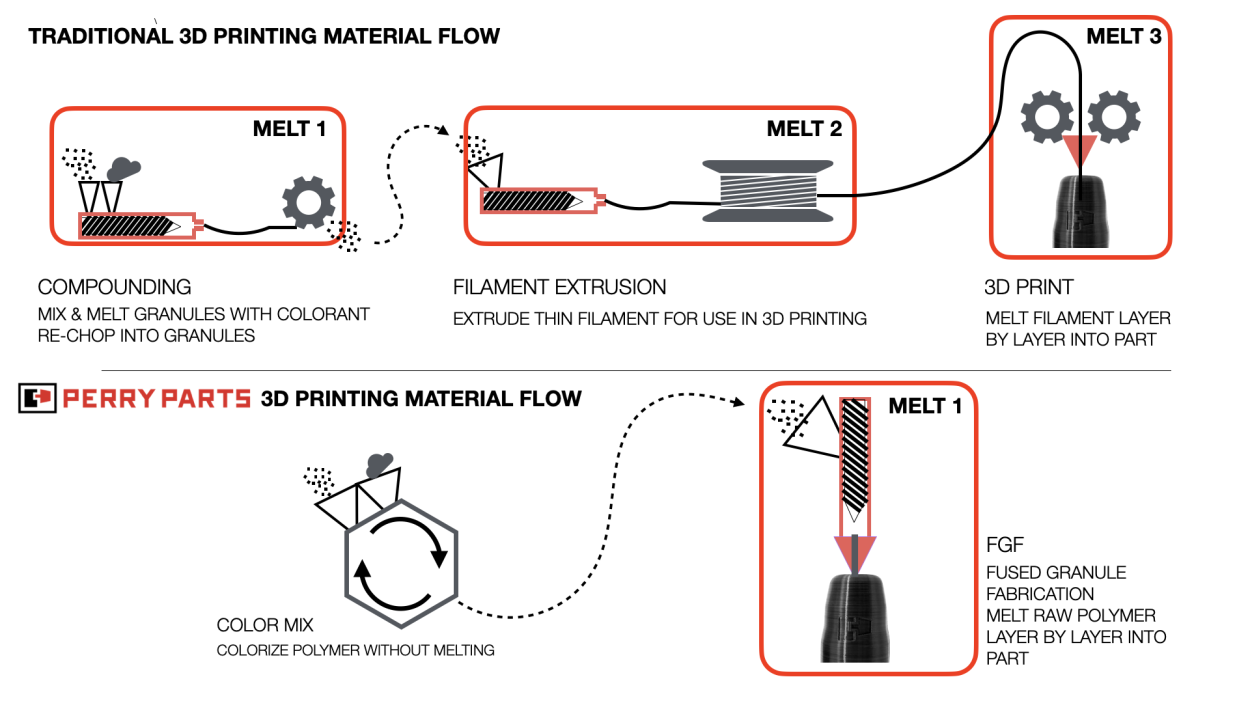
With the Gen 2 bump stops, Perry Parts looked to simplify and increase their ownership of the process from start to finish. Working with new suppliers and buying and building their own machines, they followed a process of printing that allowed for full control over the product.
This new material flow achieved that goal of simplification while also increasing consistency:
- Color Mixing: Perry Parts found a way to color mix the raw granules without melting them down.
- FPF – Fused Pellet Fabrication or FGF – Fused Granulate Fabrication, a process in which the raw granules are loaded into a machine and melted layer by layer, just like a personal 3D printer, but without the filament.
The Gen 2 workflow pushed beyond what 3D printed filament could produce all while reducing the chances of variation between prints.
- “The result of this new process allowed us to use stronger materials that are not available as 3D printing filament, and materials that would see fewer melt cycles, preserving the material’s overall strength.”
Is 3D Printed Material Durable?
I’m sure Perry Parts gets this question a lot. When I think of 3D printed items, I often picture websites filled with page after page of 3D printed junk. However, learning about the advancements in 3D printing processes, particularly FGF used in printing the Gen 2, and the high-quality materials available, it’s clear that not everything is made from a consumer-level, at-home setup. Their success and high ratings speak for themselves, backed by a no-questions-asked 2-year warranty. Their new material workflow and commitment to pushing the limits on durability have provided valuable feedback to the team on how to further improve their latest version.
- “I also often get questions about durability, ‘why not just print from another filament?’ What’s not intuitive or generally known is that re-melting a polymer degrades its properties.”
Improvements go beyond the material work flow. A suspension dyno is used to stress test their designs up to 100,000 cycles, which led to faster testing, studying, updating, and repeating the process. This allowed Perry Parts to fine-tune their bump stops to operate optimally for as long as possible, further improving durability.
What Does This All Mean?
At the beginning of this process, Patrick made a comment to me saying that their product has the ability to tune the progressiveness, damping, density, and size of their product between vehicles. I thought this meant that we as consumers could reach out and request a version of the bump that was purpose-printed for rock crawling or sending it through the desert.
Through talking with Patrick and reading what is offered up on their website, it highlighted that these are, through all of their improvements, built to handle both situations. While crawling, the bump stops allow for air to pass through the compression ports, allowing for full compression and creating a slight amount of resistance as you “bottom out” the bumps. While sending it through the desert, the ports become restricted, letting less air pass through, increasing resistance, and providing a more progressive style response. The best of both worlds. The way it was said to me, is the bump stops work with what you’re doing, soft when you need it, strong when you send it.
Final Thoughts
I’ve been running the Gen 2 bumps for a few months at this point, and it’s hard to explain the feeling, or lack thereof.
On the stock bumps, you know when you bottom out. That side-to-side hard rocking that you get on rocky trails makes my watch think I’m working out. The same thing happens when hitting big dips or whoops; the OEM bumps are simply there to prevent metal-on-metal contact.
With my new set – the jarring feeling is gone. I’ve seen it said before and I certainly agree with it now: it feels like the suspension is endless. So, what do you think? Do 3D printed bump stops have a place? Perry Parts certainly thinks they do, and I’m looking to see what they come out with next.
I’ve had these for about 5,000 miles and am so happy with them! If you’re upgrading your suspension you CAN NOT skip replacing your harsh OEM bump stops.
I tried the Energy Suspension fronts first (for cheap) and they just weren’t enough of a difference. So, after watching his videos on their impact dampening compared to other brands, I was sold on the full set.
PerryParts did his homework when developing these, and you can really feel the progressive/variable compression design when driving.
Very cool! Wish I could select custom colors though.
Innovation in any space is always intriguing. I saw that metal and ceramic 3D printers exist now. Who knows what we’ll be printing 10 years from now!
Nice write-up here, well written! My buddy Derek at Mitten State Tours pointed me towards Perry Parts and I’ve had some good email correspondence with Patrick. He’s a solid dude that truly cares about getting you in the right bump stop for your needs. Between my 4R and GX I’ve tried most of the bumps screw-on bumps available and my take away is always the same, Perry beats them all! This seems like a good spot to throw down a challenge question for Patrick “Mr. Perry, Do you have plans for a bump-to-bump (one bump on top at the frame as normal with an additional bump on the bottom of the front LCA or rear axle) setup for long travel or do you plan to stick with an extra long bump for the LT world?”
Hey Mike!
Interesting idea. I’ve also gotten questions from folks about a more modular, “build your own bump” strategy. These concepts could potentially combine to give folks the freedom of complete tunability.
I’ll add it to the list 🙂
Patrick