Why did I pick All-Pro Off-Road? Let me share the story of a company that has been a pioneer in aftermarket components since 1996. They started simply aiming to craft badass components for Toyota 4×4 vehicles. They quickly became the go-to guys for rock crawling – if it could be climbed, they ensured your Toyota could tackle it. But they didn’t stop there. As the sport grew, so did they. They pivoted to manufacturing, pouring their expertise into creating top-notch, reliable components. Today, they’re the masters of making sure your ride is as tough and rugged as you want the neighborhood to believe you are.
When you come across a builder specializing in your vehicle’s brand and model, it signifies their commitment to providing the best fit and performance. This is exactly what All-Pro Off-Road does for Toyota 4×4 vehicles.
- Use code – TRAILCO – for 10% off!
Overview
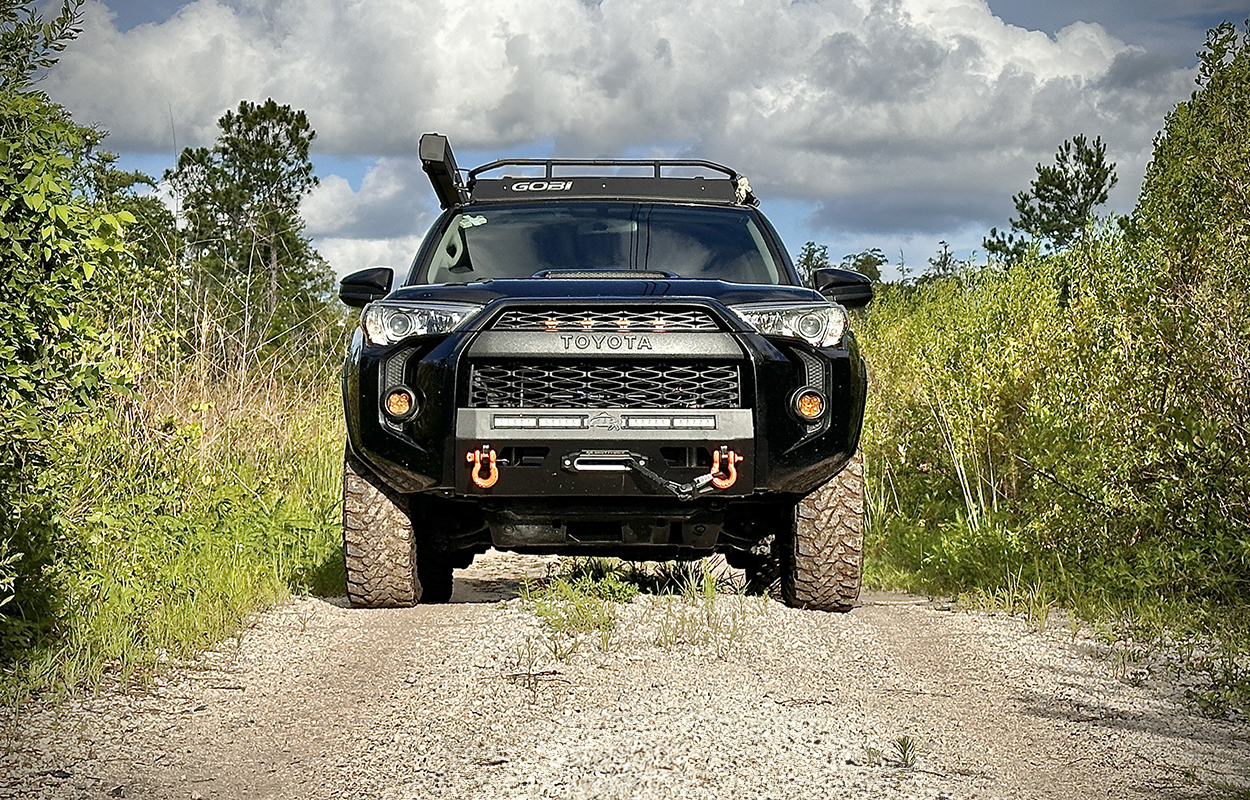
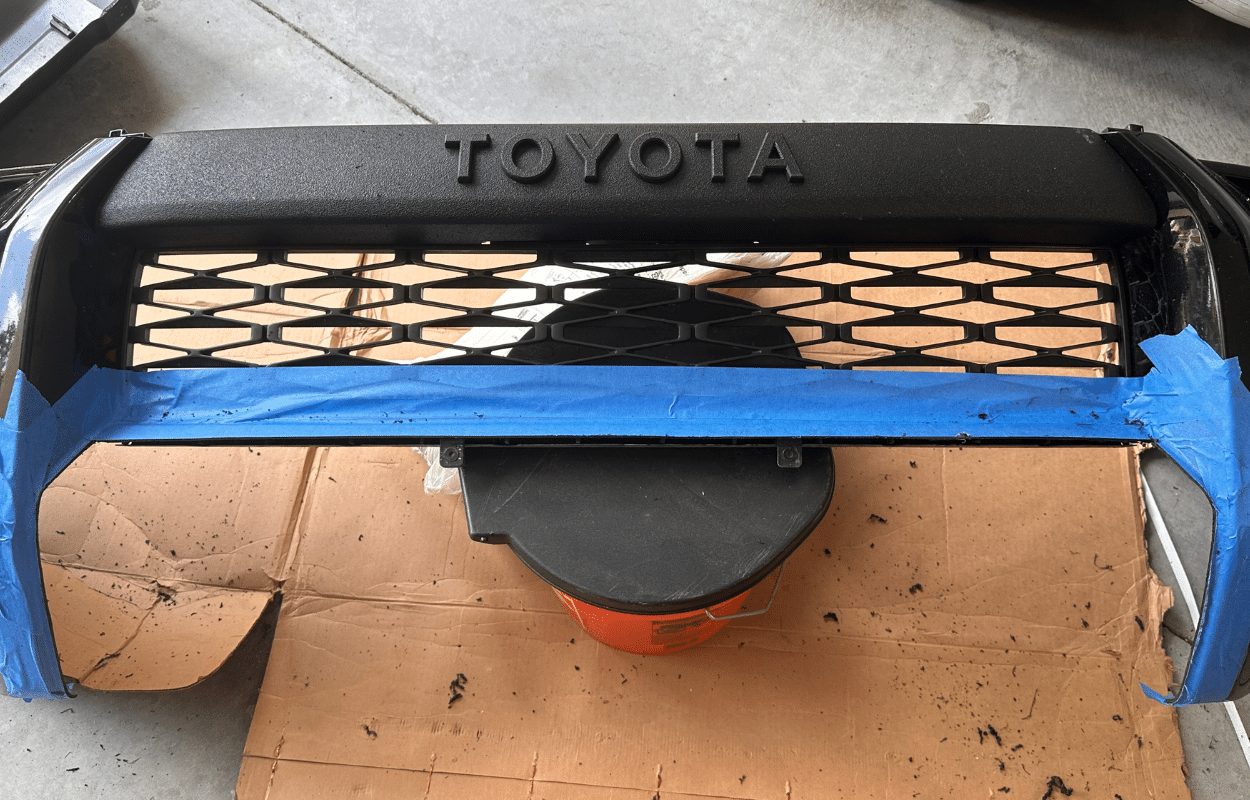
Let me tell you, this isn’t just any ordinary bumper. This DJ mashup blends style and substance — “boots n’ pants n’ boots n’ pants.”
Imagine wanting to keep the sleek look of your OEM bumper while craving something tougher, something that can take a hit and keep on rolling. That’s where these come in. It seamlessly integrates with the original design, but don’t let its good looks fool you—it’s built to take a beating.
Crafted from a CNC laser-cut, brake-formed, 3/16″ steel faceplate, this bumper is as sturdy as it comes. The 1/4″ steel winch plate ensures your winch is securely mounted, ready to pull you out of any sticky situation. And those two 3/4″ thick recovery points? They’re not just for show; they provide massive beefy anchor points directly tied to the steel mounting plate, ensuring you’re prepared for any recovery scenario.
One of my favorite features is how it improves the front approach angle, crucial for tackling those tough trails without damaging your undercarriage or mowing down your neighbor’s mailbox (looks longingly out the window).
Compatibility? Yes, but … This bumper works perfectly with Toyota Safety Sense (TSS) and the Multi-Terrain Monitoring system (MTM). You might need to tweak the sensor alignment post-installation, but that’s a small price to pay for such a robust upgrade. Plus, it’s designed to fit 30″ single-row light bars with a mounting width of 31.75″ or less (seriously, if it’s longer than that, it’s going to take a miracle and grinding to shoehorn in there), and most 8-12k winches with a remote mount solenoid box. All that said, please note: I’ve read that this bumper is NOT compatible with Limited Edition 4Runners – but thank goodness for ya’ll, I’m not that fancy.
Installation Guide
Difficulty: Moderate
Profanity used during installation: Moderate
The aftermath of garage: 2 mil-spec grade hand grenades
Time & Assistance:
- Hours: 6, less if you’re accustomed to cutting body molding and have a sober friend (which won’t last long, so hurry) who will sit in your garage and tell you what you’re “probably” doing wrong.
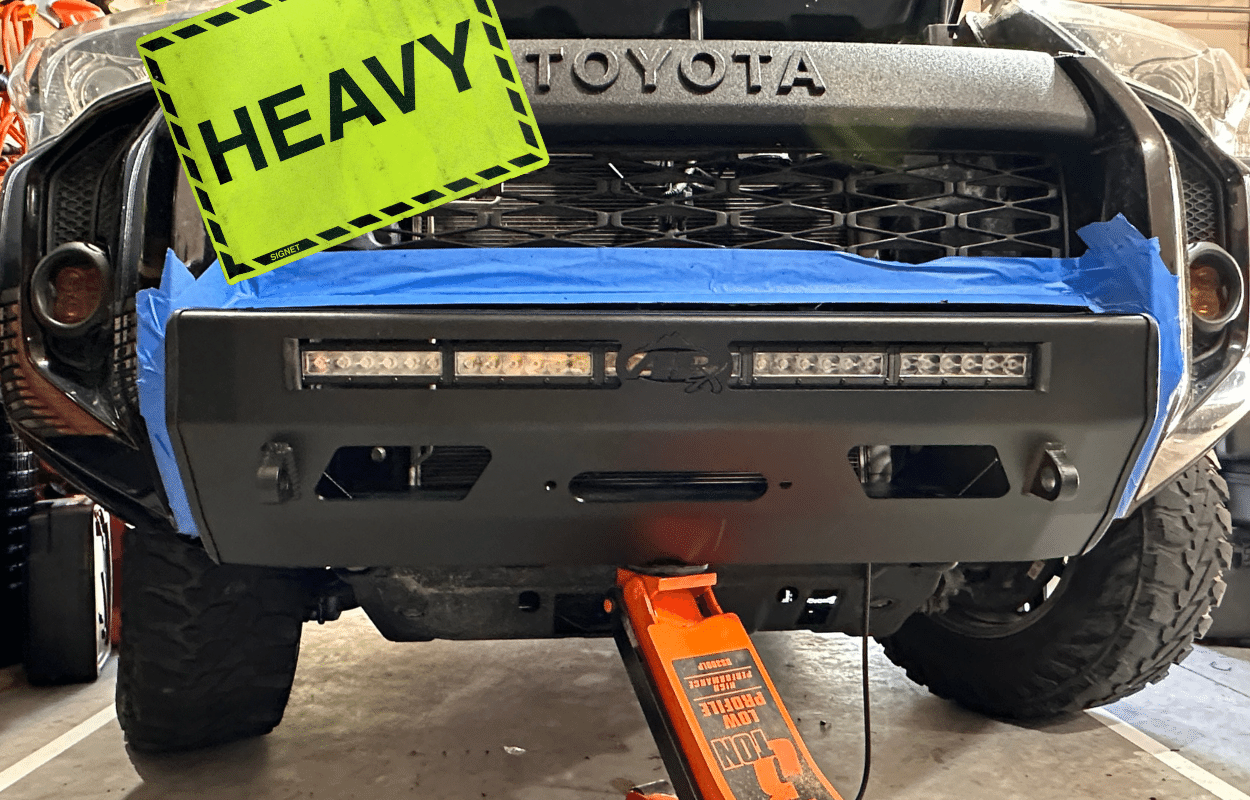
- People: This can be done with one person, but this product is roughly 70+ pounds. I whacked the ‘cash n’ prizes’ out of my knee during the installation and reenacted the welt Fred Flintstone would give himself during bowling.
- Speaking of assistance, my only true frustration with the installation is that All-Pro’s photography and step-by-step instructions leave something to be desired. So, I hope to shed more light on how to make the process easier.
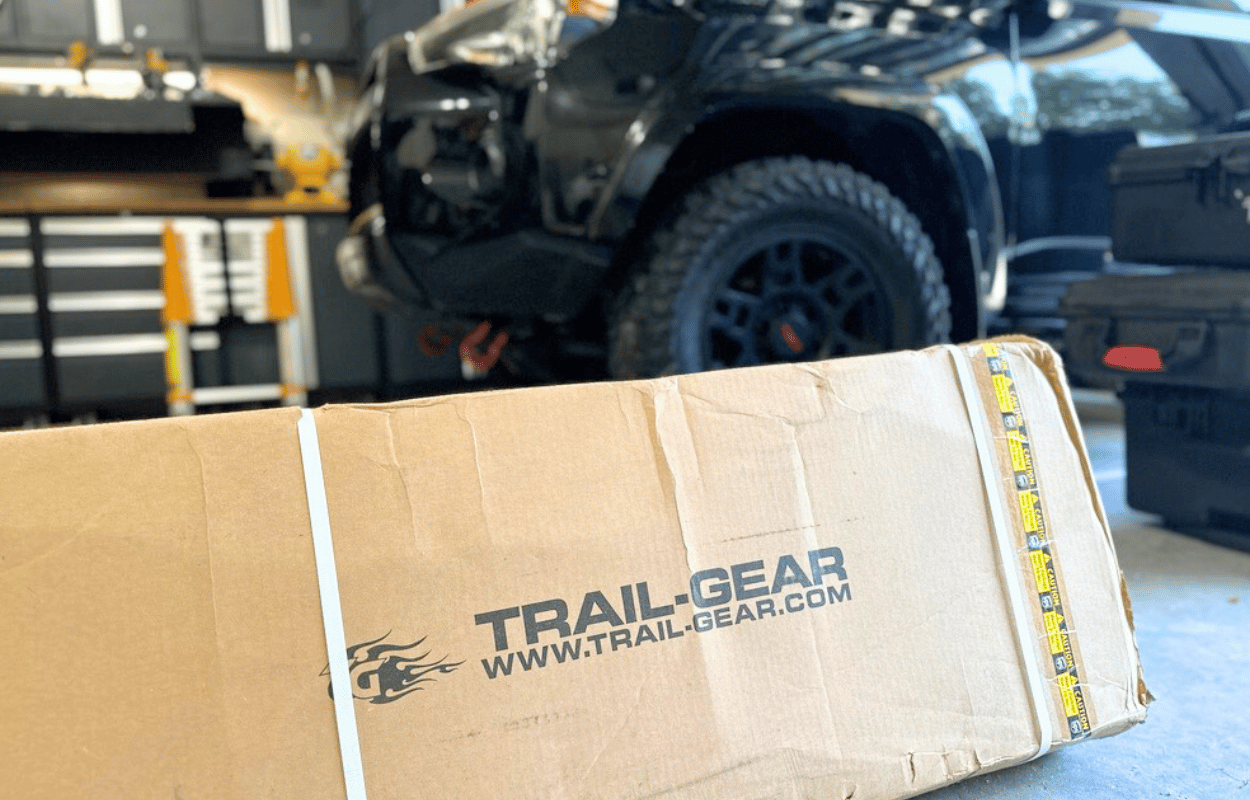
Tools & Materials:
- Floor jack
- Socket/Ratchet set
- Wrench Set
- Hex wrenches
- Screwdrivers
- A set of automotive body trim tools is super nice to have
- Trim removal tool
- Rubber mallet (the “scootchie” hammer) let’s face it – you always need one
- A cutoff wheel/tool – I used a Dewalt oscillating multi-tool
- Zip ties
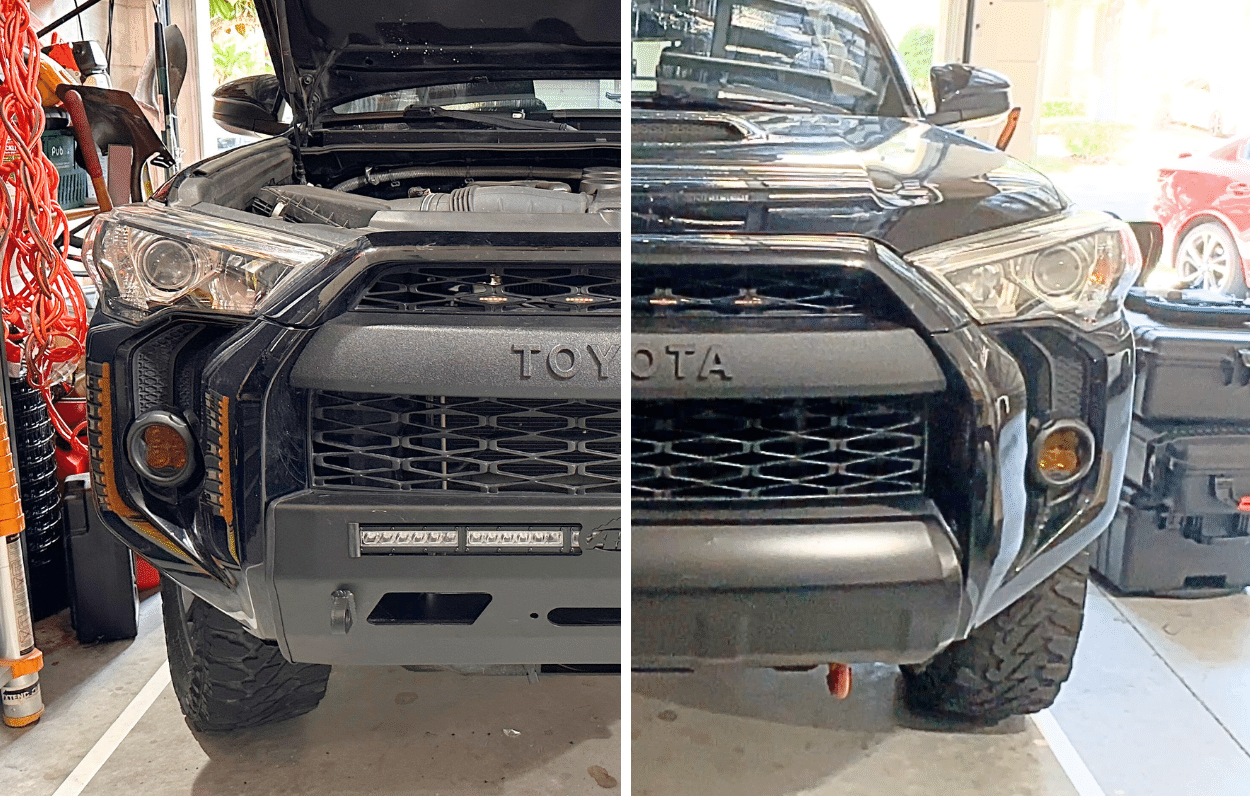
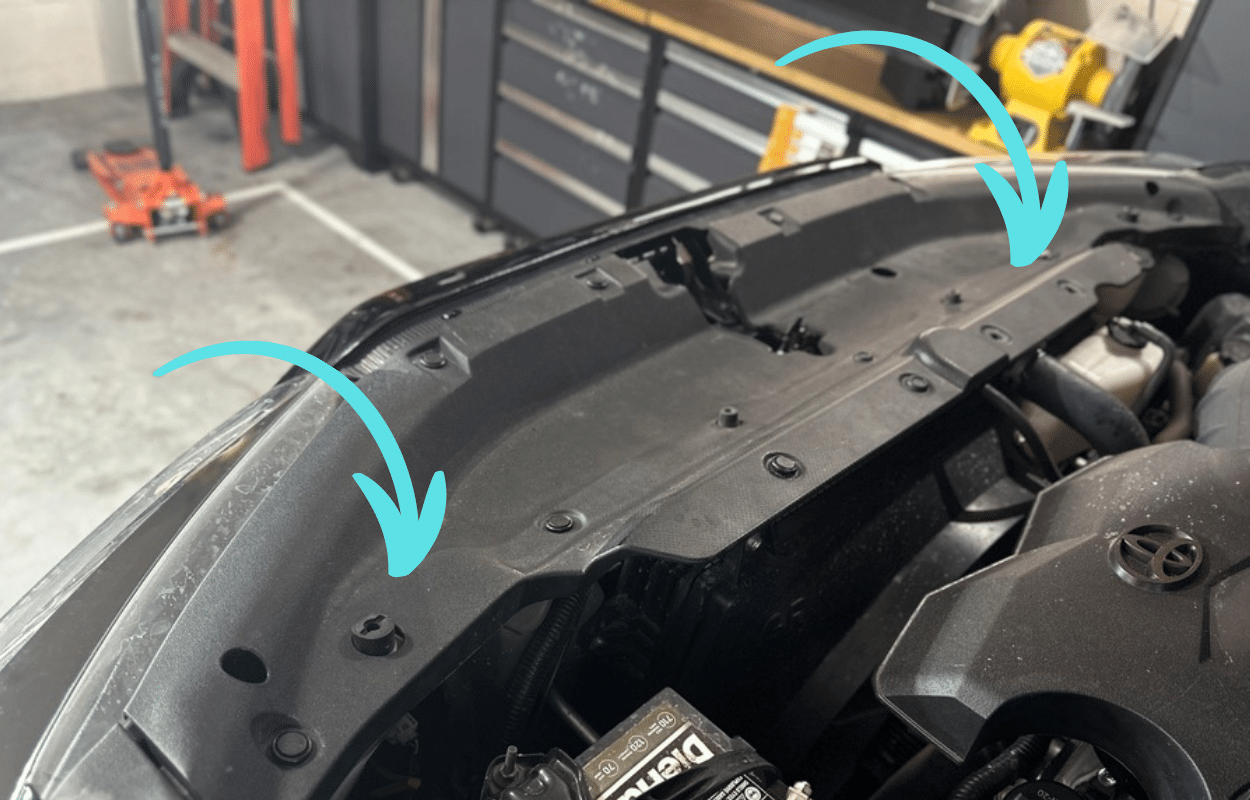
Step 1. Remove Upper Radiator Cover
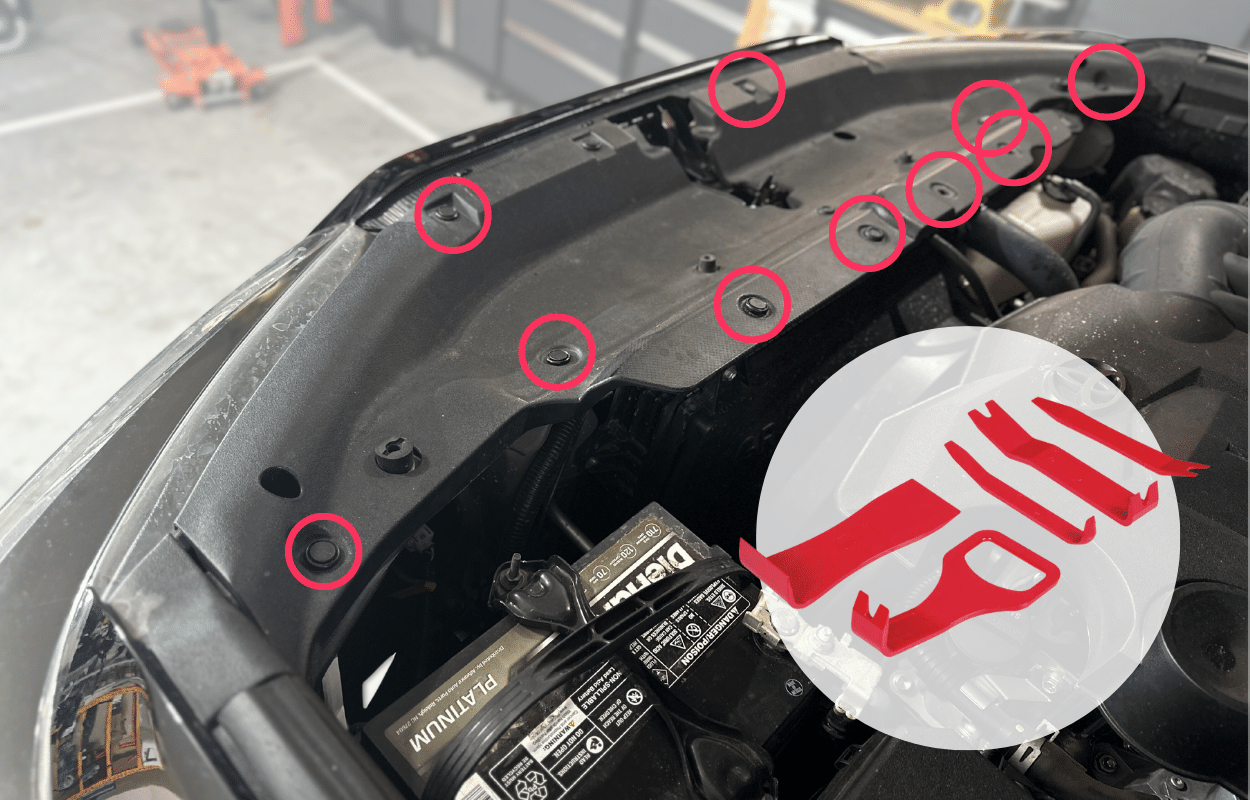
Let’s start by removing the clips holding the upper radiator cover to the body. Push down on the center of each clip and lift upward. Once all clips are out, remove the upper radiator cover. Easy peasy! Just like children, it starts off easy and rapidly becomes more challenging.
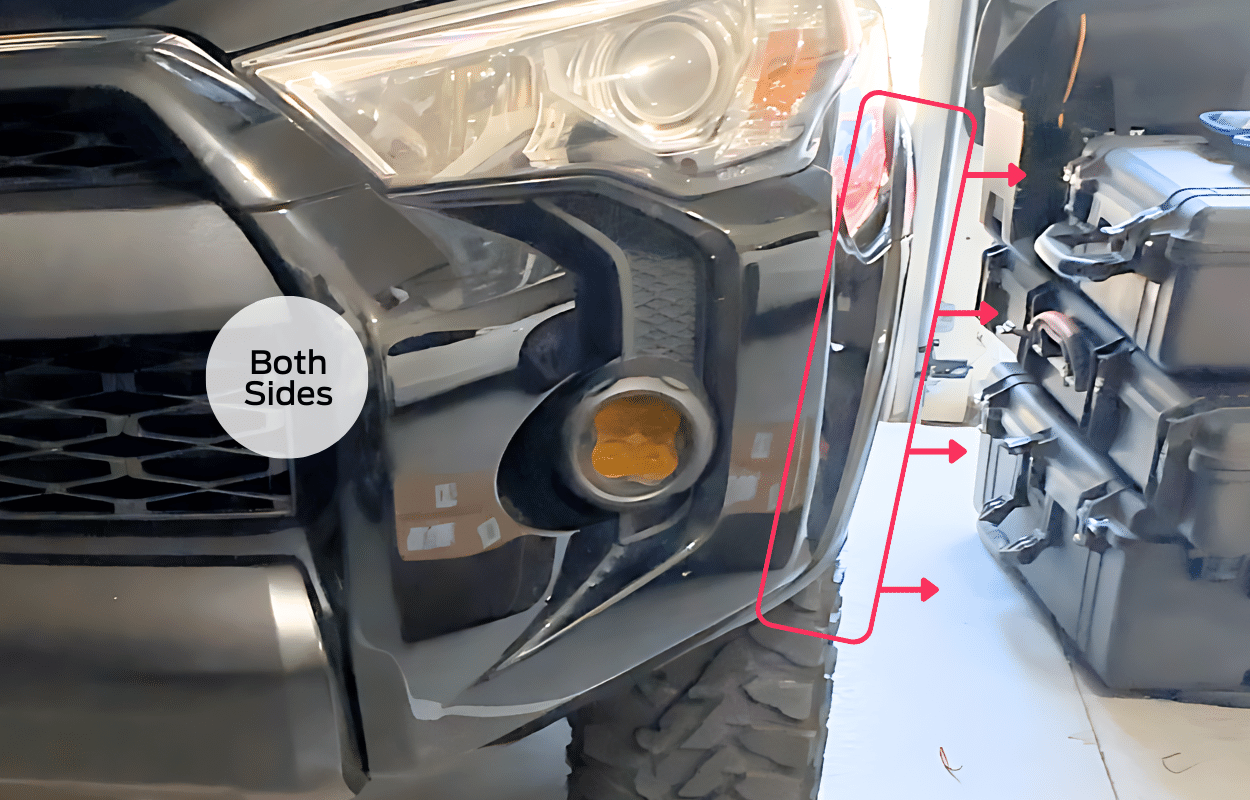
Step 2. Detaching Upper Front Bumper
Next, tackle the left and right clips holding the upper section of the front bumper to the body. Then, remove the 10mm bolt at the center of the bumper. Don’t forget the four clips holding the middle of the bumper to the radiator support. Removing these will free up the upper section.
SEMI-PRO-TIP: If you’ve never taken off your front bumper and started wondering if your headlights somehow need to be involved for removal, they do not.
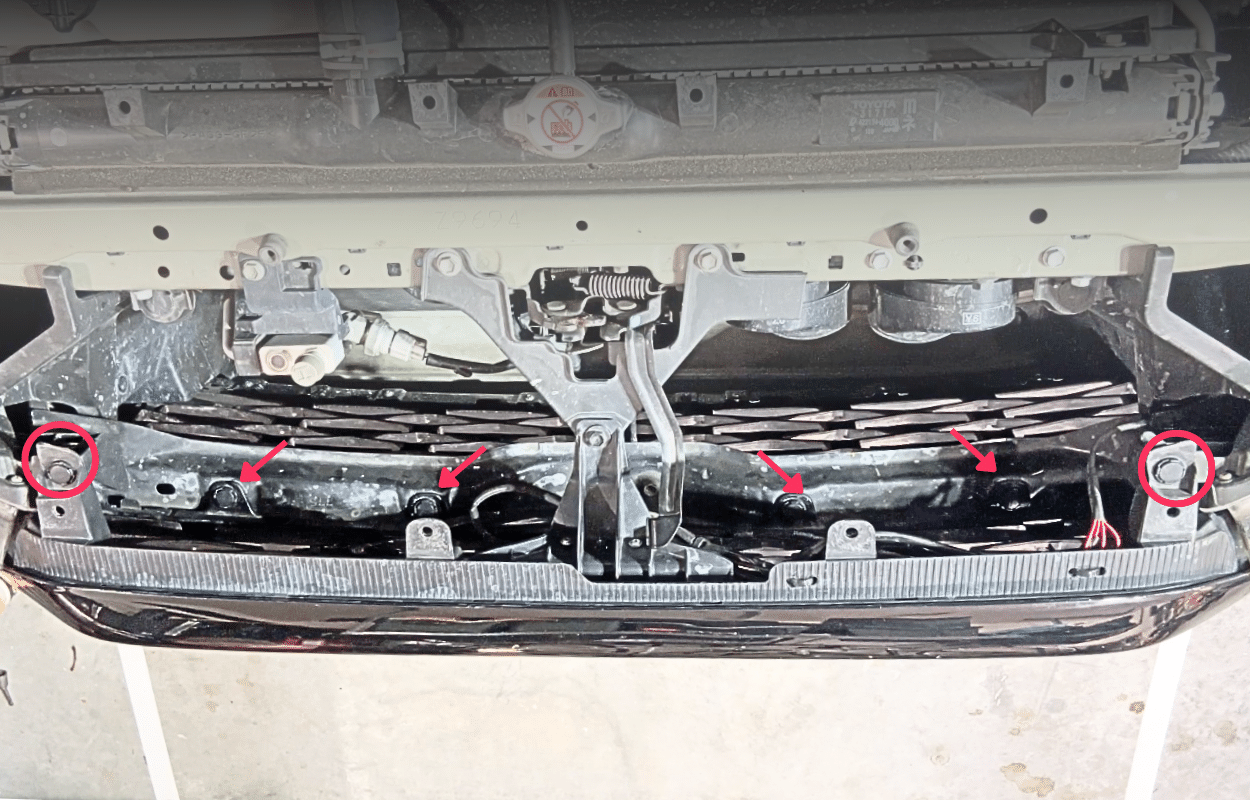
Step 3. Removing Bottom Screws
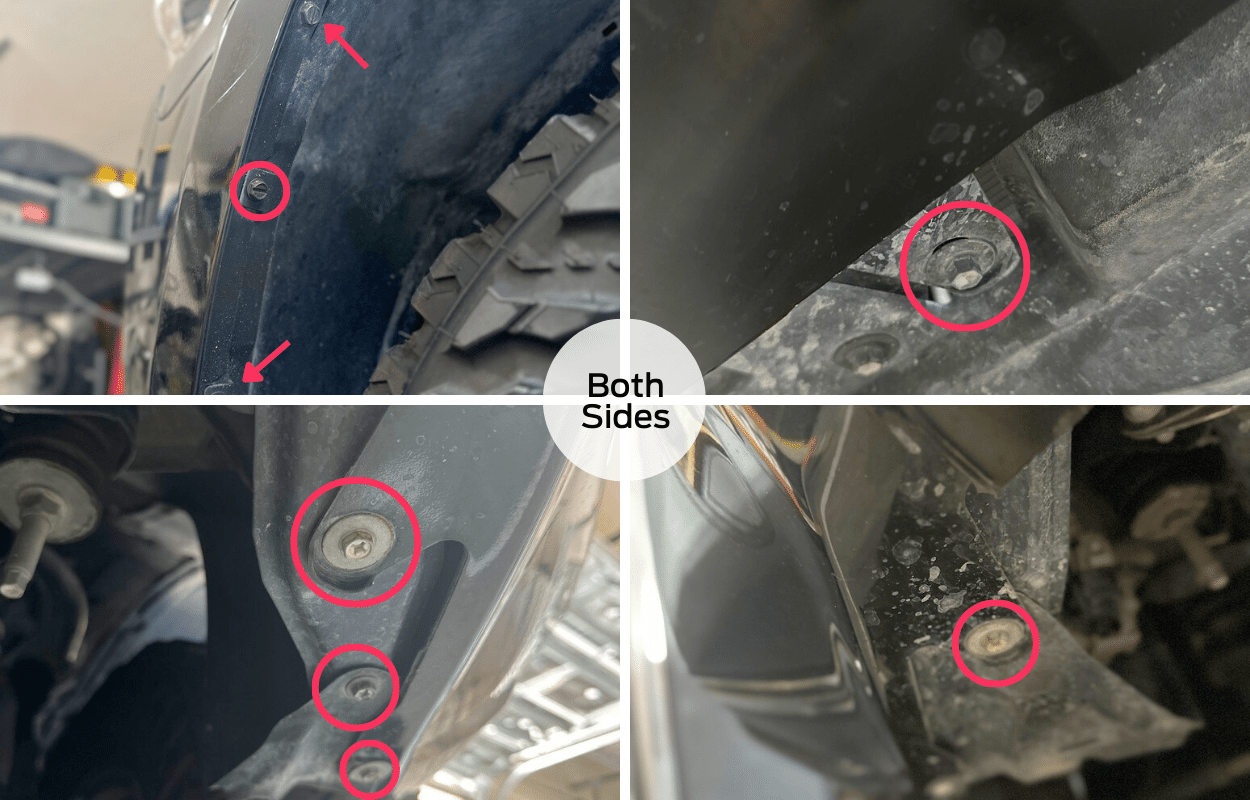
Underneath, you’ll find three screws on each side securing the bumper to the inner fender wells, plus seven (or less in my case, the trail gods ate a few, I fear) more holding the bumper to the frame. Grab your tools and remove these to free the bottom of the bumper.
Step 4. Pulling Off Bumper Cover
Now, it’s time to pull the bumper away from the body of your 4Runner. Start at the sides near the wheels. Be gentle to avoid bending the bumper or snapping the plastic clips. If your 4Runner has fog lights, remember to disconnect them before you pull the whole piece.
PRO-TIP: Get a moving blanket or large piece of cardboard and place it around the front during this process, as it will often pop out and then drop to the ground. This will give you more padding and protection from scraping the paint on the bumper.
Step 5. Laying Out Cut Lines
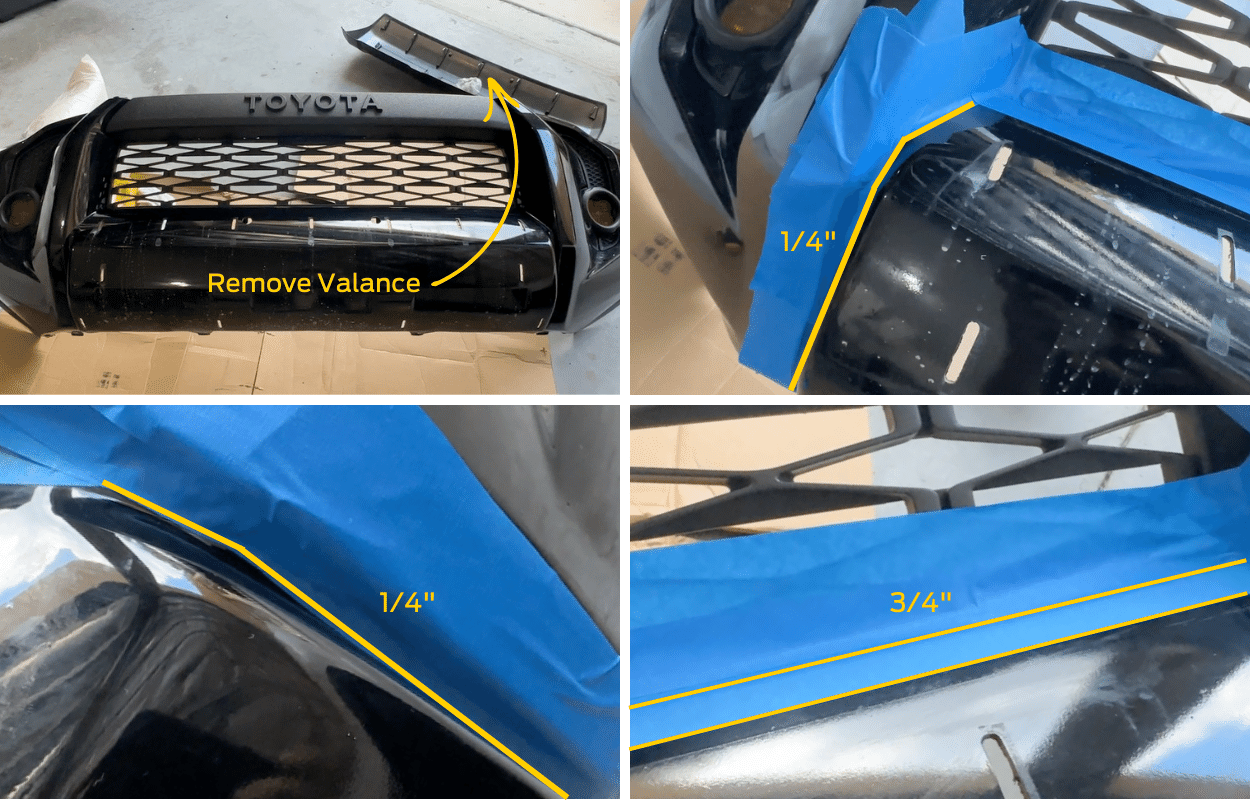
Using masking tape, mark the cut lines for your new bumper. Follow the inner edge of the bottom bulge, leaving about a ¼” lip. Do the same for the sides, maintaining a ¼” lip. For the upper horizontal cut, they suggest measuring ¼” below the grille’s edge; I’d go further down to 3/4″. Remember, you’d rather go back and trim more than have nothing to trim from.
PRO-TIP: If you have a valance (a large painted panel on the part you’ll be cutting out) on your front bumper, flip it over and remove it. This will create additional room for you to cut from. I recommend following the line of where that valance was as your guide.
Step 6. Cutting
Carefully cut along the lines you laid out using a sharp razor blade or a cutoff wheel. Smooth out any sharp edges or burrs with a file. Remove the masking tape once you’re done. Your bumper is starting to take shape!
PRO-TIP: The cutting tool in question becomes a bigger debate than teenagers debating anime, but I used a Dewalt oscillating multi-tool with a semi-circle blade, as it forces you to keep a longer line with minimal deviation. Then I returned it to Home Depot because I think this tool is useless in most cases, and I would rather go to war with a Sawzall. But it is the “right tool for the job,” as our dads would say.
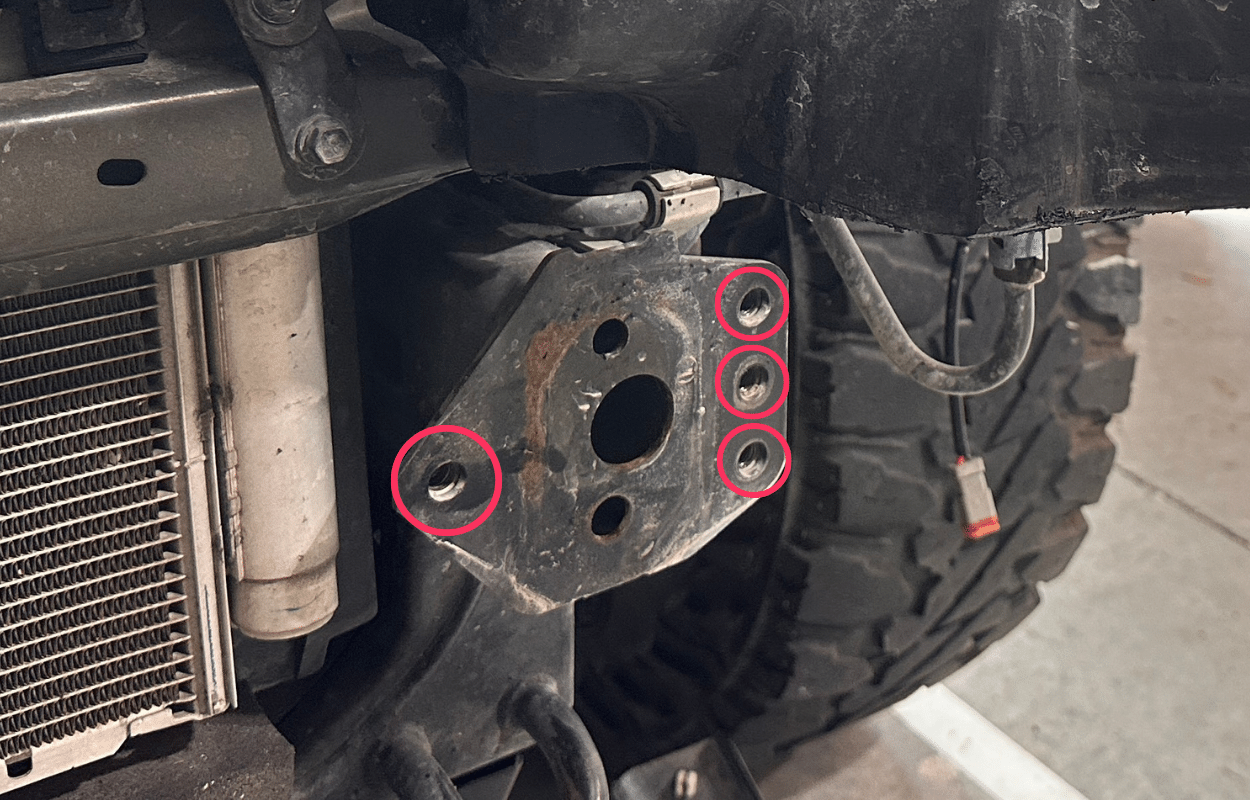
Step 7. Removing Bracket Bolts
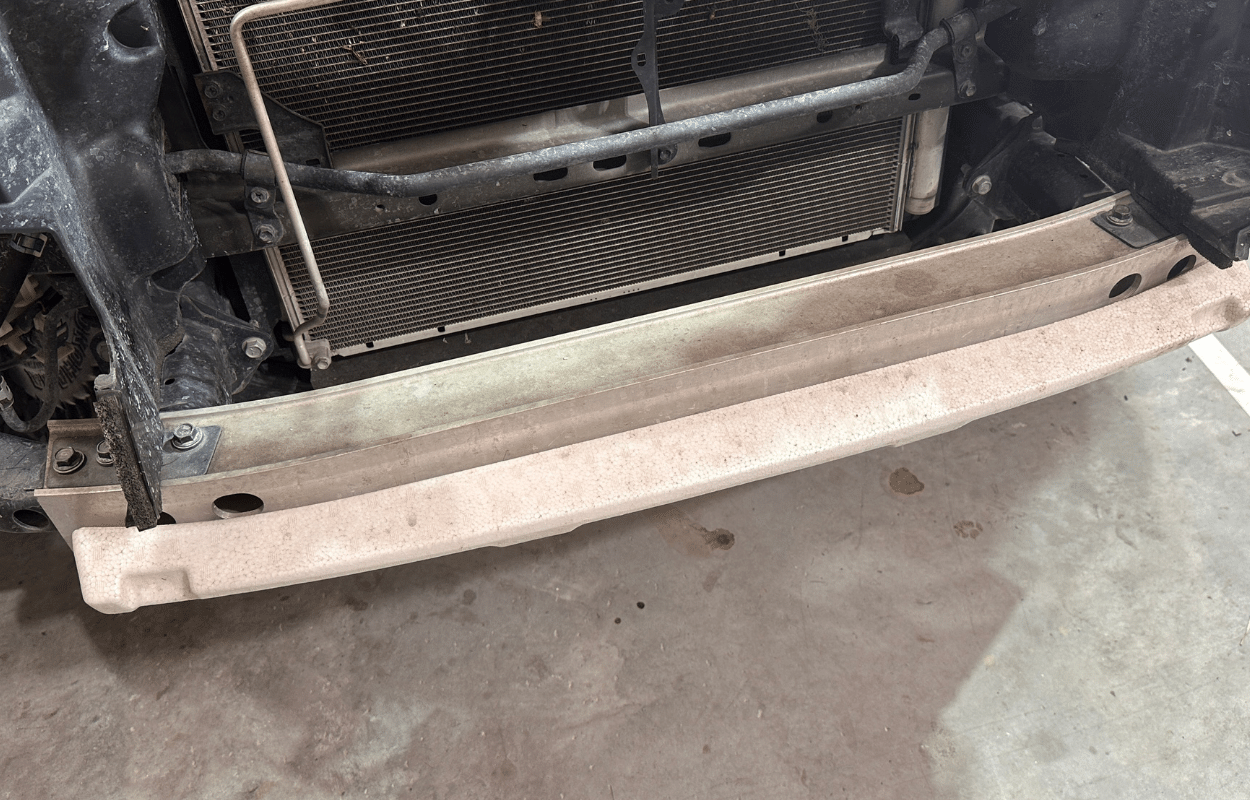
If you haven’t already, remove the two 10mm bolts connecting the crash bar brackets to the inner fender liners and the plastic snap connecting the piece below the crash bar to the vehicle frame.
Step 8. Taking Off Crash Bar
Using a 14mm socket, remove the bolts holding the crash bar to the frame. Carefully remove the crash bar along with its attached plastic piece. This gives your new bumper the room it needs. I suggest making a big show of flinging the old crash bar onto the driveaway to establish dominance over the neighbors who pay to have their lawn manicured. But do what you want — I’m not your mom.
MUST DO TIP: Keep the 8 large bolts that you removed to pull the crash bar from frame. You’ll be reusing these bolts when you install the new bumper.
Step 9. Adjusting Cooler Line
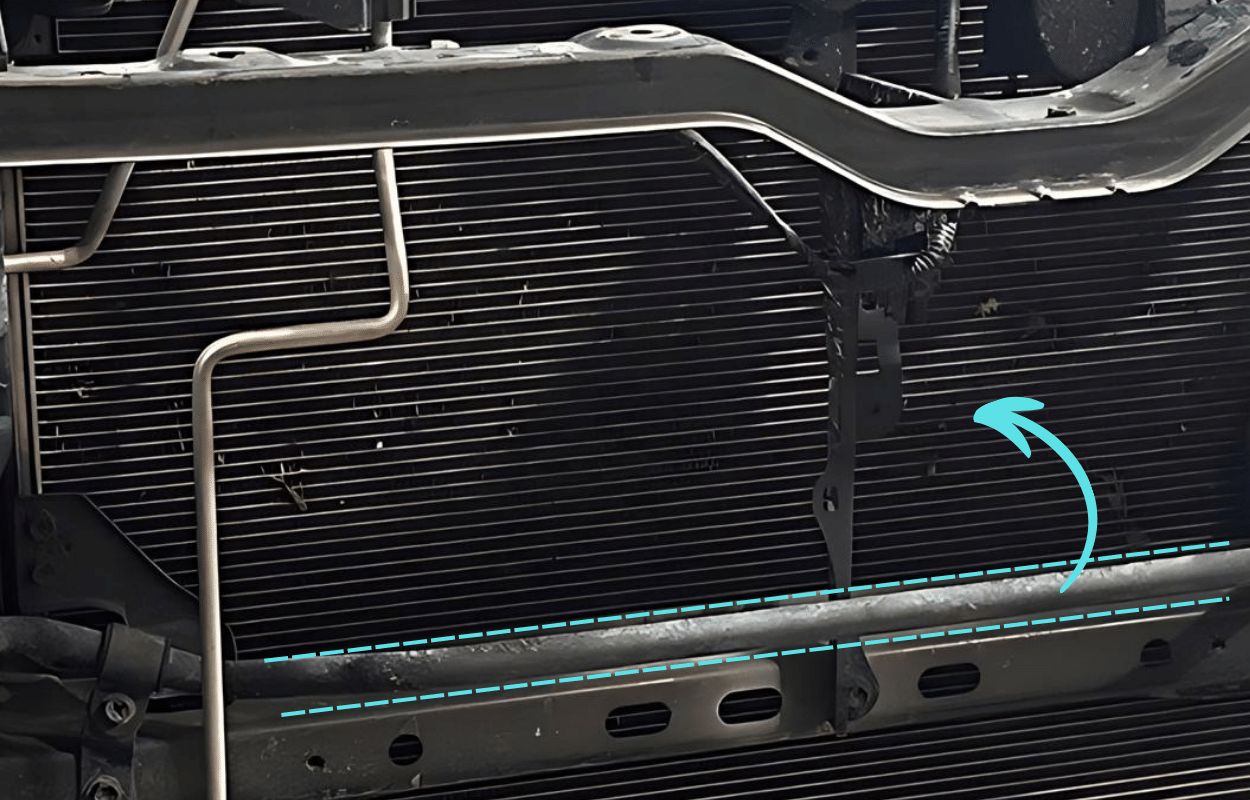
Depending on your winch and control box, you may need to bend the cooler line up and run it in front of the radiator. Loosen the mounting bolts, gently push the line toward the radiator, and re-tighten the bolts, leaving about ¼” clearance to prevent any rubbing.
PRO-TIP: It’s zip tie time. You’ll want more security for this cooler line. While this repositioning sounds easy, it will undo itself without additional reinforcement.
Step 10. Trimming Air Deflectors
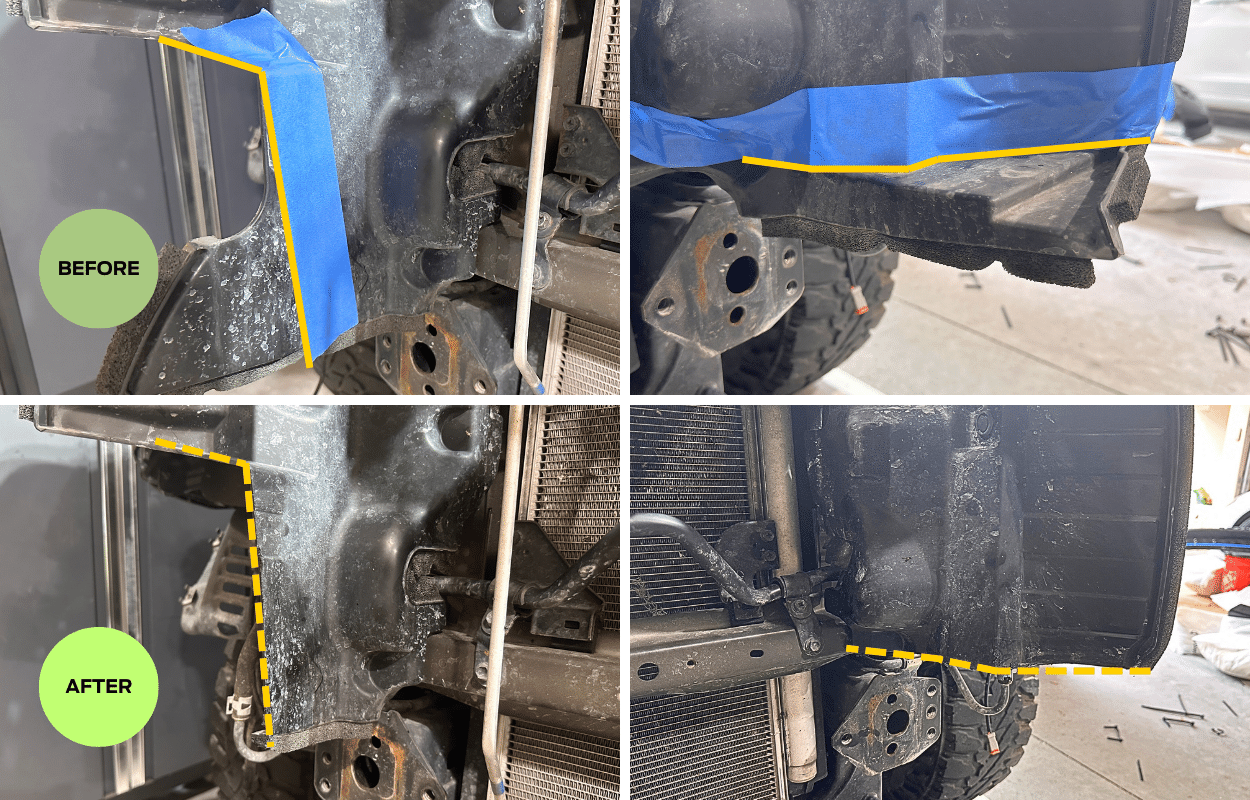
Trim the left and right air deflectors, as shown above. This ensures they fit perfectly with your new bumper. It’ll look and feel odd during the cutting process of how it will match up, but it will.
This is one of the instances where All-Pro’s installation instructions (only in a static PDF with no video) fell short of conveying accurate directions. Don’t worry; you’re good now.
Step 11. Reinstalling Trimmed Bumper

Reinstall the factory-trimmed bumper using the original fasteners. This should fit as best as you can at this point. The bumper itself will lack a lot of structural rigidity from cutting away the later middle of its form, but a fair amount of that will be made up later with provided side support brackets.
PRO-TIP: Reconnect the fog lights before you seal up easy access to them.
Step 12. Adding Rubber Trim & Accessories
Install the supplied rubber trim around the edges of your new bumper. I like that they provided this trim, but it’s a pain in the butt to get situated without lifting and unfolding, especially when you snug up the OME fender to the new bumper, so keep an eye on it.
SEMI-PRO-TIP: I’d also cut some quasi-mitered corners (ideally without cutting all the way through) on the edges of the rubber to give it more ability to wrap the edge and not unseat itself.
STOP! Add-On’s Time?
If you’re adding a winch or light bar, now’s the time. For the winch, start with the front mounting bolts, then slide it forward to install the rear bolts. When dropping in a light be sure to position the wires towards the battery side of the 4Runner; this way you can minimize the distance the wiring much travel to your power and associated controls.
Step 13. Mounting Bumper
Attach the new bumper using the original crash bar mounting bolts. Adjust it vertically for proper clearance between the bumper’s upper edge and the original bumper grille. Use (or leave the previous) masking tape to protect the paint, then remove it once everything’s in place.
Step 14. Side Support Brackets
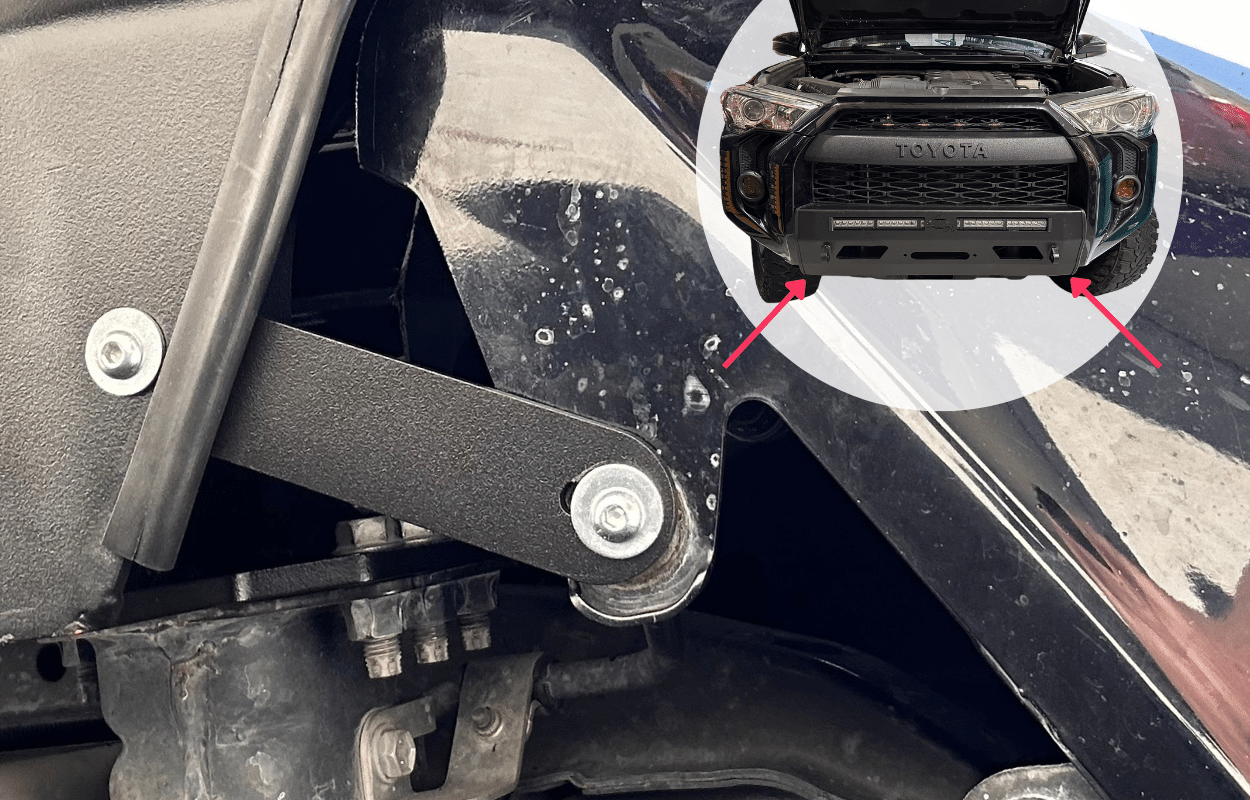
Install the provided side support brackets and hardware to connect the lower corners of the factory bumper to the new one. Adjust the brackets to minimize the gap between the bumpers for a sleek, finished look.
Step 15. Reinstalling Upper Radiator Cover
Lastly, reinstall the upper radiator cover using the original clips. Stand back and admire your work – your 4Runner now sports a sturdy, stylish All-Pro Off-Road bumper that’s ready for any mailbox! I meant “outdoor adventure.”
Enjoy the clean fit and finish, knowing you’ve got some new armor that’s not just utilitarian but also adds a touch of rugged charm without going full apocalyptic.
Review
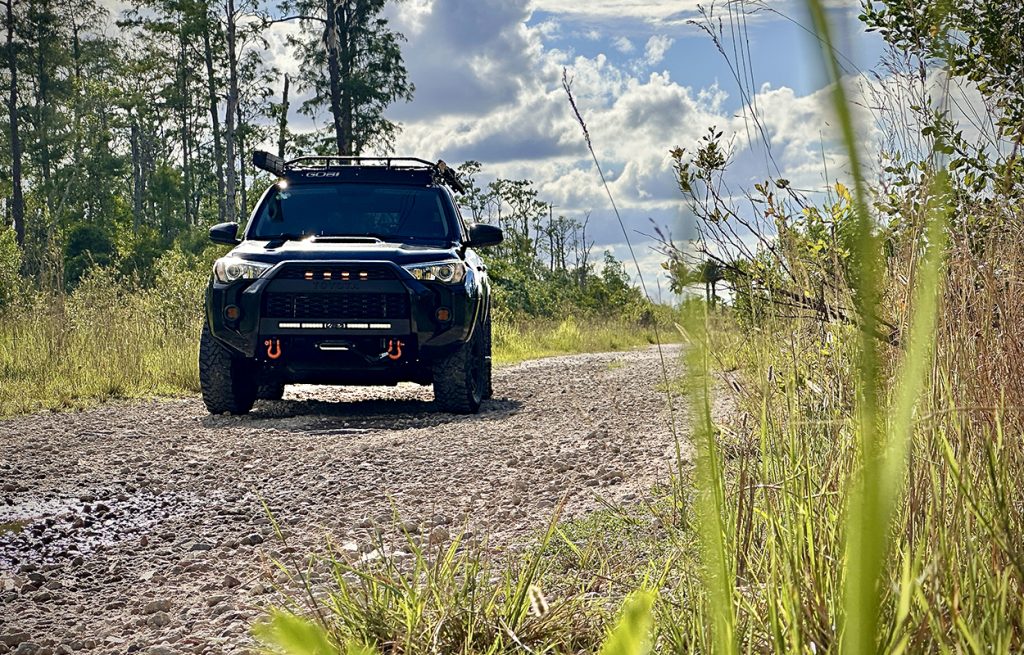
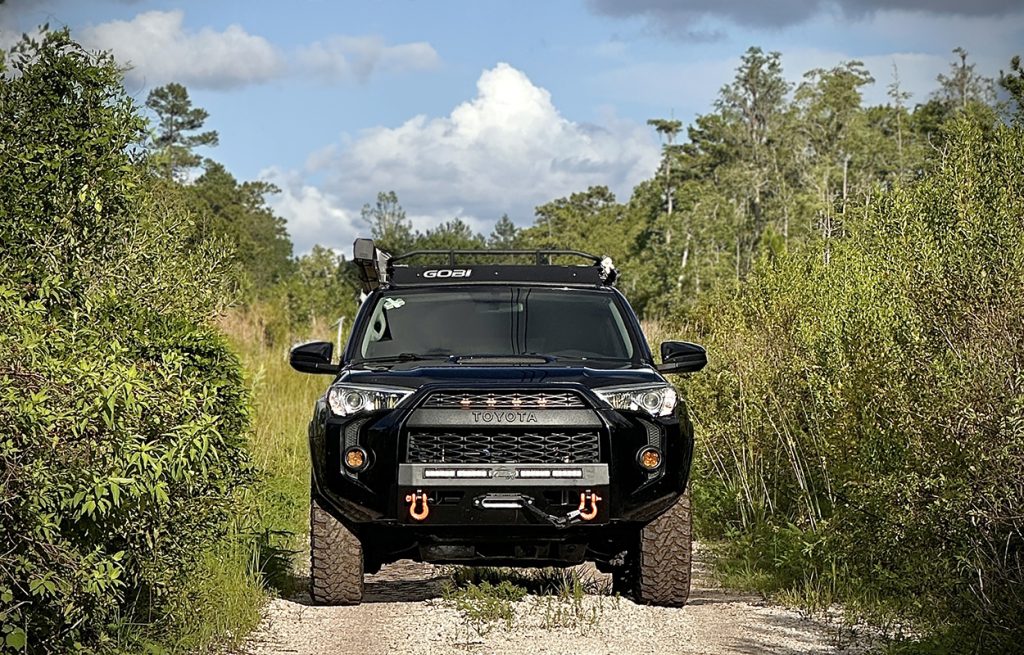
This bumper is a MASSIVE upgrade that brings both fun and functionality to your off-road adventures. Imagine your 4Runner leading the charge, equipped with a bumper built better than most naval warships. It’s like having the USS Nimitz strapped to the front of your ride, ensuring durability and reliability in the harshest conditions.
Installing is a bit of a dance. Once it’s on, it doesn’t scream, “LOOK AT ME! I wish I were in a Mad Max sequel!” Instead, it quietly commands respect with its sleek, “sleeper-like” modern design. Think of it as the James Bond of bumpers – sophisticated, stylish, and oh-so-effective.
One quirky aspect is the rubber molding. But here’s the kicker – it looks clean with or without it. So, whether you decide to keep wrestling with it or let it do its thing, your 4Runner still looks killer.
Final Thoughts
For me, being slightly obsessive about utilitarianism, the functionality is where this bumper truly shines. It holds a winch like it was born to do it. I bestowed the SmittyBilt x20 Gen 3, and it fits like a glove, ready to rescue me from bad decisions. The bumper also supports a 30″ light bar, such as the Diode Dynamics spotlight, which I decided was a great match.
Combining damn near Mil-Spec construction with a sophisticated design, it is an excellent investment for owners seeking to enhance both the form and function of their vehicle. It’s overkill in the best possible way, ensuring your adventures are safer and stylishly without sacrificing the Toyota “face,” if you will. Whether cruising down the highway or tackling rugged trails, this bumper is your reliable and sleek companion, ready for whatever lies ahead.
Well done, Justice! Your writing is always thorough and entertaining.
Would it be compatible on the OG 5th Gen (2010-2013) T4R? This is a problem I keep running up against. Seems everyone just glosses over making anything for us…
Exactly Rick P, I have a 2012 and other than basic mechanical items anything related to body at the front is darn near impossible to accommodate our year models.
Highly unlikely. The issue is supply and demand, we voiced for a low pro and C4 invested time/money to R&D one just for us but when it came time for purchasing, not many people followed through. Plus we are a very small percentage compared to 2014 – 2024…not even mentioning Trail vs SR5 front end difference
I have this bumper and for the cost and effectiveness of the product, I feel its a great alternative to the “other” competitors brands. I ordered mine raw steel, and upon arrival I sanded its down with high count sand paper, hit it with alcohol rub, and coated with with undercoating. I also added the Lasfit led bar, which required some altering didn’t hinder the performance of the light. All in all I’m super happy with the All Pro Lo-Pro Bumper.