As of 2025, Alpa Equipt is no longer in business.
Let’s be honest, there are several great snorkel options on the market for the 5th Gen 4Runner. Though they all work essentially the same, if you want something a little more streamlined and low profile, options are limited. After understanding the real benefits, I knew that I wanted something with awesome aesthetics and wouldn’t get caught on low-hanging tree branches.
I found a few different low-profile options currently on the market. However, I found that they required some serious rerouting of my aftermarket electrical cables inside my KC Wire Hider. Suffice it to say, I didn’t want to do all of that extra work.
Then, I came across the Alpha Equipt Short Snorkel, which checked all my boxes. It would sit flush from the fender up to the passenger side A-Pillar but stop before getting to the roofline of the 4Runner, meaning that I wouldn’t need to reroute my existing wires.
Note: There is a short and long version, with the latter extending over the roofline.
Table Of Contents
Product Overview & Installation

After ordering, I was impressed with how quickly it arrived. Everything was wrapped in several layers of bubble wrap and packaged well to avoid any shipping damage. Kudos to Alpha Equipt!
The snorkel is a one-piece, complete carbon fiber design, making it super light. It comes with a heavy-duty plastic intake “pipe” to connect it to the air intake box.
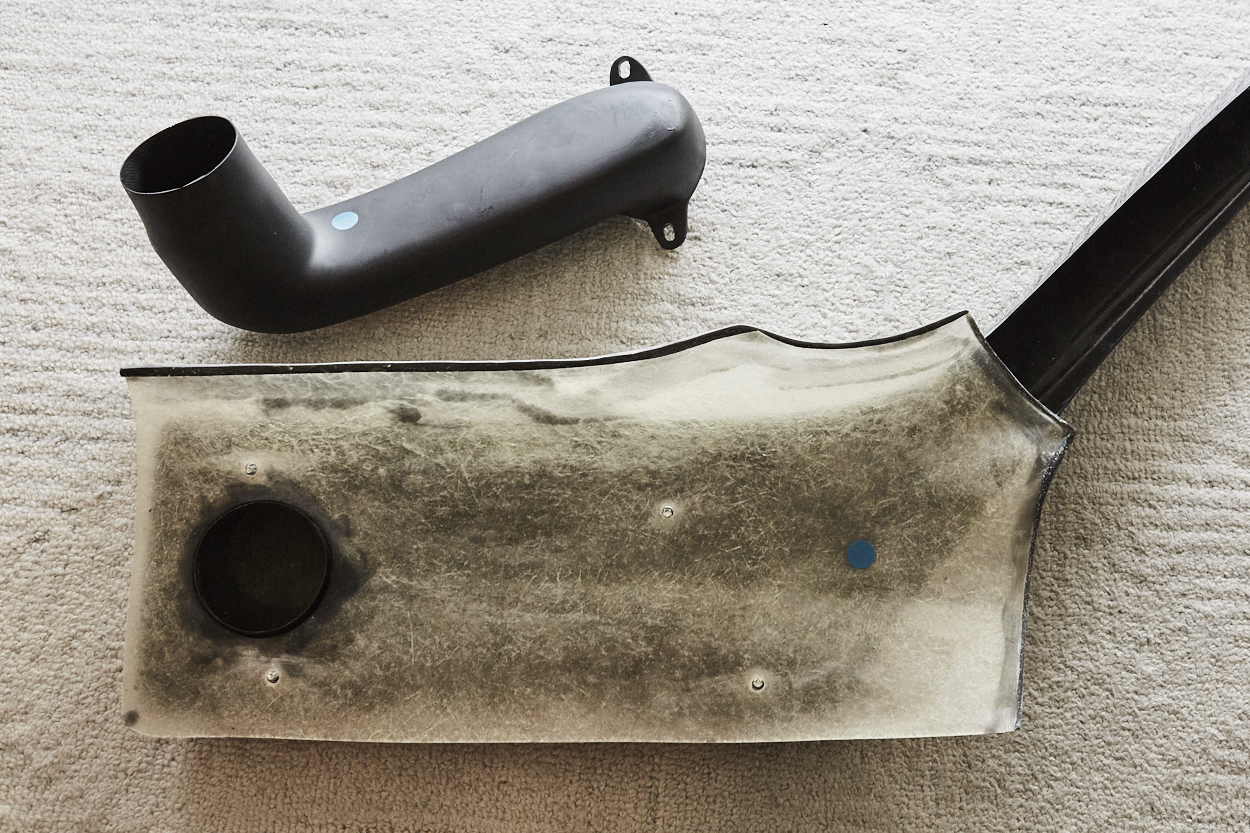
Also included is a nice fiberglass template, which I found easy to use. However, I read that some people said the template was off and didn’t line up with their snorkel mounting studs, so double-check to make sure everything lines up properly before drilling. My template was pretty spot on.
Overall, the installation was straightforward and not as intimidating as I imagined (drilling a giant hole into my fender).
Alpha Equipt states that its snorkels are engineered to connect with the OEM air intake box using an intake coupler. The steps below will be for installing this onto a TRD cold air intake. So, some steps may be slightly different if installed with an OEM stock air intake box.
Tools & Materials Required:
- Flat Head Screwdriver
- Painters Tape
- Sharpie/Marker pen
- Center punch
- Safety Glasses
- Drill
- Drill Bits 1/8-3/8
- 3 1/2 inch metal hole saw
- Dremel tool
- 12mm Socket
- 10mm Socket/Ratchet Wrench
- RTV Silicone
- Rustoleum/Touch up paint
Needed for TRD CAI install only:
- 4″ x 3.5″ Intake Coupler
- 4.5″ Worm Clamps x 2
Step 1. Remove Air Intake Box Lid

Before we start, we need to remove the air intake box and prep it for the snorkel connection. This has to be done regardless of whether you have a stock OEM intake air box or an upgraded cold air intake. To remove the stock air intake box, you can reference this article.
To remove the TRD CAI box, start by loosening the two worm clamps that hold the coupler in place with a flathead screwdriver. Then, wiggle the coupler away from the intake box to clear it from the opening.
Next, unclip the two clips holding down the lid of the box. Be careful not to bend them too far, as they may break. With the lid unclipped and the coupler pushed out of the way, lift on the side with the clips and slide it toward the passenger fender to release it from the hinge. Set the lid aside in a safe area and avoid getting it dirty or damaged.
Step 2. Remove Air Filter

Remove the air filter and set it aside. If your filter needs to be replaced or cleaned, this is a great time to do so during reinstallation later.
Step 3. Remove Air Intake Box

Remove the three 12mm bolts on the bottom of the air intake box. Then, unclip the wire harness on the backside. Finally, pull the box away and out from the fender.
Step 4. Remove Intake Duct

To remove the TRD intake duct, fold it in half and roll it together to clear the flange from the port hole.
The OEM intake box will have a plastic duct attached to it. Remove it by carefully prying it off with a flathead screwdriver.
Note: If your 4Runner has an OEM air intake, skip the sanding and coupler steps below and loosely reinstall your air intake box in the engine bay.
Step 5. Sand Down Intake Box Tabs

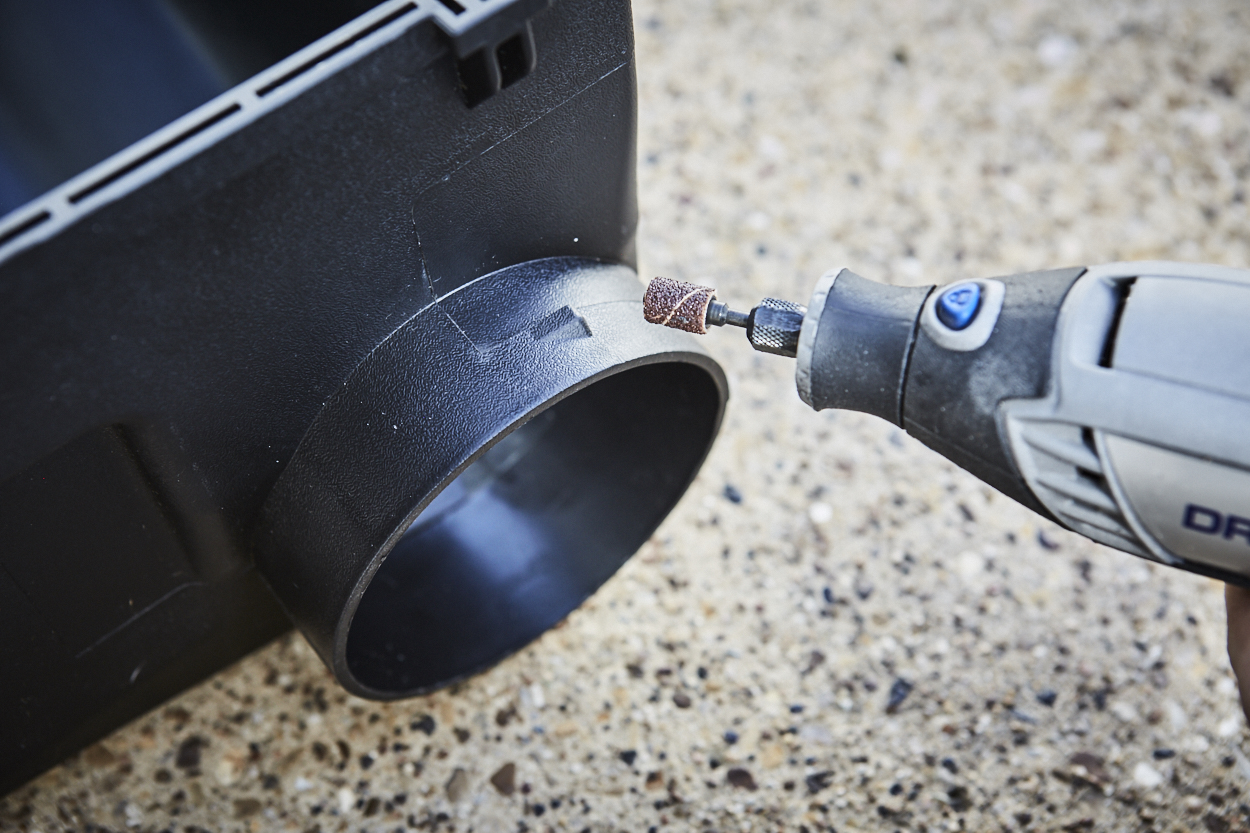
For the TRD CAI to connect to the snorkel pipe, a 4′ to 3.5″ intake coupler needs to be used. To ensure a good airtight connection, two tabs need to be sanded flat using a Dremel or something similar.
Step 6. Install Intake Coupler

Place the 4″ side of the intake coupler over the box’s intake. Then, place the center worm clamp on the coupler and tighten it down. Position the clamp to easily tighten or loosen once the box is reinstalled.
Once your air box has been prepped, reinstall it into your engine bay. Don’t tighten these down all the way just yet. You’ll want to leave them a little loose when installing the snorkel pipe.
Step 7. Remove Fender Liner

Next, you must remove the inner fender liner from the passenger side. I didn’t plan on reinstalling it, so I broke off all the heads from the clips and cut the rest of the liner out. If you plan to reinstall the liner, I recommend using a body clip removal tool. Or, order enough of those clips to replace the ones you break.
Step 8. Prep/Clean Fender

Clean the fender well to remove grit, dust, and grime. Then, use painter’s tape to cover the entire area where the snorkel will be installed.
Step 9. Check Template Against Snorkel

As mentioned previously, I had heard of some Alpha Equipt templates that didn’t line up with the mounting studs on the snorkel correctly. Double-check to make sure it all lines up and is good to go.
Step 10. Attach Template To Fender

Align the template to the body lines on the fender. This fiberglass template is molded to the 4Runner’s fender, so placement is easy. Tape it down once you’ve triple-checked placement to mark your drilling holes.
Step 11. Mark Drilling Holes

Using a Sharpie, mark all the drilling holes on the tape with the template.
Step 12. Center Punch All Holes

Mark the centers for all the holes using a center punch and hammer. This will ensure more precise drilling.
Step 13. Drill Mounting Holes

Start by drilling a small pilot hole using a 1/8 bit. Then, step up the sizes until you reach a 3/8 bit for the final hole size. This produced a hole slightly larger than on the template but allowed some wiggle room for adjustments for final fitment.
Step 14. Cut Hole For Snorkel Intake

Next, remove the fiberglass template, and with a 3.5″ hole saw, slowly let the drill and saw do the work. It’ll cut through the fender pretty easily. Take your time and don’t try to force it.
I used a brand-new hole saw rated to cut metal, slicing through the fender like butter.
Step 15. Test Fit Snorkel

Place the snorkel on the fender and make sure everything lines up properly.
Step 16. Clean Up Hole Edges

Use a Dremel tool with a grinding bit to clean up all the hole cuts and smooth everything out.
Step 17. Rust Prevention

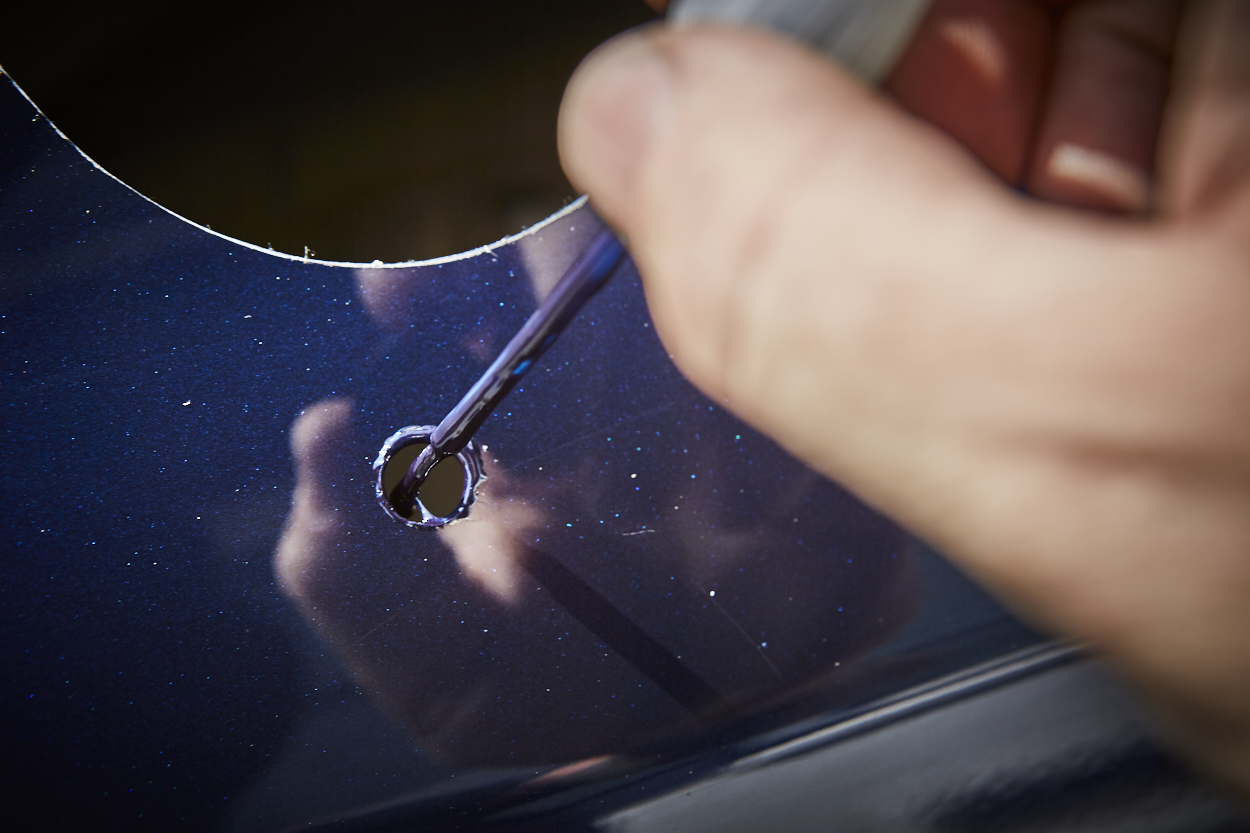
After removing all the painter’s tape, it’s a good idea to apply some rust prevention to the bare metal from the drilled-out holes. I used some Toyota touch-up paint that I had lying around. Rust-Oleum clear paint could also be used.
Step 18. Prep A-Pillar & Snorkel

Clean the A-pillar and the backside of the snorkel with rubbing alcohol and a microfiber cloth. This will help give the 3M tape a good, clean surface to stick to. Then, place the included 3M tape on the section that’ll sit on the A-pillar.
The nuts and washers are attached to the snorkel’s mounting studs. Remove them with a 10mm deep socket or wrench and set them aside in a safe spot.
Step 19. Mount Snorkel

Align the snorkel to the fender and A-pillar, and ensure all mounting points are aligned with the mounting studs. Once everything is lined up correctly, push on the section with the 3M tape and hold it down with some pressure for about a minute or two to create a good bond.
Using two of the supplied 10mm nuts and washers, start the threads on the two mounting studs closest to the A-pillar. Do not tighten them all the way yet.
Step 20. Slide Worm Clamp Onto Intake Coupler

The intake coupler I ordered came with two worm clamps: one 4.5″ and one 4″. While testing the fitting, I found the latter wasn’t big enough to insert the intake pipe and attach it to the snorkel. So, I used the 4.5″ clamp. Hang the clamp on the intake coupler and align it so it’s easy to tighten up after the intake pipe is in place.
Note: This step is unnecessary if installed onto an OEM stock intake air box.
Step 21. Seal Connection From Snorkel To Intake Pipe

Using RTV silicone, lay a good bead around the mounting face of the intake pipe. This will seal it up and prevent water ingress.
Step 22. Attach Snorkel Intake Tube

Take caution not to get the RTV silicone all over the place. Slide the tapered end of the intake pipe into the intake coupler for the air intake box. Wiggle it in and rotate the intake pipe upwards towards the mounting tabs for the snorkel’s mounting studs. A little silicone spray can help here, but I didn’t find that necessary.
Once the mounting tabs are lined up with the mounting studs, install the remaining two 10mm nuts and washers and tighten them down until snug. Take care not to overtorque these, as the mounting studs on the carbon fiber snorkel could break free. Finally, tighten the worm clamp on the intake coupler.
Reassemble Air Intake Box
Tighten all (4) mounting nuts and the worm clamp under the fender, and the (3) 12mm mounting bolts for the air intake box in the engine bay. Then, reinstall your air filter and intake box lid. Double-check all connections and you’re done!
Final Thoughts

After installing this snorkel, I love the look on my 4Runner. I’m not sure if it’s just a placebo effect, but paired with the TRD CAI, it also seems to have gained a slightly better MPG, although probably by only .5 MPG.
Installation was pretty straightforward, and can easily be done in an afternoon. One thing that I noticed immediately is that at certain RPMs with the passenger window down, you can hear it sucking in the air. That sound isn’t noticeable with the window up, however.
In the end, the Alpha Equipt short snorkel meets all my criteria. It is low profile, and the installation didn’t require me to reroute any electrical cables running up to my roof rack. Now, I have a little piece of mind when crossing deeper water, and compared to a traditional style snorkel, I will be less likely to get hung up on low-hanging branches. Keeping my intake cleaner from dust during the summer is also an awesome benefit.
The cherry on top is that carbon fiber construction, which is just super rad.

Just tried to buy one online because of your review. Money was quickly refunded. Looks like others are correct that either they’re no longer making this snorkel or they’re out of business. Real bummer. Might want to update this article.
Hello JEREMY,
The vendor’s phone number of this product is no longer in service. Are they still in business & is this snorkel still available? Where can I order the short version of this snorkel? Thank you kindly!!
Great write up, I reached out to them to purchase one because of your write up, but was told by Alpha they aren’t making these anymore.
Great write-up Jeremy, Glad to see someone do it with a TRD CAI, I was told by the company it didn’t fit. Looks great and now that you’ve completed yours any chance of hiring you? Thanks for the info
Thanks Matt!! Yes technically this snorkel is only designed to work with the stock intake air box, but using a coupler works well to attach it to the the TRD CAI.
I got to check out one of these on a 4Runner up in Denver a few months ago and really liked the quality and fit as well as the look. Excellent write up and now I’m really going to have to look into one of these next year.
This was a great write-up with lots of smart mechanic/install tips. I sadly have no need for a snorkel (my Limited serves more time as a buff minivan more than anything), I read the entire install. That’s a sign of good write-up!
Well, this is one of the coolest looking snorkels I have ever seen. I think everyone needs to understand that carbon fiber parts are not cheap. I think this would be a great fit on a prerunner type truck, due to the sleekness. I would love one of these for my Sequoia.
Considering the cost of just about everything for the 4Runner, I honestly think the snorkel is priced well, especially for carbon fiber. A quick glance at ARB snorkels for example, all run around the $600-$700 range. So a little more for carbon fiber is reasonable to me.
The price is ridiculous!
Good write up. Glad it went well and it looks cool in a unique way. But the price point… ouch.