
Wide-Angle Heated Convex Mirros with Built-In LED Sequential Turn Signal Mirrors – Install & Review For 5th Gen 4Runner
Overview
Apple’s CEO Tim Cook once said “Apple has made products for years that people didn’t know they wanted, and now they can’t live without.”
Regardless of your opinion on Apple, that quote pretty much sums up the LED Sequential Mirrors from Car Trim Home.
If you have read other articles on the blog before, you know that the site is full of installs and reviews from Car Trim Home, like this one and another install of the previously covered sequential turn signal mod. Car Trim Home focuses on all kinds of products for many different makes and models. Some are functional and others change the look of your 4Runner. The new heated sequential turn signal mirrors with led indicators on the glass fill both roles. The might not come in an Apple box, but their stuff sure is cool… and cheap.
This is the second item I now own from them (I recently installed some of their emblem overlays to blackout my badges), and the quality is very impressive for the price you pay. If this is the first time you are hearing about them, I would encourage you to take a look at their product offerings when you click the links below.
Find It Online:
- LED Sequential Turn Signal & Mirror Bundle: Check Price
- Other Products: Check Prices
Specs & Features

Key Features:
- Wide-Angle Convex View (Blind Spot Prevention)
- Non-Fading Blue Tint (Glare Prevention)
- Heated & Hydrophobic
- Integrated LED Turn Signal Arrow
Let’s take some time to discuss the key features of the mirror, as well as my experience thus far; then we will dive into the install.
Wide-Angle Convex View

The mirrors on the 4Runner are small and sleek, which is appealing to the eye. However, there are blindspots just like any vehicle. Prior to installing the mirrors, I installed some blind spot mirrors on the corner of the OEM Mirrors. In my case, I just want to be as safe as possible on the road.
I have yet to tow anything with my 4Runner, but if I do in the future, I will not need to install more blind spot mirrors on the newly installed side mirrors. These mirrors take you from the OEM narrow Field of View to a Wide-Angle view, which allows you to see so much more. While writing this down does not do it justice, the pictures are much more telling.
I used a tree as my point of reference and took before and after pictures. The after pictures are shocking to look at. I went from seeing just the tree to seeing the entire tree and everything surrounding the tree. See for yourself!
Non-Fading Blue Tint (Glare Prevention)

The next thing is also incredible as well. The mirrors have a blue tint to them which reflects the light back, instead of in your face. I tested these out with both the sun and with nighttime driving, and they work better than you might think.
The 4Runner I have already had this auto on and off feature with the rear-view mirror. I have always wished it was on the side-view mirrors as well as an older truck I used to have. The mirrors take care of that for you, only it is like the dimming feature is on at all times. It works for both daytime and nighttime driving.
This is one of the features that I immediately noticed was non-existent on the OEM mirrors. Had I known that these were available as an option, I would have done an install so much sooner!
Heated & Hydrophobic

Something I was initially hesitant on was getting these and giving up the heated mirrors. That might sound petty to some, but I live in Colorado. The winters range from blizzard conditions to negative temperatures. Some winters can be more brutal with additional wind chill and freezing rain, paired up with snowstorms.
All of that ice and snow sticks quite nicely to the plastic of your vehicle’s mirrors, and then you are left with a situation where you can’t see. Many mirrors nowadays have some sort of coating to prevent this from happening, but when it is in the negative temps, sometimes you have to get creative.
On a side note, I never recommend using your ice scraper or brush on any mirror. This will just scratch up the mirror and could remove any coating the mirror has on it. It is better to fold the mirror housing in if you have that option, which could prevent you from having to do any scraping at all. In any case, you do not have to give up the heated mirrors to have these, so if that was one of your concerns, rest assured that is not the case.
Along with these mirros being heated, they boast a hydrophobic coating on them. So that sticking I was referring to should not be an issue for you. I have yet to test this with a brutal winter, but I am confident that it is the case. If it doesn’t work as well as I am hoping, I suppose I still have the heated mirror to rely on.
Integrated LED Turn Signal Arrow

Last, but not least, is the integrated turn LED Turn arrow in the mirror. The arrow is visible during the day and at night and the LEDs are very bright. These not only look cool but could help other drivers know when you are switching lanes or turning in either direction.
At night especially, it is almost disorienting as the driver the first time you use your turn signal; because of how bright the LEDs are. However, I would say that in this case, the brighter the better. It will definitely help other drivers see you coming. Combined with the LED Turn Signal Indicator Lights (see install details below), other drivers should see you coming from a “mile away.”
Overall, these mirrors add so much value to your existing setup. All of the features they offer to make it well worth the price. They add functionality, safety, as well as a handful of other features that make them worth at least considering.
If you are towing anything, the mirrors will also prevent you from having to attach one of those mirror extenders or add a blind spot mirror to the existing one (like I had on my OEM Mirrors).
All in all, the mirrors are solid, easy to install, and combined with the sequential turn signal LED’s, they make for an incredible combination.
Installation Guide

While these do work in unison with the LED Sequential Turn Signals, this article will only cover the mirror install. If you want to know how to swap out the turn signals, I would recommend reading Atul’s article on how to install the LED Sequential Turn Signals.
Difficulty: Easy
Time: 1 Hour
Number of People: 1
Tools and Materials:
- Screwdriver
- Pry Tool
- Vise-Grip – Wire Stripping Tool, Wire Cutter, Crimping Tool: Check Price
- T-Tap Wire Connectors: Check Price
Step 1. Remove Mirror Cover

The best way I found to do this is to squeeze the corner of the mirror cover closest to the vehicle, then slowly lift.

Be sure to lift up slowly on the mirror cover in this step, as to not damage the clips. If you feel inclined, you can use your pry tool at this point. However, I found it easy to take off.
Step 2. Disconnect Heated Mirror Plug

You may need to give it a slight wiggle for it to come off. Take your time here too, the nodes this is connected to are flimsy, and could break off inside of the plug. I also found it helpful to push my mirror to the right as well to make it easier to pull off.
Step 3. Pull Mirror Out of Housing

Push your mirror in the opposite direction, and yank on it for it to come off. Don’t be afraid to put some elbow grease into this, but be careful not to pull with too much force on the edge of the mirror itself, as you can break the mirror or the clips here holding it in place.

Here is a close up of the mirror clips. If you would like to, you can use your screwdriver to loosen these up a bit before pulling off the mirror entirely.
Step 4. Attach New Mirror

Here is a shot of what the mirror looks like on the back. The one from CarTrim Home looks exactly the same and should line right up with the clips.
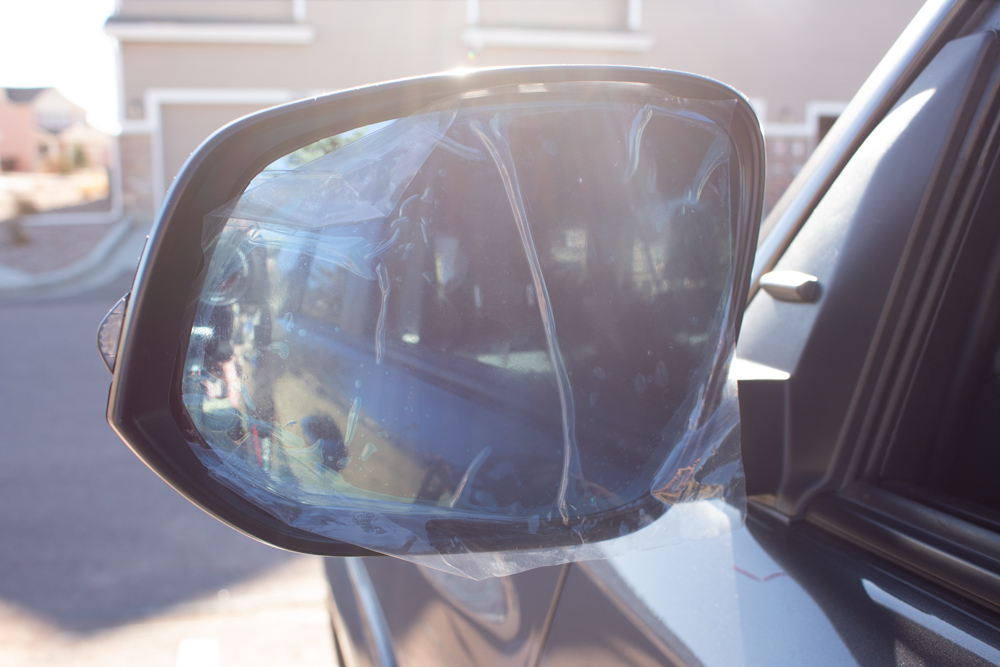
I would not recommend pulling off the protective plastic on the mirror until the very end of the install. The oil on your fingers will stick to the mirror like a magnet due to the hydrophobic coating; not to mention potential scratches from any dirt on your fingers or gloves.
Step 5. Wire Integrated Turn Signal

Pull the black and red wire through the hole where the heated mirror plug goes.
We will be tapping into the red and white wire going to the integrated mirror turn signal.

The wires coming from the mirror are red and black. So we will connect red to red and black to white.

I found it easier to disconnect the wiring harness from the integrated turn signal to tap into these wires. This is not a required step, but it does make it easier in the next step.
Step 6. Crimp

Feed the wire into your spade terminal, and crimp!
Step 7. Attach T-Tap Connector

Here is a shot of how the T-Tap connector looks once connected.

You should be able to use your fingers to press down on this. If you have any difficulty though, you can use your pliers, or you can strip part of the wire in between before closing the clip.

Repeat this step for the other wire. I used a blue connector here.
Note: The color of the connectors doesn’t matter, this is just to separate the wires in case you need to unplug them at some point.
Step 8. Plug It In, Plug It In!

Plug the spade terminal into the T-Tap Connector.

Plug your heated mirror connector back in.

If you disconnected your integrated turn signal, plug that back in as well. Then, tuck your wires into the mirror housing. If you would like to, grab some zip ties to clean up your wires a little more.
Step 9. Testing…1, 2, 3…

Before you fully reassemble the mirror, be sure to test everything out. Don’t get too excited before you test this. I actually didn’t fully connect one of the spade connectors into the T-Tap Connector the first time.
Step 10. Autobots, Assemble!

Once you have tested to make sure everything is working, you can reassemble your mirror.
Now you can pull off that plastic that you have been dying to pull off. Repeat the same steps on the passenger side.
What is the T-tap connector size? to fit the wires.
ir do you need the upgraded mirrors to start
will these work on 21 sr5 plain jane mirrors
Compared to Suma mirrors ? Any input
Alex,
I am not familiar with the Suma Mirrors, but I did look them up. Those puppies cost $190 for just the mirrors. I would say to give these a shot for $83 and get the sequential turn signals with them. I have had them on my 4Runner for almost a year now and they are still working like they did on day one!
did you have turn signals before upgrading? I’m wanting to upgrade to have turn signals on my side mirrors but I don’t have them currently.
Sent a DM, but thought I would post here as well. I want all these lights! But, I have 2018 TRD Off Road that has the plain side mirrors without the lights. Any info on what it would take to swap out the old lights with the “premium” versions that come with the lamps (and wiring) installed so that I can add all these awesome mods to them?
Thanks!
That’s my exact same question. I also have a 2018 TRD Offroad that has plain side mirrors.
Michael,
First off, my apologies for not getting back to you sooner. For some reason I have not been receiving the notifications I used to via email.
I am not sure what it would take to wire these on a model that comes with the “plain” side mirrors. I imagine that these work if the wiring harness is already wired into the mirrors, but I really could not tell you.
I would say to check some forums, or contact your local Toyota Dealer directly to see. Please keep us posted on your findings to help out other readers!
Thanks!
I’ve had these installed for about a month…had some freezing temperatures and now I have hyper flashing on the drivers side, front, rear, all the turn signals are hyper flashing…any ideas?
Mike,
Unless moisture made it’s way into your mirror housing, I would say it could be worth reaching out to CarTrimHome for a replacement.
You can email them at service@cartrimhome.com, or click the link on their website to chat with them via chat or in Facebook Messenger.
I have chatted with them a few times via both contact methods, and they have been great at responding to me. Best of luck to you!
I just finished installing these CTH convex mirrors in my 2019 4 Runner. What a breeze, 15 minutes per side. I had previously installed a RAV4 mirror upgrade on my drivers side because it had a built-in convex corner mirror. A waste of $56 on the setup. At $83. these are a bargain. On the Vegas freeways a lot and I need a wider view of my left side.
I saw the comment from someone that they had trouble getting their mirrors to click into the secure slots during assembly. I put just a dad of lub grease on the new mirror tabs and they clicked right in with little pressure.
Very pleased with these mirrors
Love that idea Bruce!
I purchased these heated mirrors with sequential turn signal from what I thought was a cartrimhome website?! I’m wondering if I received the genuine product. I think not! They are EXTREMELY thin and flimsy. They DID NOT snap into place without using BRUT force. One actually broke due to the excessive pressure needed to TRY to get it to snap in place which it never did – think I ordered from different website. Uhhhh. The mirroring silver cracked into a million pieces and fell onto the floor like confetti. NOT HAPPY! WOULD NOT RECCOMMEND! If I find I received copy cat product I will repost if the situation changes in a positive manner.BTW, I also received an unusual email from seller saying not to respond to any other emails except those from sales@cartrimhome or service@cartrimhome.
Update on my 1/16/21 post. I contacted Cartrim via email who replaced the mirrors I first received which were sent in error. The correct mirrors fit well, are installed easily and work as expected. I am happy with the outcome, their customer service and attention to resolve. Thank you Cartrim!
I had dome LED light from cartrimhome.com and it nearly caused vehicle fire when it shorted and melted my light fixture after month being fine. Their prices are good but be cautious about their product quality. I hope these mirrors hold up. GL
you have any other reccomendations on this mod just a better brand?
Awesome write-up!
I appreciate it Ryan! Worked really hard on this one!
You run into an issue where the new mirror will not snap into the mirror housing? The four clips in each corner will not snap into the white inside piece, the mirror just kept on falling out.
Hello Scott. The clips on the new mirror are much more stuff. I found it easier to snap one clip on, then the rest. I started with the one that I can actually see; through the hole where the heated mirror connects (See the second picture under step 3).Once you get the first one, the others should be much easier to snap in. Hope this helps!
Thanks for the tip, I’ll try that and hopefully that helps.
Be careful, as I just learned the hard way, mine were also not clipping in at all but it was because the crappy ones I got from Amazon didn’t have clips that line up with the 4Runner at all even though it was listed as a 4runner one,.. if you didn’t get it from CarTrimHome you might want to look and see that the clips line up, compare it with your OEM Mirror back.
Just to follow up… I ordered the CarTrimHome ones and they go on perfectly. Dumped the Amazon ones in the trash.