
OBDLink MX+ OBD2 Bluetooth Scanner and Real-Time Performance Monitor for iPhone, Android, and Windows
If you’re like me and would like to keep a closer eye on the vehicle data in real-time, but find the info provided by the gauges of 5th Gen 4Runners to be lacking in that department, look no further. This is the ticket. Introducing the OBDLink MX+ Bluetooth OBD-II Scanner.
Easily connected to a vehicle via the under dash On-Board Diagnostics (OBD) port, the OBDLink MX+ wirelessly transmits data to any iPhone, iPad, or Android device.
The device includes free access to a fully-featured OBDLink app, that allows for real-time monitoring of many factory sensors, including ABS, SRS, TPMS, transmission temperature, and more. It can also connect to and provide data to a number of popular 3rd party apps, with customizable “dashboards” that can be configured as desired.
Need to read and/or clear trouble codes from the ECU? The OBDLink MX+ can do that.
Want to gather performance data, like 1/8 mile, 1/4 mile, and/or 0-60 MPH times? The OBDLink MX+ can do that too.
Find it Online:
- OBDLink MX+ OBD2 Bluetooth Scanner for iPhone, Android, and Windows Check Price
FEATURES:
The OBDLink MX+ Bluetooth OBD adapter is small in size but large in features. It works with all 1996 and newer vehicles sold in the United States and includes free OEM data upgrades for not just Toyota/Lexus/Scion, but also Ford, GM, Mazda, and Nissan/Infiniti.
It is 300% faster than competitive products, for smooth graphs and gauges in real-time. Unlike other devices, the OBDLink MX+ provides wireless access to proprietary GM-LAN and Ford MS-CAN vehicle networks. The variety of vehicle makes and models that the adapter can connect to is great for 4Runner drivers who might also have other brands in their fleet, and it is super easy to switch between them.
The adapter uses Class 2 Bluetooth 3.0, which provides 128-bit encryption, and a range of ~33 feet. Connecting to the OBDLink MX+ is secure, as it does not broadcast the device name or use a simple PIN. Pairing the adapter requires physical access, but easily done by pressing a button on the face of the unit.
Once it is installed into the OBD port of a vehicle, there is no need to remove it for fear of battery drain. Built-in BatterySaver Technology allows the OBDLink MX+ to automatically sleep, but then wake when connected via Bluetooth, the doors are unlocked, or the engine is started.
The OBDLink MX+ Bluetooth OBD adapter has a 3-year warranty and 90-day money-back guarantee.
INSTALLATION:
Installing the OBDLink MX+ adapter could not be much easier. Under the driver side dashboard, to the right of the emergency brake cable, there is a large white plug. This is the OBD port, and it is highlighted in green below.

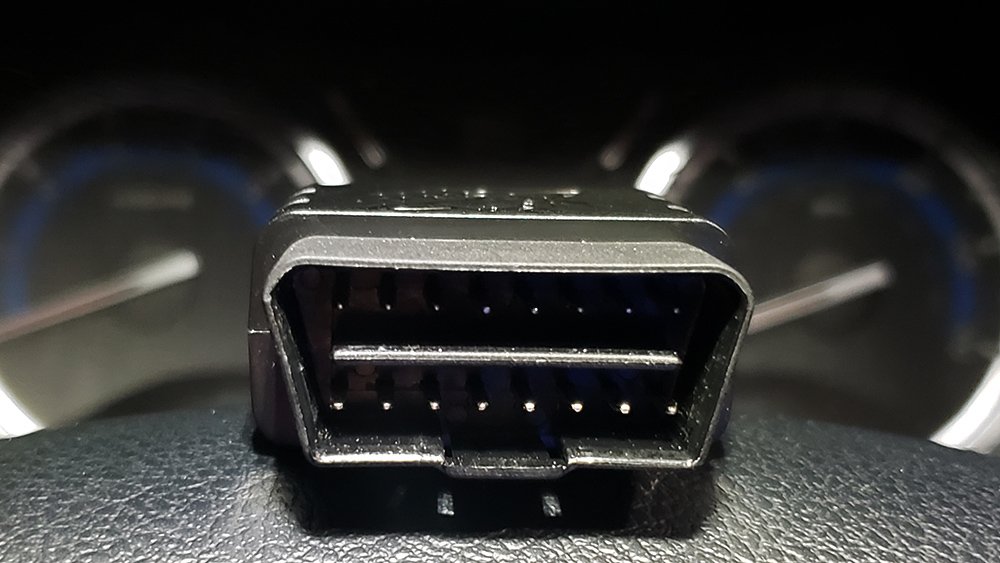
Orient the OBDLink MX+ in a manner that matches the shape of the OBD port, and plug it into the port. It’ll only go in one way, and on a 5th gen 4Runner, that is with the label upside down. The fit is snug, so it won’t fall out once it’s installed.
I used one hand to support the backside of the OBD port, and the other hand to press the adapter into place. The power indicator is a green light on the far end of the device. If it is lit, you’re good to go.

APPS:
The OBDLink MX+ Bluetooth OBD adapter is compatible with dozens of apps for iOS, Android, and Windows on phones, tablets, laptops, and desktop PCs.
Here are a few of the popular OBD apps iOS and Android:
- OBDLink for iOS (free and exclusively for OBDLink devices)
- OBDLink for Android (free and exclusively for OBDLink devices)
- DashCommand for iOS
- DashCommand for Android
- OBD Auto Doctor for iOS
- OBD Auto Doctor for Android
- OBD Fusion for iOS
- OBD Fusion for Android
- Torque Pro for Android
Bluetooth Pairing and App Connection
For Android:
- Turn ignition to Key On, Engine Off position
- Open Android “Settings” App, and enable “Bluetooth”
- Press the “Connect” button on OBDLink MX+. The blue LED will blink rapidly, and allow for connection within 2 minutes
- Open “Bluetooth settings” menu and tap “OBDLink MX+” to pair the device
- Tap “OK” in the “Bluetooth pairing request” dialog box
- Launch the OBDLink app. Set “Communication Type” to “Bluetooth”. Go to Settings > Preferences > Communications, and tap “Bluetooth”
- Tap “Connect” from the OBDLink app main menu
- Choose “OBDLink MX+”
- The app will establish a connection with OBDLink and detect which OBD-II protocol your vehicle uses. Once the app establishes a connection with MX+, the “BT” LED will display a solid blue light.
For iOS:
- Turn ignition key to Key On, Engine Off position
- Open iOS “Settings” App, and enable “Bluetooth”
- Press the “Connect” button on OBDLink MX+
- Tap “OBDLink MX+” to pair the device when it appears in “Other Devices”
- “OBDLink MX+” will now appear as “Connected” under “My Devices”
- Launch the OBDLink app. Set “Communication Type” to “Bluetooth”. Go to Settings > Preferences > Communications and tap “Bluetooth”
- Tap “Connect” from the OBDLink app main menu
- The app will establish a connection with OBDLink and detect which OBD-II protocol your vehicle uses. Once the app establishes a connection with MX+, the “BT” LED will display a solid blue light.
OBDLink App

Settings
The settings section of the OBDLink app can be used to configure preferences, vehicle-specific info, user-defined PIDs, get enhanced OEM add-ons, enable/disable LED lights on the device, download/install firmware updates, enable logging for GPS and OBD2 data, and a lot more. I could write a lot about this section, but I think it would best to do some poking around in the app yourself and learn by doing.
Dashboard (Custom)
The dashboard option in the OBDLink app allows for creating custom dashboards that display information for all the available on-board diagnostics Parameter IDs (PIDs). There are a ton of PIDs in the app – many of which are vehicle brand specific (like Toyota, Lexus, and Scion that are part of the enhanced OEM option), along with others that are related to fuel, sensors, SAE PIDs, calculated PIDs, trip user-defined PIDs, and GPS.
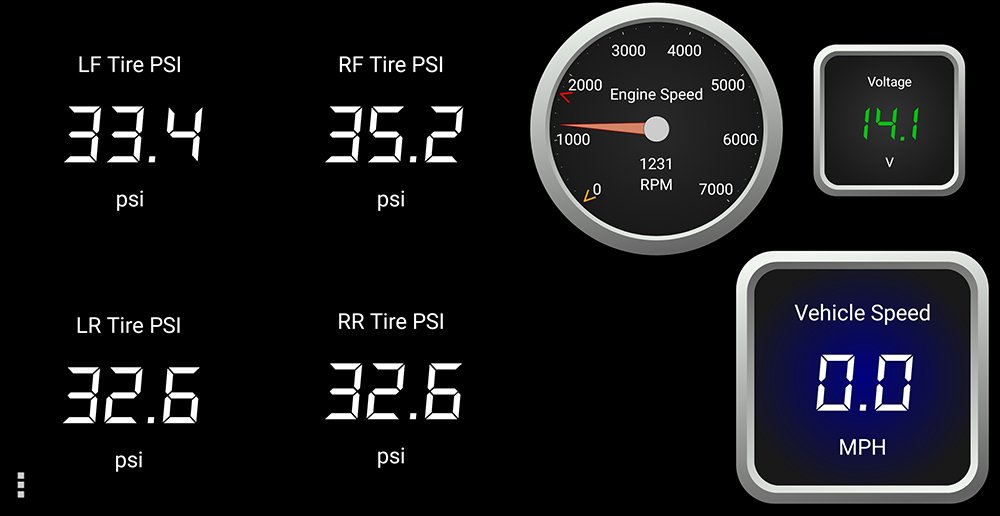
Here some examples of OBDLink custom dashboards on one of the T9 head units from Car Trim Home. If you haven’t already seen it, take a look at Derek’s T9 Head Unit Review and Setup article for more info on the T9. The OBDLink MX+ is displaying individual tire pressures, engine RPM, voltage, vehicle speed, transmission oil temperature, engine oil temperature, and coolant temp.
How sweet does that look??
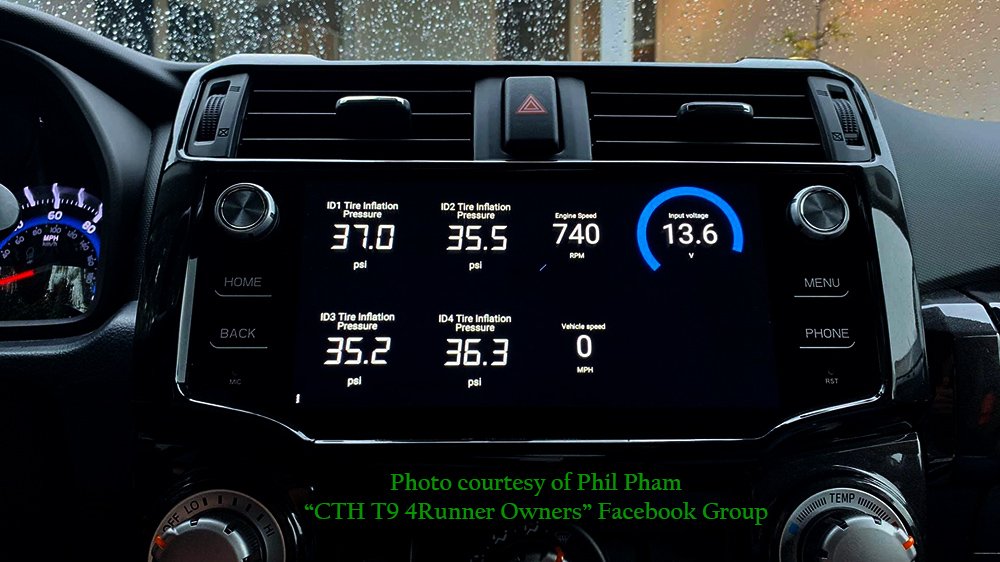
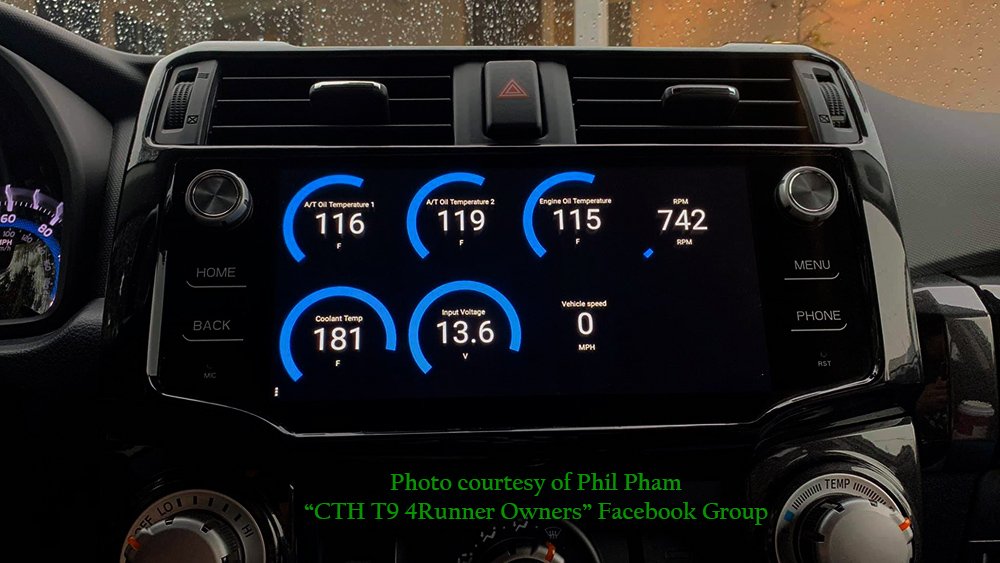
One of the items that I was most excited about, is the ability to display tire pressure (TPMS) for individual tires. In the OBDLink app, this involves using the “Add Display” option in a custom dashboard, then selecting PIDs from the “Toyota, Lexus, Scion” set.
Once there, select the Tire Pressure Monitor network, and PIDs called “IDx Tire Inflation Pressure”. When setting my dashboard up, I fou front TMPS sensor is “ID1 Tire Inflation Pressure”, passenger front TMPS sensor is “ID4 Tire Inflation Pressure”, driver rear TPMS sensor is “ID2 Tire Inflation Pressure”, and passenger rear TPMS sensor is “ID3 Tire Inflation Pressure”.
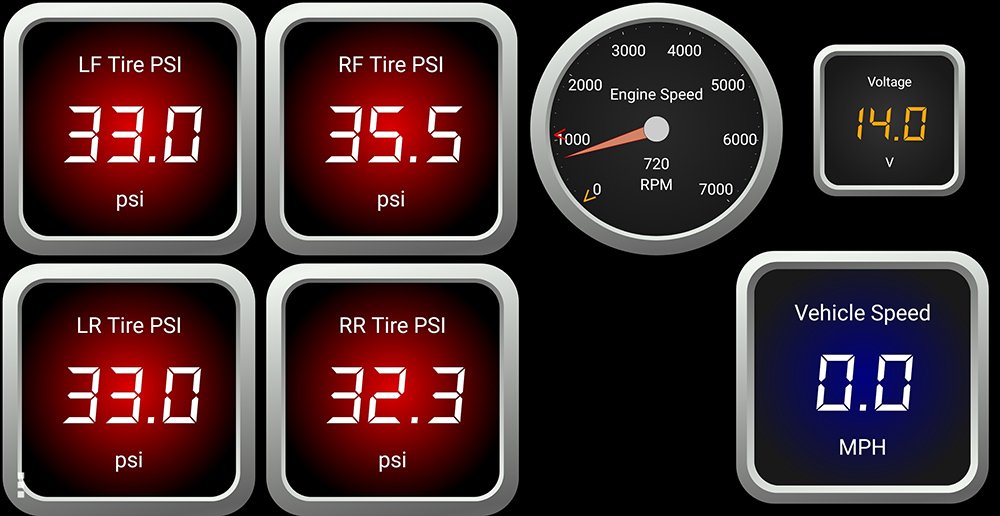
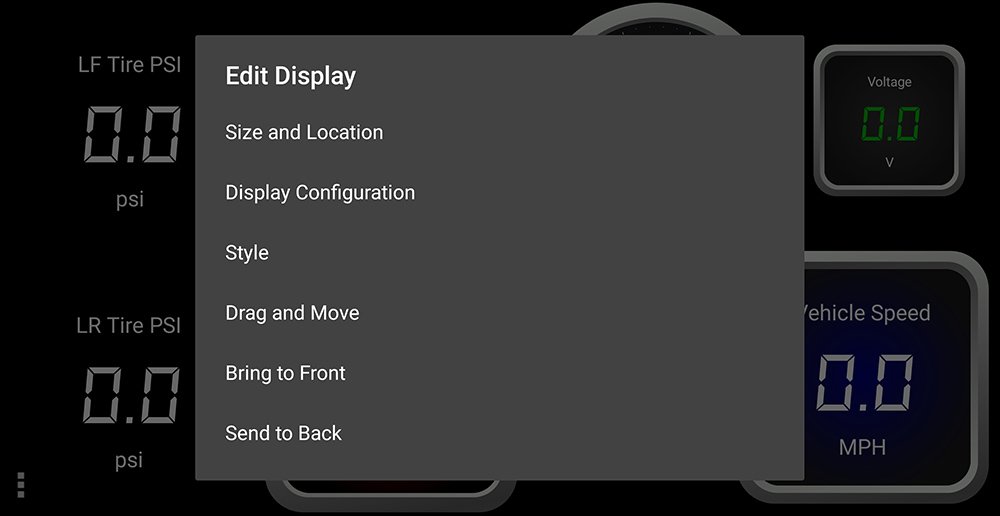
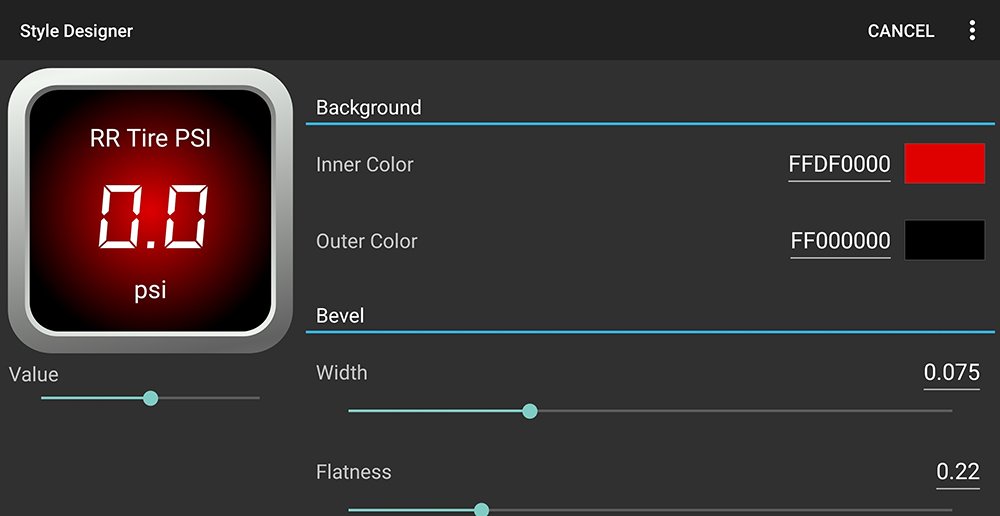
Each of the individual displays can be customized to be a radial or digital style gauge, along with labels, colors, borders, sizes, and positions. Here are some of those options, along with a modified version of the above dashboard, where I’ve removed the bezel on the digital gauges and changed the color of the display for the voltage meter:
A sort of limitation of the custom dashboards is that getting data from certain PIDs requires a “connection” to a certain “enhanced network”. For example, to display TPMS sensor data, you must be connected to the Tire Pressure Monitor enhanced network.
Other enhanced networks are Generic OBD2, Network A (included in Generic OBD2), Occupant Detection, Immobiliser, Telematics, and Network F. It took me some time and experimentation to figure out which PIDs and enhanced network connections were required to return 4Runner specific data. In addition to experimenting, I found a lot of good OBD PID info in various forums and groups online.
Diagnostics, aka Check and Clear Codes
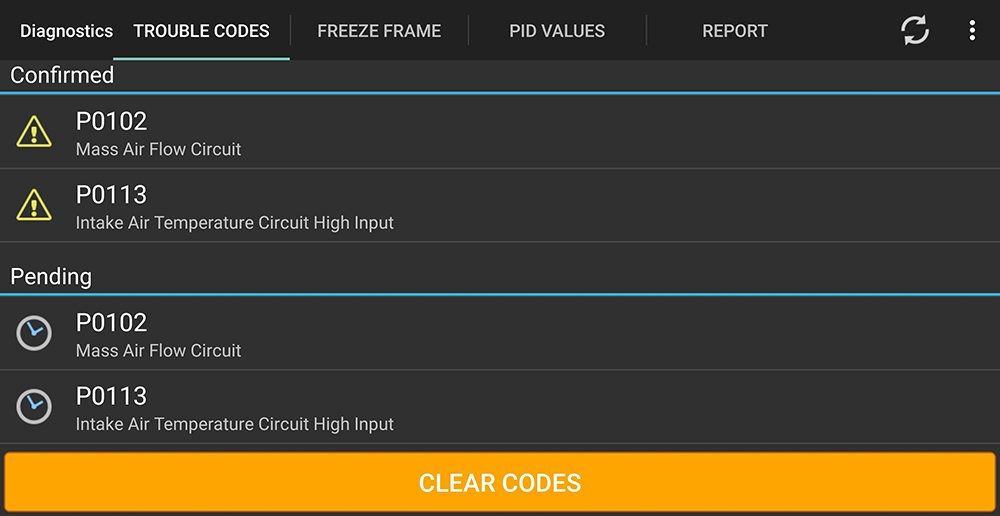
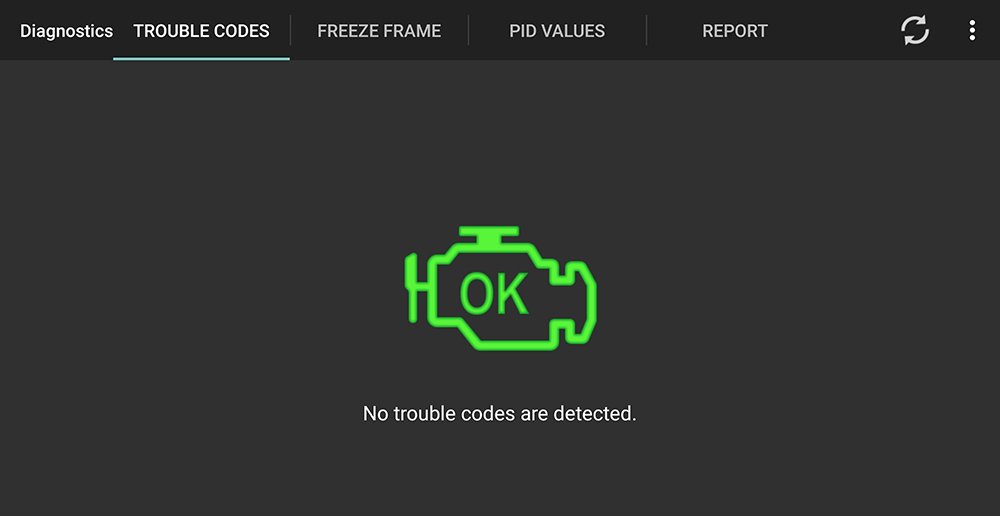
The Diagnostics section of the OBDLink app allows for easily scanning for trouble codes that are stored in the ECU, getting info on those codes, and clearing those codes.
Uh oh, look at those dashboard warning lights…
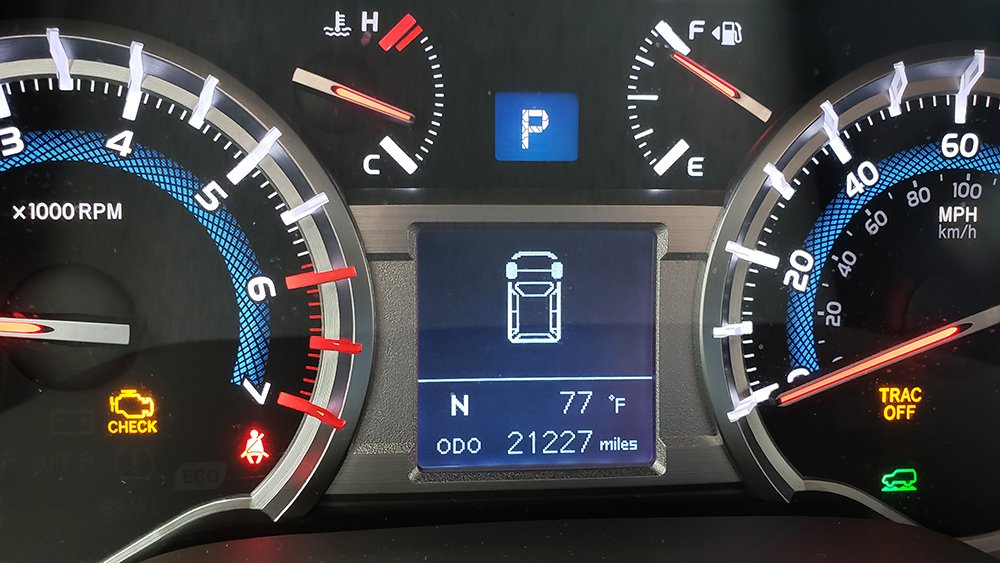
An initial scan will provide high-level details on existing codes. I created the condition related to the above warning lights, and code below by disconnecting the wiring harness that goes to the mass flow sensor.
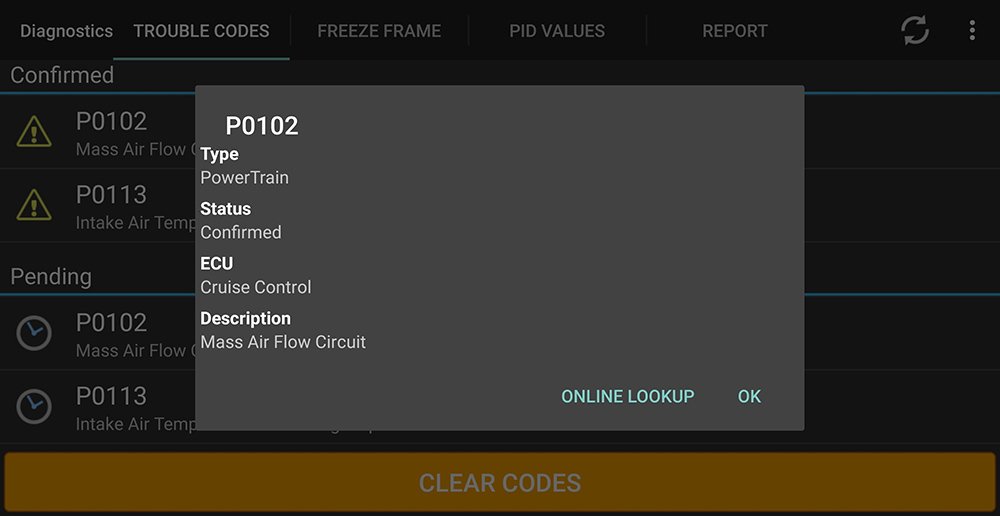
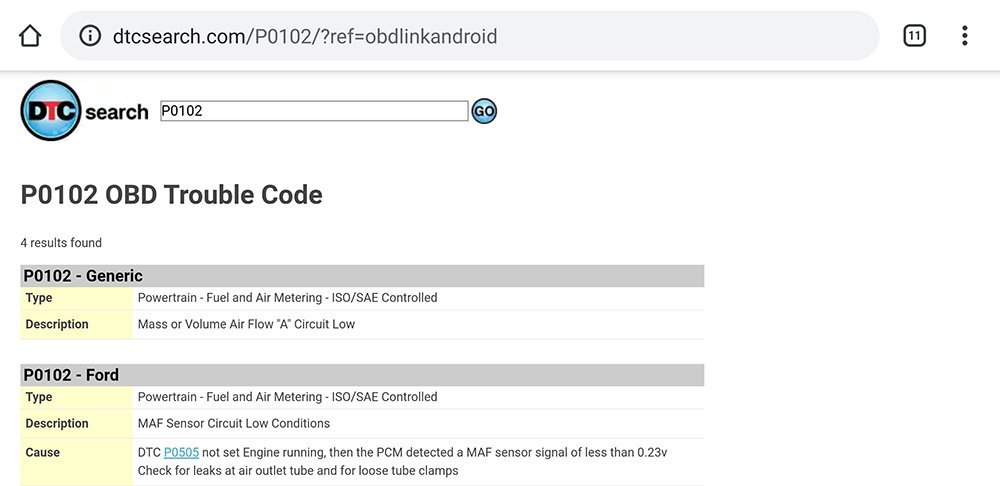
Clicking on a specific code brings up a dialog that contains additional information, along with an online lookup link that may provide even more information, as well as a possible solution.
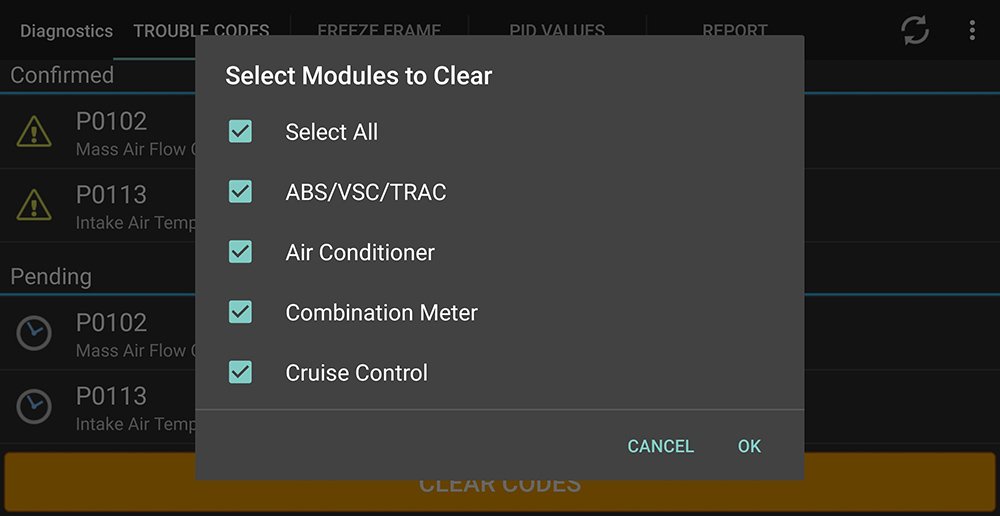
Click the “Clear Codes” button, select modules related to the codes, and click OK. Voila! The codes are gone. I my case, I corrected the underlying problem by reconnecting the mass airflow sensor, but had that sensor truly been in a problem state, further troubleshooting would be required to prevent the code from coming back.
Maps
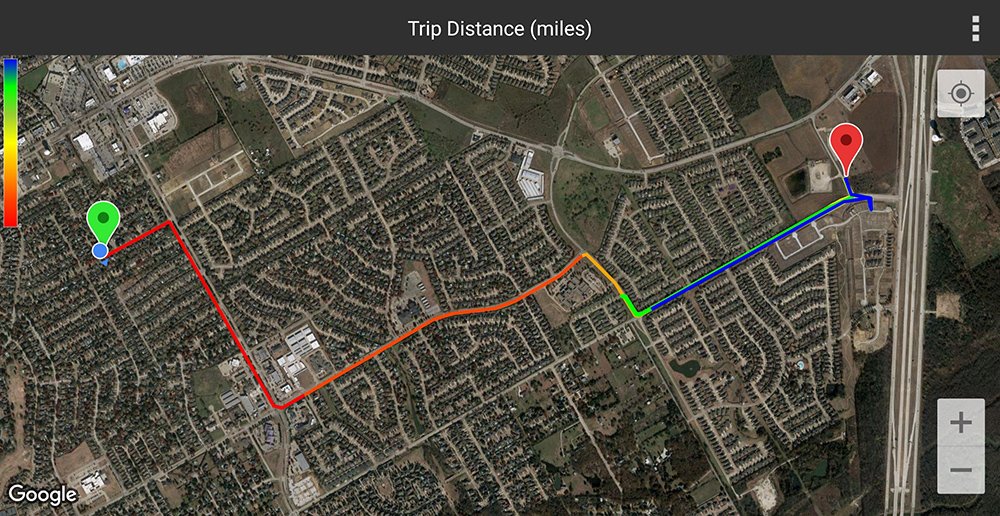
If logging options for GPS are enabled, the Maps portion of the app provides location and trip-related info. Upon opening Maps, a Google street or satellite view of the last known location of THE OBDLink MX+ adapter is displayed, along with an option to get directions to that location. This would be handy in a scenario where you forgot exactly where you parked.
Log files from previous trips can also be opened. Doing so will show data such as the route on a Google map, as distance traveled, and time spent traveling.
Performance
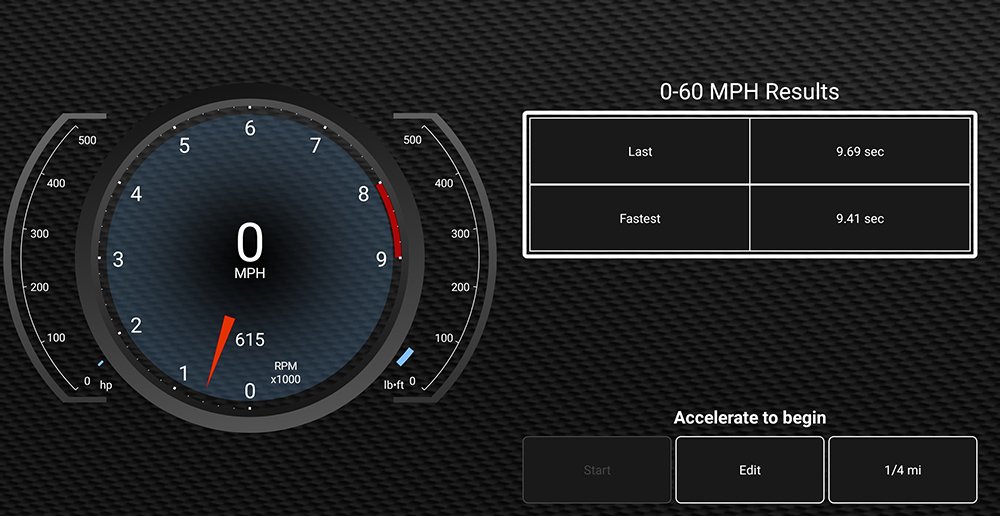
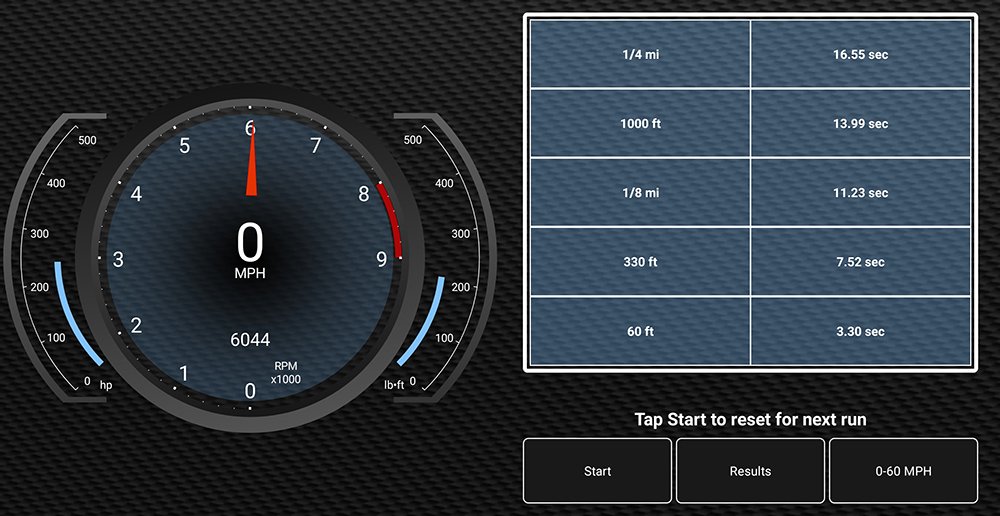
There are two performance tests, which are fun to play with. For safety, these tests should not be performed on a public roadway, and the driver should not interact with the application while performing the app.
The 0-60 MPH Results test records the last and fastest time that it takes to go from zero to sixty miles per hour. Come to a stop, click the Start button, and accelerate to start the timer. Once you hit 60 MPH, the timer stops and displays times. The values for starting and finishing speeds can be changed if desired (i.e., a timed highway acceleration test, from 55 to 75 MPH).
The 1/4 Mile test records the amount of time it takes to go 60 feet, 330 feet, 1/8 mile, 1000 feet, and 1/4 mile, along with MPH at each of those distances. In addition, speed splits show the amount of time it took to get to a specific speed (i.e,, 0-30 MPH, 0-50 MPH, 0-70 MPH, etc.).
Questions or comments? Leave them below!

Curious, Do you have to program any special codes for this to show trans temp in a 2021 5th gen? I know others like the Ultragauge require you to search the internet to find the codes. Looking to monitor trans temp for towing. Some say the ScanGauge II does not require additional codes. Just looking for the best option to keep longevity of the wife’s Runner.
I appreciate any help!
My wife recently forgot to screw the gas cap back on our rig causing the CEL and several warnings to flash across the screen. I live across the street from a toyota dealer and figured it would be no problem to get the lights wiped. Wrong!
They wanted $115 and 8 hours to do the job. Plus they couldn’t do it that day so I had to bring it back in 4 days.
I went home jumped on Amazon and had the MX+ delivered on 2 hour delivery. Plugged it in, connected to my 4runner, downloaded the 4runner specific tools or whatever and cleared the lights before Noon. So far this thing seems awesome. Sytays plugged in, doesnt draw power like cheaper brands, gives me uptodate diagnostics, and even has map logs. It has literally already paid for itself out of the box
Can transmission oil temp for 2017 Nissan Pathfinder be displayed on the app? Can threshold alarms be set for any parameter?
Thanks for the detailed write up. I just received my MX+ and I’m working on customizing the gauges. I would like to display the TPMS info on one page and swipe to see engine\trans\fuel\etc info on another. But it seems as if TPMS is on a separate OBD network. I noticed in your screenshots you have engine speed and voltage displayed with TPMS. Do you have to do anything special to mix TPMS with other PID not showing up in the “Tire Pressure Monitor network”?
Does the obd link mx+ work with a 2002 vw jetta 2.0
4th gen noob here. Question: Does this unit (or any unit) unlock doors via phone app? I would love to rid myself of key fobs.
Thanks. And great work on the site.
For ID5 Tire Inflation I’m getting -14.5psi (it’s one of my 4 tires and my spare is ID3.) I’ve tried the other ID #s but they are all at 0. Do you know why I’m getting -14.5?
How did you get the voltage meter to work in TMPS setting? I tried every battery setting and doesn’t work. Thanks
Hi Long,
You have to select “SAE PIDs” and the “Input voltage read by the scan tool”. See the attached screenshot that illustrates this.
Finally figured it out! Thanks
Hello Eric,
I see you have the T9 head unit! I do too, but I have an iPhone. How did you get the OBDLink to connect to the head unit to display the data? Do you have an android phone?
Thanks,
Troy D. Carter
I truly live by this site and its reviews. but the OBDLink MX+ OBD2 Bluetooth Scanner was the biggest POS i have ever seen. Box looks open, could not get toyota test to run or build new dashes. 2 weeks of NO TECH SUPPORT. This device is not cheap. I did all the updates and I know my way around iPhones and bluetooth. The only thing the showed any data on was 5 year old Dash Command.
Disappointing …
JP
2019 4Runner SR% slowly getting upgraded.
Hey Joe. Sorry to hear that you had problems with the OBDLink. There was a bit of a learning curve for me to figure out which networks that I needed to connect to, and what PIDs were what, but the scanner has worked well. Two of my friends have had the same, good experience.
Given that the box for your scanner appeared to have been opened, I wonder if it was a returned/defective unit. Where did you buy it, and have you contacted the seller to inquire about an exchange?
Hi Eric,
I’m a a Broadcast Engineer by trade with degrees in IT and EE. I’m no stranger to software.
The unit was ordered through Amazon and was sent back. It’s interesting how the price has been jumping up and up on this. I had an iPad mini going on a Ram Mount as a dedicated display for this.
I live in good old Brooklyn NY. Brooklyn you say? With a 4runner? LOL. you should see some of our pot holes. looks like the out back. My major disappointment was with support on this product and lack fo decent documentation.
Keep up the amazing work here. Its the first site a\I found and my favorite for news and reviews.\\
Joe
Hiya’ Troy. I’m an Android user, but I’ll bet that if you ask the same question in the Facebook group for the T9, you’ll get a quick answer — https://www.facebook.com/groups/t94runner/
Thanks for the response Eric! I actually worked with it enough to get to to work! I love this thing, it’s so helpful and customizable!
Sorry if this is a stupid question, but when someone who owns this type of scanner is looking for a used car and goes to a dealer lot, do you think it’s likely that they’d take the scanner with them and do a complete scan of the vehicle?
Any idea if you’d be allowed to use a scanner like this at an auto auction during the inspection period?
Hey TBJ. I’ve not been to a car auction before, but if the rules of the vehicle inspection allow for it, using the OBDLink would be a quick way to check for any current or past codes, provided that they have not been previously cleared. If the auction or seller had nothing to hide, I’d think they would have no issue with perspective buyers checking for codes via the OBD port.