
When researching which roof rack to purchase for your build, it is important to make sure that the rack you choose will fit your personal needs.
With so many roof racks on the market, you need to ask yourself what you will mainly be using it for and what style would best be suited for that use.
Is it a basket style or a modular flat top rack? The Crestone from Sherpa is a modular, flat-top rack well-suited to compete with other off-road racks on the market.
We picked Sherpa due to its quality, durability, universal accessory mounting options ,and price.
Product Information
- Product Dimensions: 95” L x 47 ½” W x 2” T*
- Crossbar Dimensions: 1”T x 2”W x 47”L
- Load Rating: 300LBS Dynamic/700LBS Static
- Overall Weight: 51LBS
*measured from the center of the roof
Table Of Contents
Features

The Crestone is one of the newer additions to the Sherpa line-up of roof racks; however, it holds many of the same characteristics as their other models.
Some of the features that stick out the most to us would be:
Mounting
The height of the rack keeps it as low to the roof as possible, but still allows you to easily mount accessories
Crossbars
Since the rack has slots along the side, the crossbars can be easily adjusted to fit your needs, making it super versatile. Not only that, but Sherpa offers the ability to purchase additional crossbars if the nine that come with the standard are not quite enough to suit all your needs.
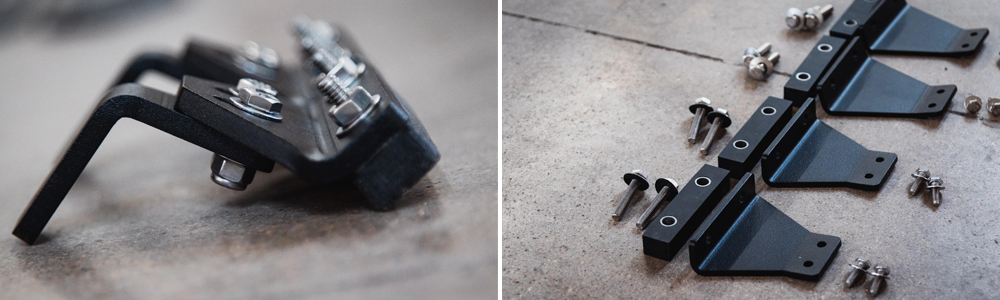
Hand Holds
Shown in the image above, this is one of my favorite features is the handholds built into the side plates. This makes it super easy to get up to and access your gear on the roof.
Tie Downs
The Crestone features built-in anchor points that can be used when securing things to your roof. Also, the new Sherpa Smileys make a great add-on to gain additional tie-down points.
Made in America
All Sherpa Equipment Co. products are made entirely of American-sourced products and assembled in the Rocky Mountains of Colorado.
The Crestone mounts to the factory rail mounts, making it “drill-free” and requiring no additional modifications to the vehicle. The functionality, versatility, looks, and cost make it a leading competitor in the off-road roof rack market.
STEP 1. UNPACK ALL PARTS

The first step to this installation is to unpack and count all the parts included in the box.
Sherpa makes it super simple by including a checklist of everything that should be included in the box.
We always start by sorting out and organizing all of the parts to make them easier to find during the installation.
STEP 2. PRE-ASSEMBLE THE FAIRING + FRONT FEET

To get started, the first task will be to assemble the wind fairing.
Required components for the fairing:
- 6x 1/4”-20 x 1/2”
- 6x 1/4” Flat Washers
- 6x T-nuts
You will want to start by inserting 6 T-nuts into the crossbar.
Three will go in the top slot and three in the bottom slot. Line up the t-nuts with the holes in the fairing and then attach the fairing to the crossbar with the six washers and bolts.
The next task will be to assemble the adjustable feet.
Required components for the feet:
- 8x 1/4”-20 x 7/8”
- 12x 1/4” Flat Washers
- 4x Nylon Lock Nuts
- 4x 1/4” Nut
You’ll start by attaching the two pieces of the adjustable leveler. Slide the bolt through the two pieces leveler. Make sure to include a washer on either end and a lock nut on the backside. Repeat this step for the two holes in the leveler.
Assemble Adjustable Leveler
Next, you’ll attach the rubber to the bottom of the leveler. Insert the bolt from the bottom of the rubber, through the leveler, and attach it on top with a washer and lock nut. Repeat this process for both of the adjustable front feet.
STEP 3. ADJUSTABLE FEET

Required components:
- 4x 1/4”-20 x 5/8”
- 4x 1/4” Flat Washers
- 4x T-nuts
You will want to use the 1” side (thinner side) of the crossbar.
Start by sliding four t-nuts into the crossbar. Two will be used on either side of the crossbar to attach the adjustable feet.
Then, you’ll thread the four bolts with washers into the t-nuts, two on each foot.
Once your feet have been attached, you’ll want to make sure they’re still somewhat loose so they can be easily adjusted later in the install.
STEP 4. MIDDLE AND REAR FEET

Required components:
- 8x M8 Bolts
- 8x M8 Bonded Washers
The fourth step will be to assemble and attach the middle and rear feet to the vehicle.
The two taller rear feet go in the very back, and the two shorter rear feet go in the middle. As with the front feet, you’ll attach the rubber to the bottom of the mounting bracket. First, line up the holes in the rubber spacer with the factory holes in the roof gutter.
Then, position the mounting bracket on top of the rubber spacer and insert the bolt, with washer, from the top of the foot, through the rubber and into the factory roof holes. The tall side of the foot should be facing the outside of the vehicle. Repeat this process for all four of the rear feet.
At this point in the install, you should have all four of the rear feet attached to the vehicle, as well as the front adjustable feet assembled and attached to a crossbar.
Also, the wind fairing should be attached to the front crossbar.
STEP 5. ATTACH THE SIDE PLATES

Required components:
- 12x 1/4”-20 x 7/8”
- 20x 1/4” Flat Washers
- 8x 1/4” Nylock Nut
Once you have all of the rear feet attached to the vehicle, it is time to attach the side plates.
Before bringing the side plates to the roof, you will want to set the front support bracket on the roof. Line up the smaller slots on the side plate with the holes in the top of the rear feet. Thread a bolt and washer through the side plate and mounting bracket, and attach with a washer and lock nut on the backside.
You will want to leave these bolts loose enough so that you can adjust the side plates to match the curvature of the vehicle later in the install.
Next, align the vertical crossbar (attached to the front feet) to the small vertical slots near the front of the side plate. Secure to the side plates by screwing two bolts through the side plate and into the top and bottom holes of the crossbar.
Repeat this step on both sides of the rack.
STEP 6. ATTACH THE WIND FAIRING

Required components:
- 4x 1/4”-20 x 7/8”
- 4x 1/4” Flat Washers
Position the wind fairing to line up with the slots on the very front of the side plate.
You’ll want to make sure that the bottom of the fairing lines up with the bottom tip of the side plates. Attach the fairing to the side plate by threading two bolts with washers on either side of the rack.
At this point, the skeleton of the rack is complete.

The next step will be to secure the remaining crossbars to the rack. The position of these bars is completely customizable to your personal needs and load requirements.
Attach each of the crossbars through the slots with two bolts and washers on either side of the rack.
STEP 7. ADJUSTING THE LEVELING MOUNTS

Once the rack has been fully assembled and is on the vehicle, you can adjust the height of the front feet.
Pull up firmly on the front of the rack while pushing down on the bottom of the mounting foot. Then, tighten the bolts in the center of the mount.
Once you have positioned the rack correctly on your vehicle, it’s time to tighten down all the hardware.
Note: This step is easier if you have another person to help you or if you can use something soft to push the front of the rack up underneath the wind fairing while you tighten the feet.
Review
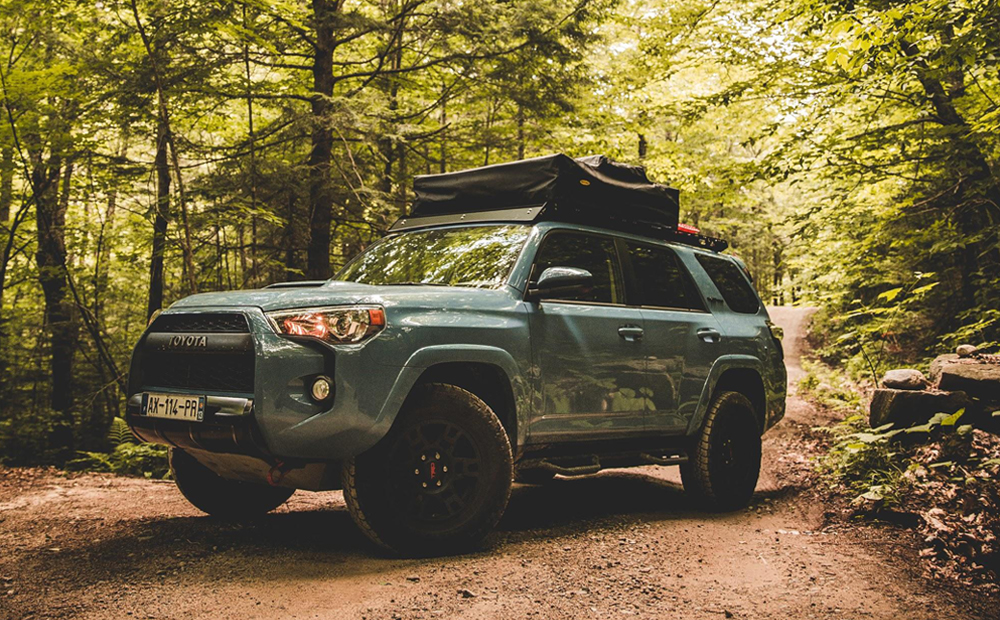
This rack is super clean, versatile, low-profile, easy to install, and affordable.
What’s not to love about this Sherpa rack? With the endless mounting possibilities, we haven’t found anything yet that cannot be mounted to the Crestone.
Besides the ease of mounting to the Crestone using the t-nuts sold on the website or some generic carriage bolts, Sherpa is also developing a few accessory mounting brackets. They currently have light bar mounts and awning mounts and will be releasing shortly a hi-lift mount.

Also, with the versatility and customization of the crossbar locations, due to the slots on the side pieces, you won’t have to worry about anything “not fitting.” Have smaller gear? Move the crossbars closer together. Have larger gear? Move the crossbars further apart.
The other awesome thing about the Crestone is its usability with a sunroof.
With the slots in the side pieces, it is easy to arrange the crossbars in a way that doesn’t interfere with your sunroof whatsoever. The possibilities are endless with the Sherpa Crestone.
Final Thoughts

When looking for a rack with a budget under $1,000, this is a fantastic option.
This rack has the ability to haul just about anything you want to throw up there. The rack is customizable, versatile, and doesn’t require much work to install and remove, should you ever need to remove it.
Not only that, but the rack has been tested multiple times throughout its development and continues to be put to the test by the Sherpa team and current customers.
Will the Roam Vagabond XL RTT work with the Sherpa Crestone?
Looks great. I just got the Crestone myself. I’m curious if your tent sits directly on the rack crossbars or if you’re using mounting hardware to lift it off the crossbars?
Hi Brooke,
One thing that might be worth mentioning concerning the rubber feet on the side mounting brackets. According to the installation instructions:
I think you may have problems with the rack properly sealing if the orientation is wrong.
Sorry if that was in your article, I didn’t see it.
Thanks for your contribution!
Cheers,
Mike
Would a Gobi ladder have any clearance issues with rear end of the roof rack?
Hey Adria, although the C4 Ladder is the recommended ladder to match up with this rack, there should be no issues with clearance on the Gobi ladder.
Do the crossbars sit flush with the side rails or do they sit lower? I’d like to spread the weight of my RTT out along the crossbars and side rails equally, not just the side rails
Yes they sit flush with the side rails
Hi Brooke, I noted you saying in your write-up the Sherpa Crestone is a fantastic rack for a budget under $1000. Can I ask where you found it for under $1000?
Hey Mike! Thanks for the comment 😊The Crestone rack starts at $879. Depending on options your choose the pricing increases from there. That’s what I was basing my statement off of (excluding any upgrade, taxes or shipping).
Great review! I do have a question reguarding front mounting brackets. Many full length racks have supports in the front that either require drilling or just rest on the roof itself. It doesn’t seem like the Sherpa racks have that. Could that cause an issue with weight on the front half of the rack? Thanks!
This Sherpa rack does have front mounting feet with rubber bottoms that rest on the roof as you described. This rack does not require any drilling but does have supports for the front of the rack so there is no need to worry about issues with weight distribution.
The rubber feet fit tight enough to the factory mounts that there’s no worry about leaking into the headliner? No need for silicone sealing?
That is correct. The rubber on the bottom of the mount feet create a seal. There is no need for silicone and no worry’s about leaks 🙂
Thank you for the review. A lot of the photos are just photos off their marketing web site and not actual how-to that I was hoping when I saw the post. For example, I was hoping to see how the feet actually mount to the factory bolt points – when you remove the factory rack, there are plastic tubes sticking up and it’s not clear to me how those work with the rubber feet that appear in one of the photos to have a metal sleeve. So if you have more pictures of an actual install, it would be appreciated.
Thank you for your thoughts Dave. I’m sorry the install photos were not clear enough for you. To answer your question, the metal sleeve goes around the plastic.
Great looking rack! Does the wind fairing come in contact with the roof? It’s hard to tell from the picture. Thanks!
The fairing should not come in contact with the roof. With the slots along the side pieces, you also have the ability to adjust the fairing up or down as needed/desired.